5 Process Helper: Dynamic Form Configuration
- 5.1 Configure Shortcuts
- 5.2 Block and field management
- 5.3 Managing Properties of Individual Fields
- 5.4 Import Block from Dynamic Form
- 5.5 Import Block from Module
- 5.6 Advanced Section
5.1 Configure Shortcuts
This feature allows for the creation of custom buttons that differ from the standard "Compile" button; they are designed to simplify and accelerate the handling of procedures requiring simple, direct user input, such as when confirmation is needed to proceed with the workflow or to direct it along a specific branch. (Figure 1)
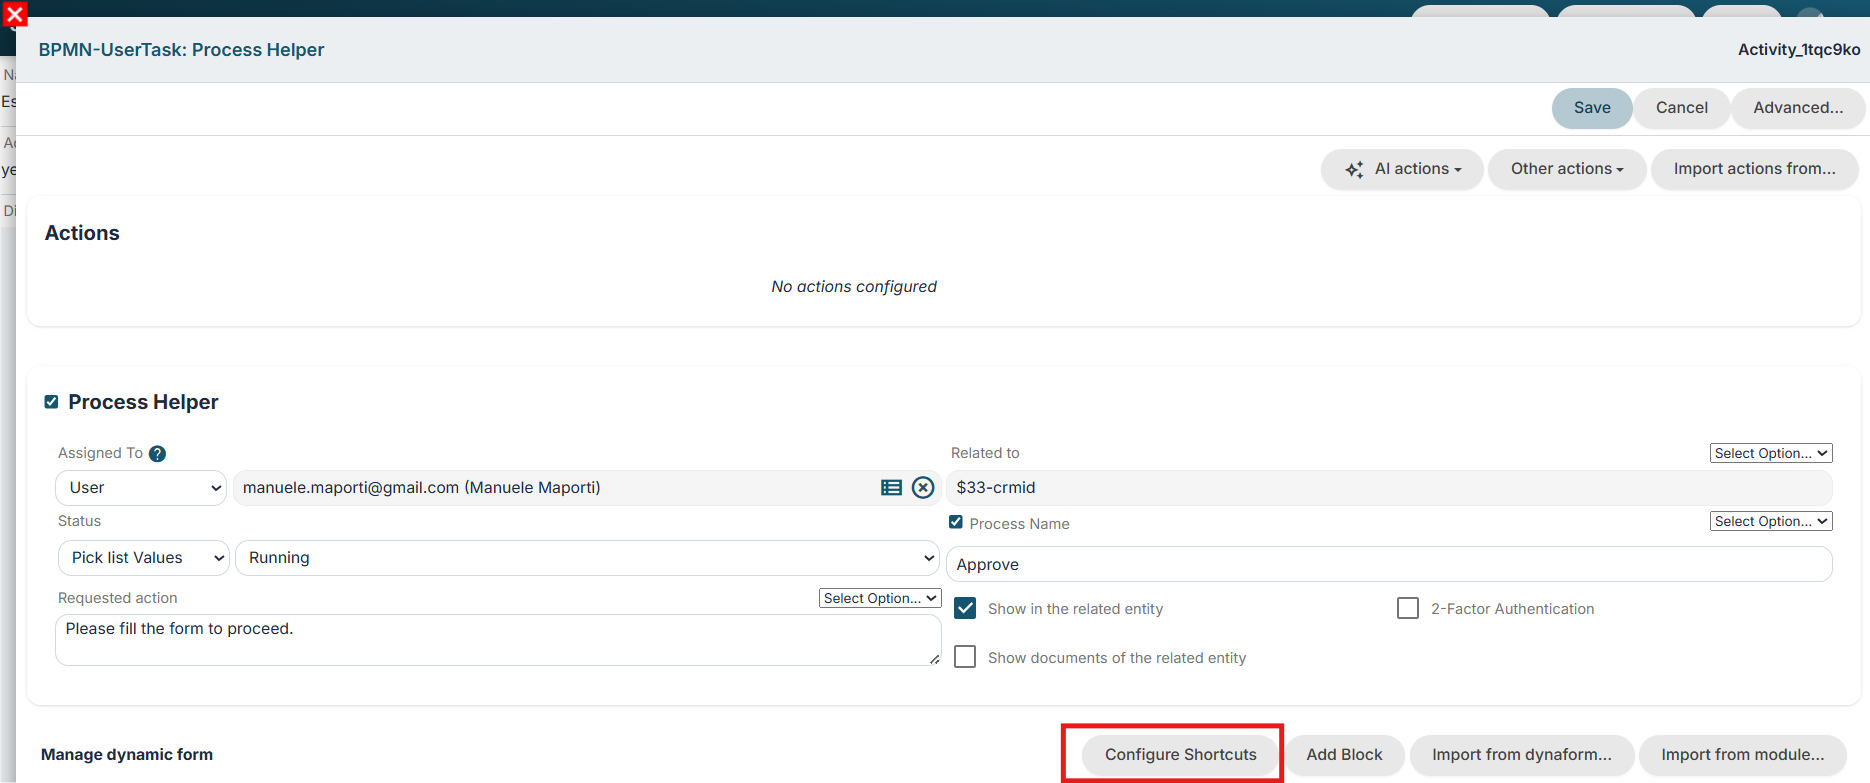
Figure 1
Clicking the "Configure Shortcuts" button displays a table where the desired buttons can be configured. (Figure 2)
Specifically:
- "Label" column -> represents the name displayed on the button
- "Value" column -> represents the value stored in the database and used for condition and gateway evaluations
Optionally, the "Label" field can contain a value such as "LBL_COLOR_RED". The corresponding translations can then be defined for each supported language (for example, Red, Rosso, etc.), while "red" is stored in the "Value" field.
- "Style" column -> represents the color in which the button is displayed
- "Confirm" column -> enables a double-confirmation step by displaying an additional pop-up when the button is clicked
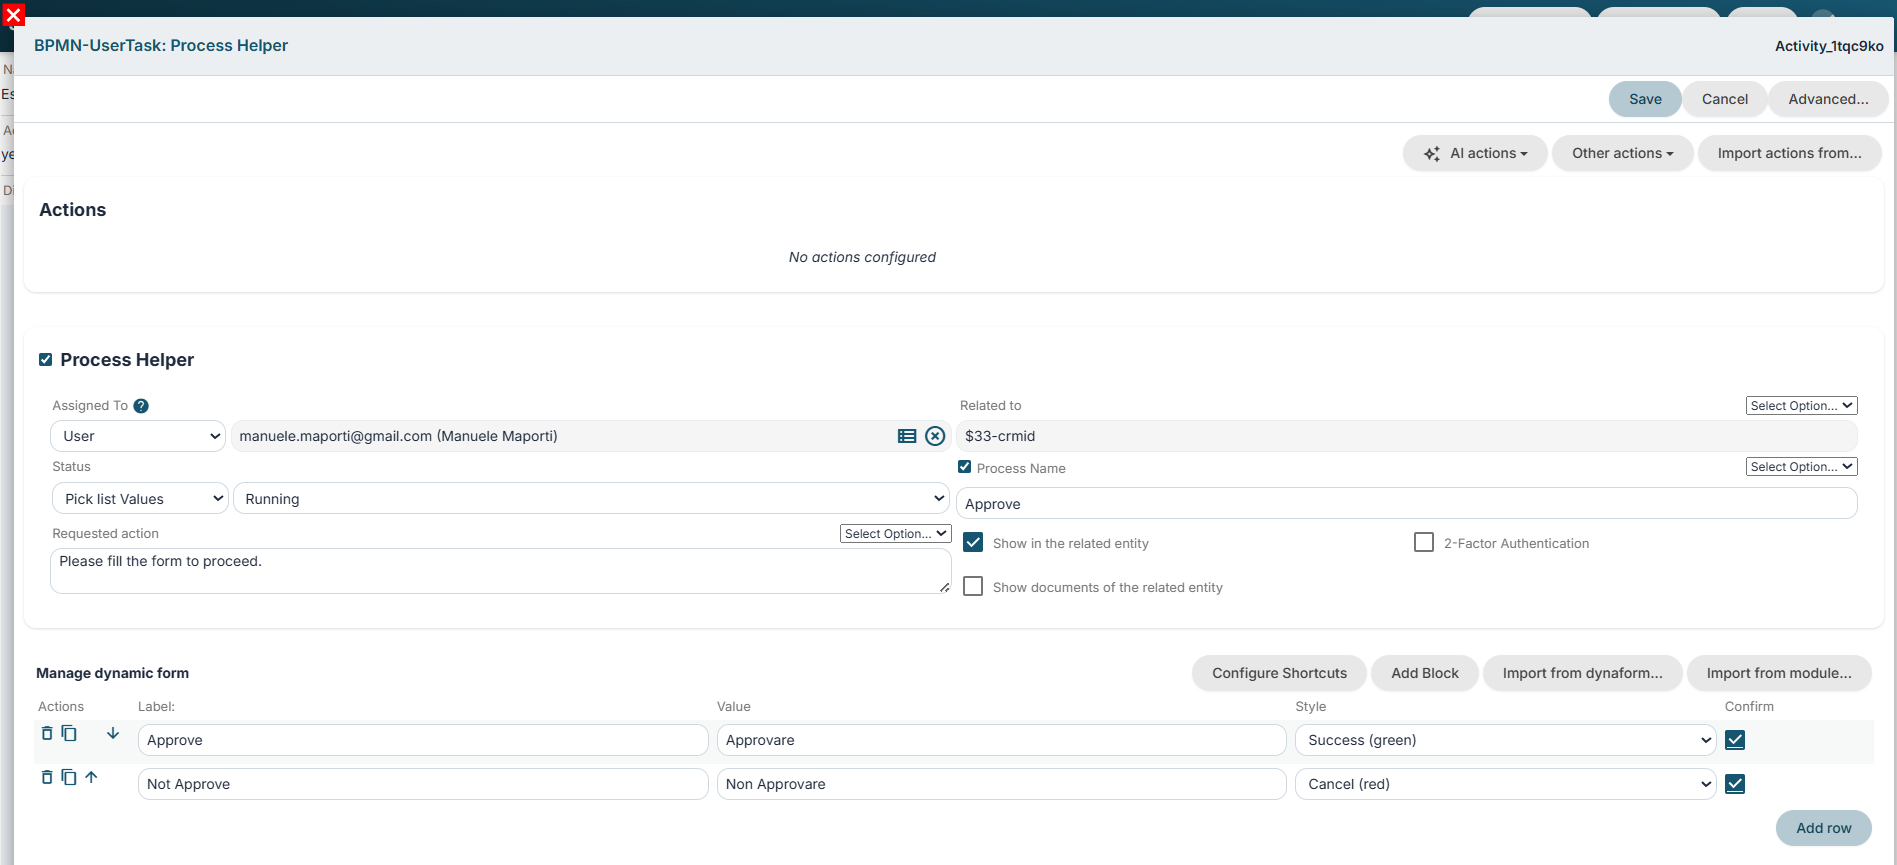
Figure 2
To view a practical example, consult Chapter 6.2.
5.2 Block and field management
It allows the creation of real customized forms aimed at receiving and historicizing the data entered (in this case) by CRM or external users (Figure 1).
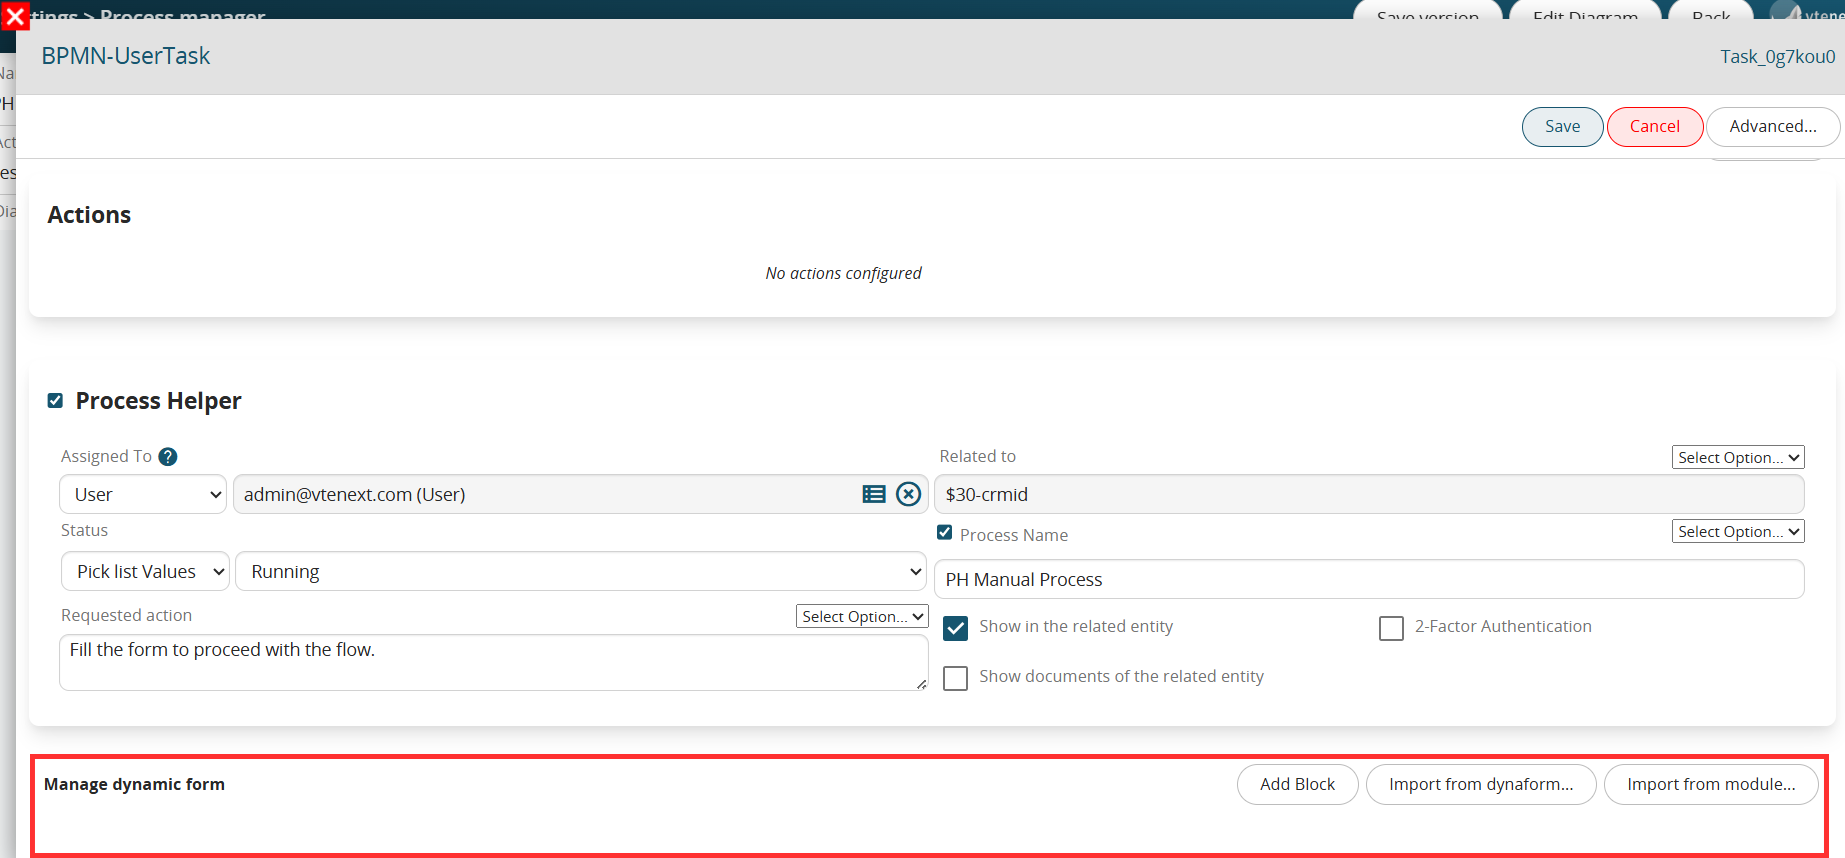
Figure 1
The configuration interface is identical to the Layout Editor section used for configuring modules (chapter 17.7 of the Vtenext general manual).
Using the “Add block” button, it will be possible to create a block, or the “base” within which individual fields or tables can be created (Figure 2).

Figure 2
Once a block has been created, a series of buttons will be made available to the right of the block name for creating/moving/deleting individual fields within it (Figure 3).

Figure 3
Specifically:

Figure 4

Figure 5
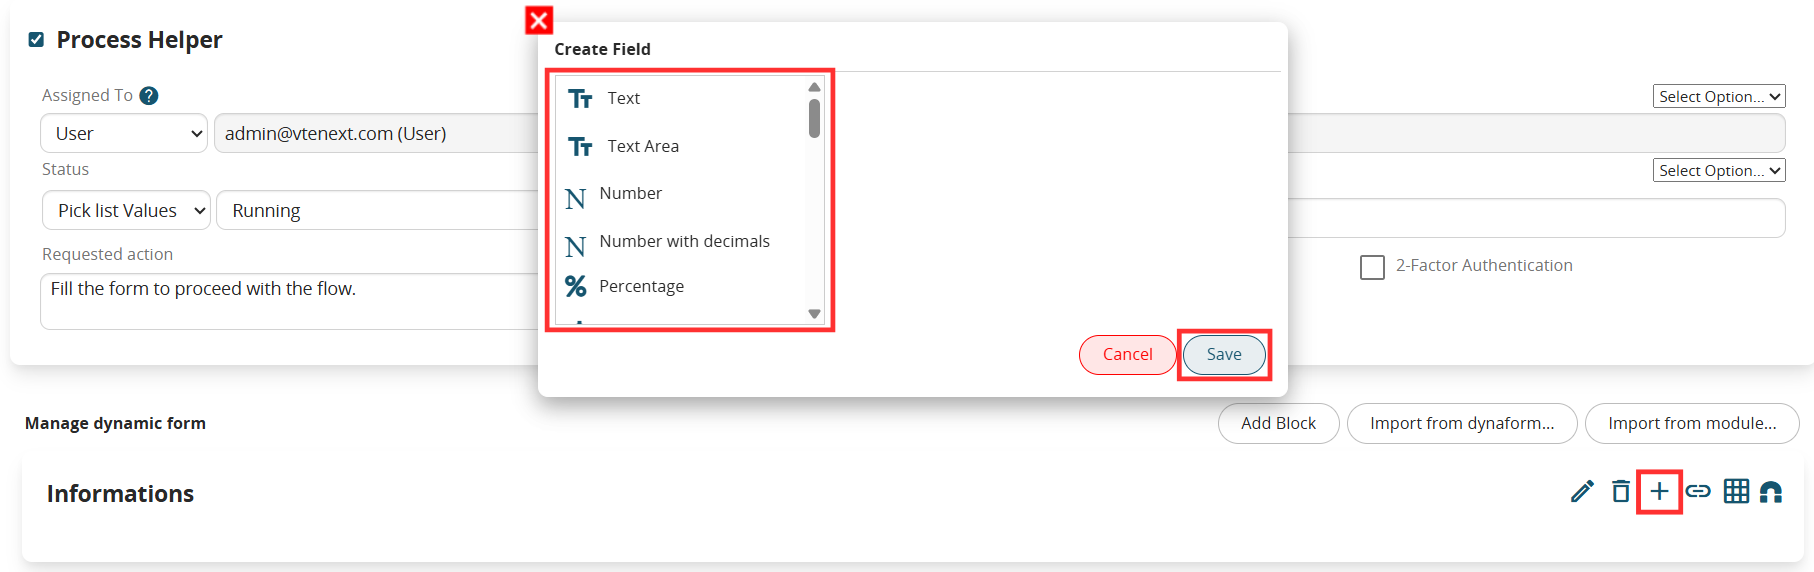
Figure 6
- Add relation field button → allows you to quickly create a field of the “Related to” type (Figure 7)
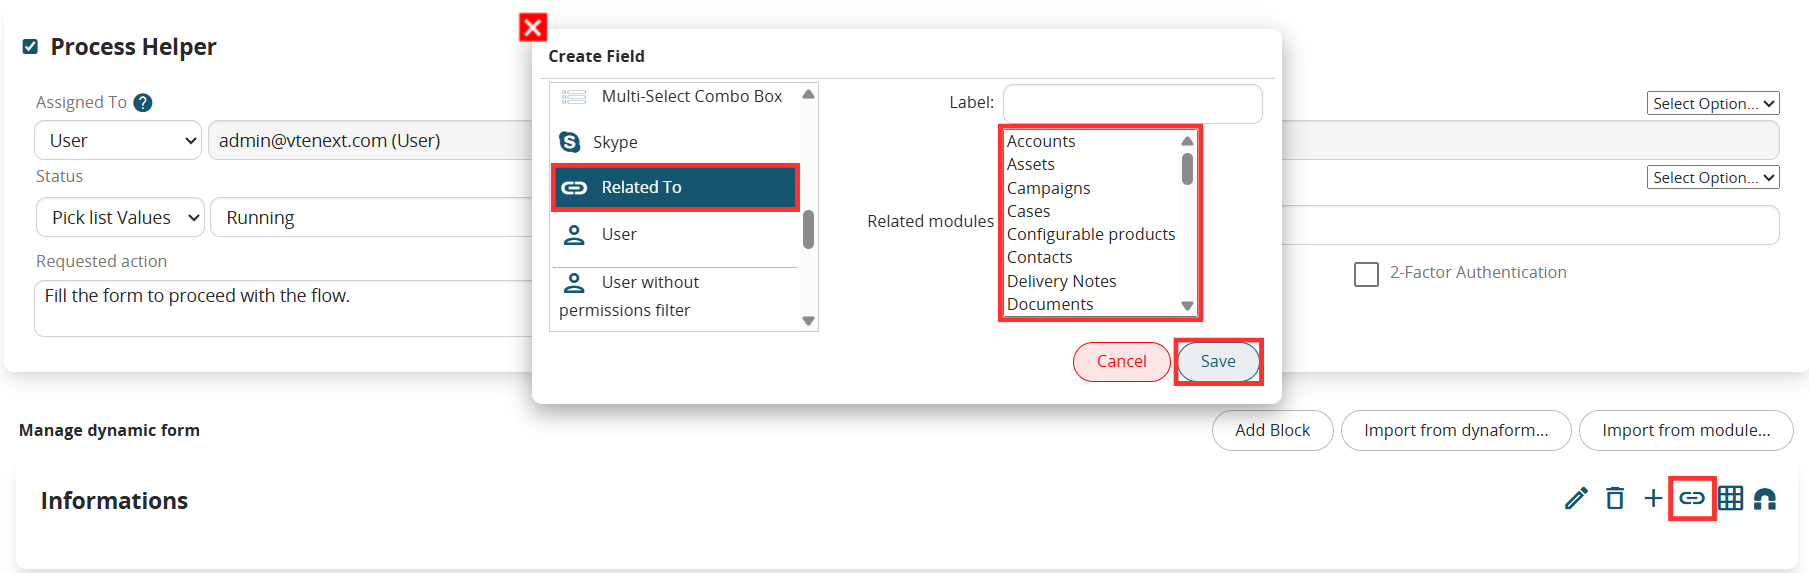
Figure 7
-Add Table Field Button → allows you to quickly create a table field (Figure 8 and 9)

Figure 8
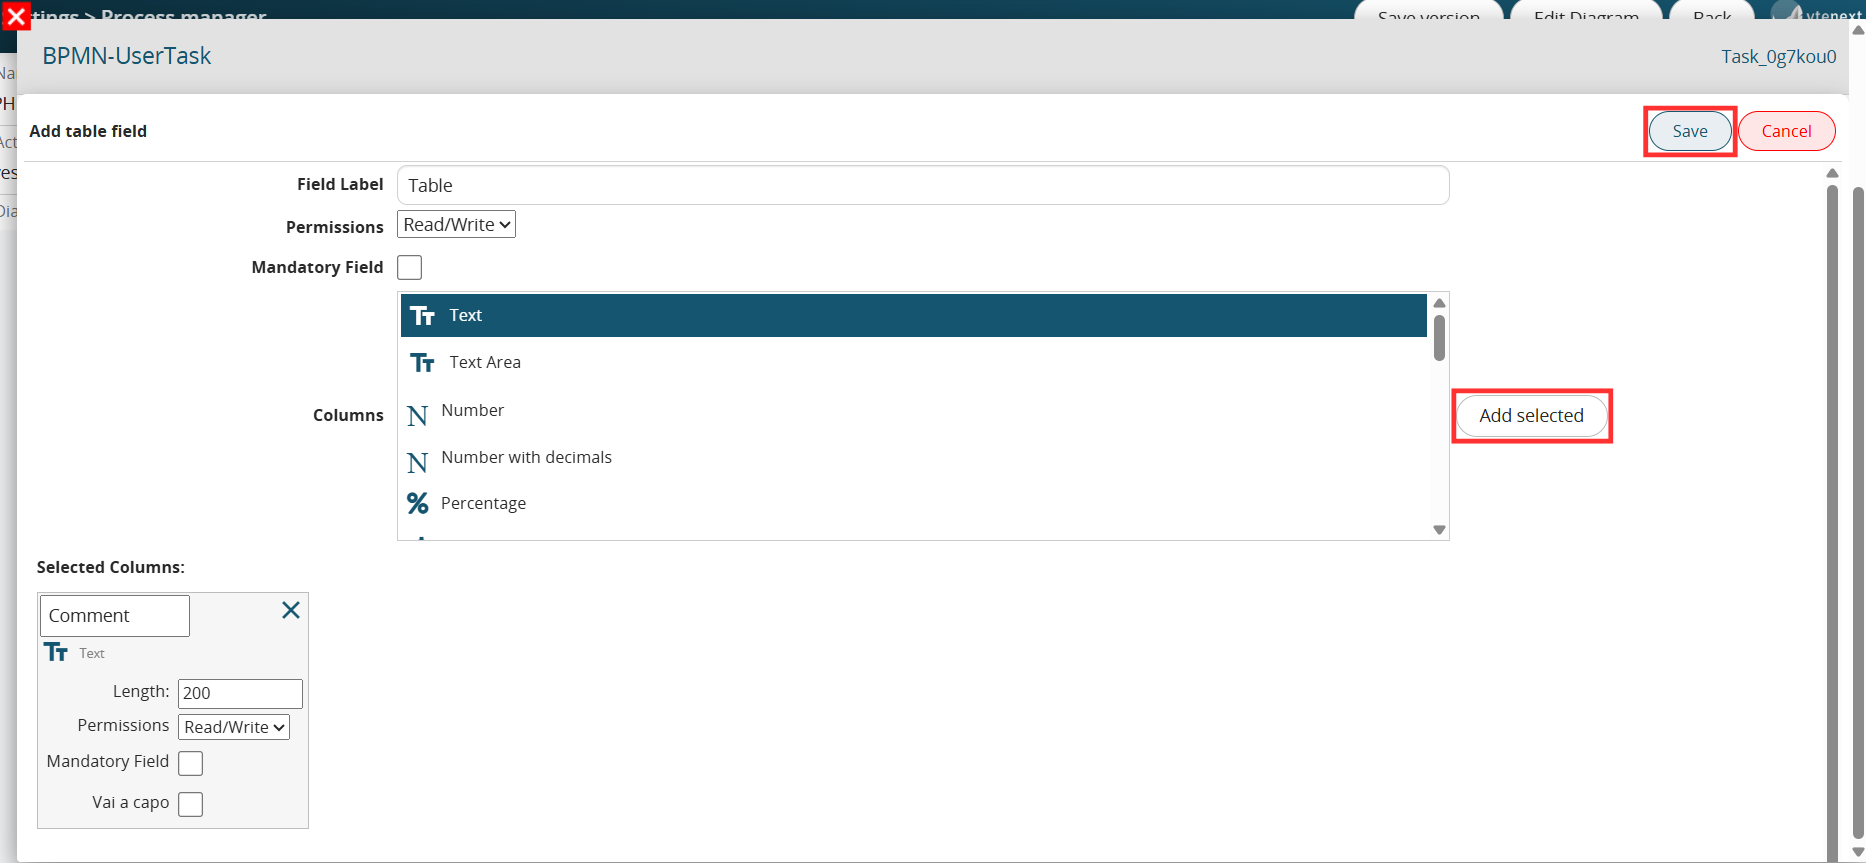
Figure 9
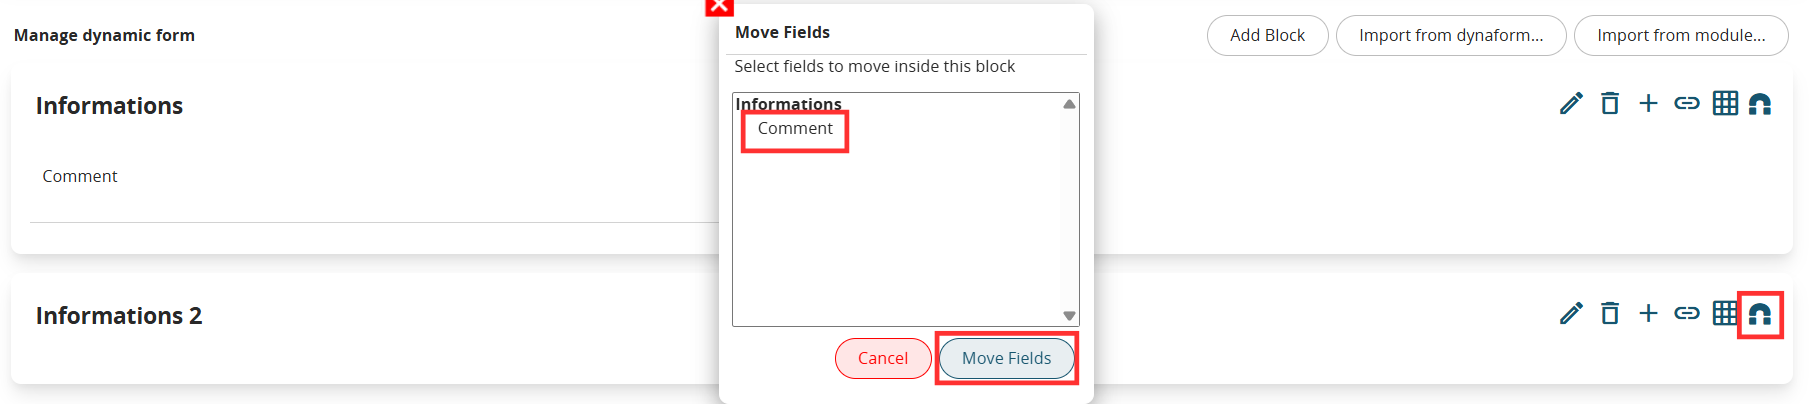
Figure 10
5.3 Managing Properties of Individual Fields
To manage the properties of individual fields in the dynamic form, you will need to click on the “Edit” button to the right of the field name (Figure 1)

Figure 1
Specifically, you can manage the following properties: - Default Permissions → by filling in the “Permissions” picklist you can select one of the following items: “Read / Write”, “Read Only”, “Hidden” (Figure 2)
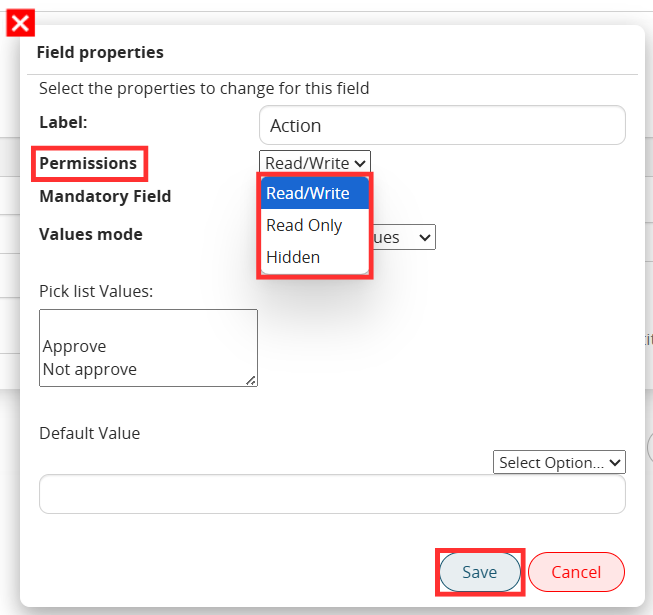
Figure 2
To set mandatory permissions instead, you will have to select the “Mandatory” flag (Figure 3)
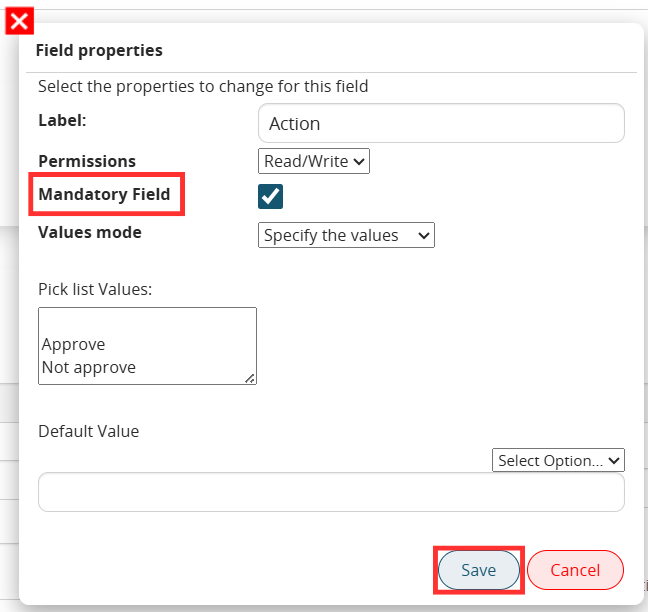
Figure 3
- Default Value → by filling in the “Default Value” field it will be possible to indicate a static or dynamic default value (by choosing from the “Select Option picklist”) (Figure 4)

Figure 4
- Values mode → this is an exclusive feature for “Picklist” type fields.
It allows you to choose whether to specify static values as components of the picklist (by selecting the “Specify values” item, Figure 5) or whether to inherit the values of an existing picklist on one of the modules involved in the process or present in the CRM (by selecting the “Inherit from a field” item, Figure 6).
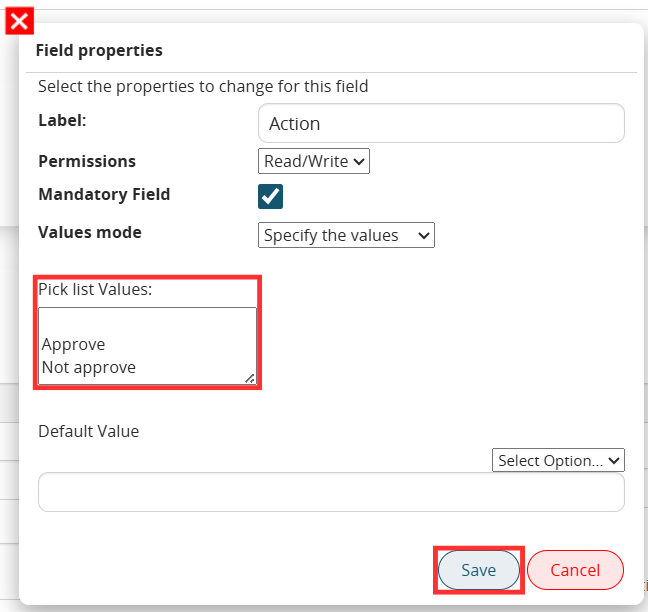
Figure 5
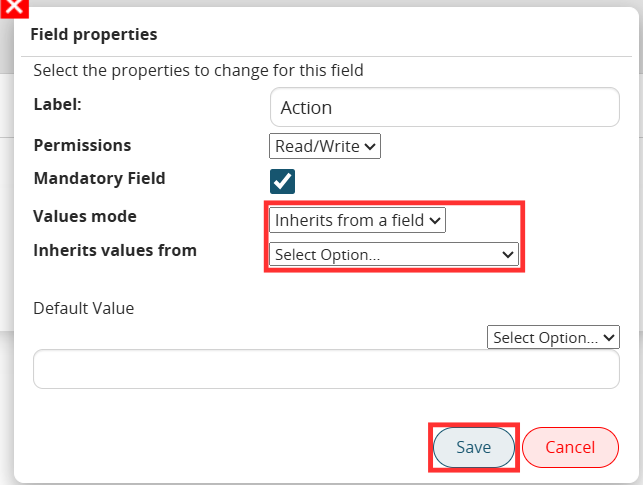
Figure 6
NOTE: within the processes it is possible to separate the process into different branches that are traversed by the flow based on the conditions that occur within it.
For this reason, when configuring this functionality, it is good to pay particular attention to the sources from which we are going to obtain the values to inherit.
In fact, in the case in which the values of a field are inherited by fishing it from an instance involved in the process, it must be ensured that that instance is actually always involved in the entire path that then leads to the process helper, otherwise there is a risk that the system will not return anything because, in that specific branch traversed by the process, the instance of that module does not exist.
For example, if the process is divided into 2 different branches, in which in the first there is a create entity action on the companies module and in the second instead the process helper that we are configuring, if we go to fish the values to inherit by pointing to the company created by the create entity action we will not obtain any value, this is because in the path that leads to the process helper that company is not created.
So in this case we will have to point to the variables linked to the generic modules present in the CRM (Figure 7)
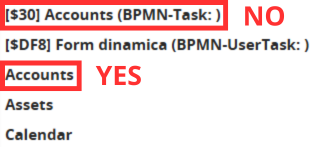
Figure 7
5.4 Import Block from Dynamic Form
If the necessary blocks and fields already exist within another dynamic form, using the “Import from dynamic form...” button it will be possible to insert a copy of the block of a dynamic form present within the process into the dynamic form (including the fields present within it, Figure 1).
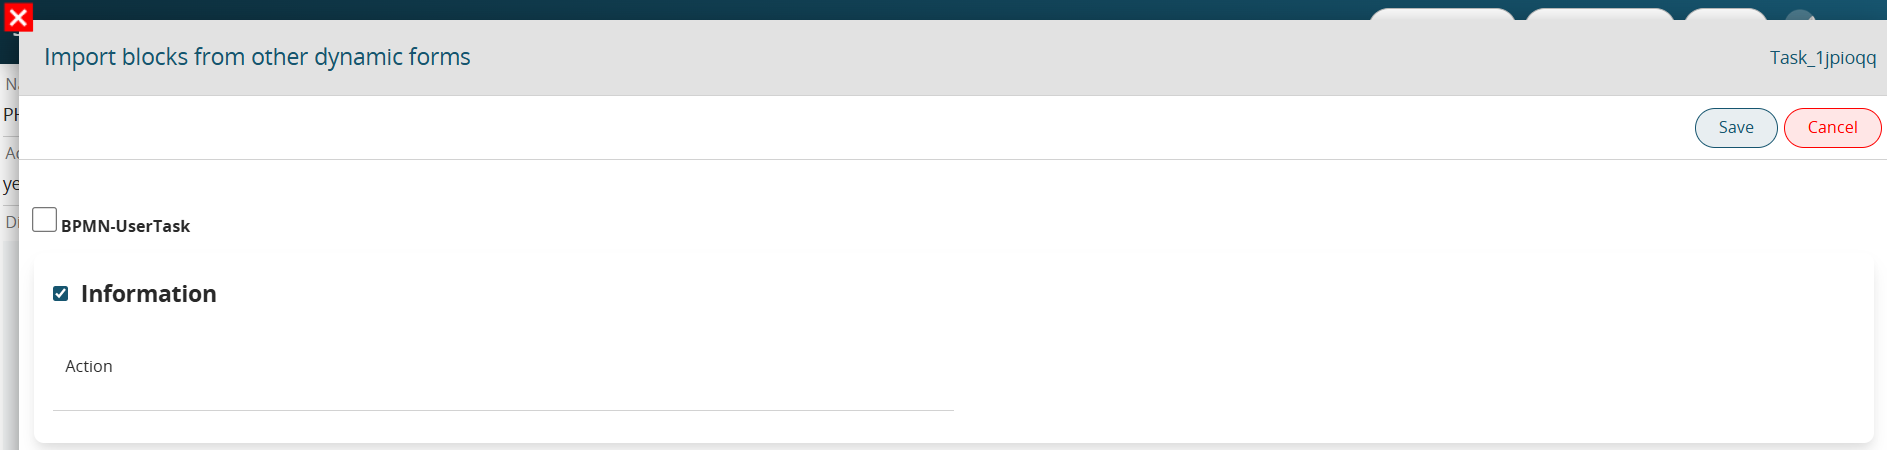
Figure 1
NOTE: All fields will be created with the following properties:
-Default Permissions → Read Only
-Default Value → variable that points to the content of the dynamic form field from which the copy was made
5.5 Import Block from Module
In the event that the necessary blocks and fields already exist within a module (standard or custom), using the “Import from module...” button it will be possible to insert a copy of the block of a module involved in the process into the dynamic form (including the fields present within it, Figure 1).
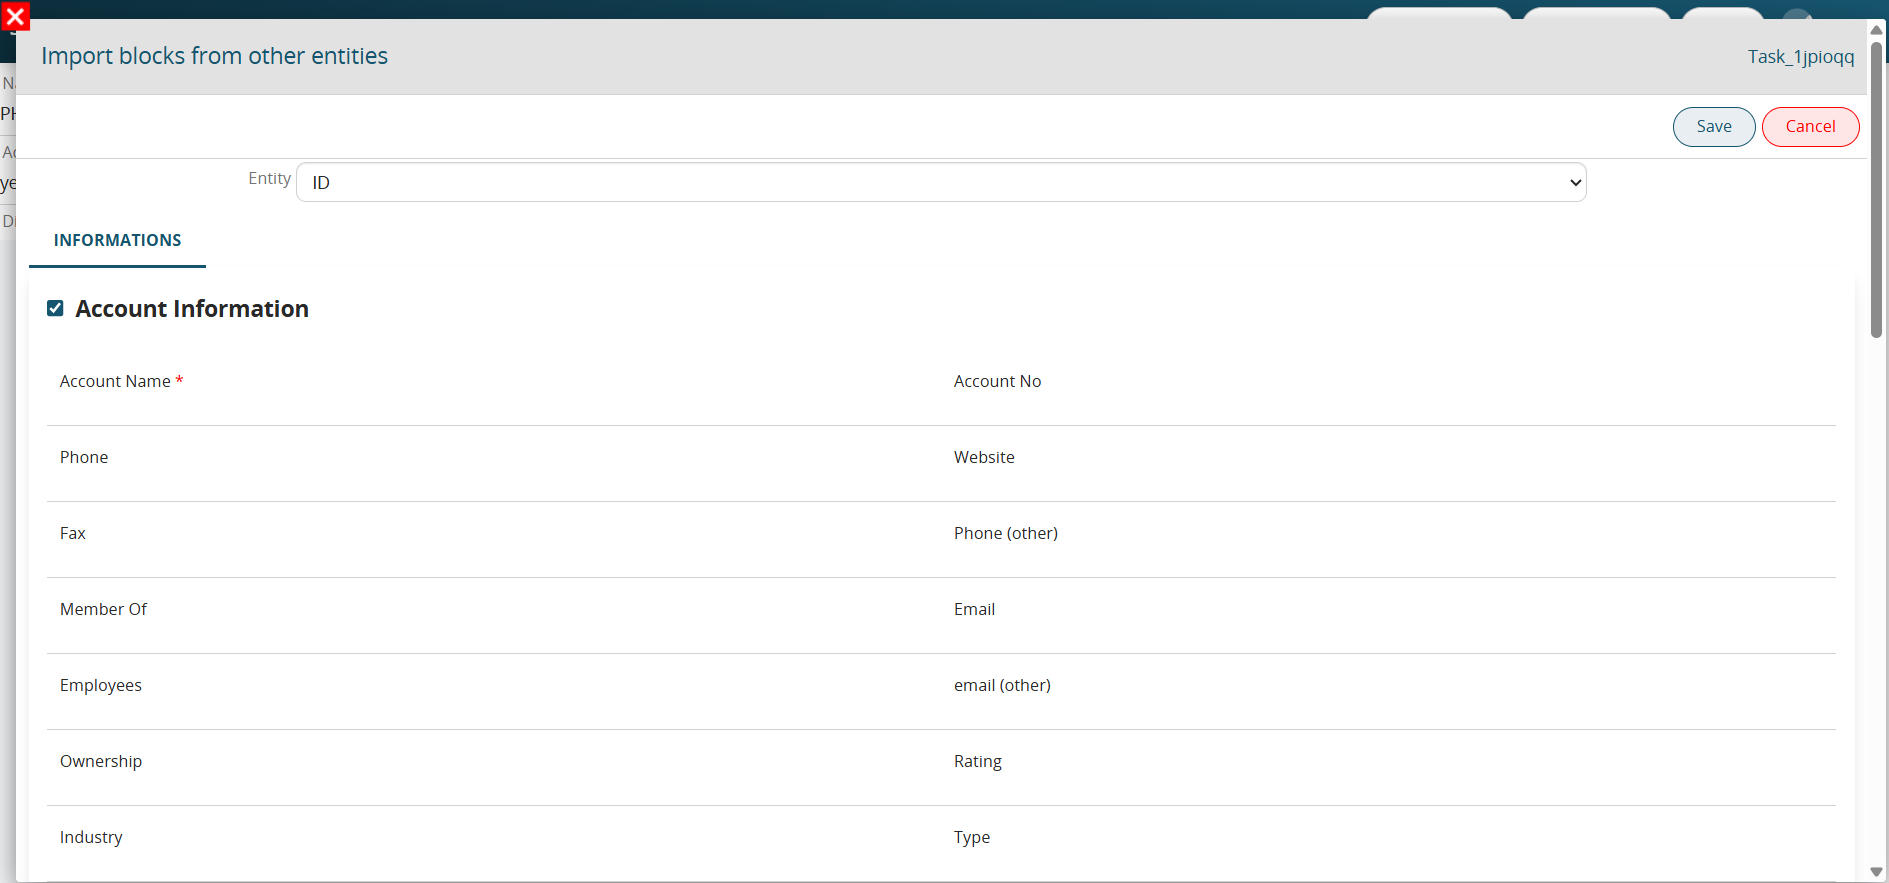
Figure 1
NOTE: All fields will be created with the following properties:
-Default Permissions → Read Only
-Default Value → variable that points to the content of the field of the form instance from which the copy was made
5.6 Advanced Section
This section allows you to set advanced rules to manage the permissions for the fields of the dynamic forms involved in the process.
To access them, click the "Advanced" button available within any Action Task (Figure 1).
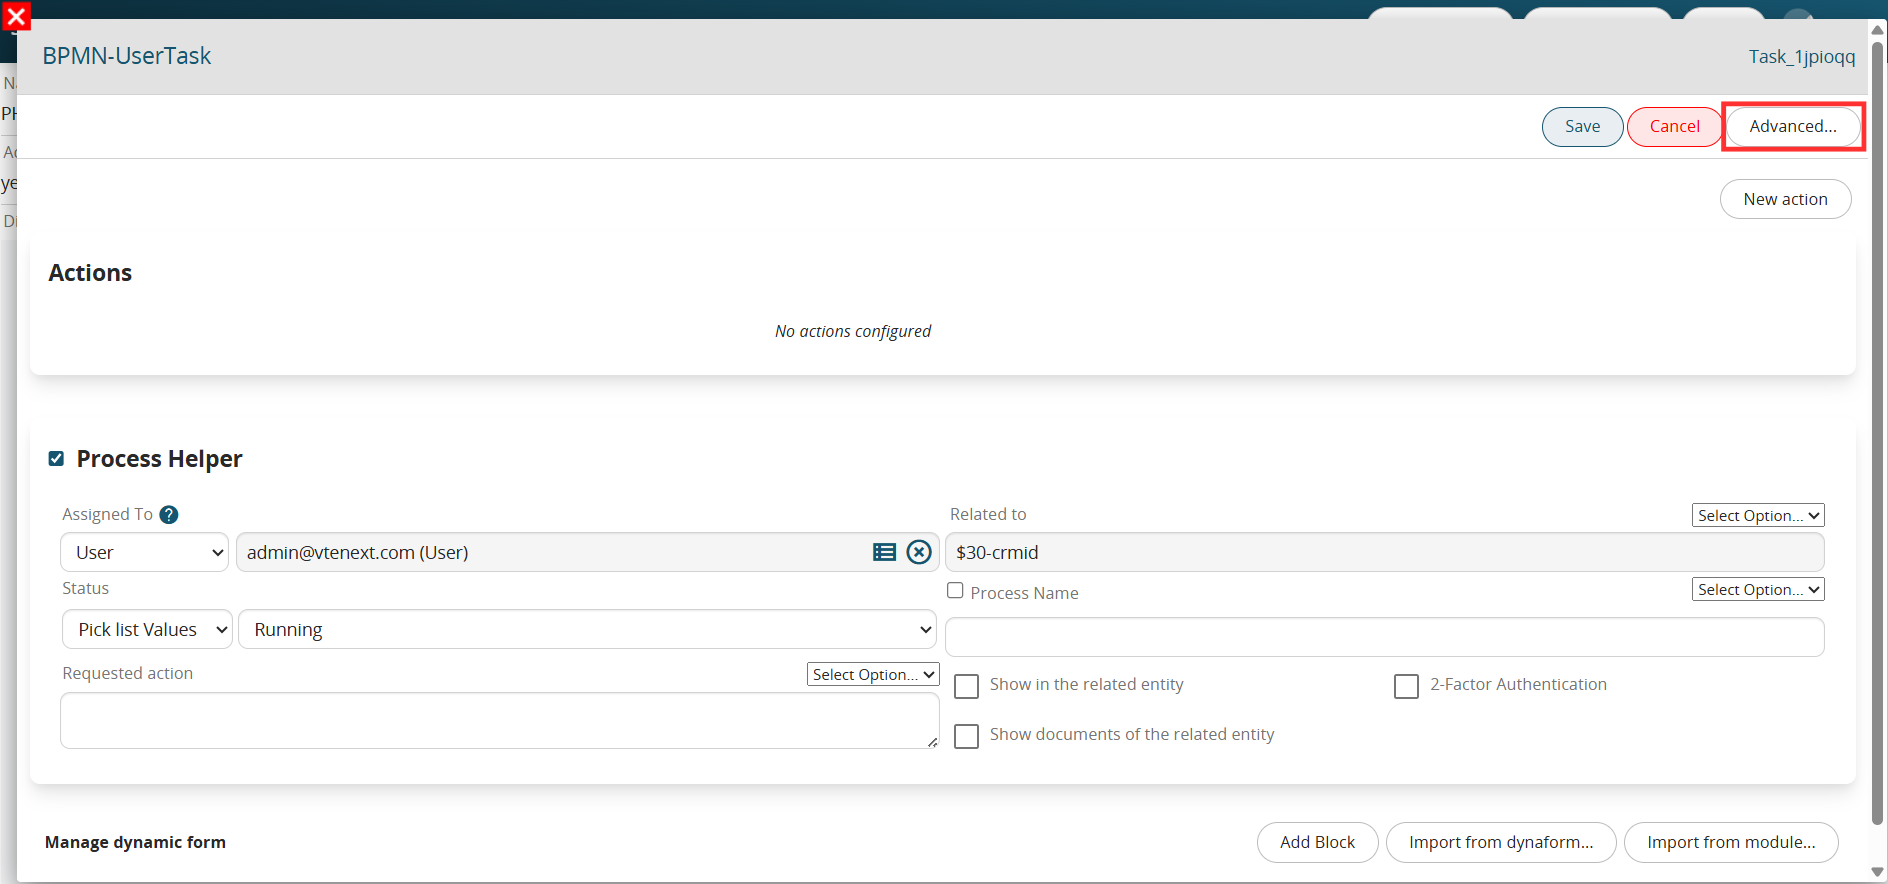
Figure 1
CONDITIONAL FIELDS (ON FORM)
Allows you to set up conditional field rules applicable to the instances of the forms involved in the process (Figure 2).
These rules will be valid only during the duration of the process, in fact once it is finished they will be automatically deactivated.
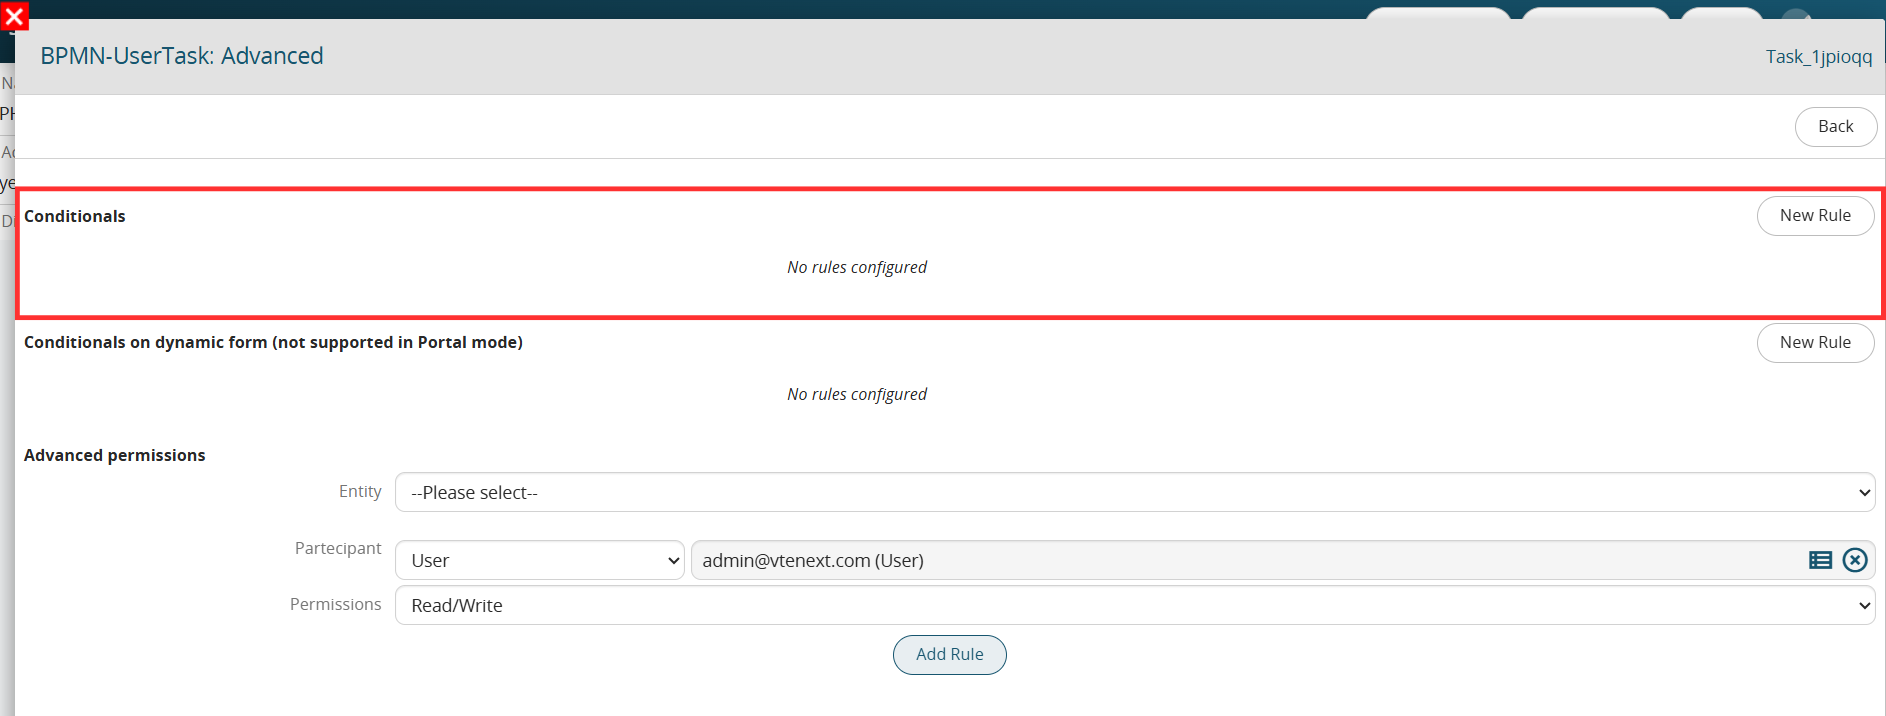
Figure 2
To proceed with the creation of a rule, you will have to click the “New Rule” button.
The system will ask you to enter a text description by filling in the “Rule” field.
You will then have to select the instance involved in the process, indicate any Roles or Groups to which to limit the application of the rule, enter a condition (which must occur for the rule to be activated) and finally enter the permissions on the fields involved (Figure 3).
For further information on the configuration of conditional fields, consult section 17.4 of the Vtenext general manual.
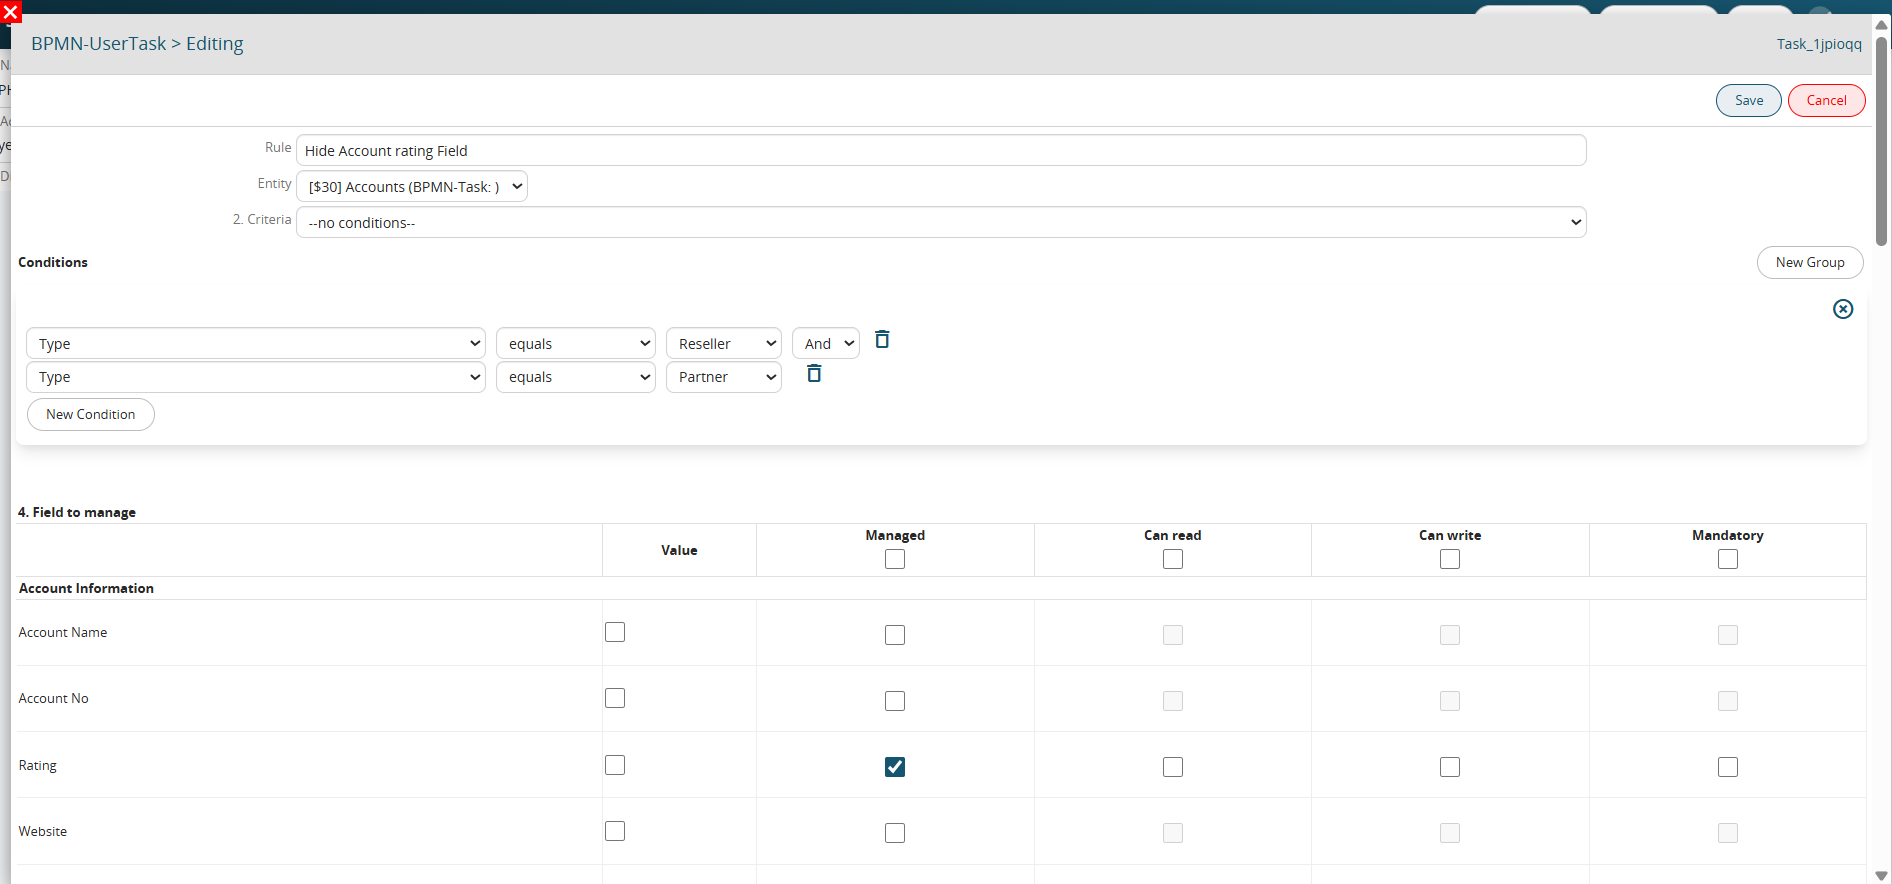
Figure 3
NOTE: compared to the standard conditional fields, an additional column called “Value” is available from the process, which allows you to force the insertion of static or dynamic data within the selected fields (Figure 4).

Figure 4
CONDITIONAL FIELDS ON DYNAMIC FORM (NOT SUPPORTED IN PORTAL MODE)
Allows you to set conditional field rules applicable to the fields of a specific dynamic form present within the process (Figure 5).
These rules will be valid only during the duration of the process, in fact once it is finished they will be automatically deactivated.
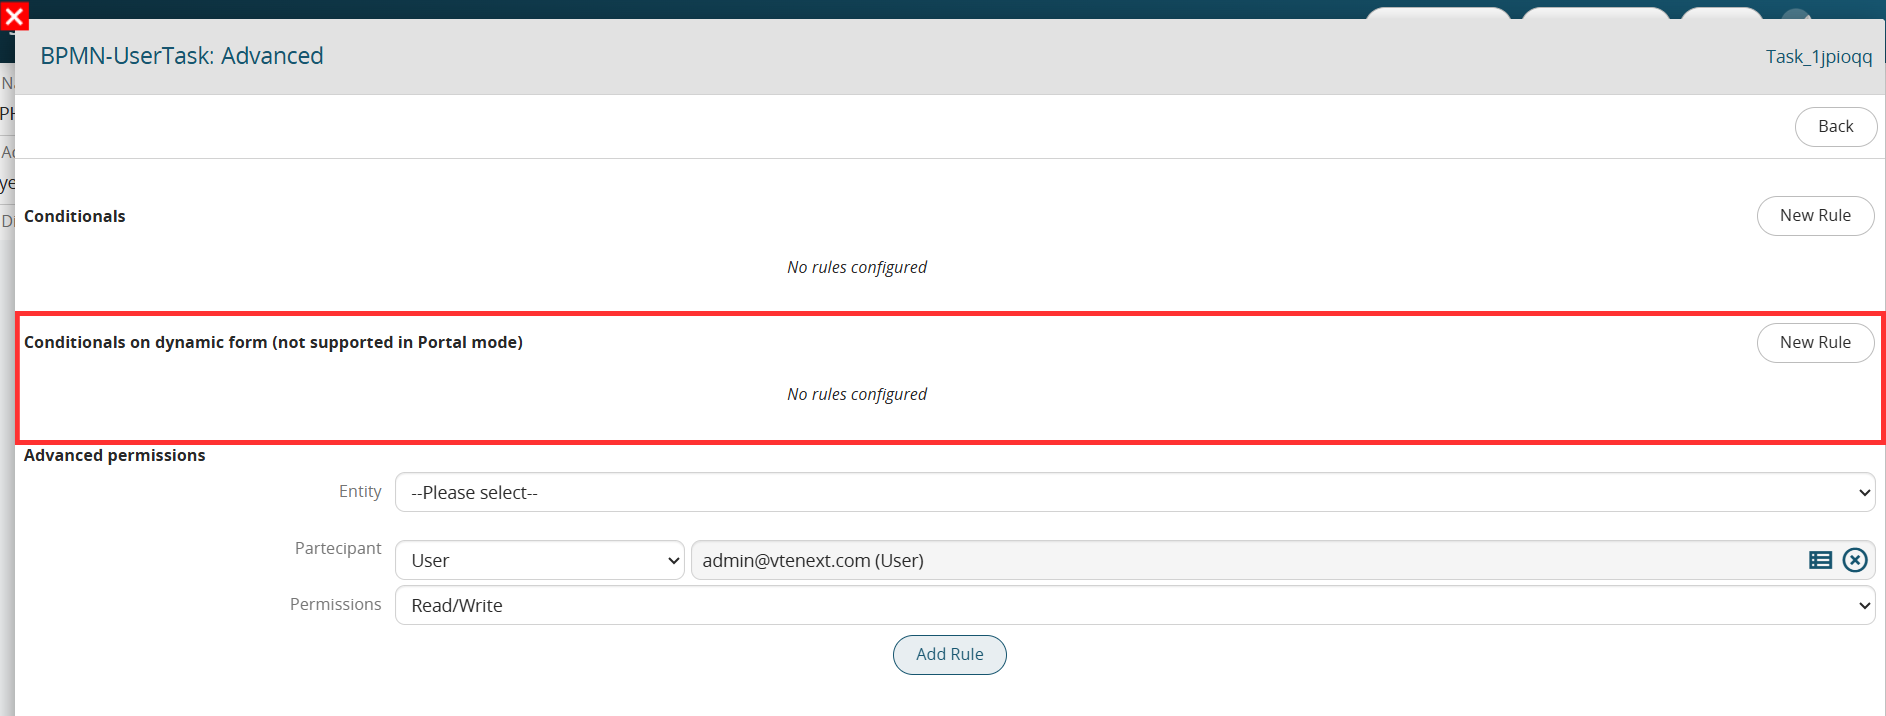
Figure 5
To proceed with the creation of a rule, you will have to click the “New Rule” button.
The system will ask you to enter a text description by filling in the “Rule” field.
You will then have to indicate any Roles or Groups to which you want to limit the application of the rule, insert a condition (which must occur for the rule to be activated) and finally insert the permissions on the fields involved.
For further information on the configuration of conditional fields, consult section 17.4 of the Vtenext general manual.
To better understand how it works, below is an example of a Process Helper aimed at requesting the approval of an internal flow by filling in a single field called “Action” (Figure 6).
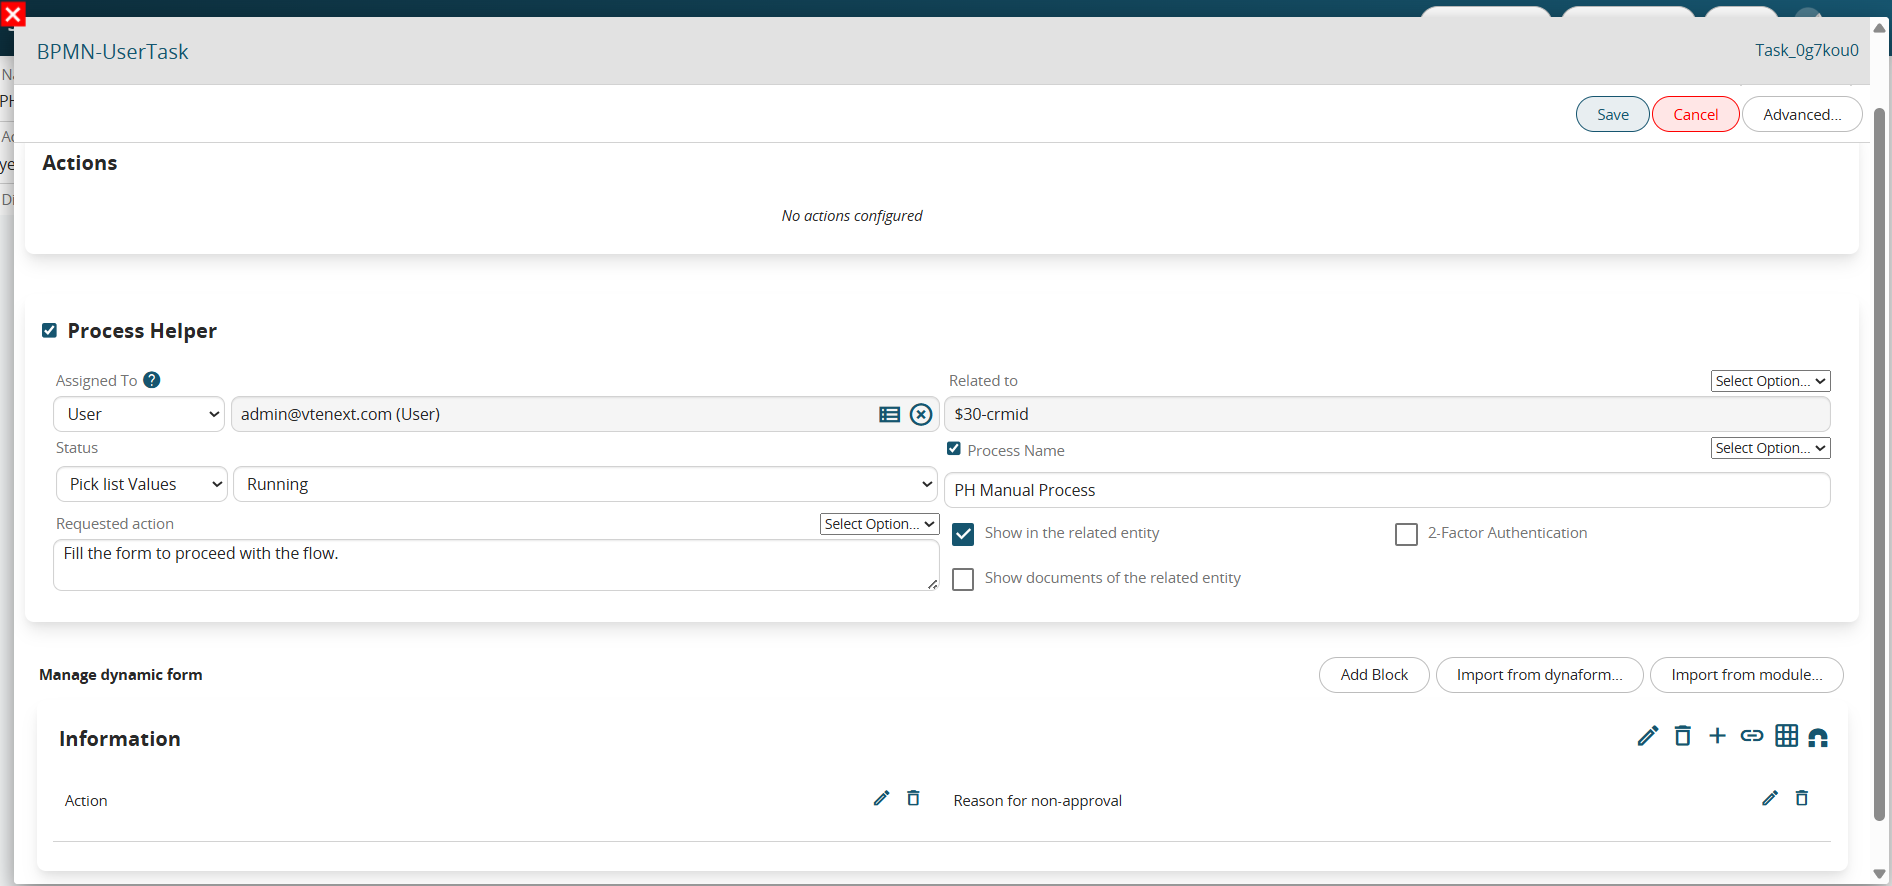
Figure 6
This is a picklist type field with the following 3 static values: “empty”, “APPROVATE” and “DO NOT APPROVE” and with mandatory permissions as Default (Figure 7)
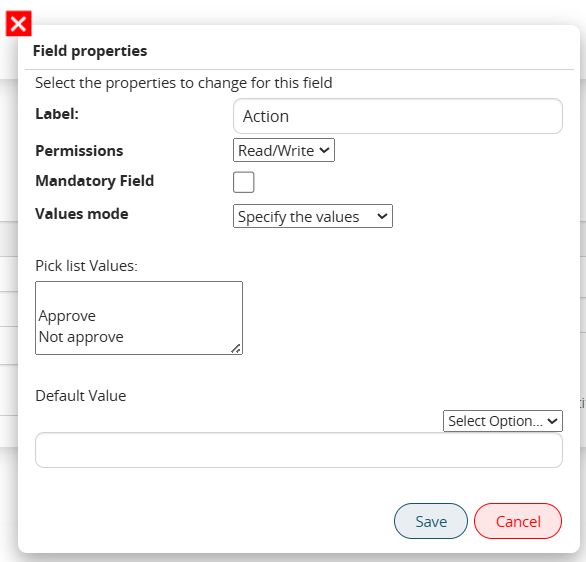
Figure 7
There is an additional field called “Reason for non-approval” that should be shown and filled in only if the user chooses the “DO NOT APPROVE” option.
For this reason, the following conditional field rule on dynamic form has been created that allows you to hide the aforementioned field if the “Action” field has a value other than “DO NOT APPROVE”.
Therefore, in the “Advanced” → “Conditional fields on dynamic form” section, a rule called
“If Action other than DO NOT APPROVE hide Reason for non-approval field” has been inserted (Figure 8).

Figure 8
In the “Condition” section, the “Action” condition other than “DO NOT APPROVE” has been inserted (Figure 9)

Figure 9
In the “Fields to manage” section, only the “Managed” column was selected in the “Reason for non-approval” field (Figure 10)

Figure 10
ADVANCED PERMISSIONS
Allows you to set complete visibility permissions on the instances of the modules involved in the process by specifying a user or a group (static or dynamic).
Advanced permissions are useful when you need to extend access to a specific record for users who previously did not have the required privileges to view and/or modify it.
These rules never override a user's existing default permissions if doing so would reduce their access privileges.
For example, if a user is allowed by default to both view and modify a record, configuring an advanced permission that grants only view access (and not edit access) will have no effect, as it would restrict the user's existing privileges.
Conversely, if a user is allowed by default to view a record but not edit it, configuring an advanced permission that grants both view and edit access will be applied, as it extends the user's existing privileges.
The applied permissions remain in effect even after the process has been completed.
To proceed with the insertion of an advanced permission you will have to select an instance involved in the process, a user or group (static or dynamic) to apply it to and finally one of the available permissions (“Read/Write” and “Read Only”) (Figure 11).
Once you click the “Add Rule” button, the advanced permission will be saved and confirmed.

Figure 11