BPMN Introduction
- 1.1 Why automate a business process? Advantages and Objectives
- 1.2 Process Manager Section: General Description and List of Features
- 1.3 Flowchart Configuration and Left Menu
- 1.4 Simbology
- 1.5 BPMN Actions
- 1.6 Process Helper Section: Introduction and Usage Guide
1.1 Why automate a business process? Advantages and Objectives
WHAT ARE THE ADVANTAGES?
The main motivations and benefits can be summarized as follows:
Saving time
By delegating the execution of internal business processes to the system, people are given the opportunity to focus on other activities—sometimes freeing themselves from daily "headaches."
Minimizing costs and errors
Human errors, misunderstandings, and oversights always result in additional costs. Minimizing them is a challenge every company must face.
Optimizing communication
Endless flows of emails and phone calls between departments are not the most efficient way to organize and manage work, especially when completing a process requires the involvement of different teams at different stages.
In an automated process, each person is guided by system notifications that indicate what needs to be done and when. Moreover, all operations, requests, and changes are recorded and traceable, minimizing the risk of lost information.
Reinforcing awareness of roles and responsibilities
For the workflow to be correctly managed through the software, every team member, in every department, must clearly understand their tasks and responsibilities. This requires a clear definition of hierarchies and interdepartmental relationships, and most importantly, a clear indication of who assigns tasks, provides input, and approves or rejects outputs.
Keeping everything under control
Managing workflows in an automated way not only allows you to know the status of each activity at any given time but also to maintain an overview of the entire situation. Automating monitoring means fewer meetings and a significant time saving.
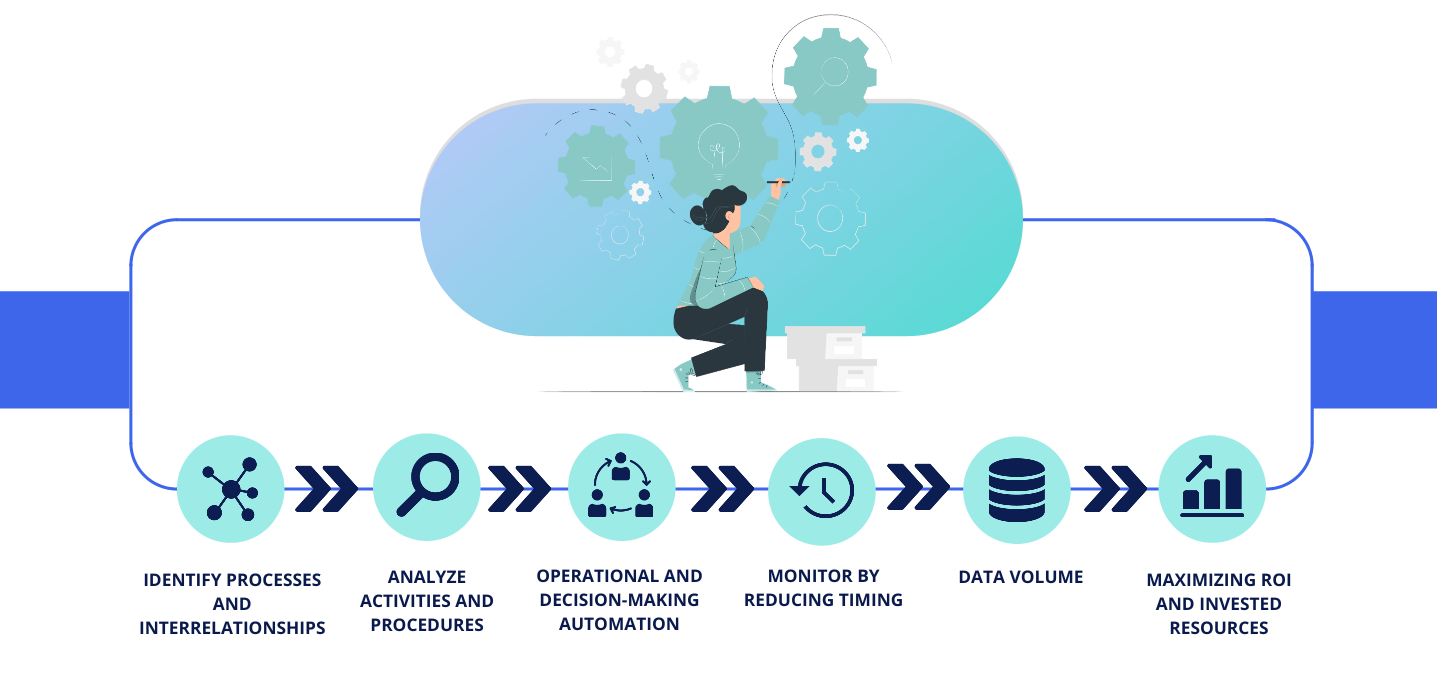
WHAT ARE THE OBJECTIVES OF BPMN?
The main objectives can be summarized as follows:
![]() The ability to identify so-called “bottlenecks,” which often cause damage by reducing overall productivity.
The ability to identify so-called “bottlenecks,” which often cause damage by reducing overall productivity.
![]() The ability to monitor the operational flow of business procedures, helping to avoid stumbling over even the most complex scenarios.
The ability to monitor the operational flow of business procedures, helping to avoid stumbling over even the most complex scenarios.
![]() Improving the exchange of information to facilitate data management at a structural level.
Improving the exchange of information to facilitate data management at a structural level.
![]() Having a unified “blueprint” of processes so that all business workflows can be executed and managed consistently.
Having a unified “blueprint” of processes so that all business workflows can be executed and managed consistently.
![]() Effectively integrating people and activities by using tools that are accessible to all types of business roles—not just technical ones.
Effectively integrating people and activities by using tools that are accessible to all types of business roles—not just technical ones.
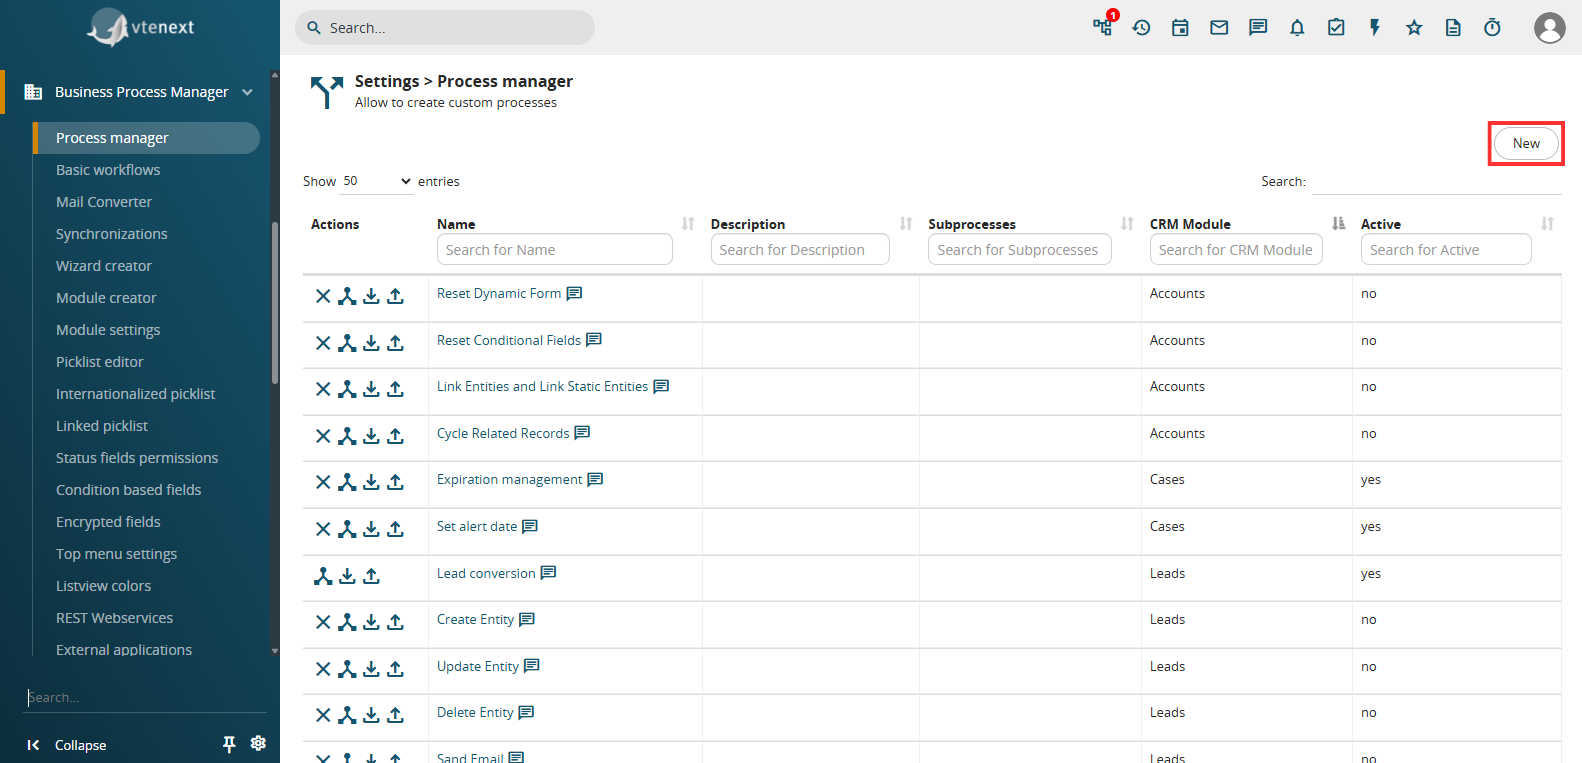
1.2 Process Manager Section: General Description and List of Features
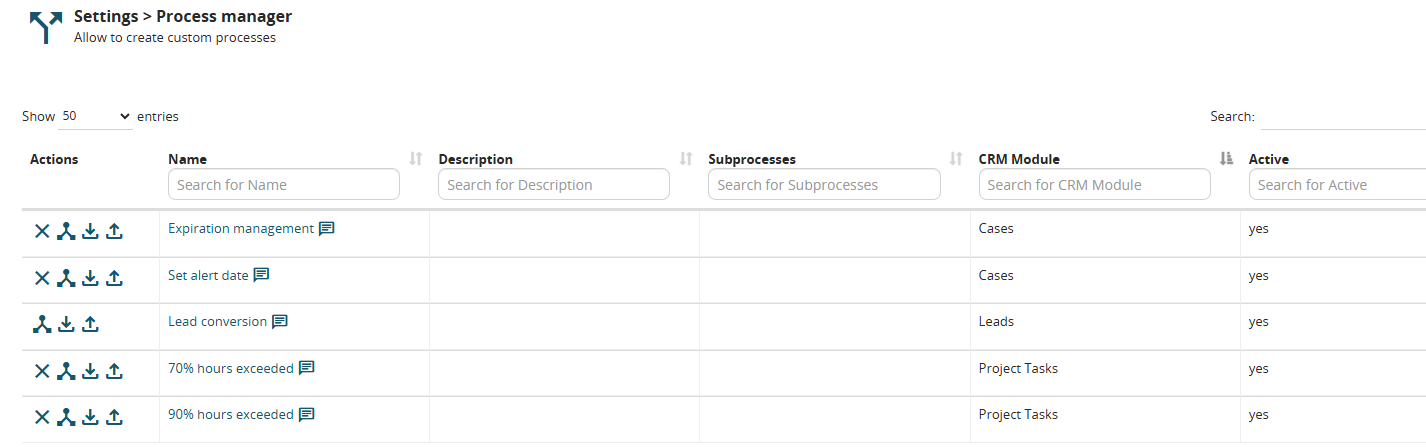
GENERAL DESCRIPTION
This section allows you to modify, create, import, and export BPMN processes.
It is composed of the following columns:
-
Name → represents the name of the process
-
Description → represents the description of the process
-
Sub-processes → indicates the list of any sub-processes linked to the current process
-
CRM Module → indicates the name of the main CRM module involved in the process, which forms the basis for the initial (starting) conditions of the process
-
Active → indicates whether the process is active (yes) or inactive (no)

Accessing the Process Manager Section with the “Next” Theme
To access the Process Manager section with the “Next” theme enabled, follow these steps:
1) Click on the profile icon, then select “Settings”
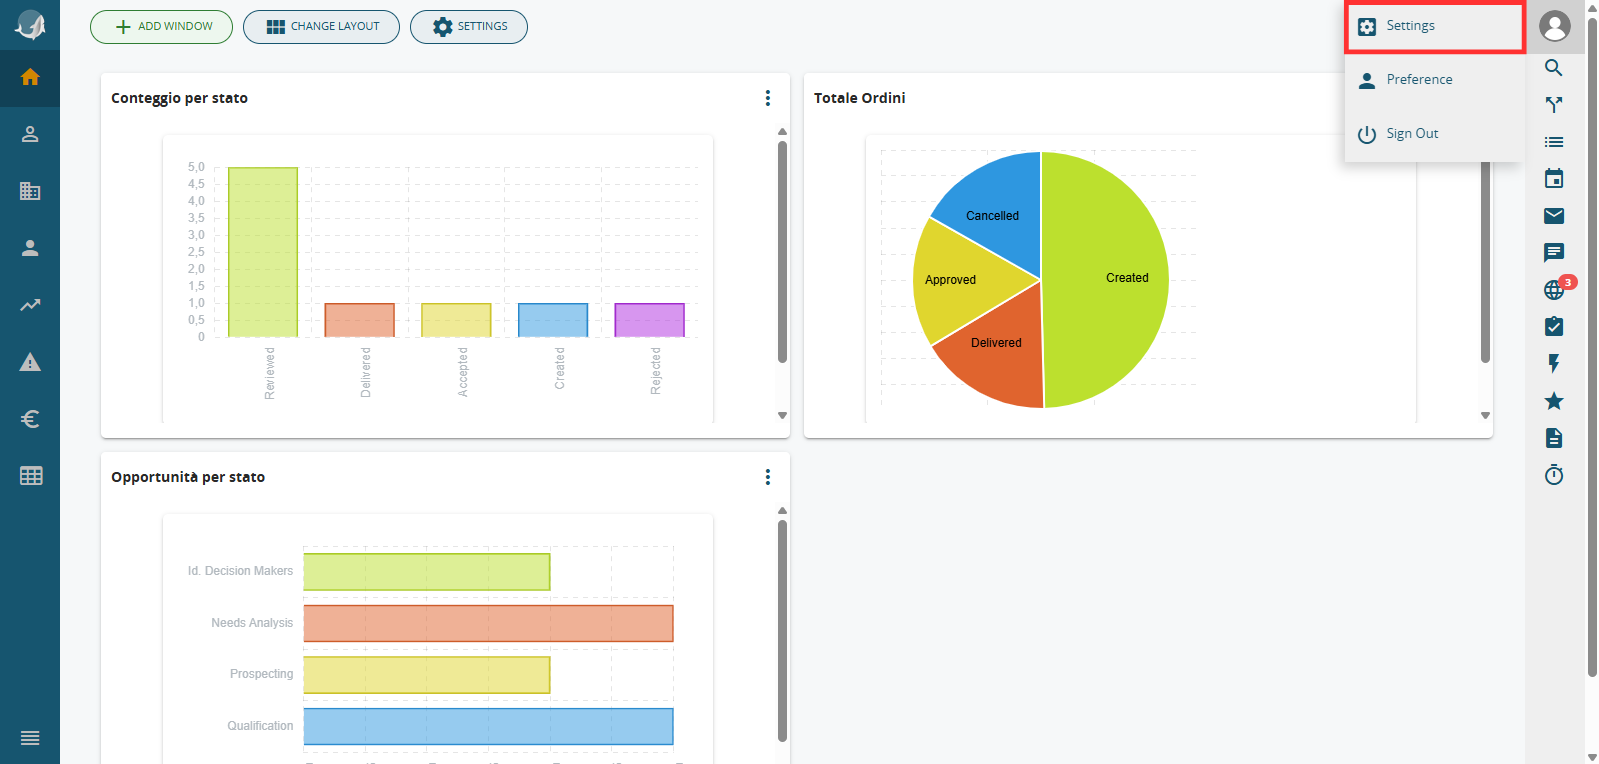
2) In the left-hand menu, click on the “Business Process Manager” section, then select “Process Manager”
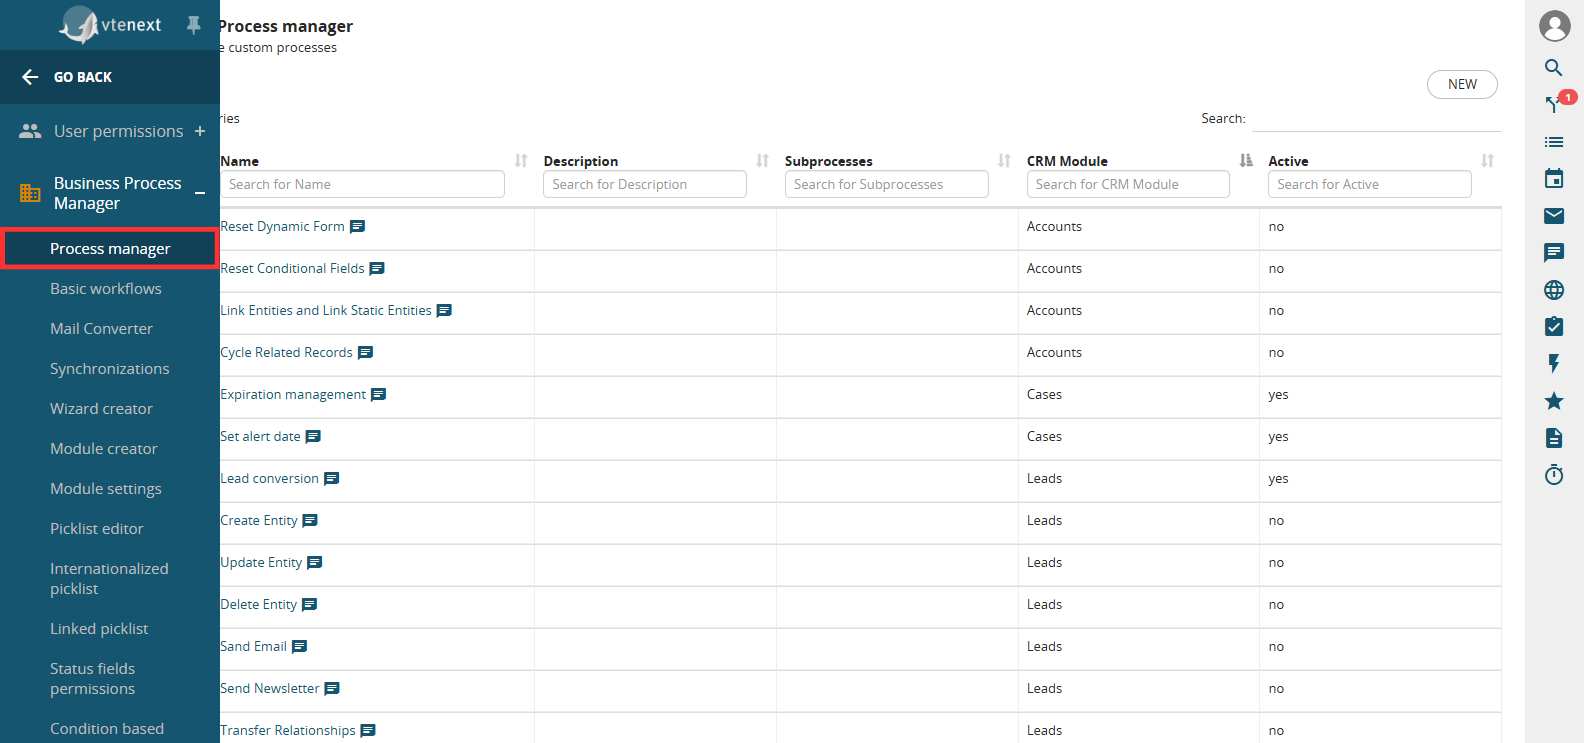
LIST OF FEATURES
Below is the list of main features:
-
Delete process
-
Export BPMN process
-
Export VTE BPMN process
-
Import VTE BPMN into an existing process
-
Create process
-
Import a new process from scratch
Delete Process
By clicking the button shown in the image, you can delete the selected process.
WARNING!: Deleting a process using the X button in the Process Manager section permanently deletes the process from all related tables in the DB.
Therefore, it is important to proceed with caution when using this function, as once deleted, there will be no way to restore the process and all pending instances associated with the affected records.

Export BPMN Process
By clicking the button shown in the image, you can export only the graphical structure of the process, excluding its configuration.

Export VTE BPMN Process
By clicking the button shown in the image, you can export the entire process (structure + configuration).

Import VTE BPMN into an Existing Process
By clicking the button shown in the image, you can import a new version of the selected process.

Create Process
To create a process, follow these steps:
1) Go to the Process Manager section (see the paragraph “Accessing the Process Manager Section with the Next Theme” or “Accessing the Process Manager Section with the Next22 Theme,” depending on the theme in use)
2) Click the NEW button located at the top right
3) Enter a name, an optional description, and then click on “CREATE NEW”
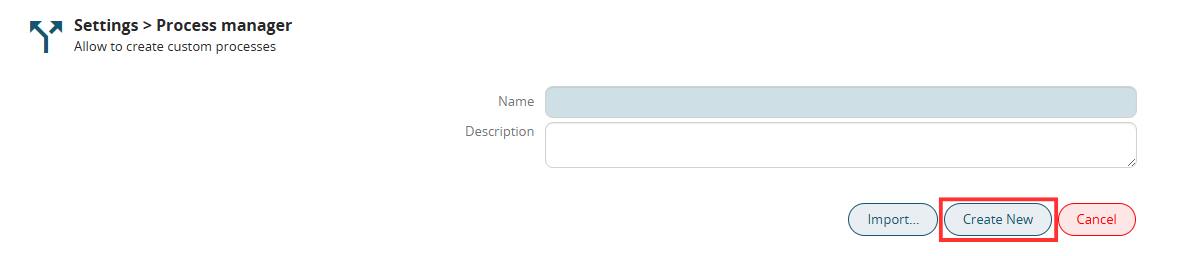
Once the previous steps are completed, the user will be directed to the screen for configuring the process flowchart (see chapter 1.4)
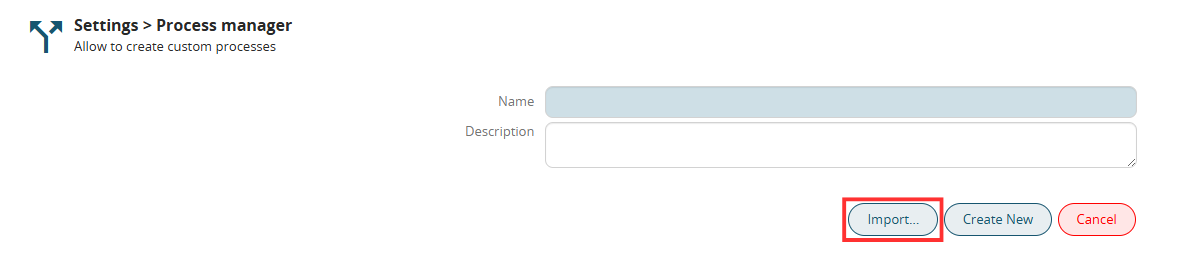
Import a New Process from Scratch
To import existing processes, after navigating to the “Process Manager” section, follow these steps:
1) Click the NEW button located at the top right

2) Enter a name, an optional description, and then click on “Import”
1.3 Flowchart Configuration and Left Menu
FLOWCHART
To view the flowchart of an existing process, click on its name in the "Name" column of the "Process Manager" section. (Figure 1)
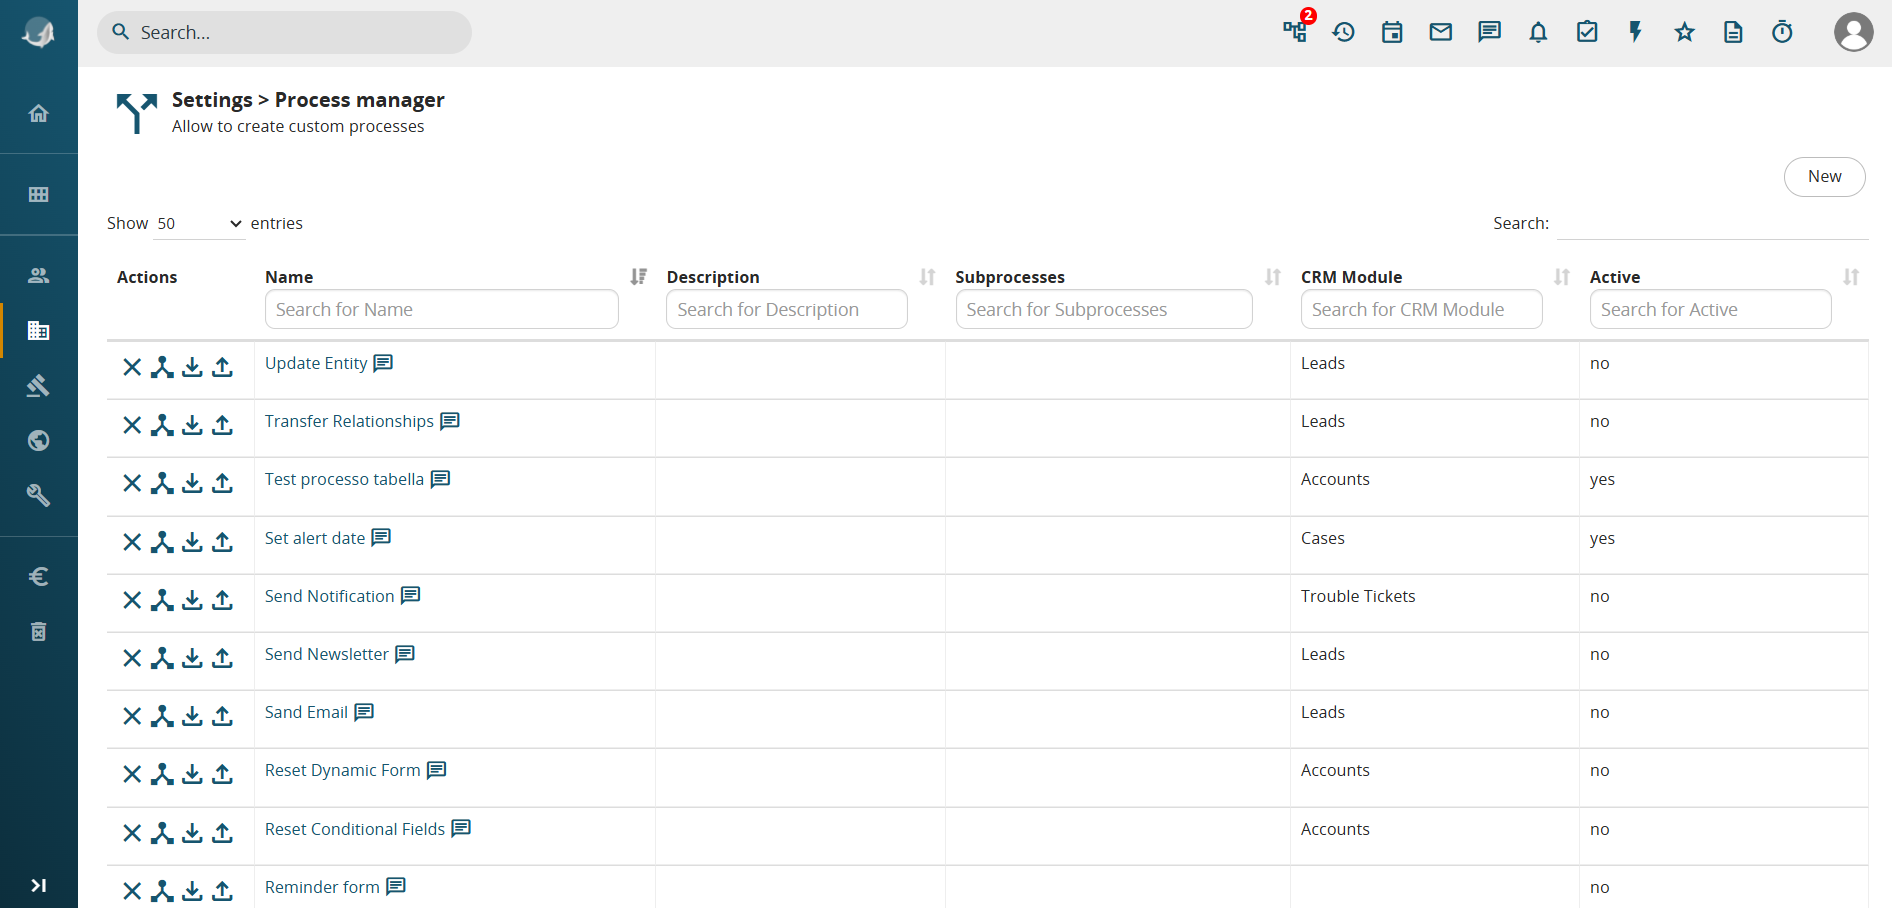
Figure 1
Within this section, you can configure all the elements included in the diagram by clicking directly on each one. (Figure 2 and Figure 3)
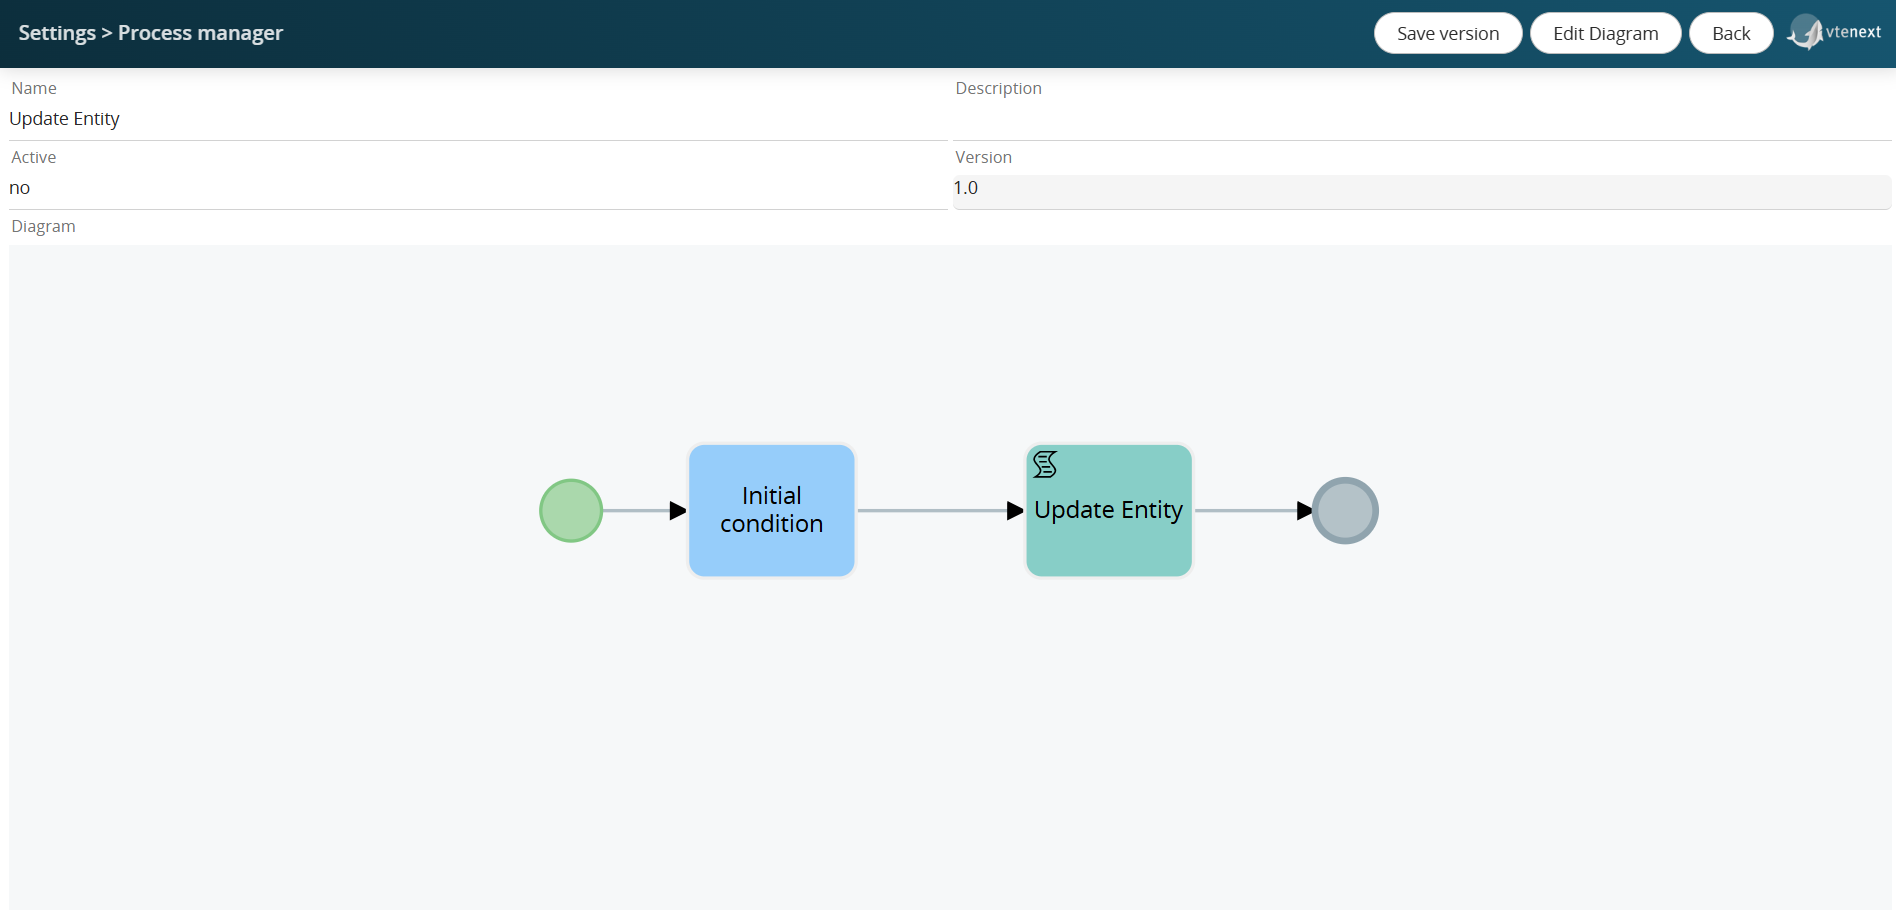
Figure 2
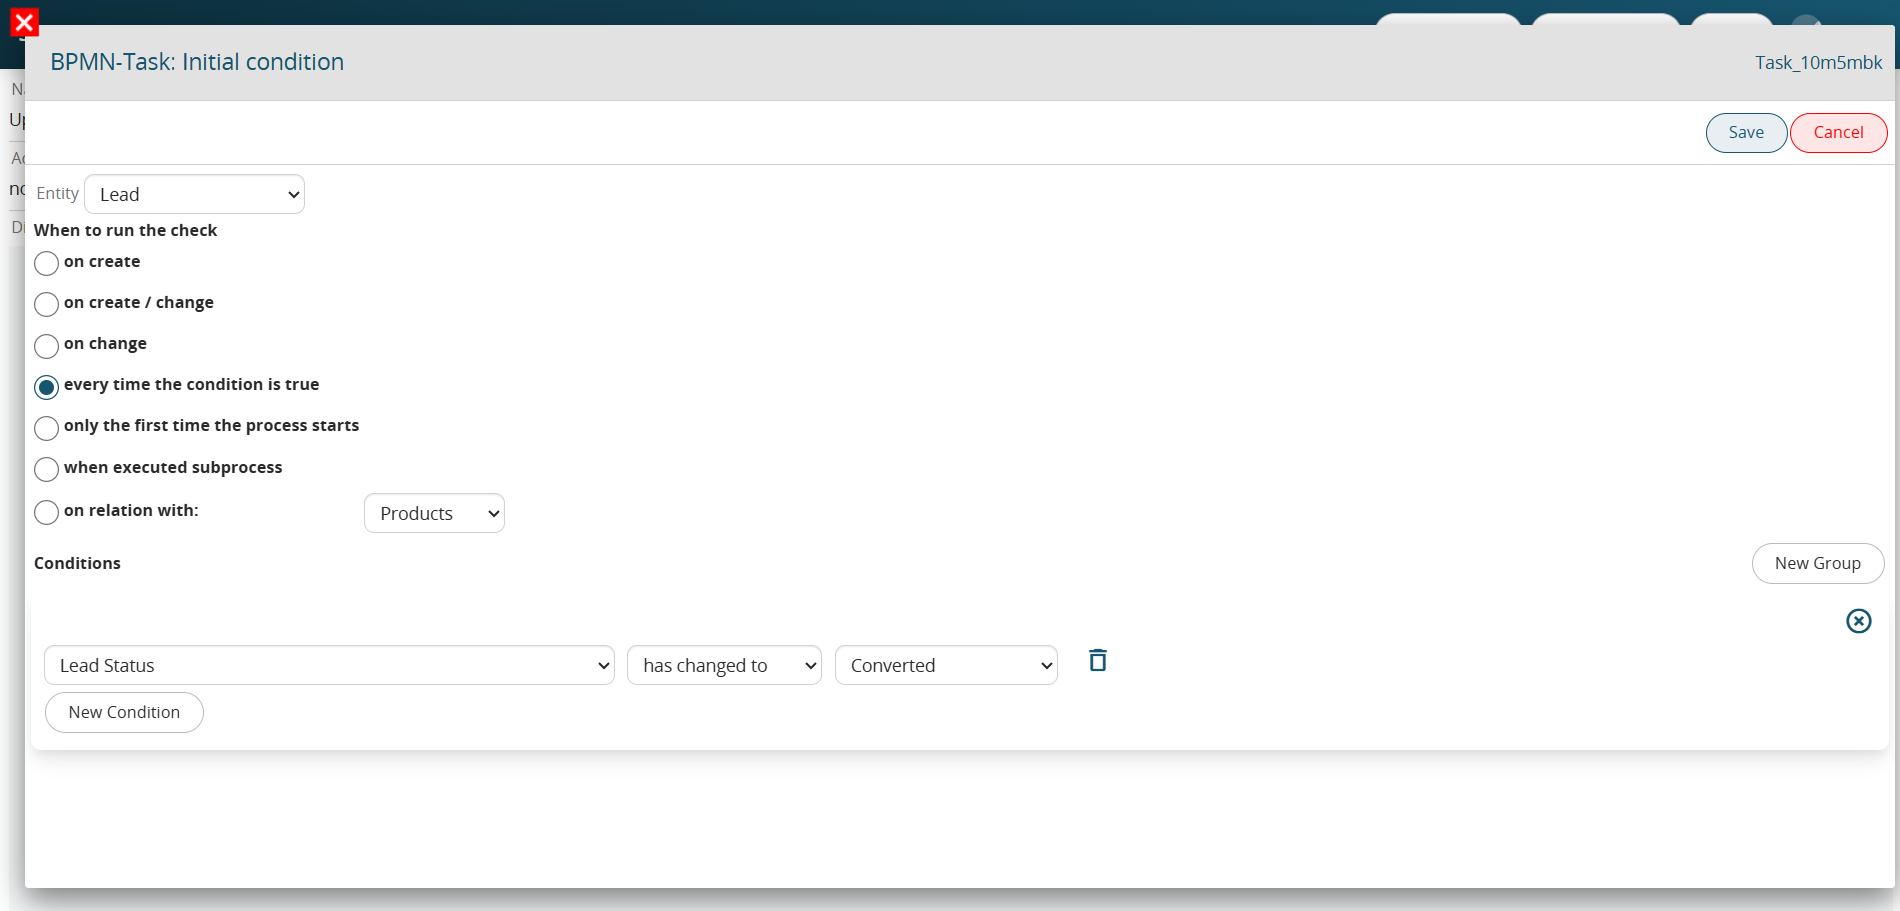
Figure 3
N.B.: The configuration of individual elements will be covered in subsequent chapters.
To make changes to the process diagram, click the "Edit Diagram" button. (Figure 4)
Figure 5
The elements used to construct the process diagram can also be quickly selected through a shortcut menu that becomes available by clicking on a specific element already involved. (Figure 6)
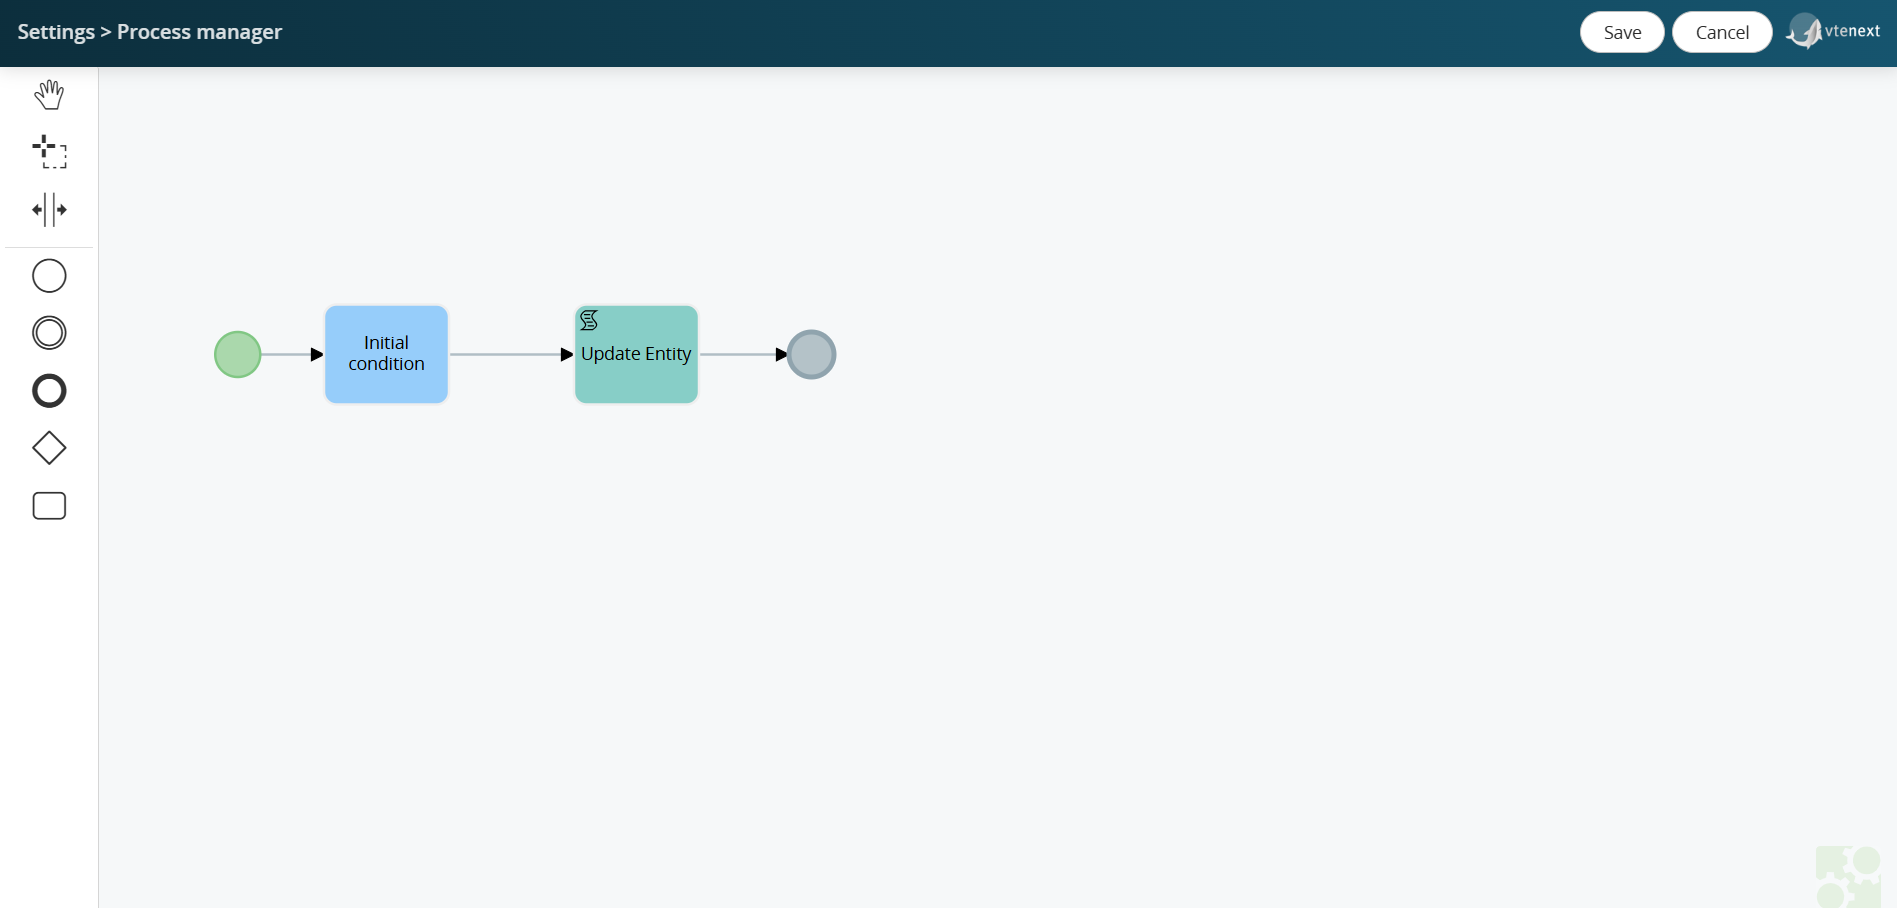
Figure 6
-
A quick selection of the main elements available for creating processes
-
A set of useful functions for the easy and organized creation of process flows
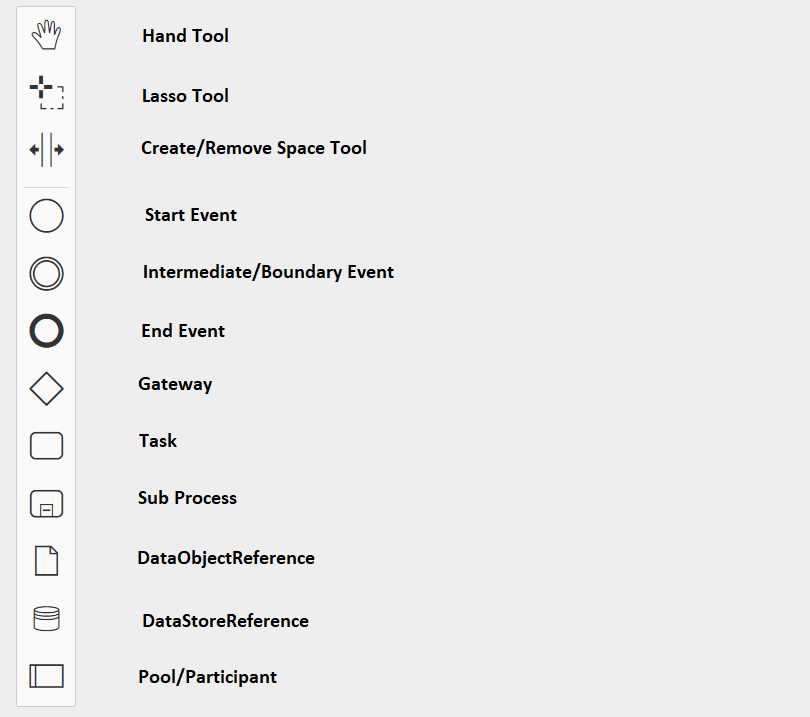
Hand Tool
A useful tool for moving the view easily and efficiently.
Lasso Tool
A useful tool for moving a group of tasks/elements at the same time, making the organization and structuring of the flow easier and faster.
Create/Remove Space Tool
A useful tool for moving all tasks/elements at once, facilitating the easy and fast structuring of the flow.
Start Event
Allows you to select and use the Start Event.
End Event
Allows you to create and use the End Event.
Intermediate/Boundary Event Timer
Allows you to create and use the Intermediate/Boundary Event.
Gateway
Allows you to create and use Gateways.
Task
Allows you to create and use Tasks.
Sub Process
Allows you to create and use Sub Processes.
DataObjectReference
This symbol allows for an action that is currently not yet implemented.
NOTE: As of version 24.08, it has been completely removed.
DataStoreReference
This symbol allows for an action that is currently not yet implemented.
NOTE: As of version 24.08, it has been completely removed.
Pool/Participant
Allows you to create areas in which parts of the process flow can be inserted. New tasks/elements cannot be created or moved outside these areas. It is also possible to textually indicate the actors involved.
NOTE: As of version 24.08, it has been completely removed.
1.4 Simbology
SYMBOLS
Below is the set of symbols used to create a diagram.
|
|
START EVENT E TIMER START EVENT |
|
|
END EVENT |
|
|
INTERMEDIATE / BOUNDARY EVENT TIMER |
|
|
EXCLUSIVE GATEWAY E PARALLEL GATEWAY |
 |
CONDITIONAL TASK E ACTION TASK |
|
|
CONNECTORS |


1.5 BPMN Actions
Below the main BPMN actions:
- CREATE ENTITY
- UPDATE ENTITY
- DELETE ENTITY
- SEND NOTIFICATION
- SEND EMAIL
- SEND NEWSLETTER
- CREATE PDF
- RESET DYNAMIC FORM
- CYCLE ROWS
- RESET CONDITIONAL FIELDS
- LINK ENTITY e LINK STATIC ENTITY
- TRANSFER RELATIONS
- INSERT TABLE ROWS AND PRODUCT ROW
- COPY PRODUCTS BLOCK
- CALL EXTERNAL WEB SERVICE
- CYCLE RELATED RECORD
1.6 Process Helper Section: Introduction and Usage Guide
INTRODUCTION
The Process Helper, as the name suggests, is a tool designed to assist those configuring processes by allowing them to create “structures” for requesting and storing data, known as “Dynamic Forms.”
It consists of two main sections:
USAGE GUIDE
Specifically, there are several ways to use this tool. Below are the main ones:
1) Using Process Helpers (and their Dynamic Forms) to create custom forms for Internal/External/Business Portal users to request and save information
Examples:
USING PROCESS HELPER TO REQUEST DATA FROM INTERNAL USERS
USING PROCESS HELPER TO REQUEST DATA FROM EXTERNAL USERS
USING PROCESS HELPER TO REQUEST DATA FROM BUSINESS PORTAL USERS
2) Using Process Helpers to activate the “Process Graph” section, enabling you to:
- Monitor the progress of a single process instance along with the actors involved
- Perform direct maintenance on active process instances
Example:
USING PROCESS HELPER TO ACTIVATE THE PROCESS GRAPH
3) Using Process Helpers (and their Dynamic Forms) to create virtual spaces for storing data or performing operations that are needed only within the process (and therefore do not need to be saved in CRM modules)
Example: