Client FTP and VPN - download/configuration
How to download and configure FTP (WinSCP, Cyberduck) and VPN (OpenVPN, Tunnelblick) clients
WinSCP
FTP client for Windows
WinSCP - Introduction
WinSCP (Windows Secure Copy) is an open source graphical SFTP and FTP client for Microsoft Windows, built in C++ language. Its main function is to transfer data (files) between a local and a remote computer. In addition WinSCP allows simple file manager functionality. For secure transfers it uses Secure Shell (SSH) and supports the SCP protocol in addition to SFTP.
As a free client, WinSCP is aimed at users who care about the security of their files and login data on the Internet. The software is quick to install and has both a comprehensive graphical user interface and a number of useful features, including an integrated text editor and automatic folder synchronization.
![]()
How to download WinSCP
Follow these steps to download WinSCP:
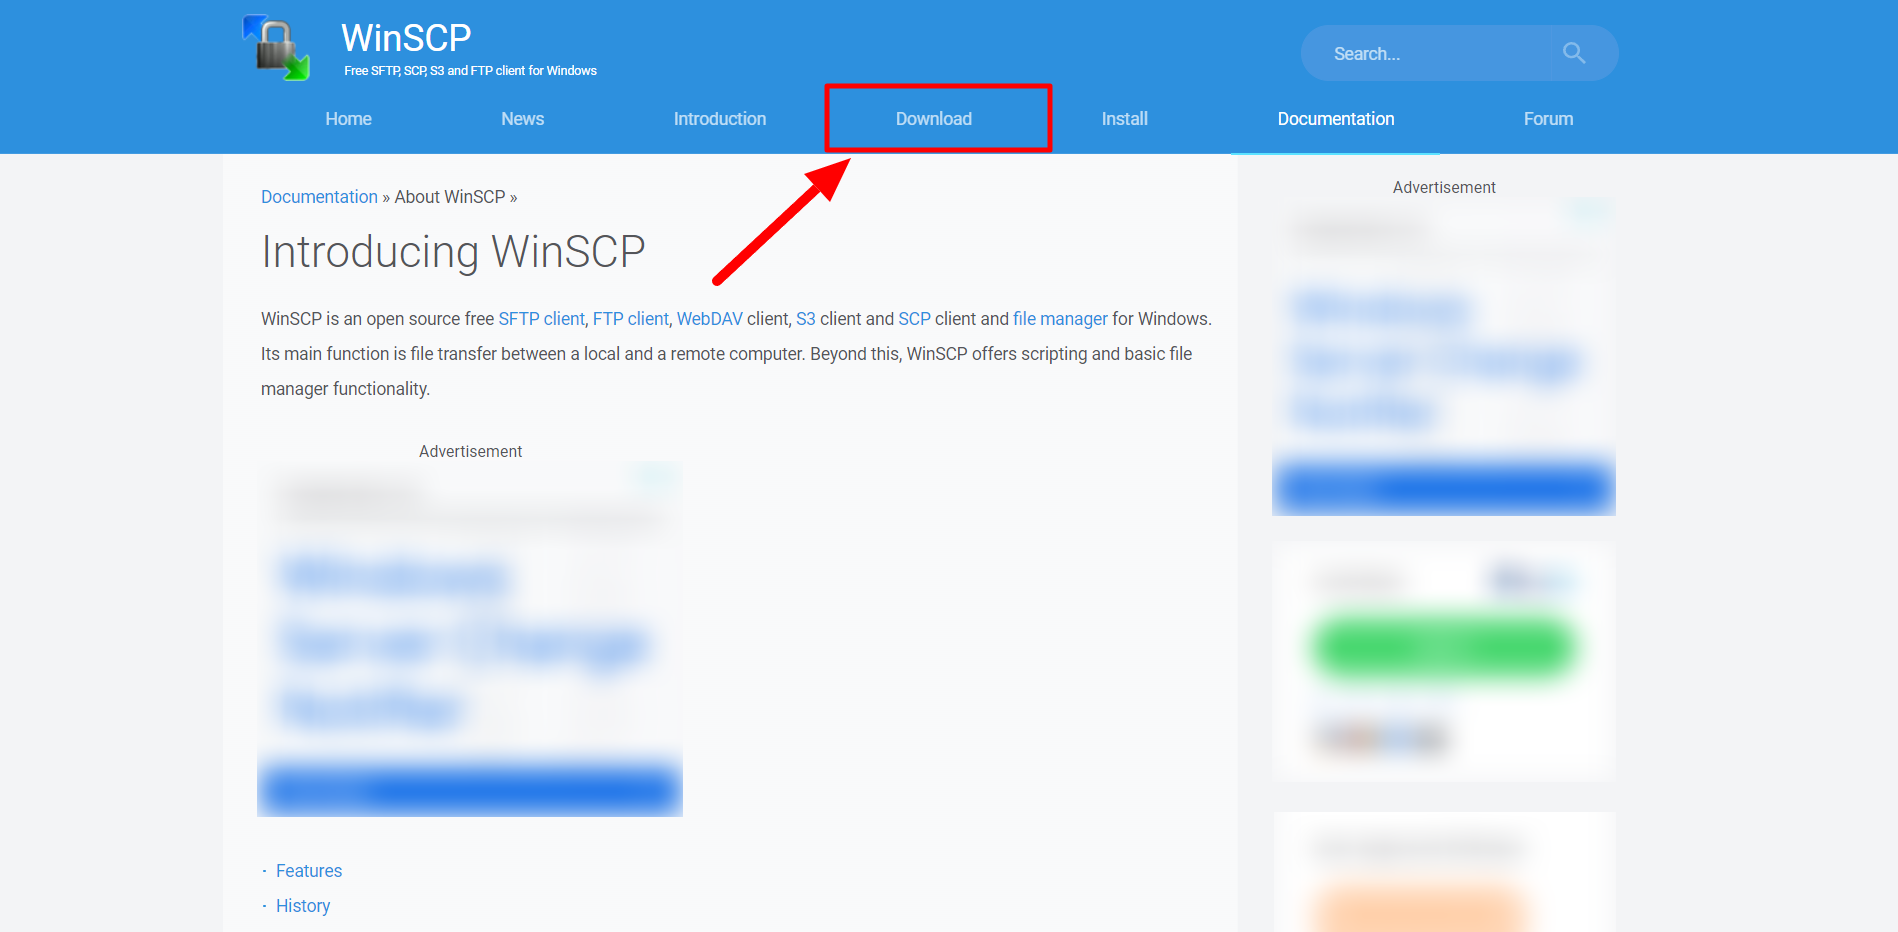
1. Open your browser and visit the WinSCP official website at https://winscp.net/.
2. Click on "Download" button at the top of the page.
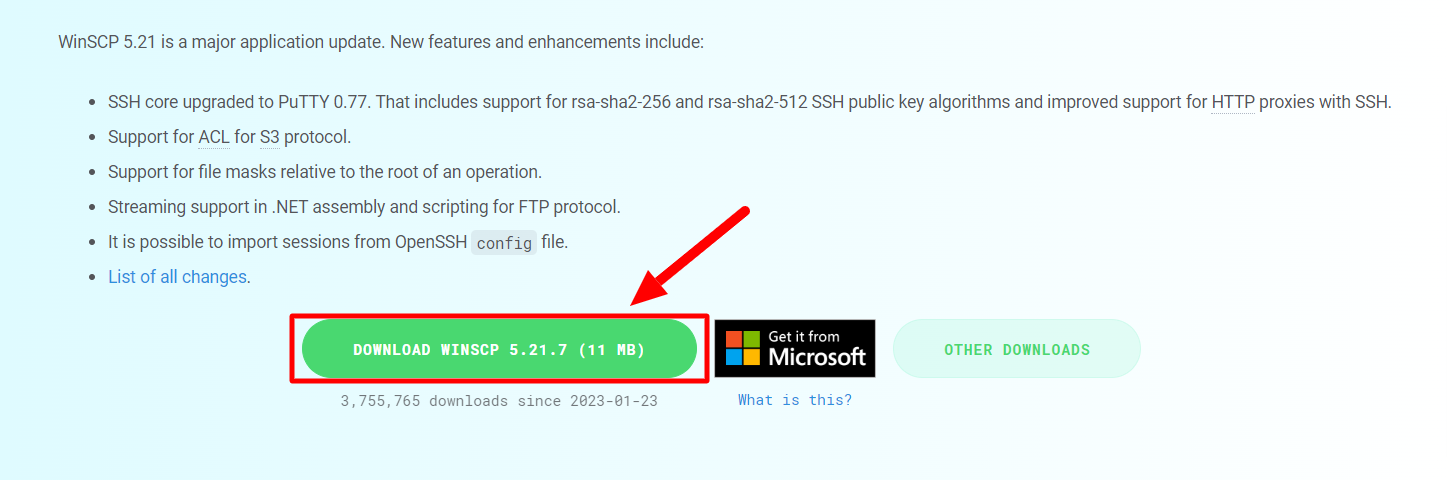
3. Select the version of WinSCP you wish to download. Available options include the latest stable release and the latest release.
4. Click on the "Download" button.
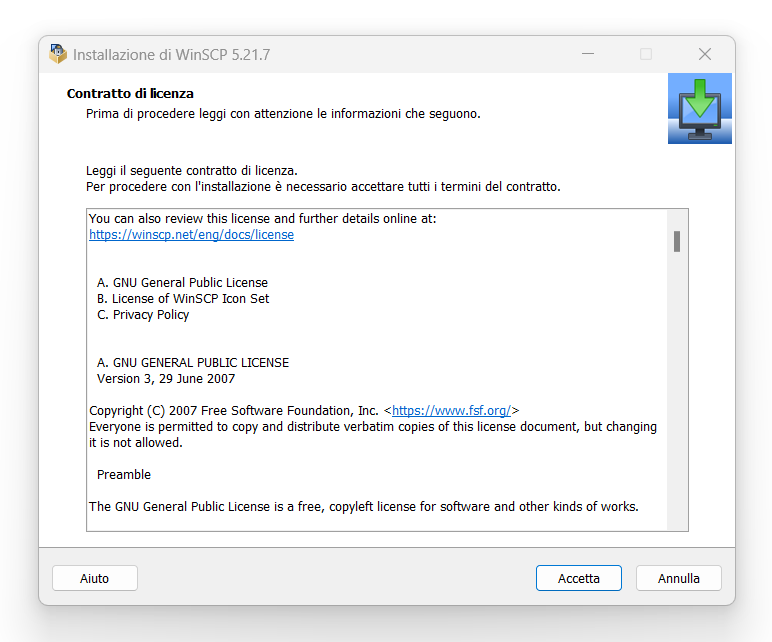
5. After the download completes, open the WinSCP installation file and follow the on-screen instructions to complete the installation.
Note that WinSCP is only compatible with Windows operating systems. If you are using a different operating system, you will have to look for another solution for transferring files via SCP or SFTP protocol.
How to use WinSCP
With these following steps, you should be able to use WinSCP to transfer files between your local computer and remote servers:
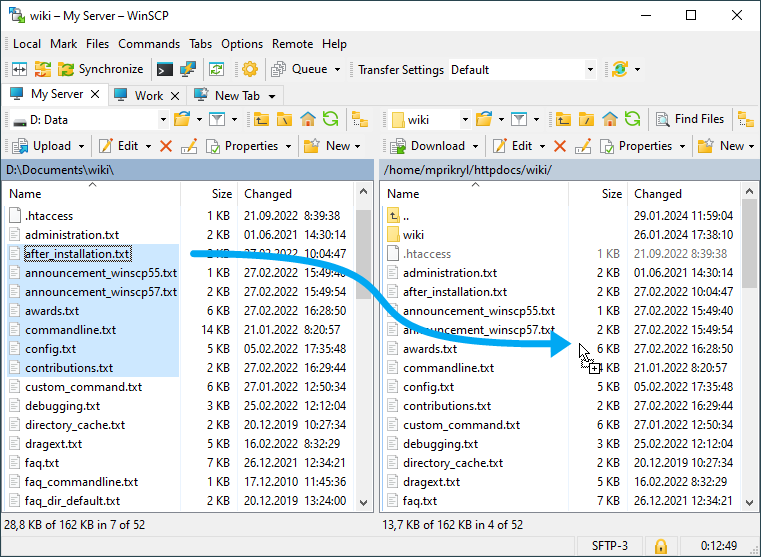
1. Launch WinSCP and select your desired protocol: FTP, SFTP or SCP.

2. Enter the hostname, username, password and port number (if different from default).

3. Click the "Login" button to connect to the server.

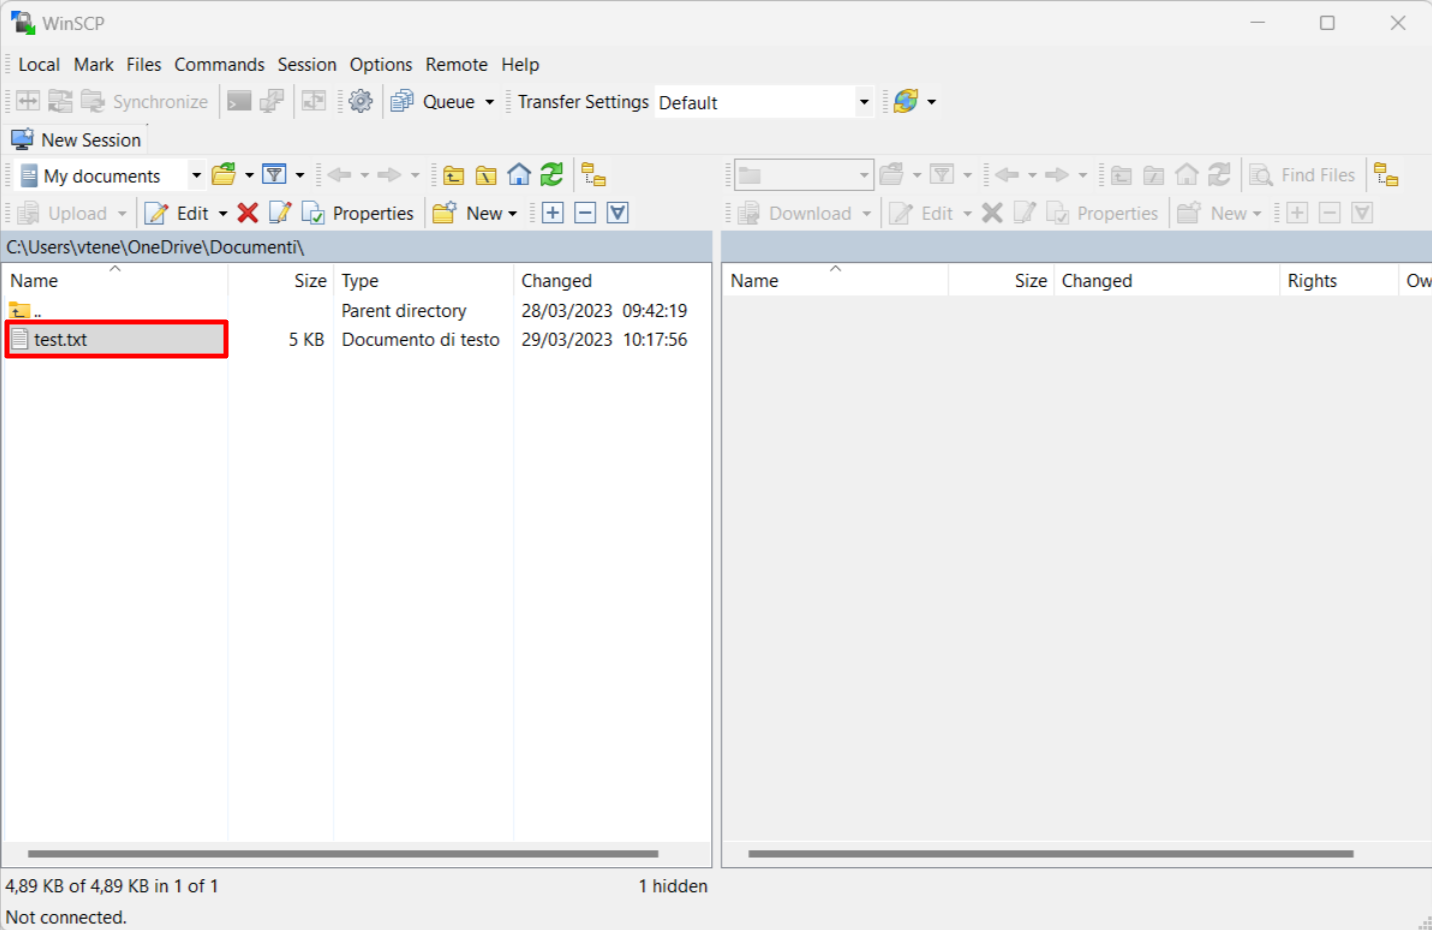
4. Once connected, you will see two panels on the WinSCP interface. The panel on the left represents the local computer, and the panel on the right represents the remote server.
5. To transfer files from your local computer to the remote server (or vice versa), select the files you want to transfer and drag them to the other panel.
6. You can also use the menus and buttons on the WinSCP interface to perform various actions such as creating new folders, renaming files, and deleting files.
7. When you're done, it will suffice disconnecting from the server.
It is recommended to consult the official WinSCP documentation at https://winscp.net/eng/docs/ for more information and advanced features.
Cyberduck
FTP client for MacOs
Cyberduck - Introduction
Cyberduck is a free and open source software that supports multiple file transfer protocols, including FTP, SFTP, WebDAV, Amazon S3, Microsoft Azure, and Google Cloud Storage. Cyberduck is compatible with Windows and macOS operating systems.
Cyberduck supports FTP/TLS authentication (FTP over SSL/TLS) using AUTH TLS, allows download and upload using drag and drop system and allows folder synchronization. It is also able to remotely open files using an external text editor. Cyberduck includes a bookmark manager, supports Mac OS X's Apple Keychain and Apple's Bonjour protocol.
![]()
How to download Cyberduck
Follow these steps to download Cyberduck:
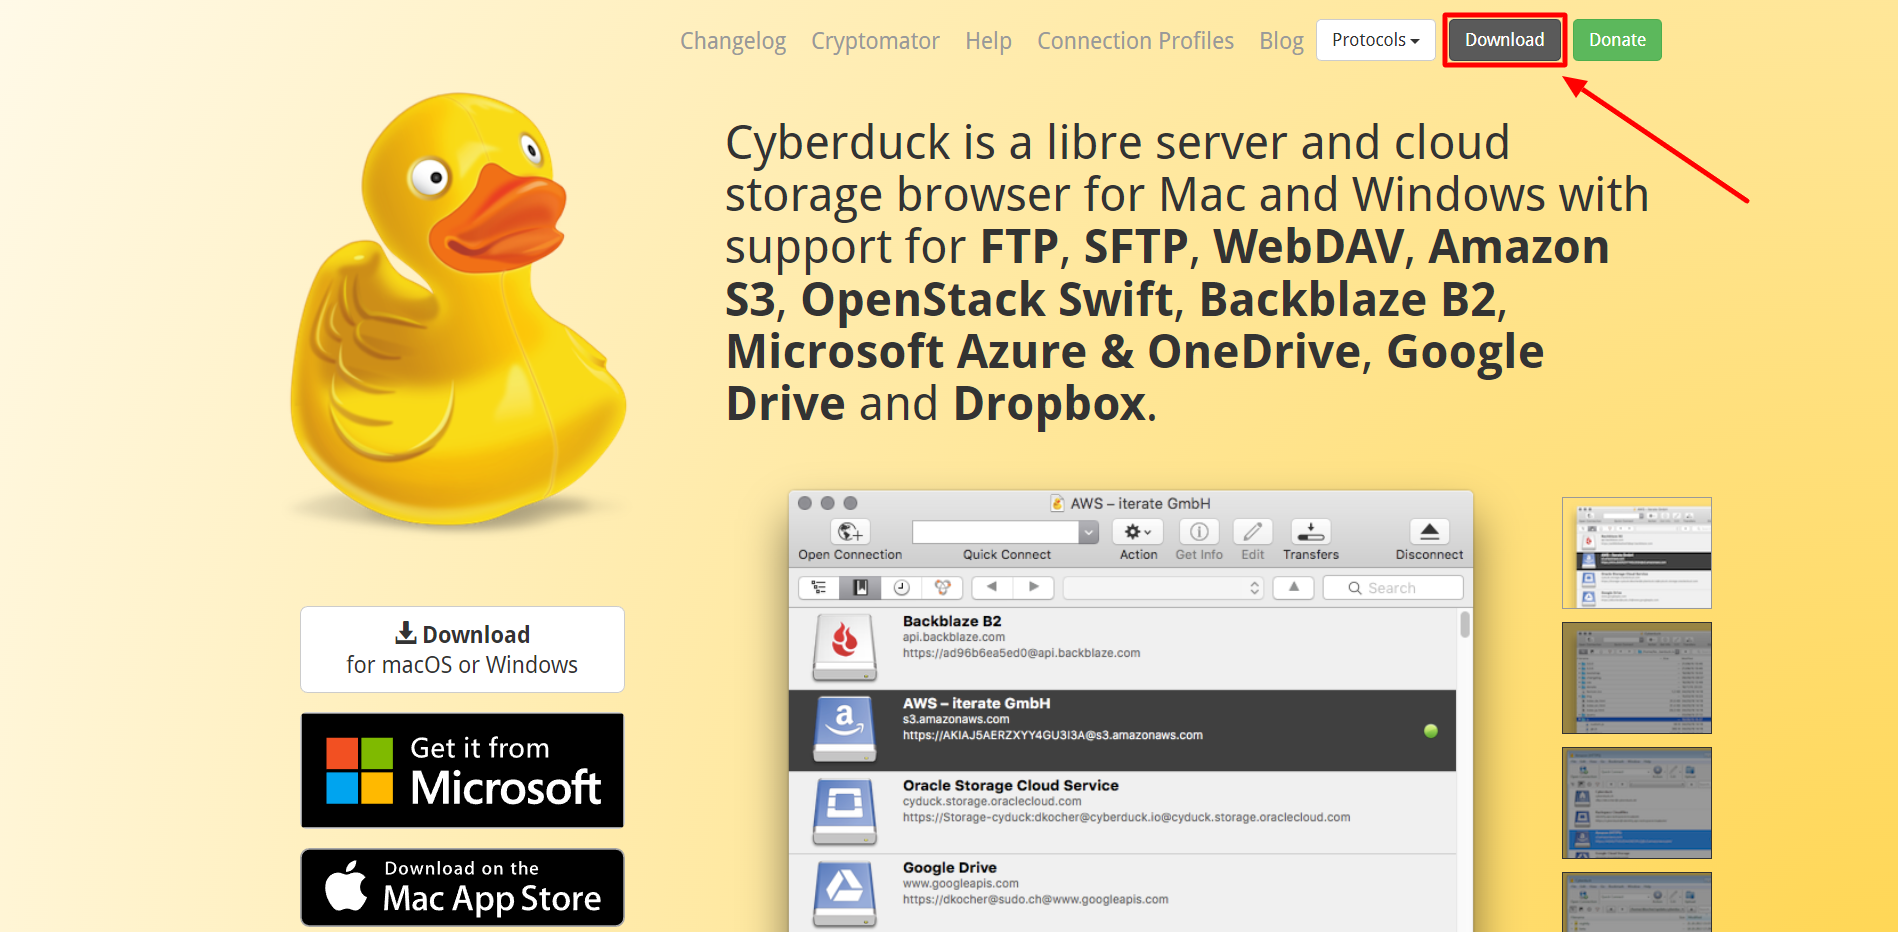
1. Open your browser and visit the Cyberduck official site at https://cyberduck.io/.
2. Click the "Download" button at the top of the page.
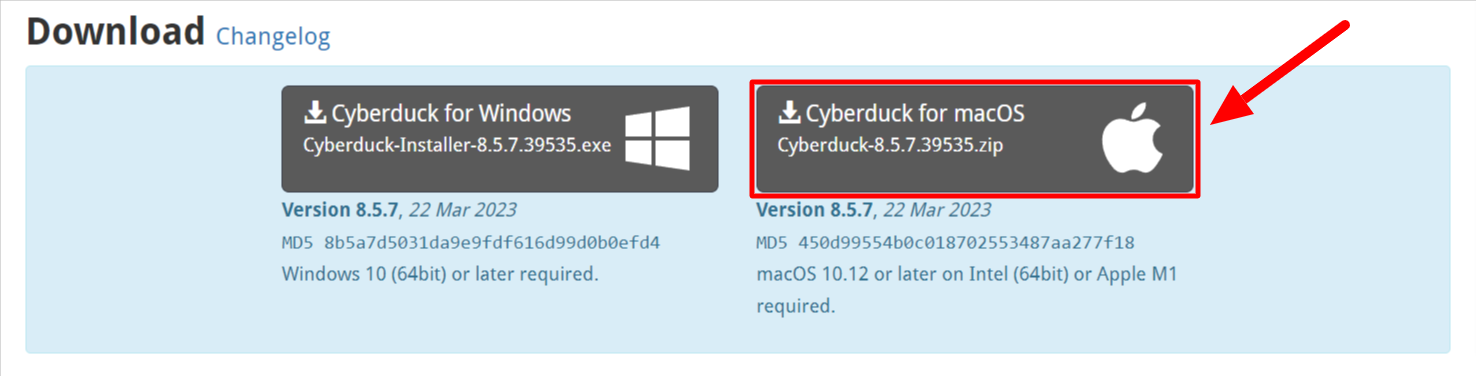
3. Select the Cyberduck's version you want to download. Available options include Mac or Windows version.
4. Click the "Download" button next to the desired version.
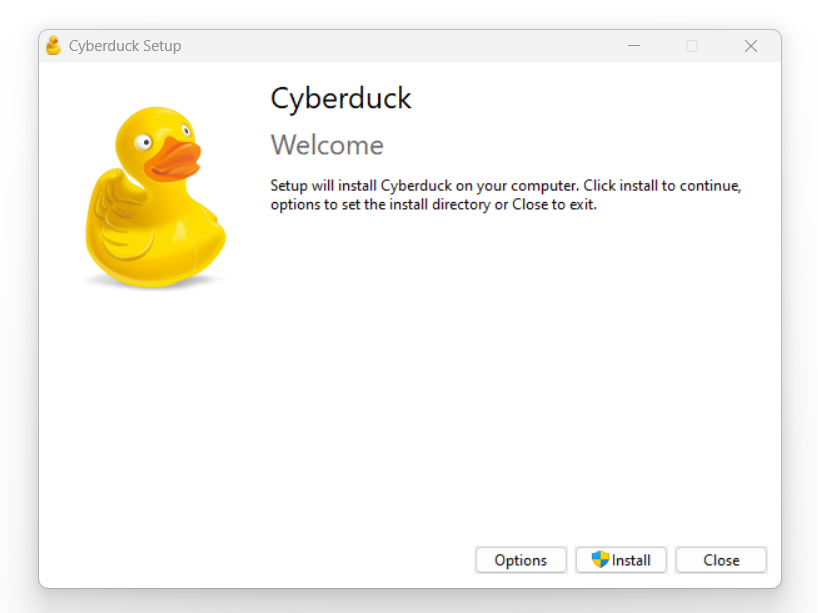
5. After the download completes, open the Cyberduck setup file and follow the on-screen instructions to complete the installation.
How to use Cyberduck
Here are the steps to use Cyberduck:
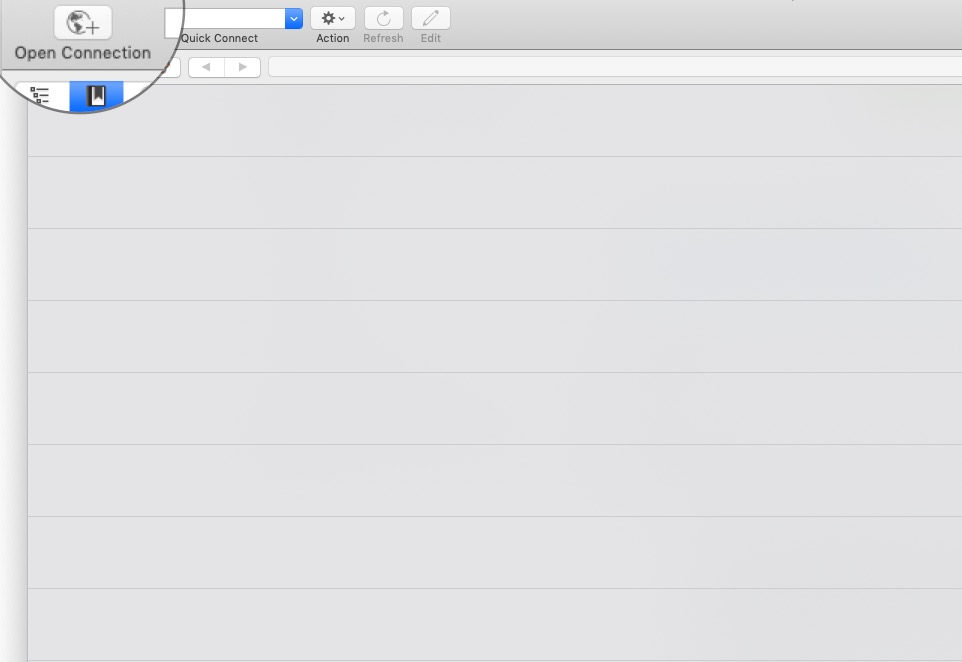
1. Launch Cyberduck and open the connection by clicking on the "Open connection" button in the top left corner of the interface.
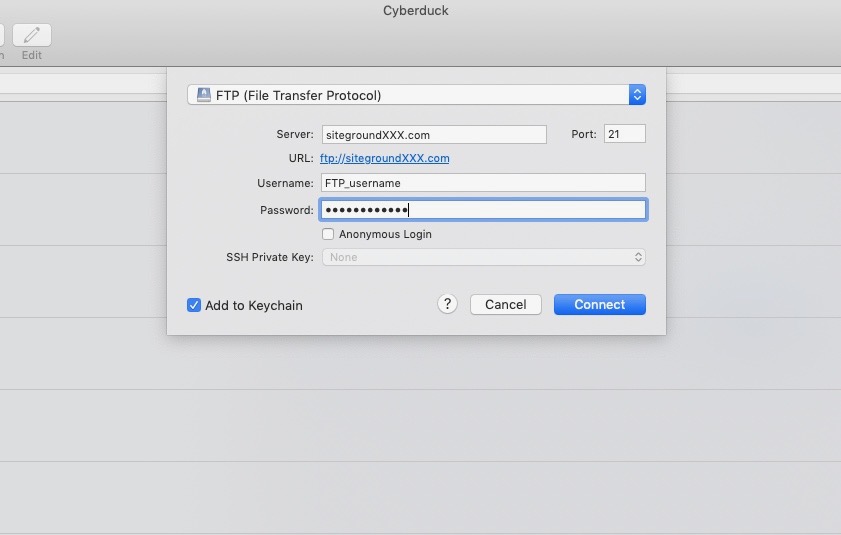
2. Select the connection protocol you want to use (FTP, SFTP, WebDAV, etc.) and enter the connection details such as the hostname, username, password and port (if different from default).
3. Click on the "Connect" button to connect to the server.

4. Once connected, you will see two panels on the Cyberduck interface. The panel on the left represents the local computer, and the panel on the right represents the remote server.
5. To download files from the remote server to your local computer, select the files you want to transfer and right-click on "Download To".
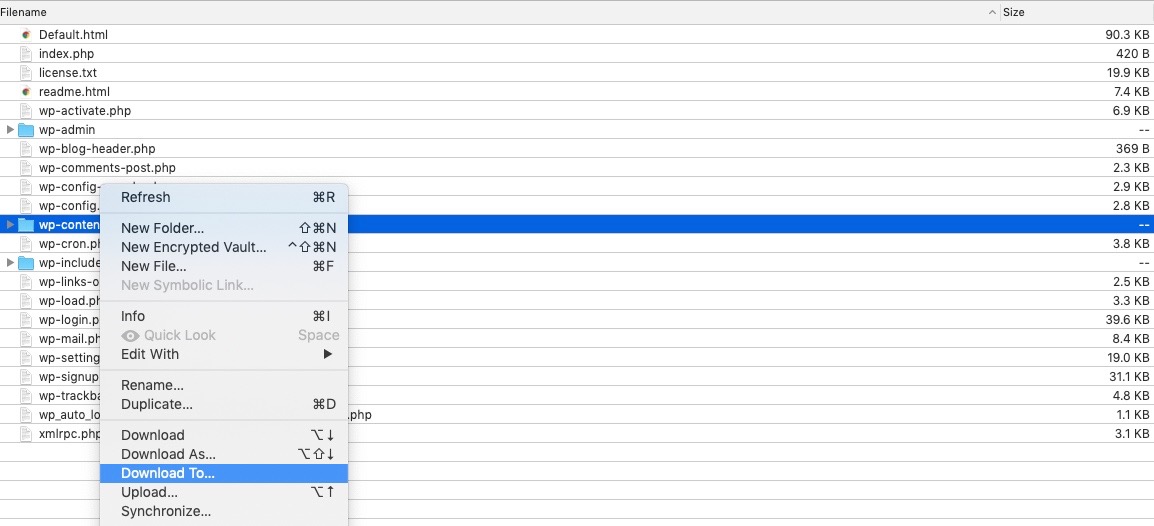
6. A new window will open, where you can view and navigate the files and folders on your computer. Search for the location where you want to save the file and click the "Choose" button to choose the location and start the download. A new window called "Transfers" will appear where you can follow the progress of the download.

7. To upload a file or folder from your computer to your account, navigate to the desired location, then right-click in the application window and select "Upload".
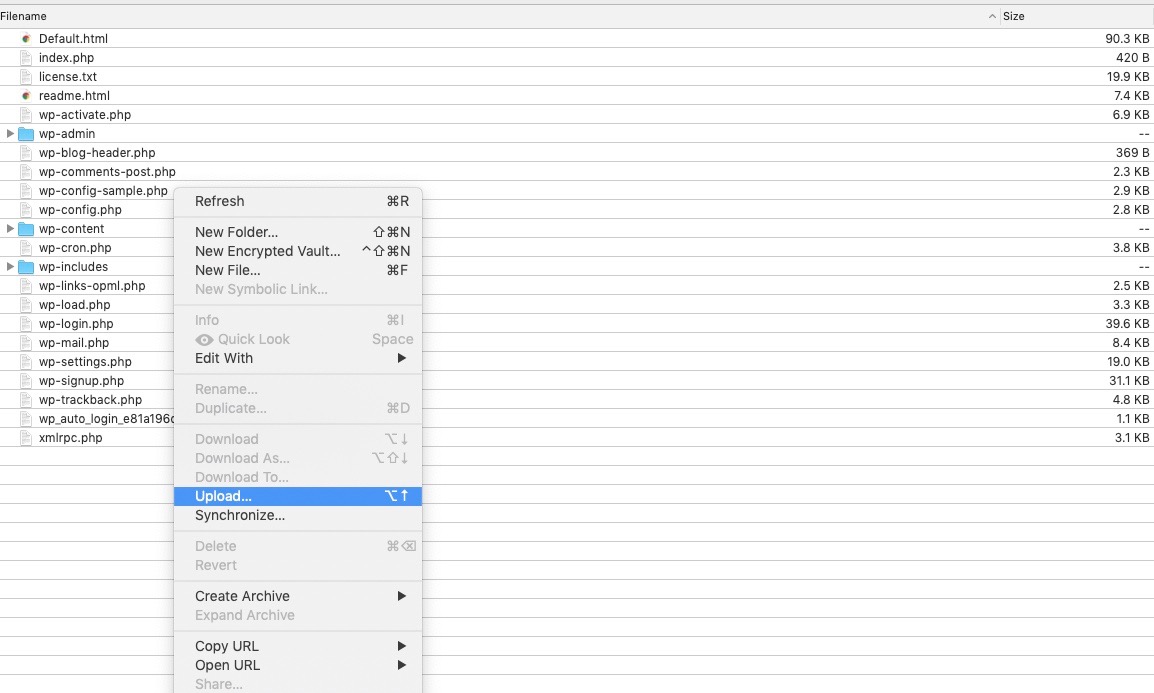
8. A new window will open, where you can view and navigate the files and folders on your computer. Go to the item you want to upload, click on it and click the "Upload" button. A new window called "Transfers" will appear where you can follow the progress of the upload.

9. Once the file transfer operations are complete, simply disconnect from the server.
It is recommended to consult the official Cyberduck documentation at https://docs.cyberduck.io/ for more information and advanced features.
OpenVPN
VPN client for Windows
OpenVPN - Introduction
OpenVPN is an open source software for creating a virtual private network (VPN) that allows you to access protected network resources and browse the Internet securely.
It is used to create secure point-to-point encrypted tunnels between two computers over an insecure network. It allows hosts to authenticate with each other using shared private keys, digital certificates, or user/password credentials.
It uses OpenSSL cipher libraries and the SSLv3/TLSv1 protocol. It is available on a variety of platforms such as GNU/Linux, xBSD, macOS, Solaris, Android and Windows. The entire program is contained in a single executable file that can run in both server and client modes, from an optional configuration file and from one or more files containing the keys, depending on the authentication method used.
![]()
How to download OpenVPN
Follow these steps to download OpenVPN:
1. Open your browser and visit the official OpenVPN site at https://openvpn.net/.
2. Click the "Community" button and then the "Downloads" one at the top of the page.
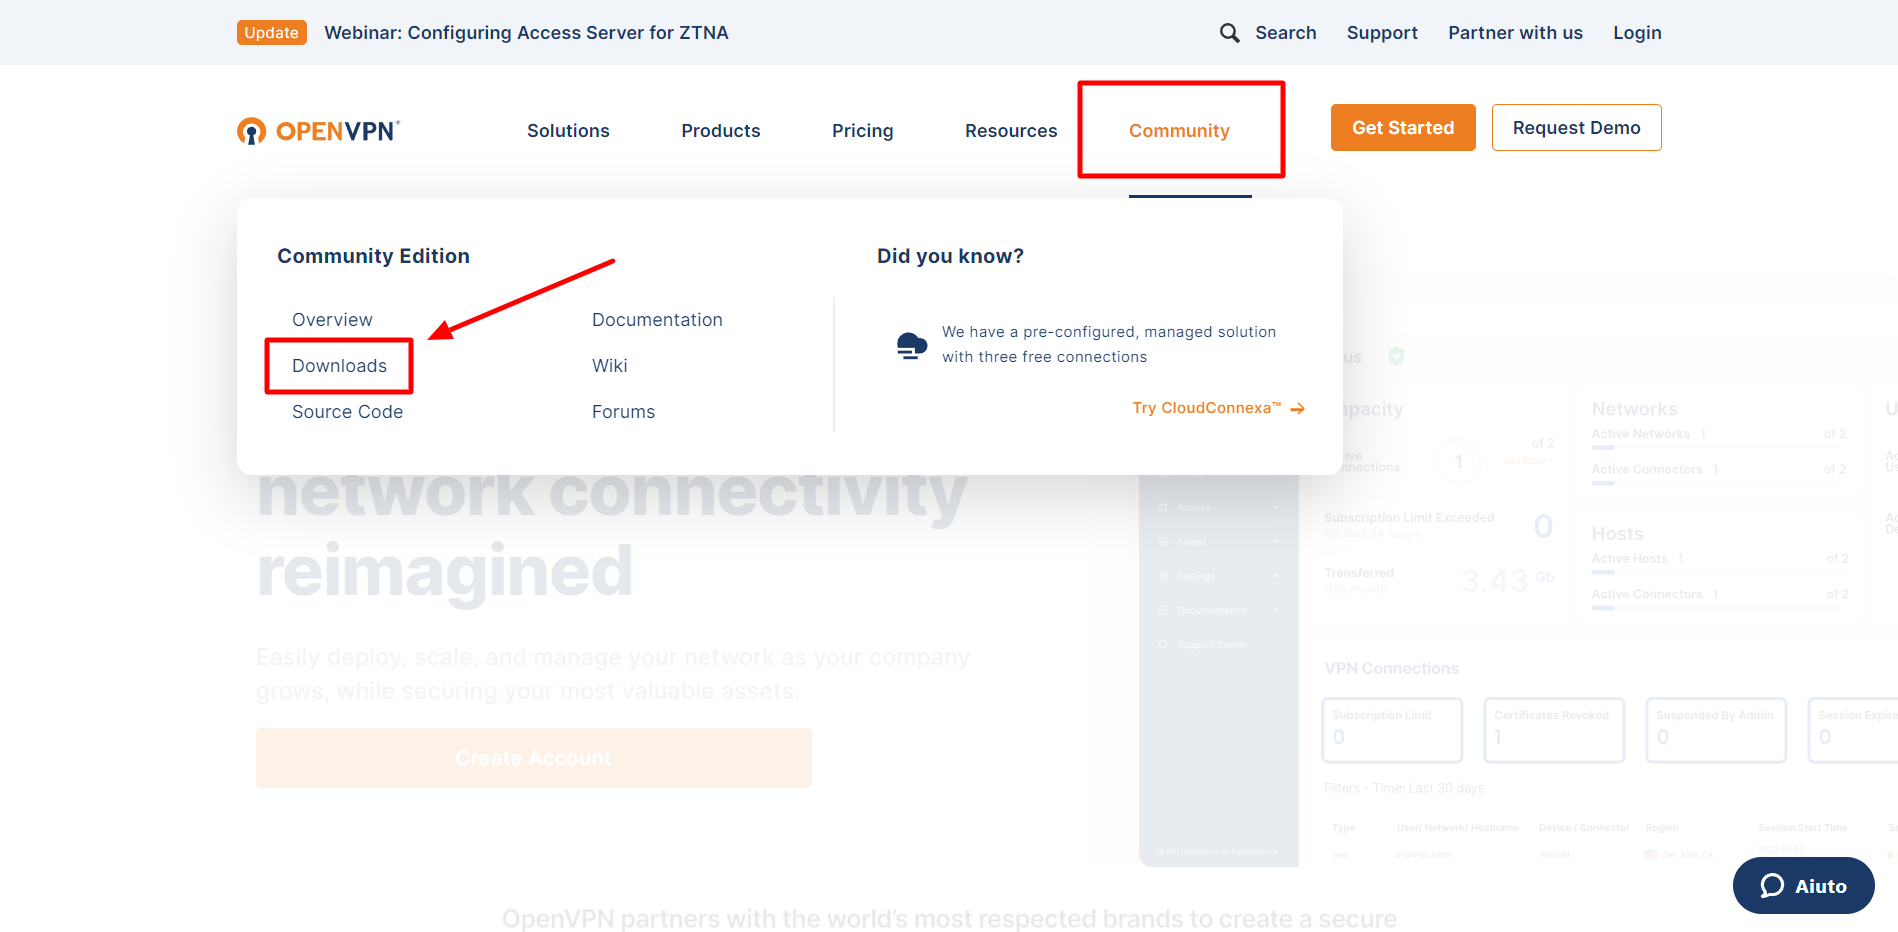
3. Select the OpenVPN's version you want to download. Available options include version for Windows, macOS, Linux, and mobile devices.
4. Click the "Download" button next to the desired version and operating system.
N.B.: at the moment it is necessary to download version 2.5.9 as more recent versions have incompatibilities with certificates.

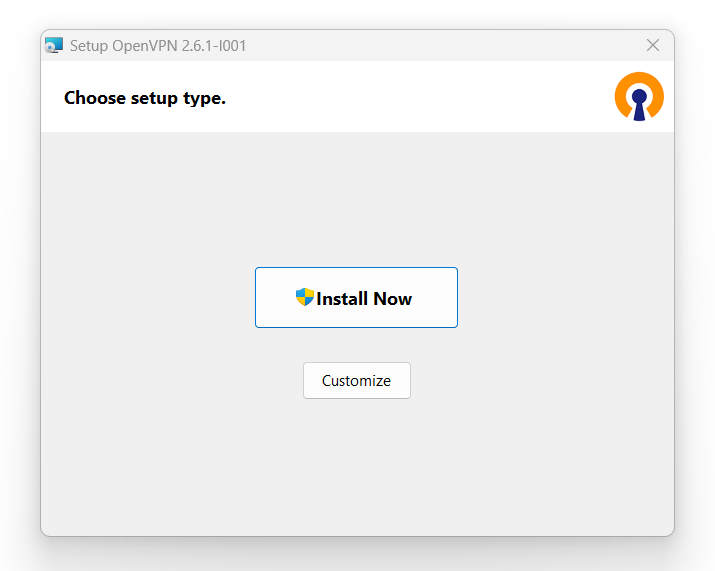
5. After the download completes, open the OpenVPN setup file and follow the on-screen instructions to complete the installation.
Note that to use OpenVPN you need to have an OpenVPN server to connect to. Alternatively, you can use a VPN service that supports the OpenVPN protocol. In both cases, you need to configure the software correctly in order to use OpenVPN.
How to use OpenVPN
These are the general steps to use OpenVPN:
1. Get the necessary configuration files from your VPN provider.
2. Start OpenVPN and click the "Import" button to import the configuration files.
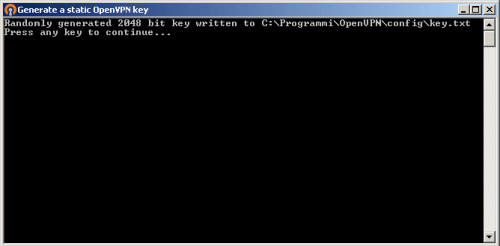
Before you can get two systems to be able to connect through an OpenVPN "tunnel," you need to generate a key that will be used to encrypt all communication. This key must be "installed" on both systems since, in the case of a symmetric key cryptography, both "interlocutors" will use the same key.
To proceed, simply click on the Generate a static OpenVPN key link by accessing the Start menu, then Programs, OpenVPN, Generate a static OpenVPN key.
The program will show a text window inviting you to press any key to start the key generation procedure. OpenVPN will produce a 2048 bit encryption key which will be stored in the config subfolder with the name of key.txt.
To create a first test connection with OpenVPN, start by copying the sample.ovpn file from the folder containing the sample files into the config folder.
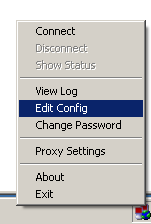
After starting OpenVPN GUI, right-clicking on the icon in the traybar, click Edit config: this will immediately open the contents of the sample.ovpn configuration file.
In this file it is necessary, first of all, to modify some essential parameters. In particular, the name or IP address of the other host involved in the VPN, the name of the file containing the key, the IP address of the VPN and the host must be indicated.
Then choose an IP address for each host of the VPN (for example, 10.3.0.1, 10.3.0.2 and so on).
3. If necessary, enter the login credentials provided by the VPN provider.
4. Click on the "Connect" button to connect to the VPN.
5. Once connected, you can browse the Internet securely and access protected network resources.
6. To disconnect from the VPN, click the "Disconnect" button.
It's recommended to consult the official OpenVPN documentation at https://openvpn.net/community-resources/reference-manual-for-openvpn-2-6/ for more information and advanced features, such as creating new configurations and customizing settings. Also, since setting up and using OpenVPN can vary by VPN provider, you should also consult the documentation provided by your VPN provider.
Tunnelblick
VPN client for MacOs
Tunnelblick - Introduction
Tunnelblick is a software that can be used to securely connect a Mac to an OpenVPN server. The server then connects the Mac to a remote network or the Internet, bypassing untrusted networks. Tunnelblick allows you to create and manage Virtual Private Network (VPN) connections on a Mac.
![]()
How to download Tunnelblick
Follow these steps to download Tunnelblick:
1. Open your browser and visit the Tunnelblick official website at https://tunnelblick.net/.
2. Click the "Downloads" button at the top of the page.
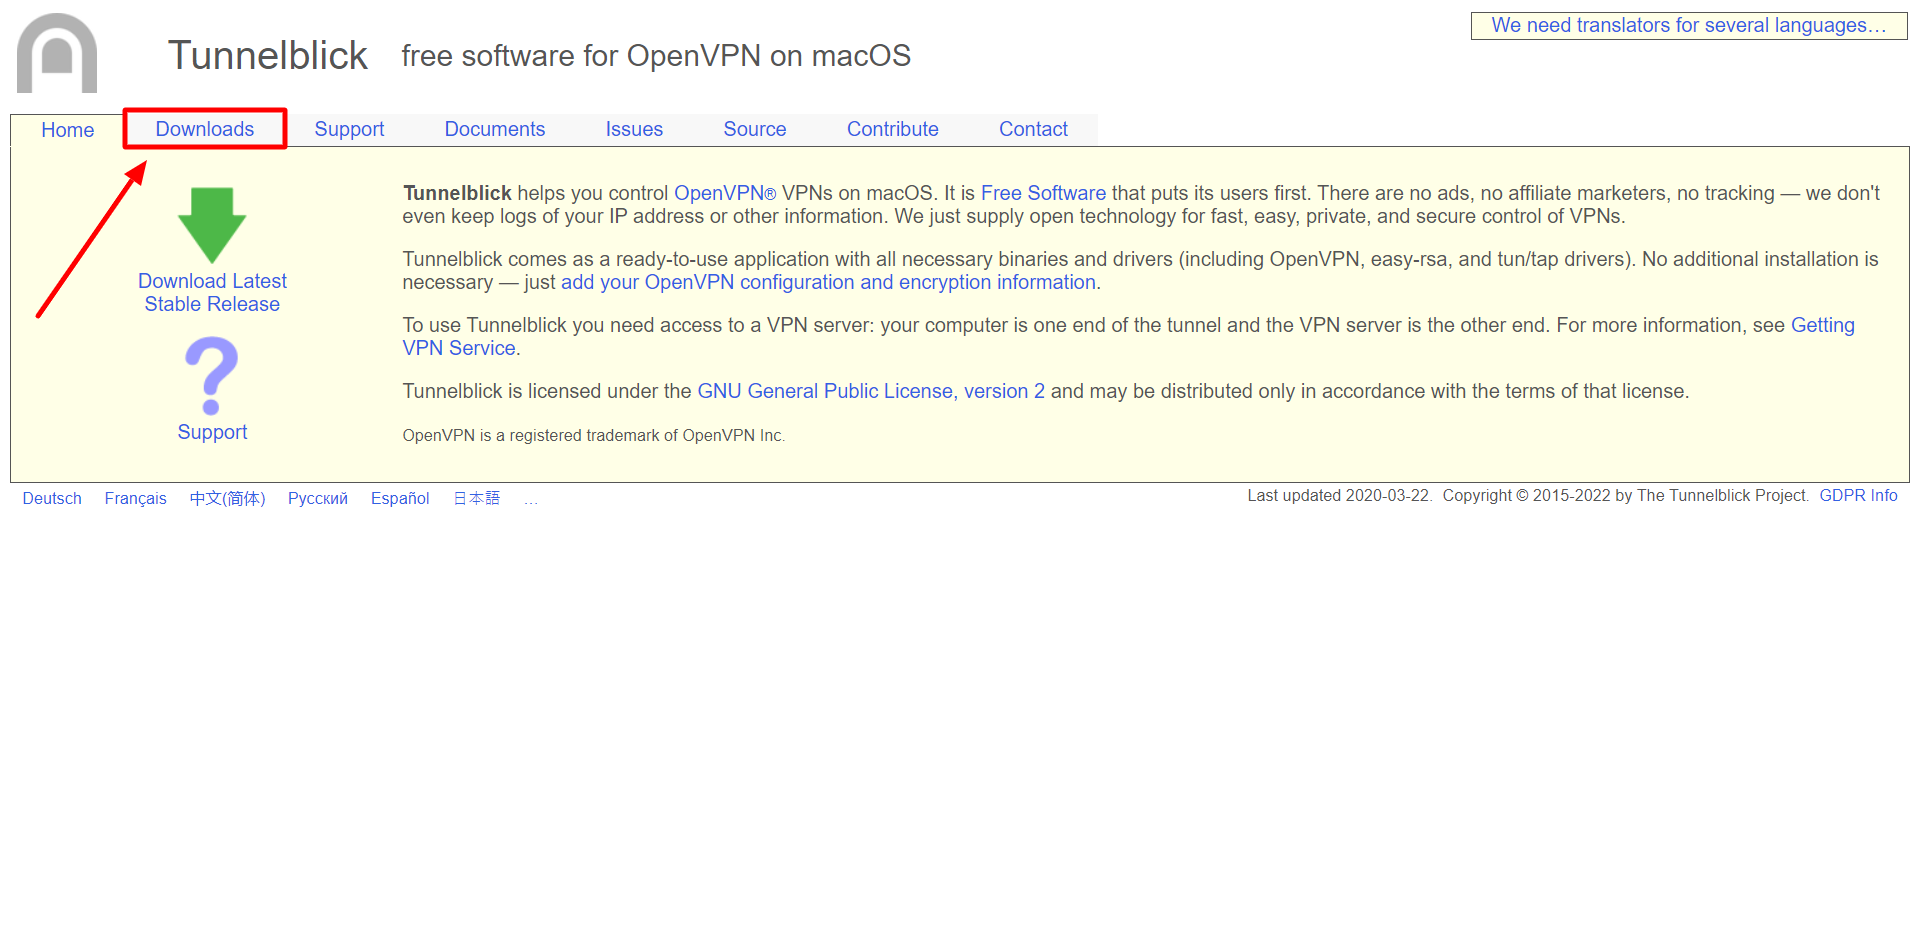
3. Select the version of Tunnelblick you want to download. Available options include the macOS version.
4. Click the "Download" button next to the desired version.
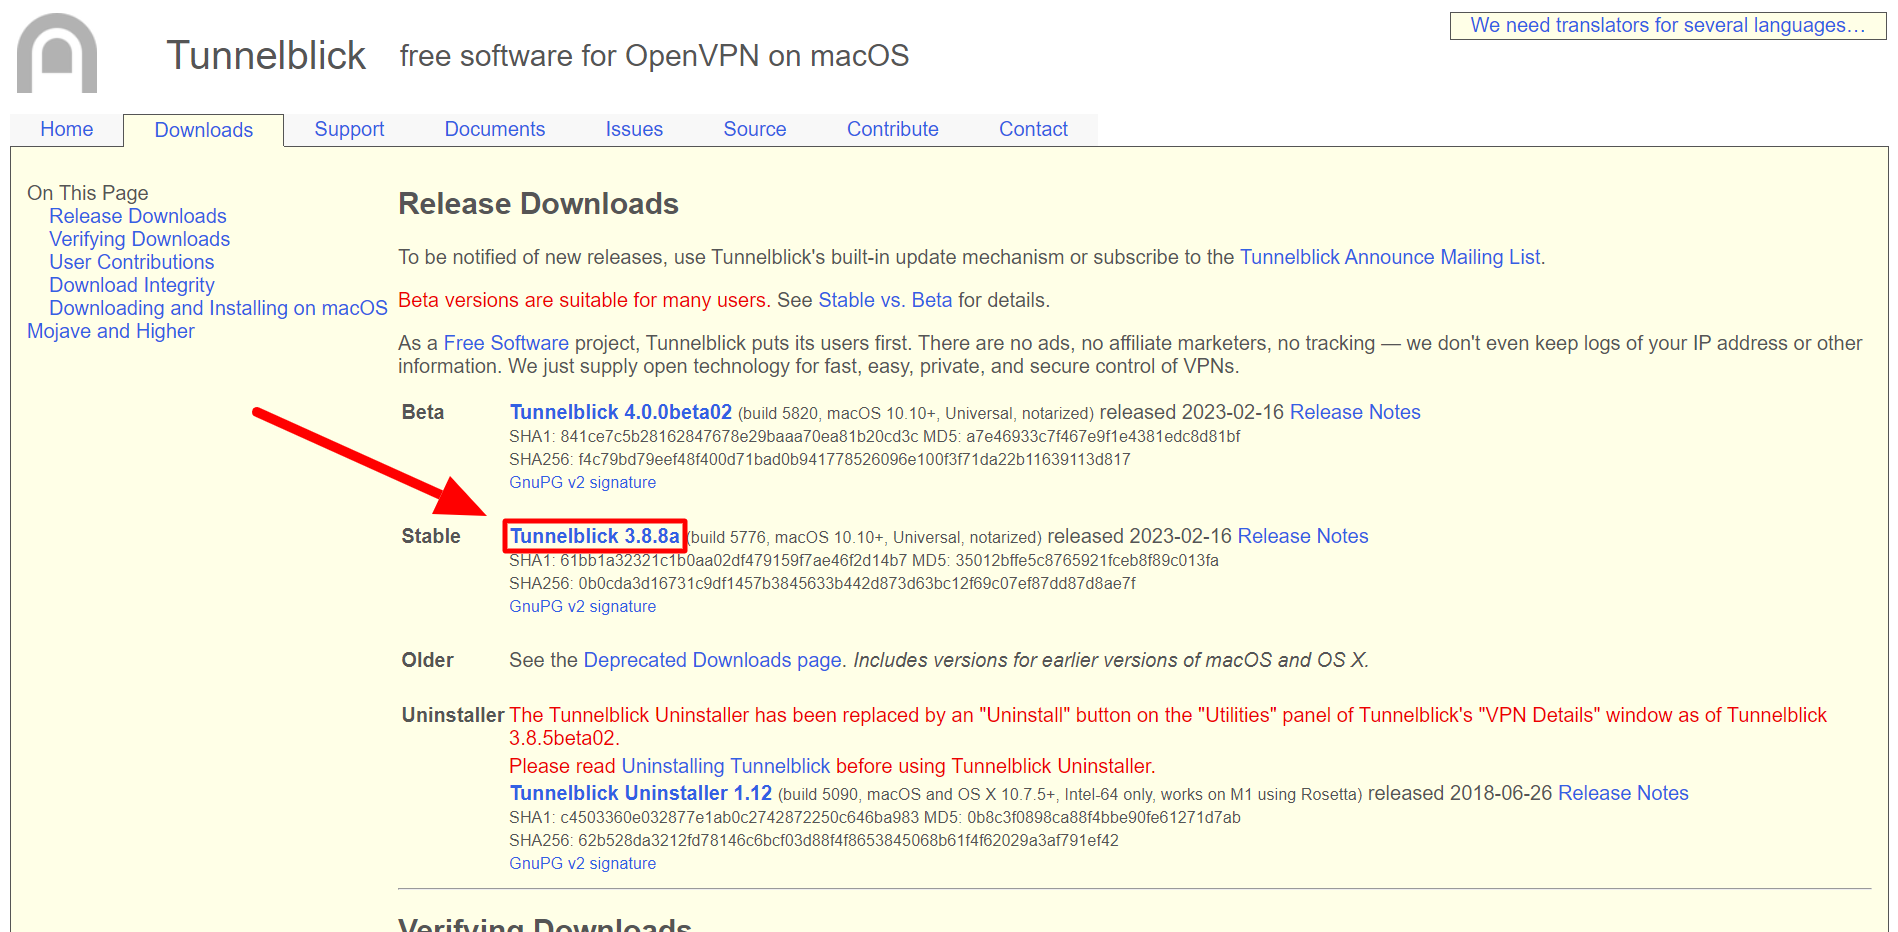
5. After the download completes, open the Tunnelblick setup file and follow the on-screen instructions to complete the installation.

Note that Tunnelblick is free and open source software that allows you to manage VPN connections based on the OpenVPN protocol on Mac. However, you need to have an OpenVPN server to connect to to use Tunnelblick. Alternatively, you can use a VPN service that supports the OpenVPN protocol. In both cases, you need to configure the software correctly in order to use Tunnelblick.
How to use Tunnelblick
With these following steps, you should be able to use Tunnelblick:
1. Launch Tunnelblick from the application launcher.
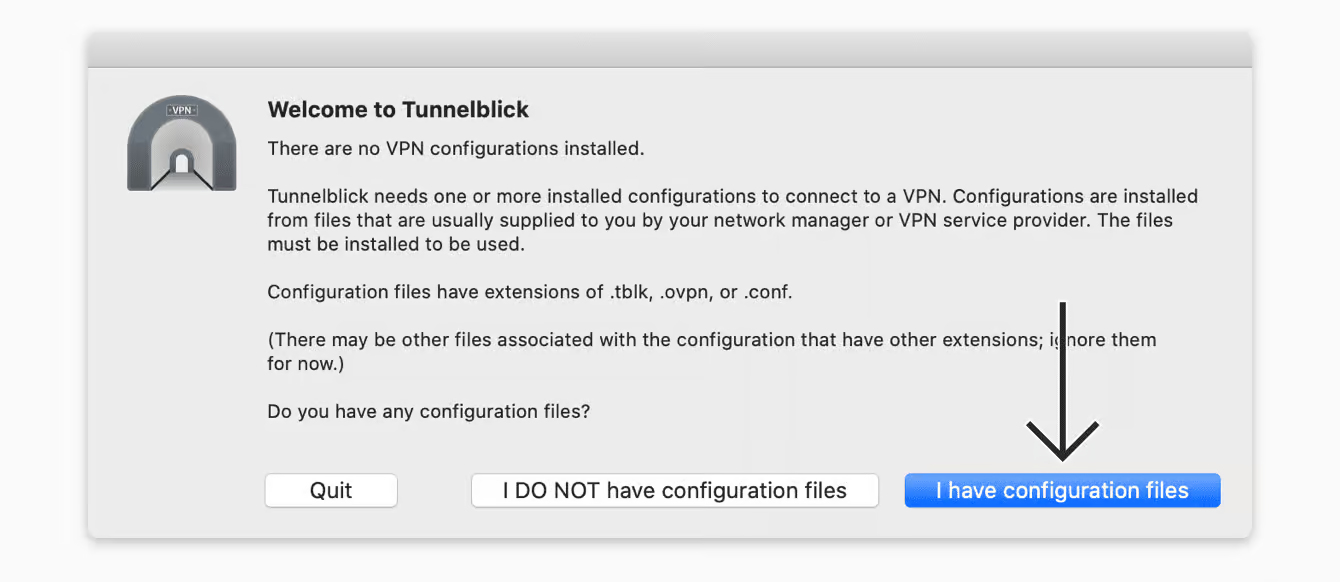
2. Download the OpenVPN configuration file from your VPN provider or create one following your VPN provider's instructions.

3. Drag the OpenVPN configuration file into the Tunnelblick window. A dialog will appear asking if you want to install this configuration for all users or just for the current user. Choose the option you prefer and enter your administrator password if required.

4. Once the configuration is installed, click on the Tunnelblick icon in the menu bar and select the VPN configuration you wish to launch.


5. Enter your VPN username and password when is required. If you selected the "Remember my username and password" option during setup, you will not be prompted to enter this information each time.

6. Wait for the connection to be established. You will see a notification message when the connection is successful.

7. To disconnect the VPN, select the Tunnelblick icon in the menu bar and choose "Disconnect" from the configuration list.

It is recommended to consult the official Tunnelblick documentation at https://tunnelblick.net/documents.html for more information and advanced features. These are general instructions only. The specific steps for using Tunnelblick may vary depending on which VPN provider you are using. Make sure you follow the instructions provided by your VPN provider for using Tunnelblick.