Google Calendar Sync Plus
- Introduction
- Installation
- Settings Panel
- License Activation or Trial 30
- License Assignment
- Google Authenticator Mode
- Global Choice for Google Meet Usage
- Synchronization Logs and Plugin Uninstallation
- User Preferences Configuration
- Synchronization and Creation of a New Event
Introduction
Plugin for bidirectional synchronization between the vtenext Calendar and one or more calendars in your Google Calendar account, with the ability to create Google Meet meetings and automatically send participation invitations.
Do you use Google Calendar and want to keep it synchronized with your vtenext CRM? With the Google Calendar Sync Plus module, you can securely connect your Google account and synchronize one or more Google calendars with the vtenext Calendar in a flexible and reliable way, while also creating Google Meet links directly from the CRM.
The synchronization is incremental (using Google Sync Tokens), ensuring fast and efficient updates. It also synchronizes event visibility settings and can map Google Calendar colors to vtenext activity types. With an active license, plugin updates can be installed independently via OTA (Over-the-Air) directly from the administration panel.
Installation
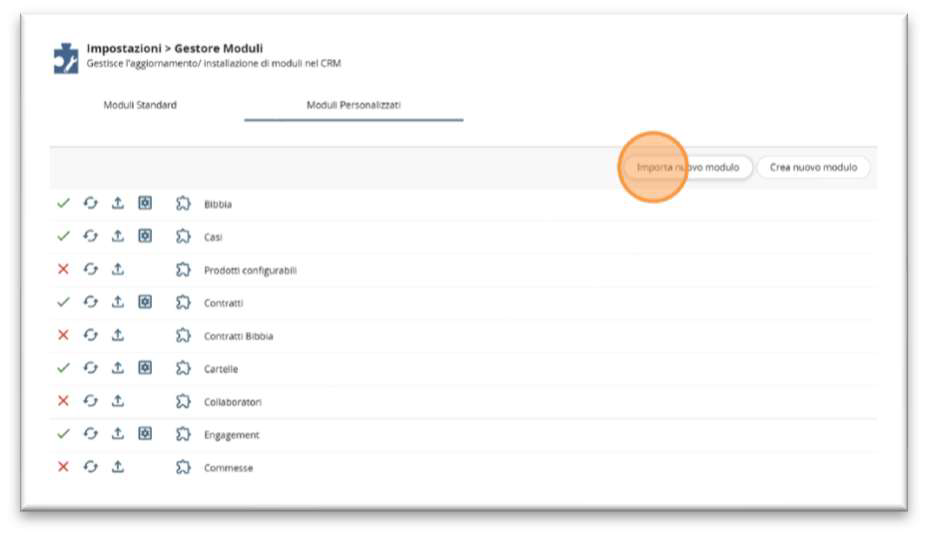
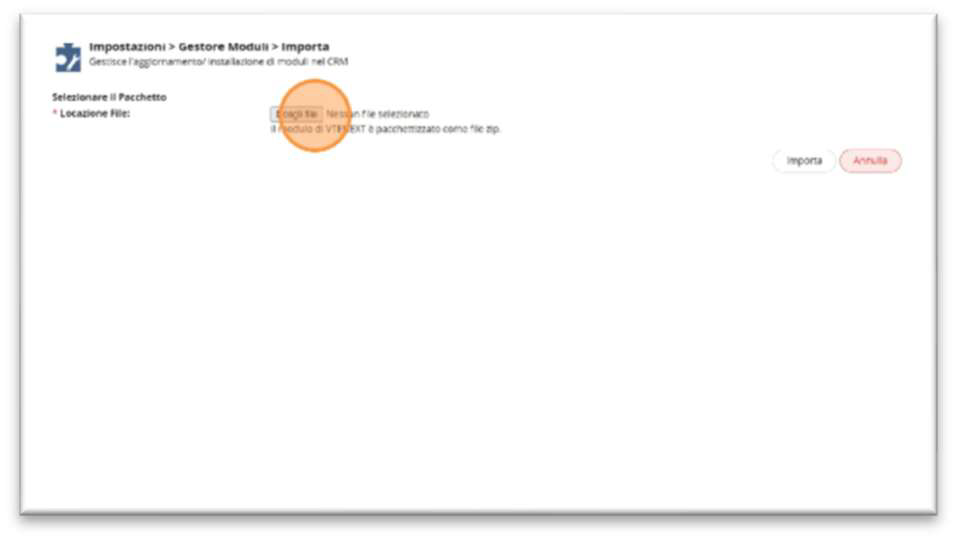
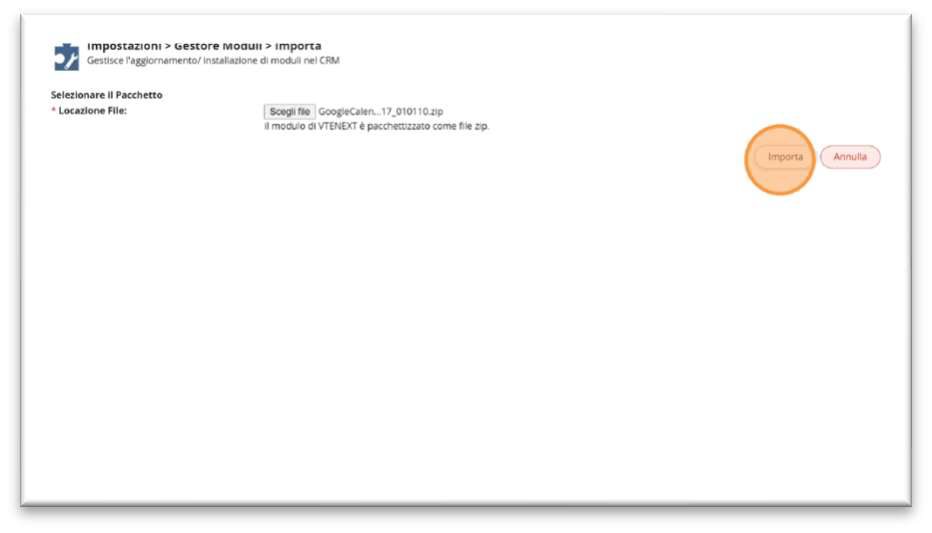
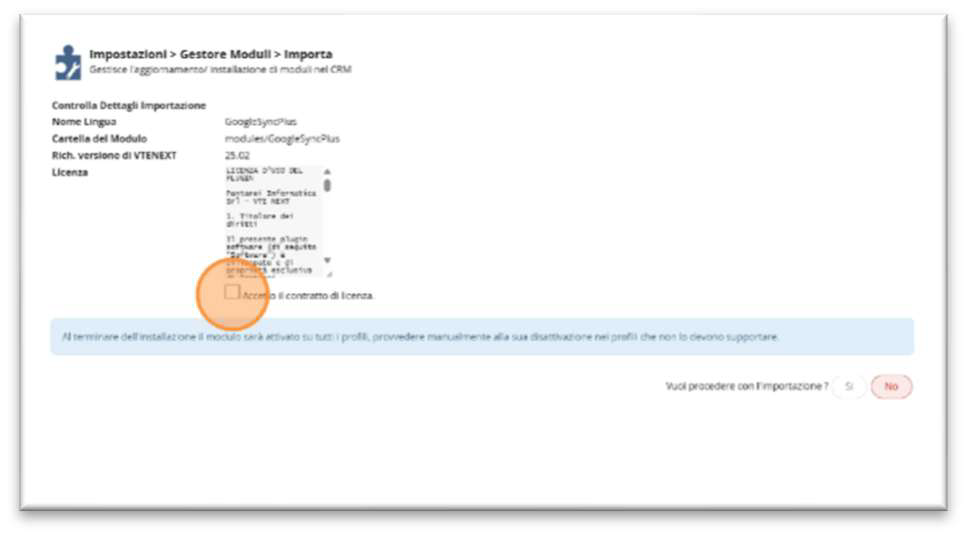
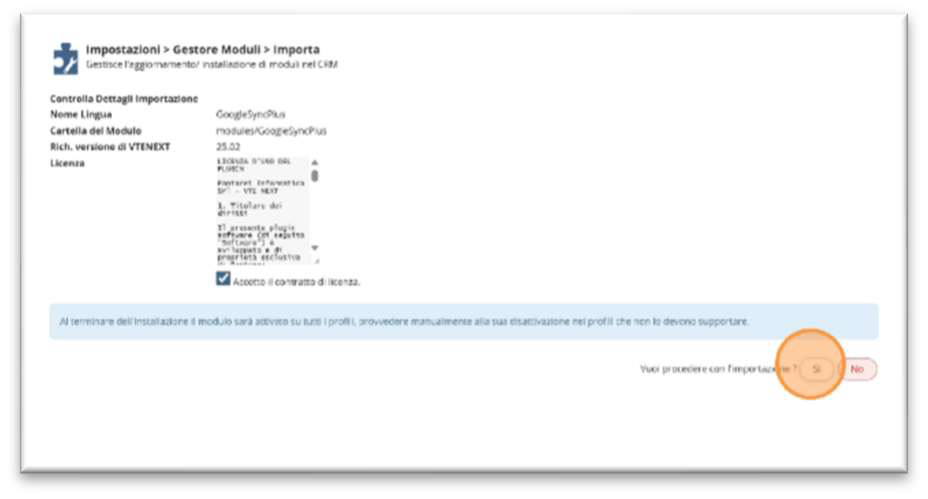
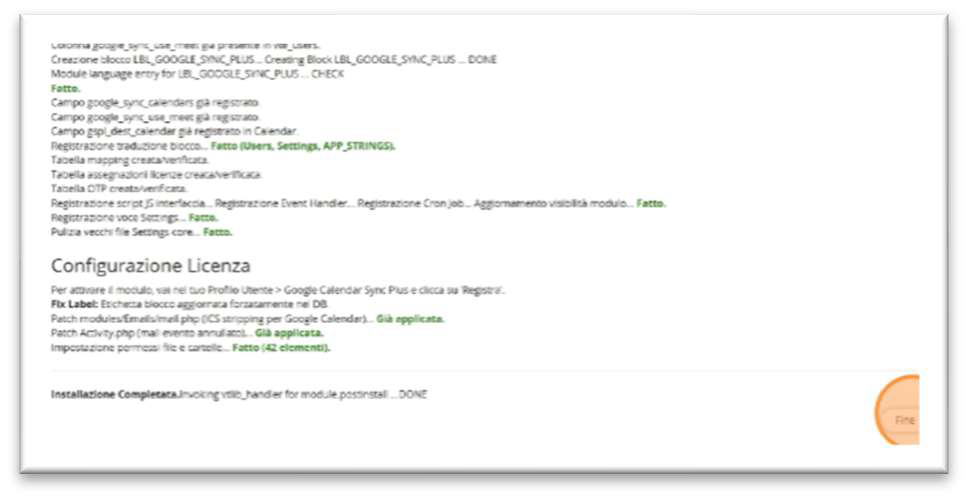
The module can be installed independently from Module Manager → Customize Modules → Import New Module, by selecting the provided ZIP package.
If the plugin is already installed and the license is active, subsequent versions can also be applied through OTA updates from the Google Calendar Sync Plus panel (without importing the ZIP file again), unless otherwise specified in the operational instructions.
Settings Panel
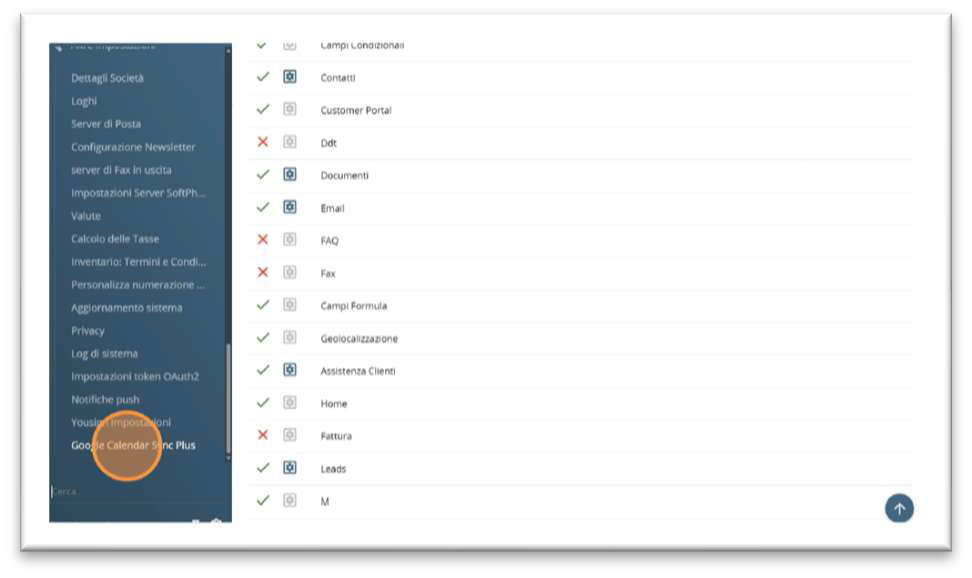
Once the installaon is completed, it will be possible to access the license panel and global settings by entering the vtenext settings with an administrator user and opening the item Google Calendar Sync Plus.
The panel displays the plugin license status and the installed version at the top, and it is organized into four tabs: Users, Settings, Log, Maintenance.
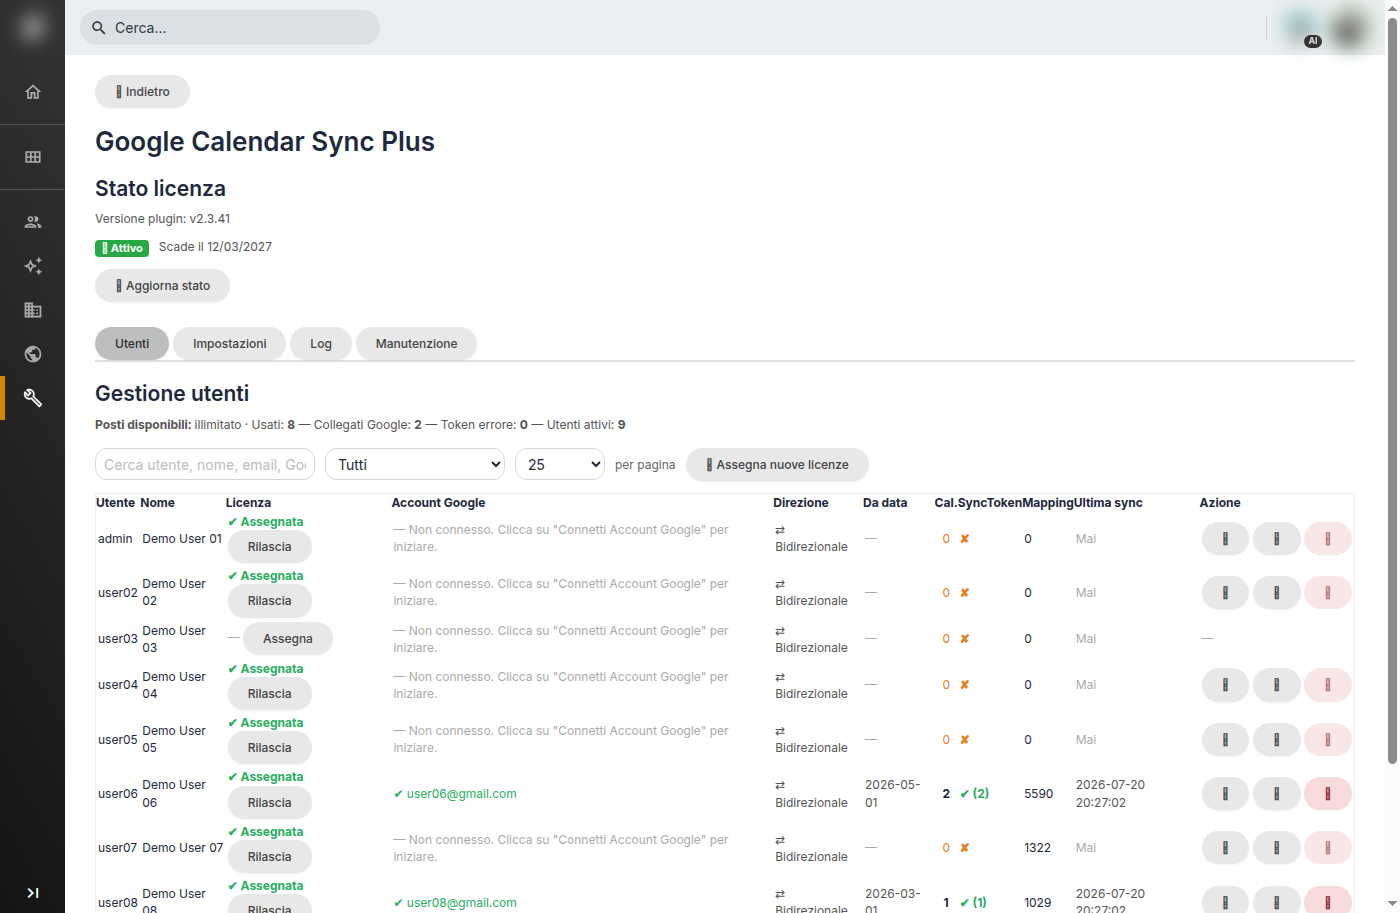
Admin Panel — Users Tab
License Activation or Trial 30
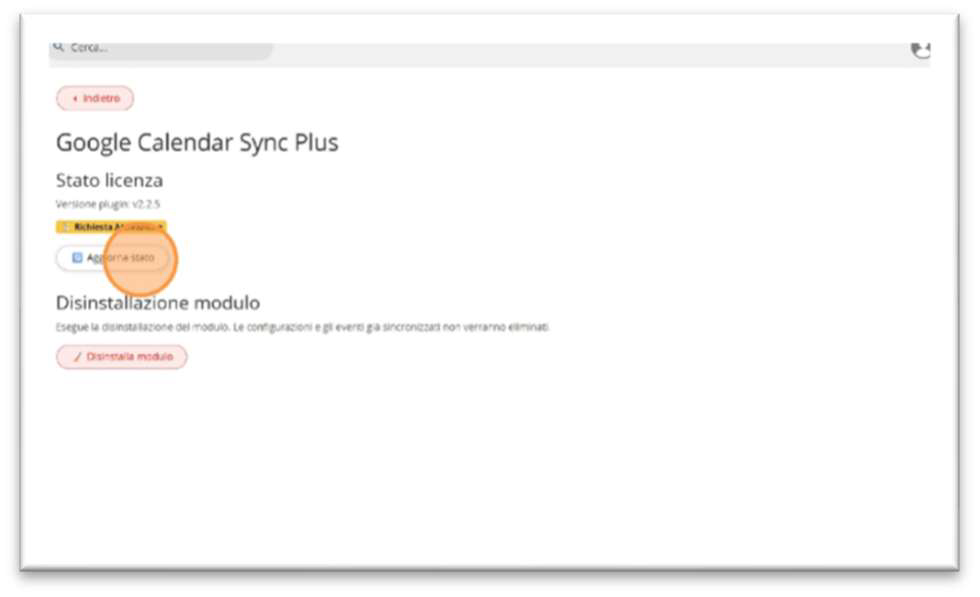
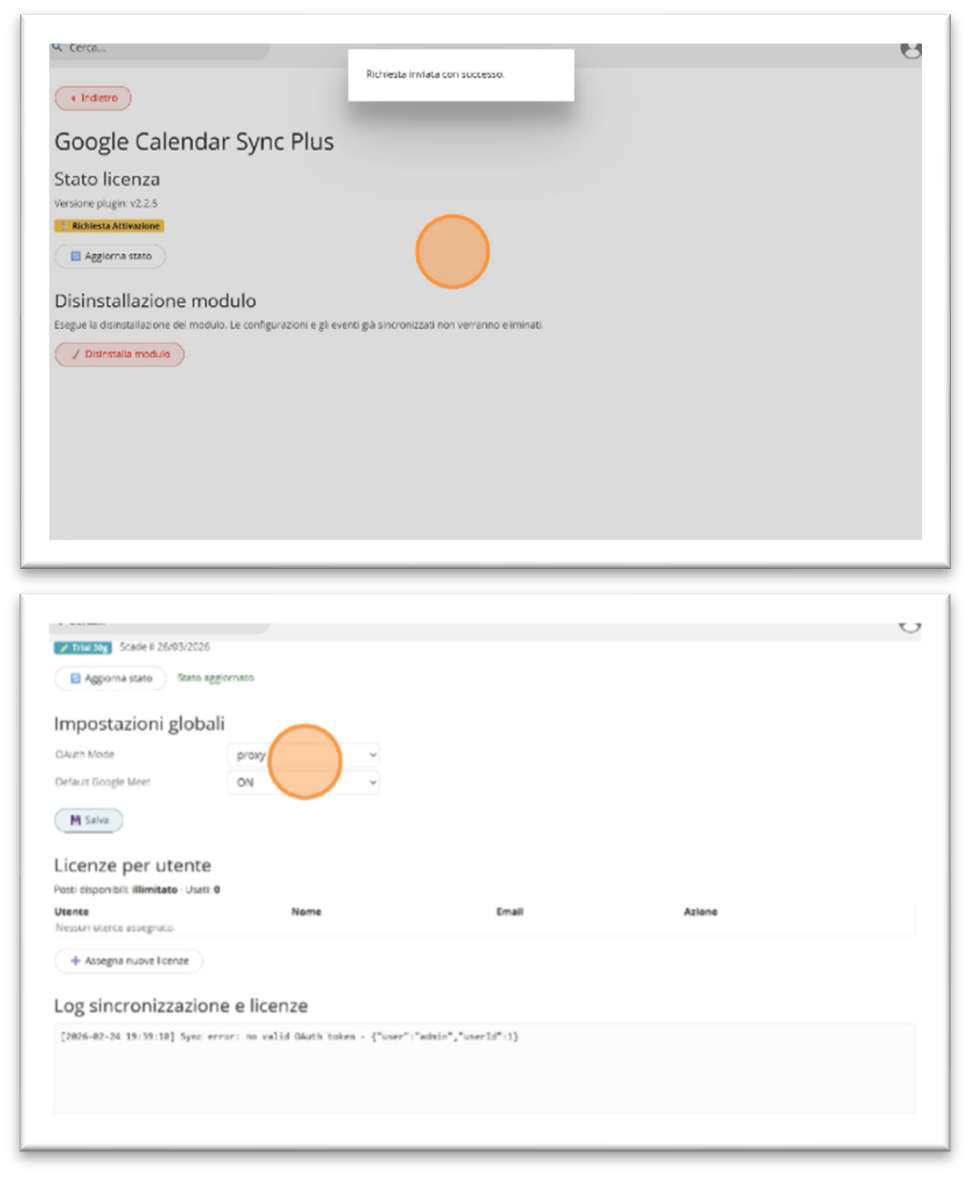
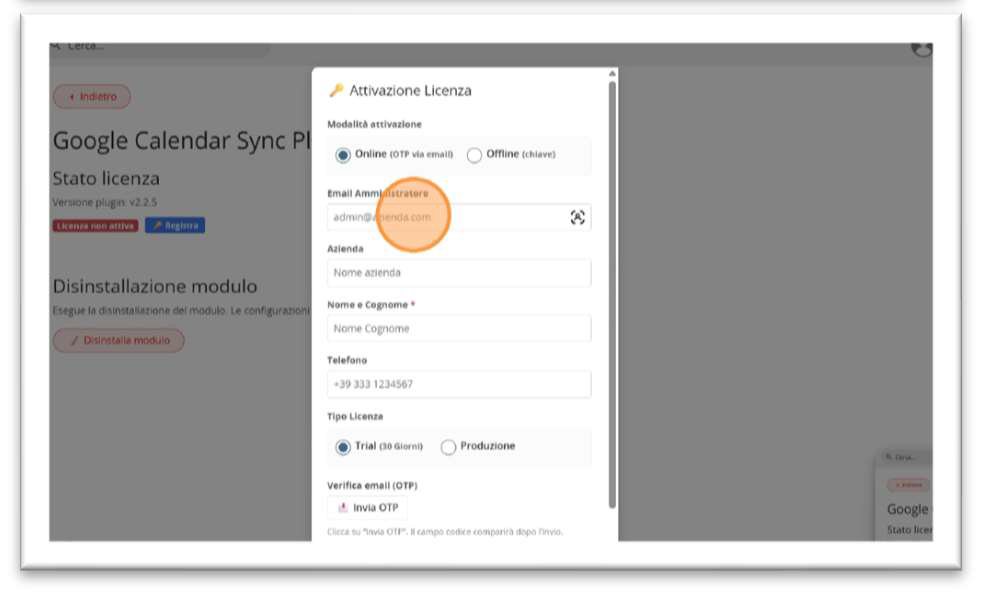
The plugin requires the activation of a license, either trial or production, with Pantarei Informatica. This license can always be requested independently by clicking the Register button and filling in the required fields in the Form that appears as a PopUp.
The request includes: online mode with email verification via OTP or manual insertion of a key previously released by Pantarei Informatica or requested by phone, by communicating the Product ID of your vtenext instance that appears on the screen. The trial license will be released automatically for 30 days with unlimited users. Simply click the update license button immediately after verifying the email. When requesting a production license, you will then be asked for the number of users that will use the plugin.
License Assignment
Once the license has been activated for the selected number of users, it will be possible to assign that license to the CRM users who will use the service. From the Users tab, a paginated table with search and filters is available: for each row, it is possible to assign or release the slot, and view Google status, sync direction, start date, sync token, mapping, and last synchronization. With the Assign new licenses button, a popup opens to select multiple users and confirm with Assign.
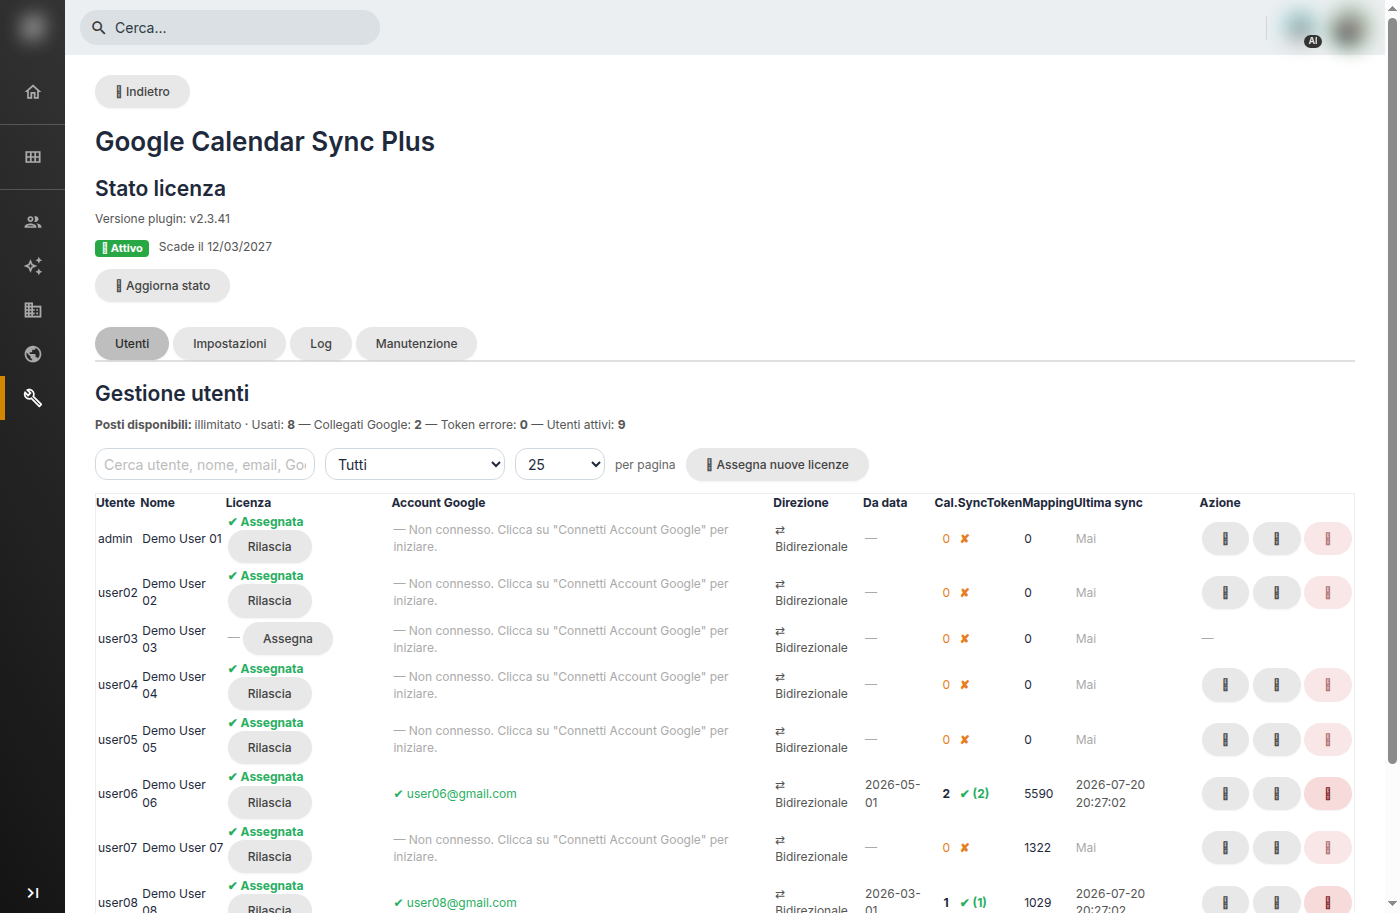
User Management Table
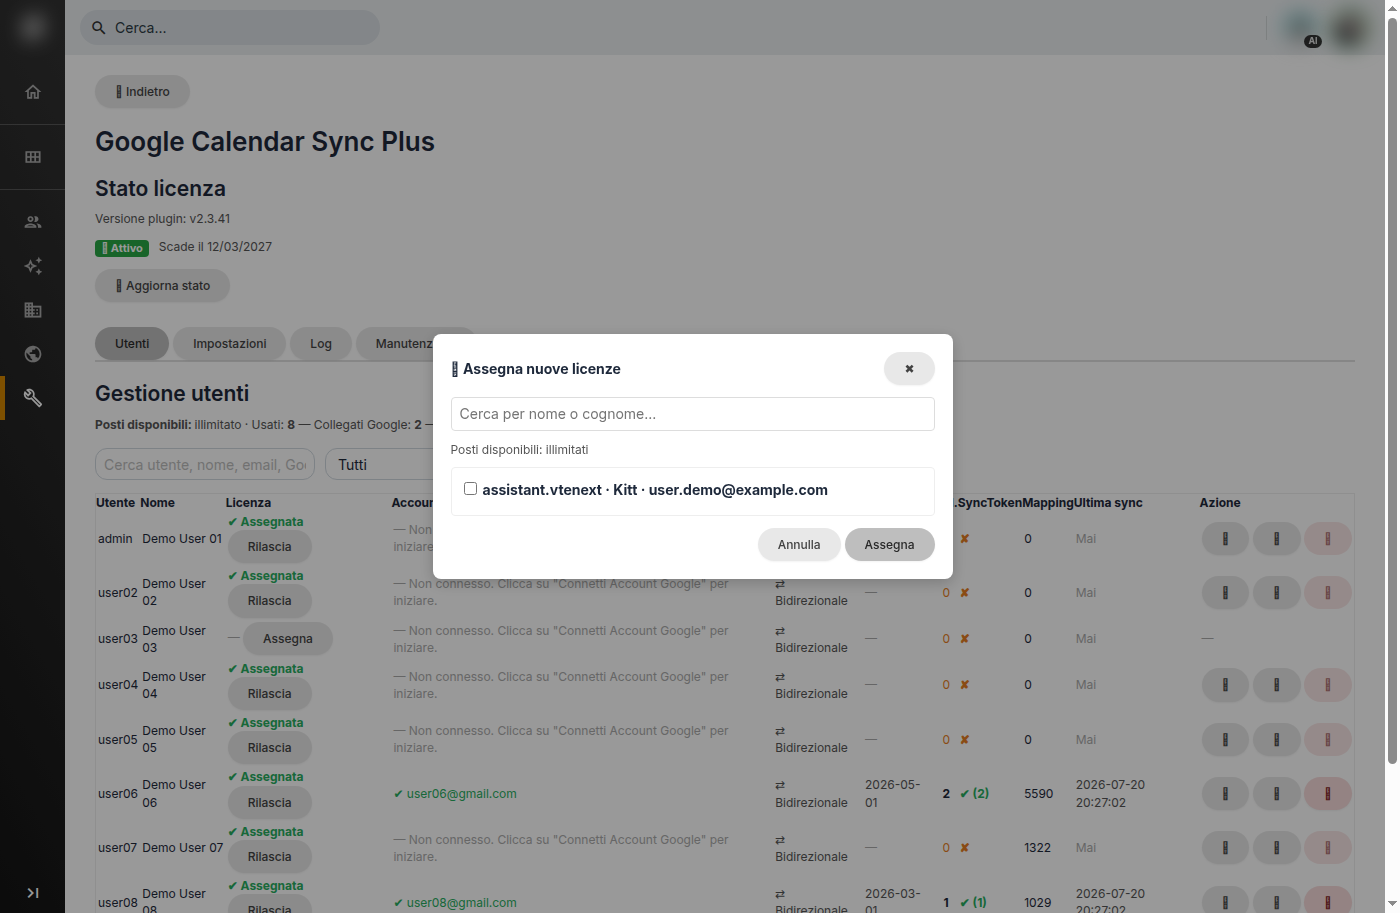
Assign Licenses Popup
On the rows of connected users, administrative actions are available (with explanations displayed on mouse hover): updating fields/mapping, retrieving missing events (catchup, respecting the sync start date), and disconnecting the Google account.
Google Authenticator Mode
From the settings (Settings tab), it will also be possible to select the OAuth2 authentication mode towards Google:
- Proxy (default): authentication will take place through Pantarei Informatica servers, which will act as a bridge with Google Cloud. This mode is recommended for most scenarios.
- Native: the customer uses their own Google Cloud project, with the Client ID and Client Secret of the application. This mode is recommended for customers who already have their own Google Cloud panel or policies that require it.
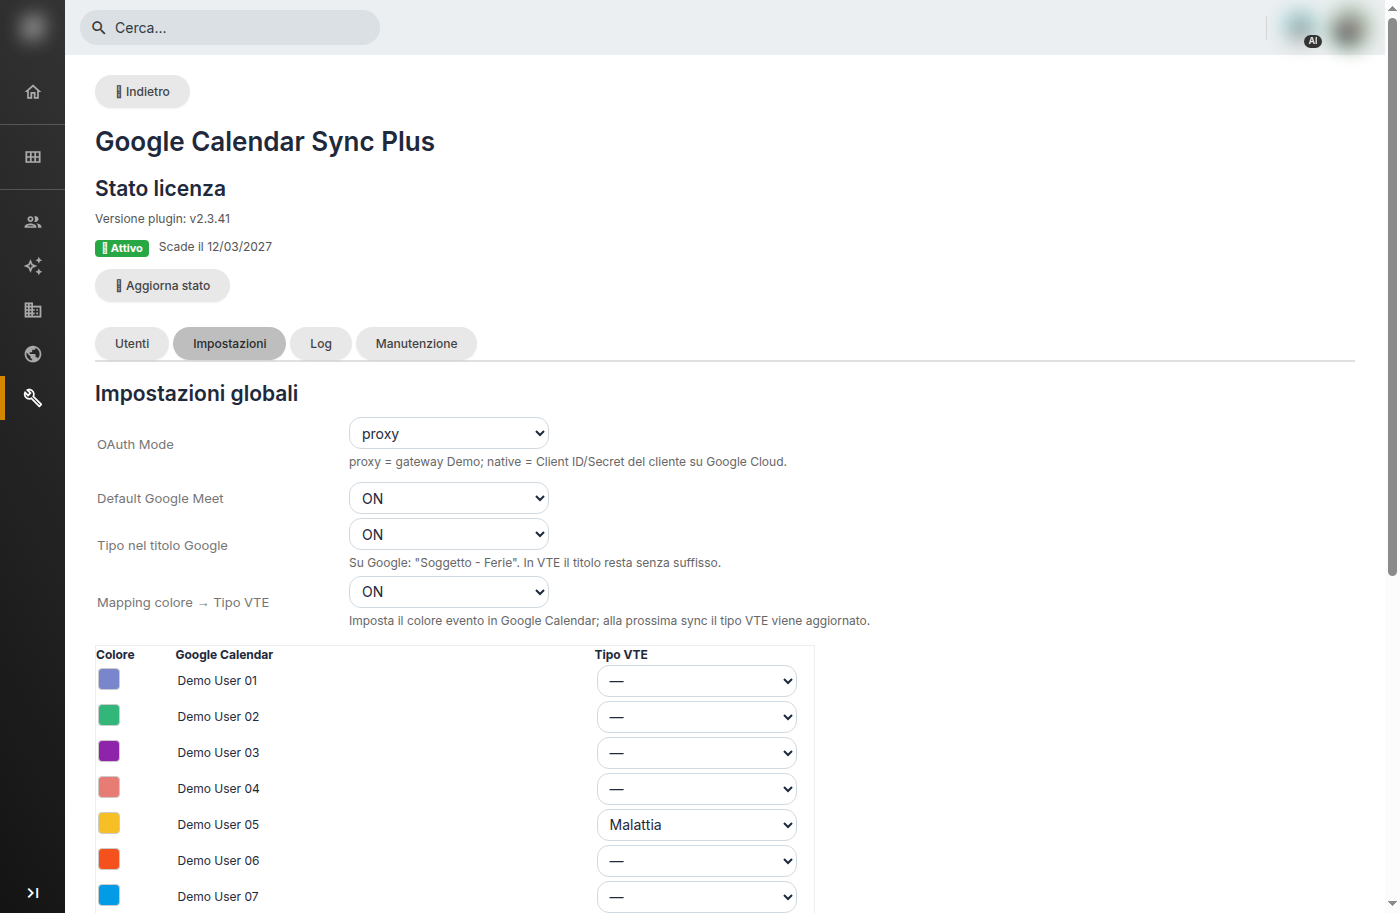
Global Settings
By selecting Native, the Client ID and Client Secret fields will appear (after saving, they remain masked), along with the Redirect URI to copy into the Google Cloud Console under the authorized redirect URIs, and a short operational guide. In the Console, it is necessary to enable the Google Calendar API, configure the OAuth consent screen (Internal for Google Workspace or External published in production; in Testing mode, refresh tokens expire after 7 days), create an OAuth client ID of type Web Application, register the Redirect URI shown in vtenext, and save the credentials in the plugin. The scope used is: https://www.googleapis.com/auth/calendar
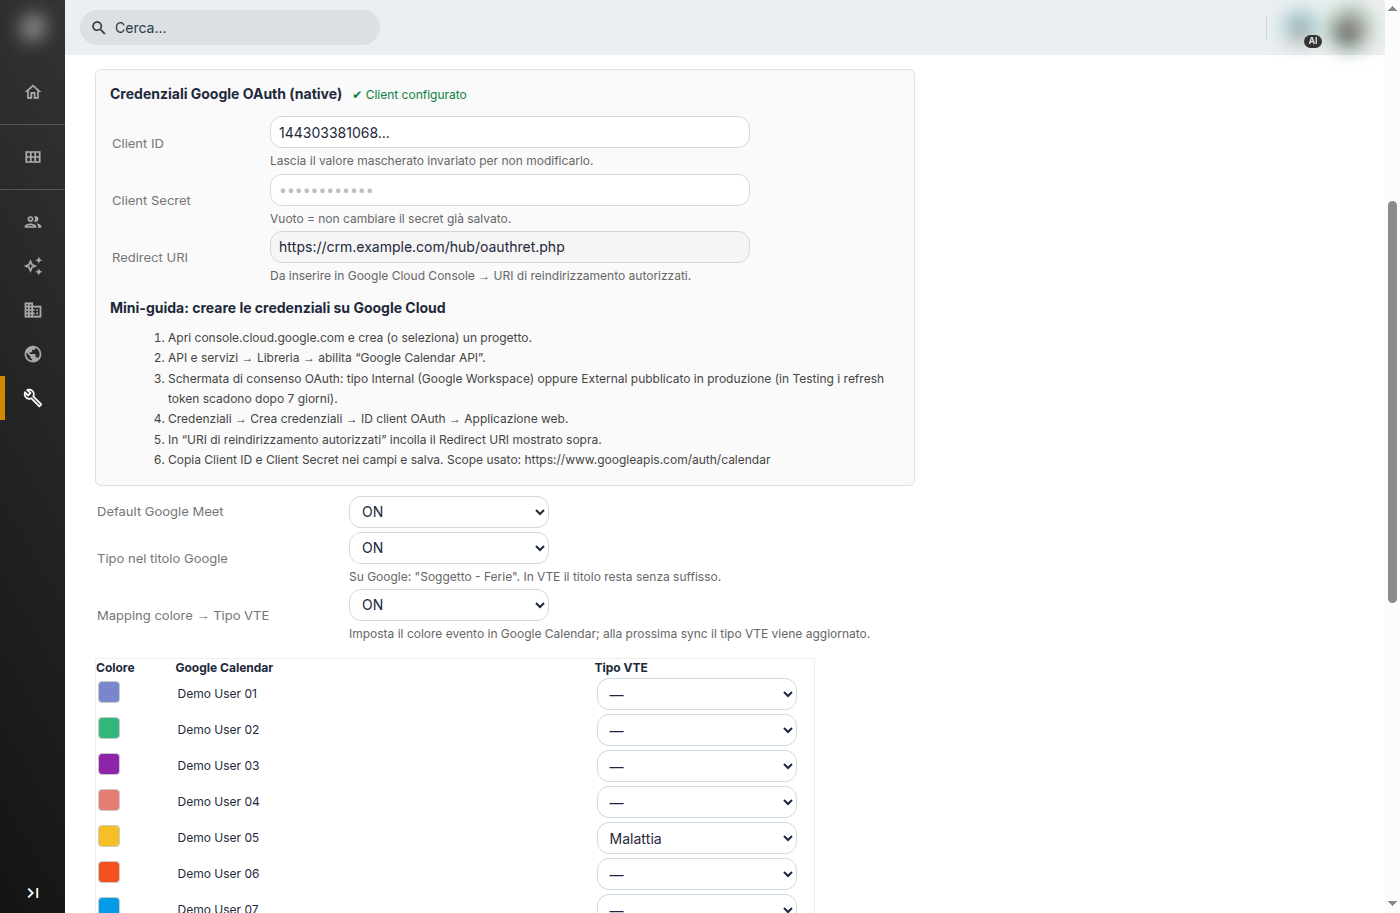
Native OAuth Credentials
Global Choice for Google Meet Usage
Another setting concerns the possibility of using Google Meet for sending Call links that will be automatically generated when selecting the "Video Call" field during event creation.
The system administrator can choose whether to allow users to use the Meet platform or disable it. (The individual user can then choose whether or not to use it from the user preferences.)
The same Settings tab also includes:
- Google title type: if enabled, the title on Google may appear, for example, as Subject - Vacation, while in vtenext it remains without the suffix.
- Color → VTE Type Mapping: associates Google Calendar colors with vtenext activity types (and vice versa, according to the configurable table).
- Cron synchronization queue: sync job status, round interval in minutes (1–60), OK/ERROR indicators, and queue reset button in case of a block. Events created from vtenext to Google typically remain immediate; from Google to vtenext, synchronization goes through the queue (the Google Sync button in the calendar is also available for manual alignment).
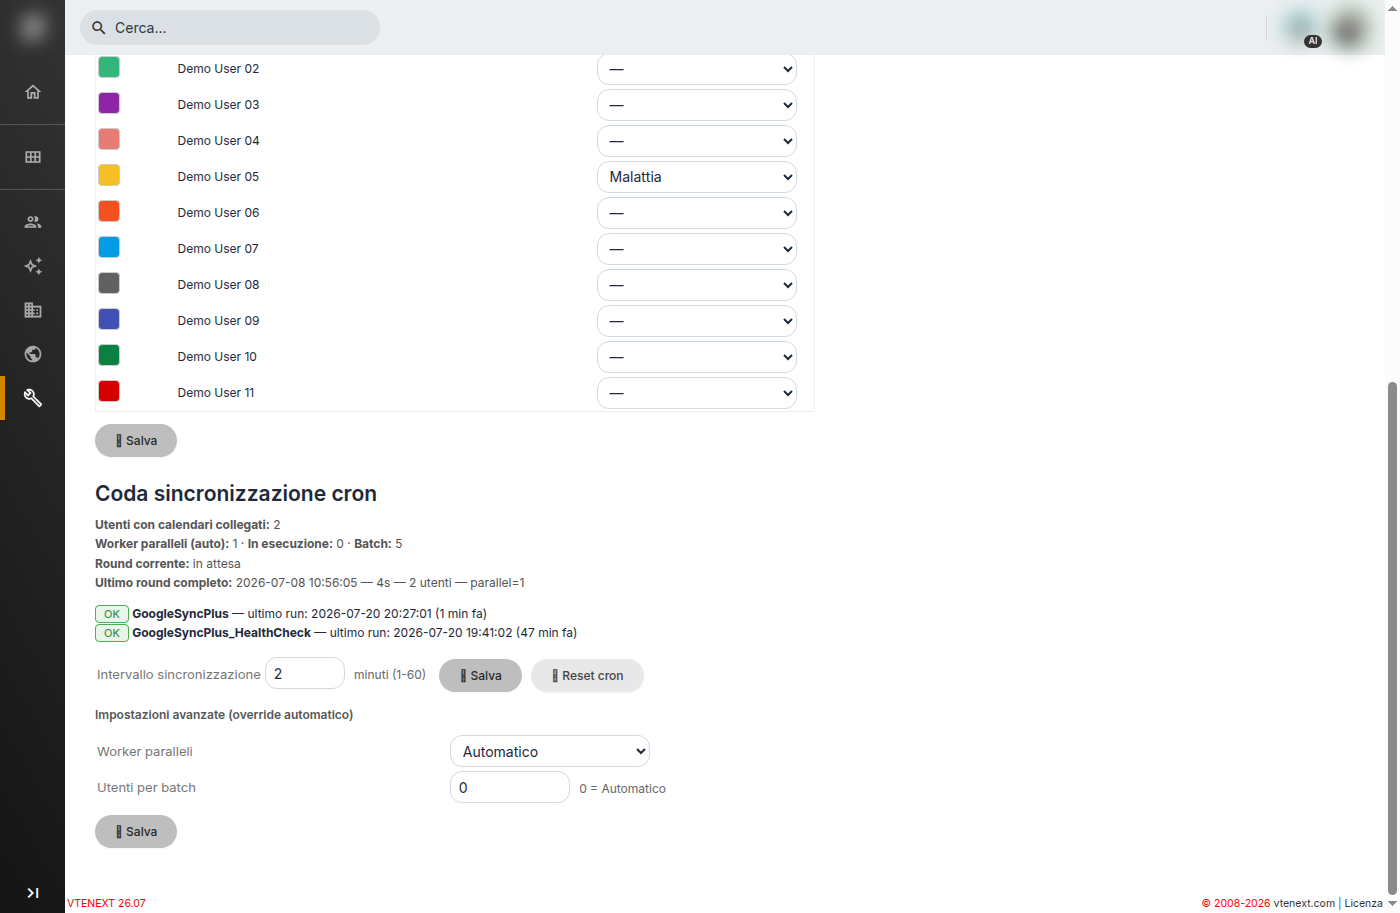
Cron Synchronization Queue
Synchronization Logs and Plugin Uninstallation
Once the synchronizations have been activated, the admin will be able to check the latest logs from the Log tab to monitor any issues. The logs will also show any connection problems with the Pantarei License server. The viewer allows filters by type, text, and user, as well as file download.
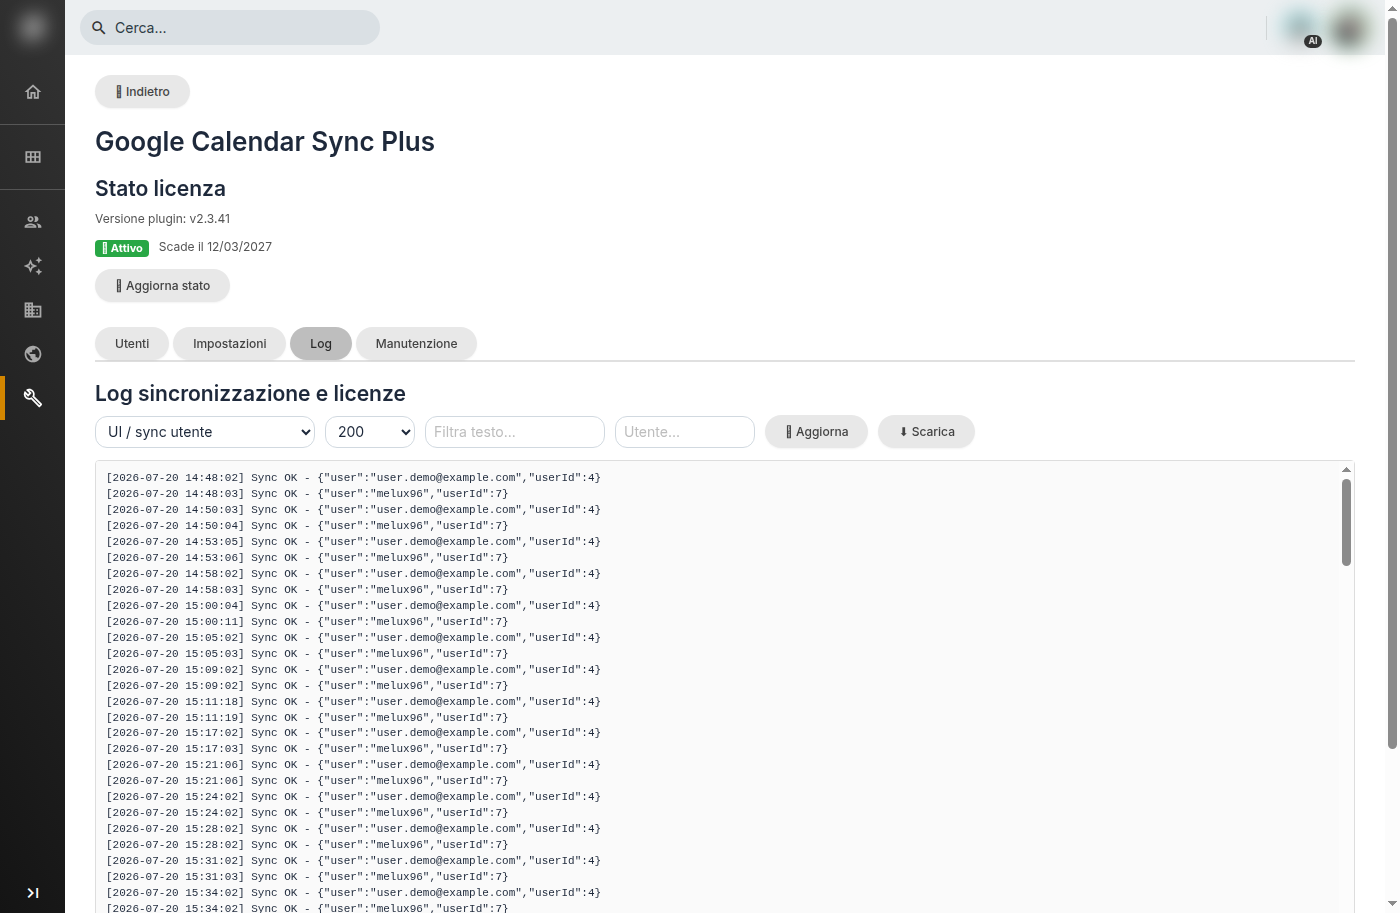
Log Tab
The plugin provides the possibility of self-disinstallation from the Maintenance tab. This procedure will remove the plugin files and the tables created in the database. The Google mapping fields will remain to avoid duplicates in case of plugin reinstallation; configurations and already synchronized events are not deleted from the calendar.
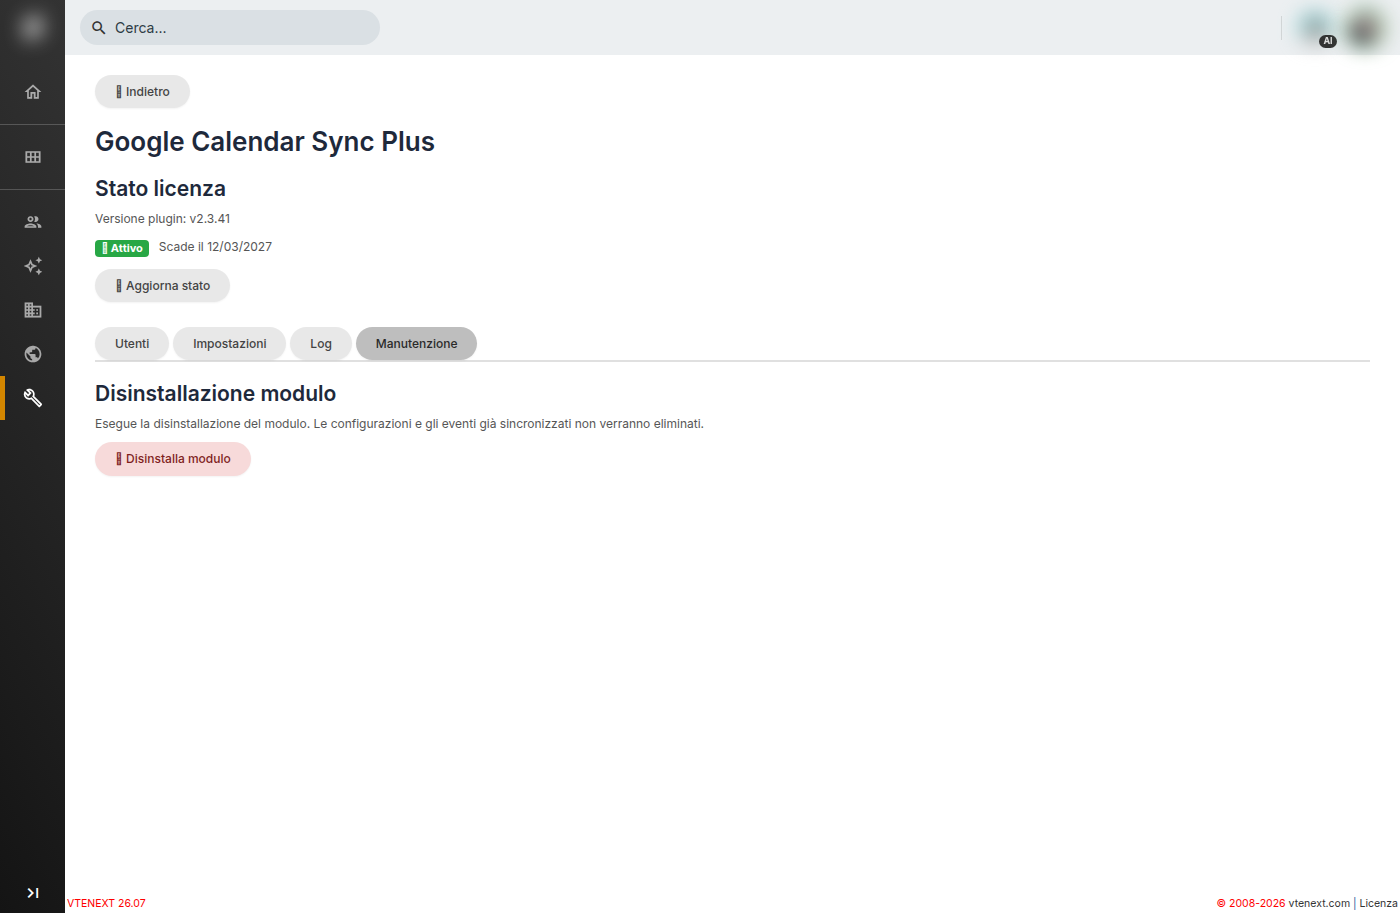
Maintenance Tab
User Preferences Configuration
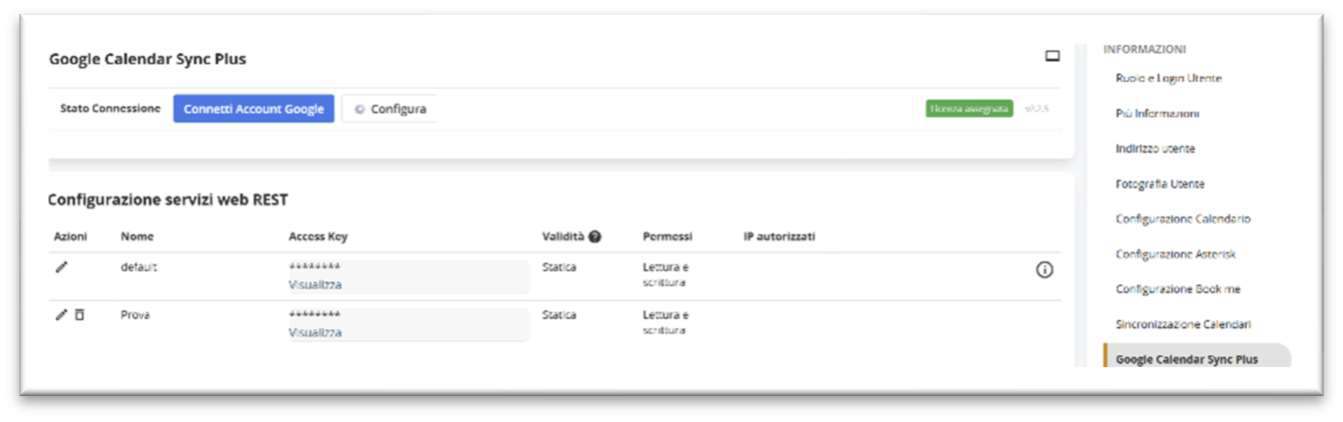
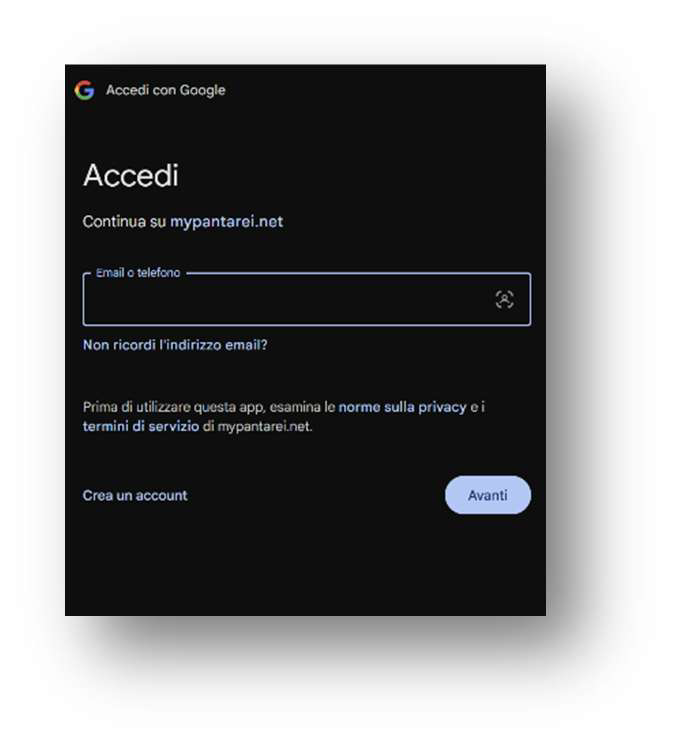
Users who have been assigned a license will be able to access their synchronization preferences and log in to their Google account. By entering User Preferences and clicking on the Google Calendar Sync Plus menu item, the user will be prompted to log in to Google by clicking the Connect Google Account button. An OAuth2 authentication window will open.
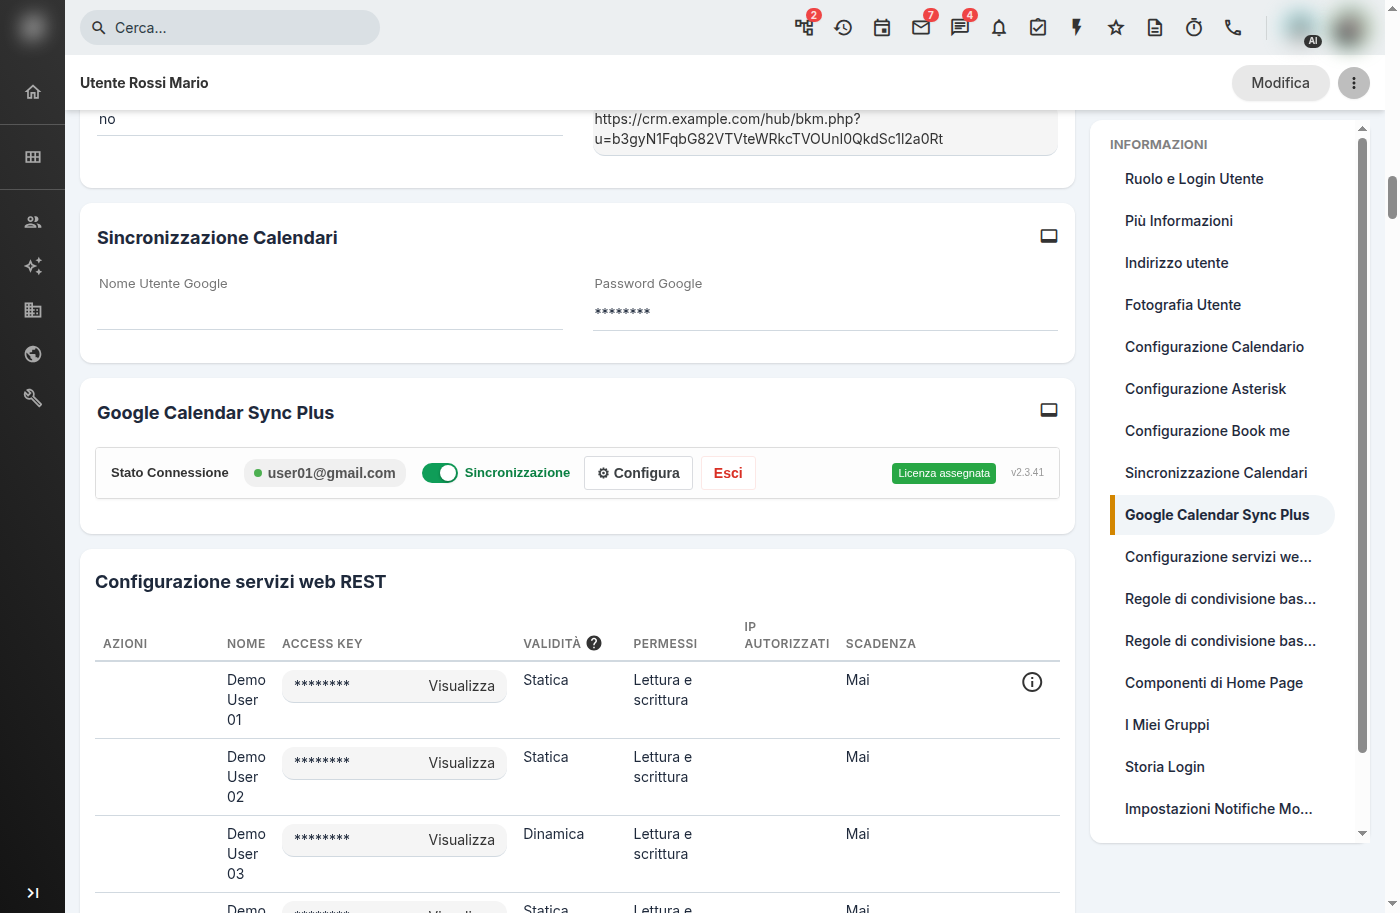
User Preferences — Plugin Block
User Preferences — Connection
User Preferences — Connected Account
Once the login has been completed, it will be possible to click the Configure button to set personal preferences:
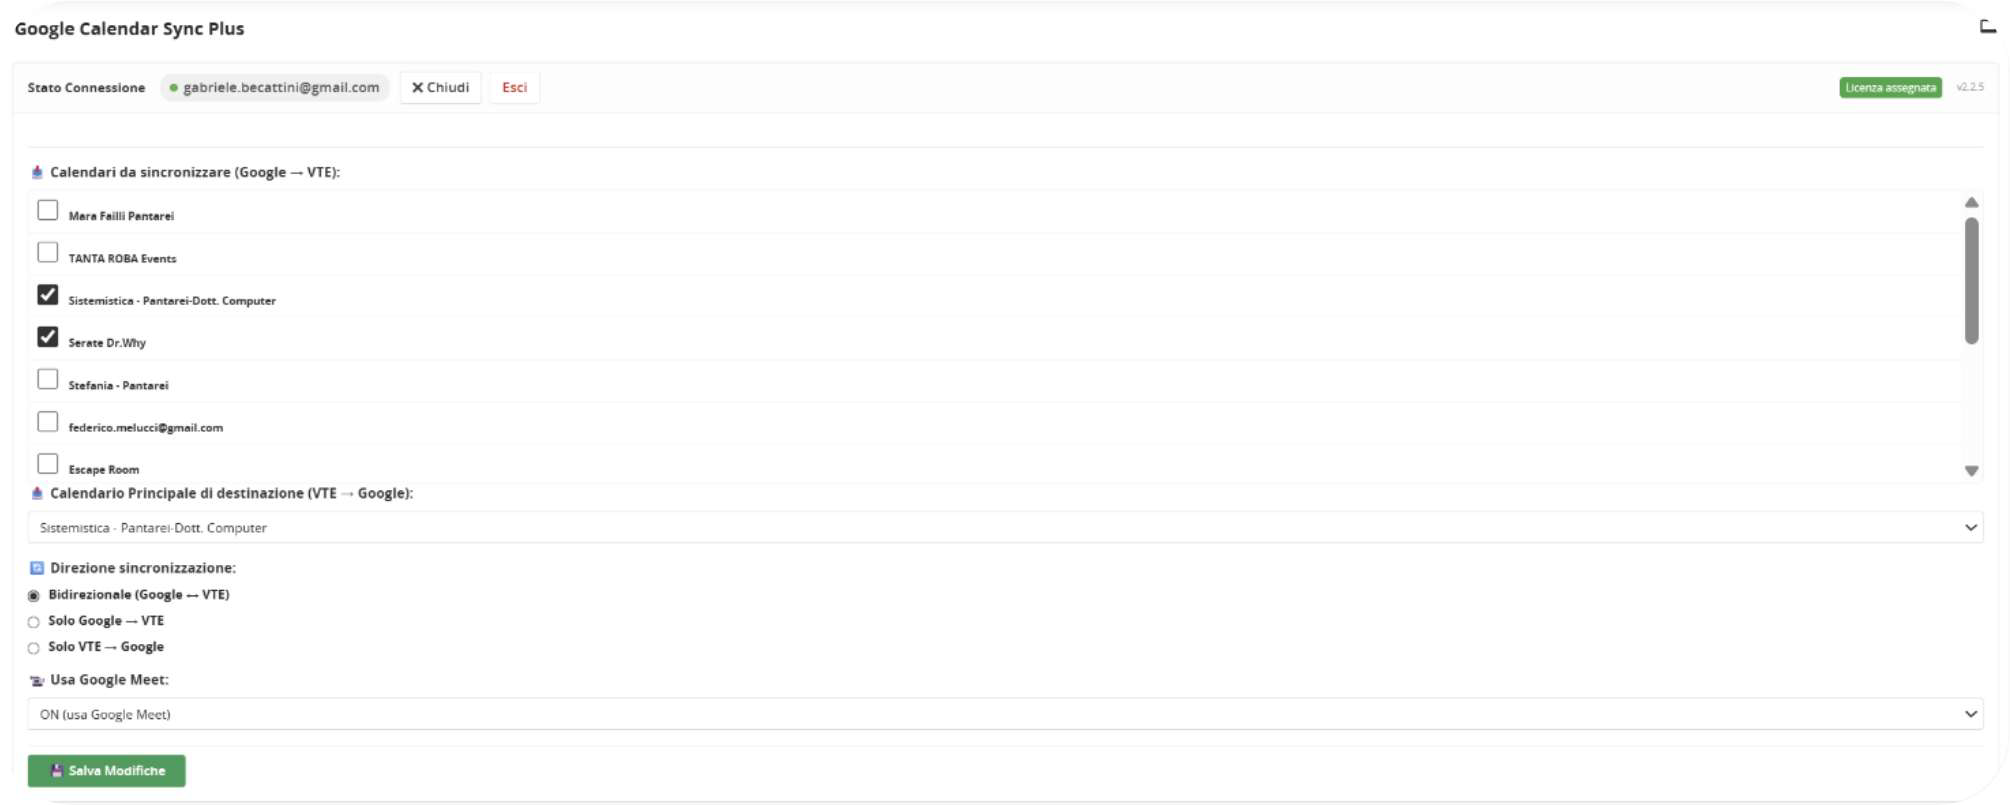
User Preferences — Configure
Calendars to synchronize (Google → VTE):
Select the calendars that will be imported into vtenext.
Main destination calendar (VTE → Google):
Select the main Google Calendar that will be used by default when creating an event in vtenext (it can be changed during each event creation with one of the calendars previously selected).
Synchronization direction:
Set the synchronization type. The system is designed as a bidirectional synchronization, but the user can choose to synchronize in one direction only, from one system to the other.
Use Google Meet:
If the admin has enabled the possibility of using the MEET system, the user can choose whether or not to use it from this setting.
Synchronization start date:
Indicates from which date to retrieve and synchronize events; it is also used by the administrative action for recovering missing events.
Once the settings have been configured and the Save button has been pressed, the plugin is ready to be used.
Synchronization and Creation of a New Event
After configuration, the system will start synchronizing events. Events created from vtenext will be immediately available in Google Calendar, while those created from the Google application will be synchronized through the cron queue configured by the administrator. The synchronization is incremental through Google sync tokens: only changes made after the last successful execution are downloaded. The Google Sync button will also be available to force a manual synchronization.
When creating a new event in the CRM, it will be possible to select "include video call" to generate a Meet link that will be inserted into the event description. If there are participants, vtenext will handle sending email invitations to the recipients as usual. It will also be possible to select a different Google destination calendar from the one configured as the main calendar.
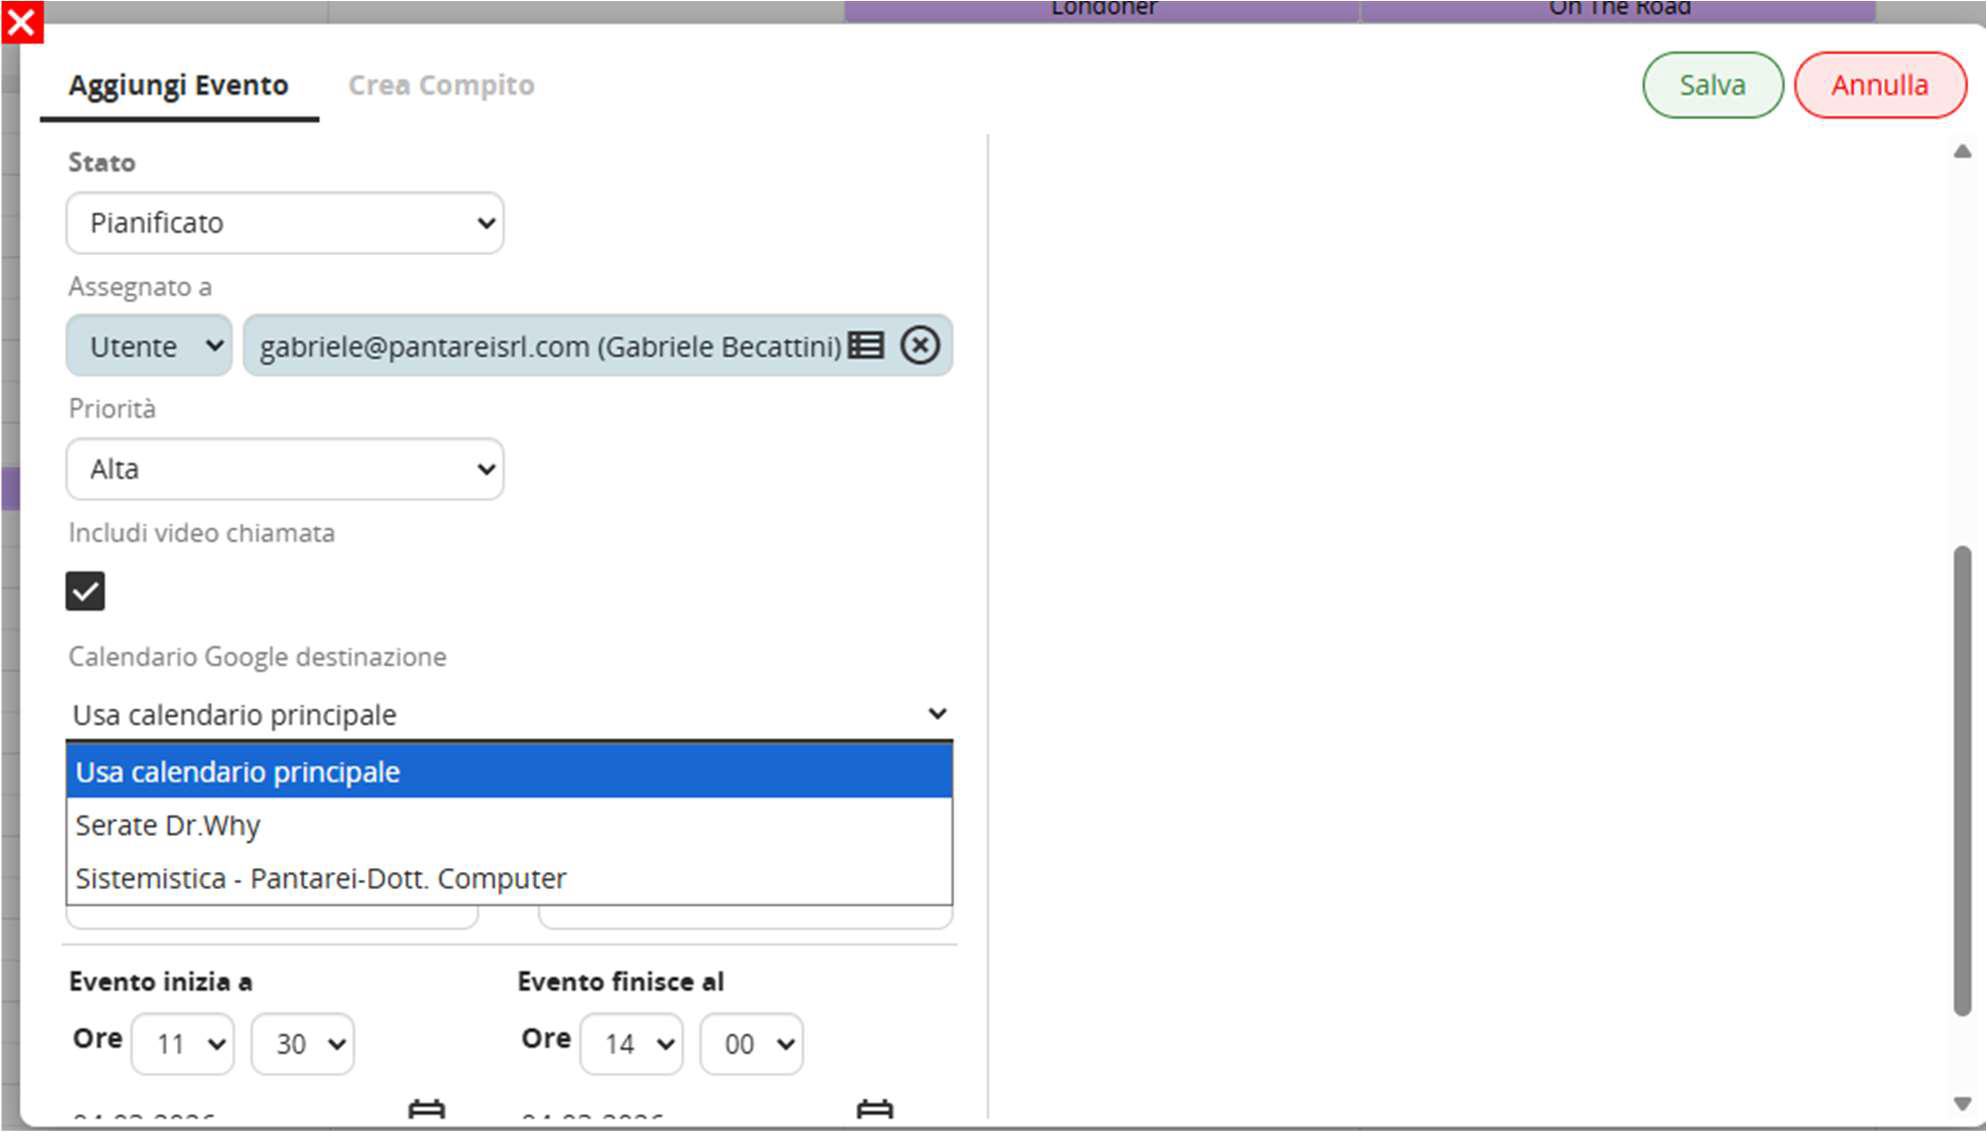
Event Creation
Example view of the two synchronized calendars between vtenext and Google Calendar.
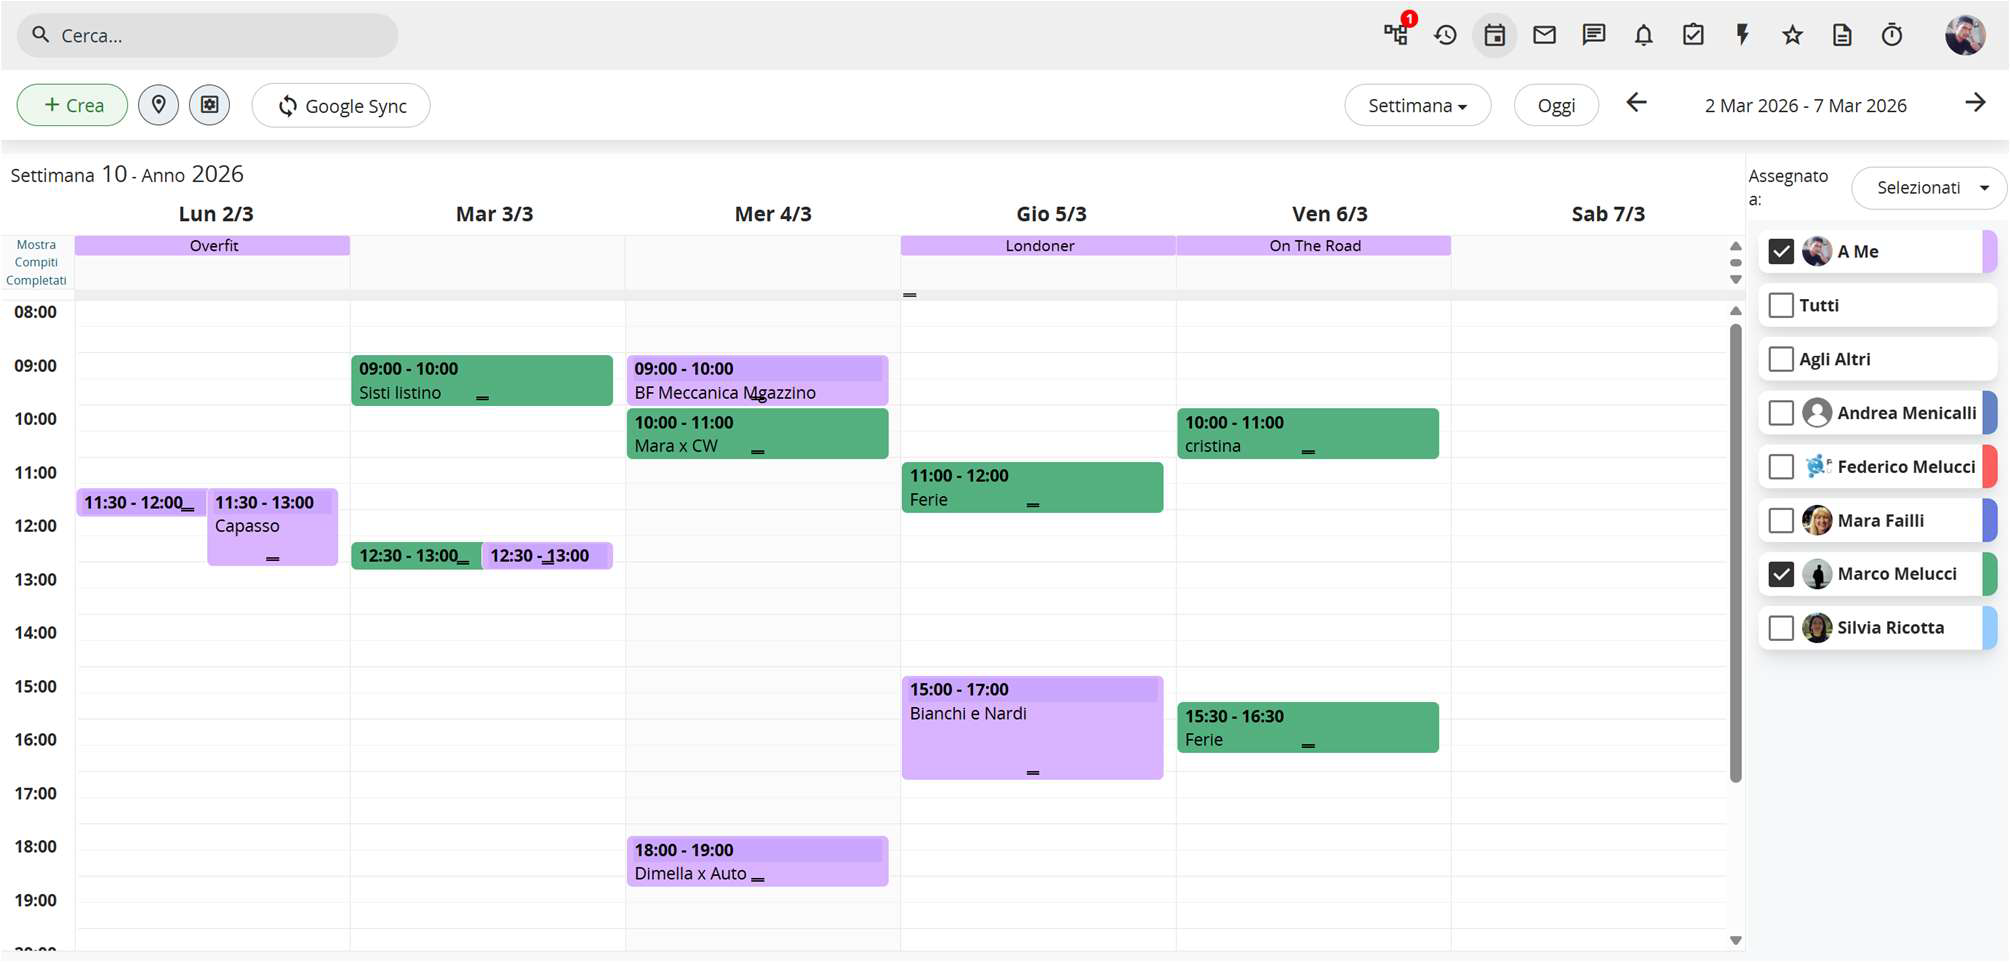
vtenext Calendar
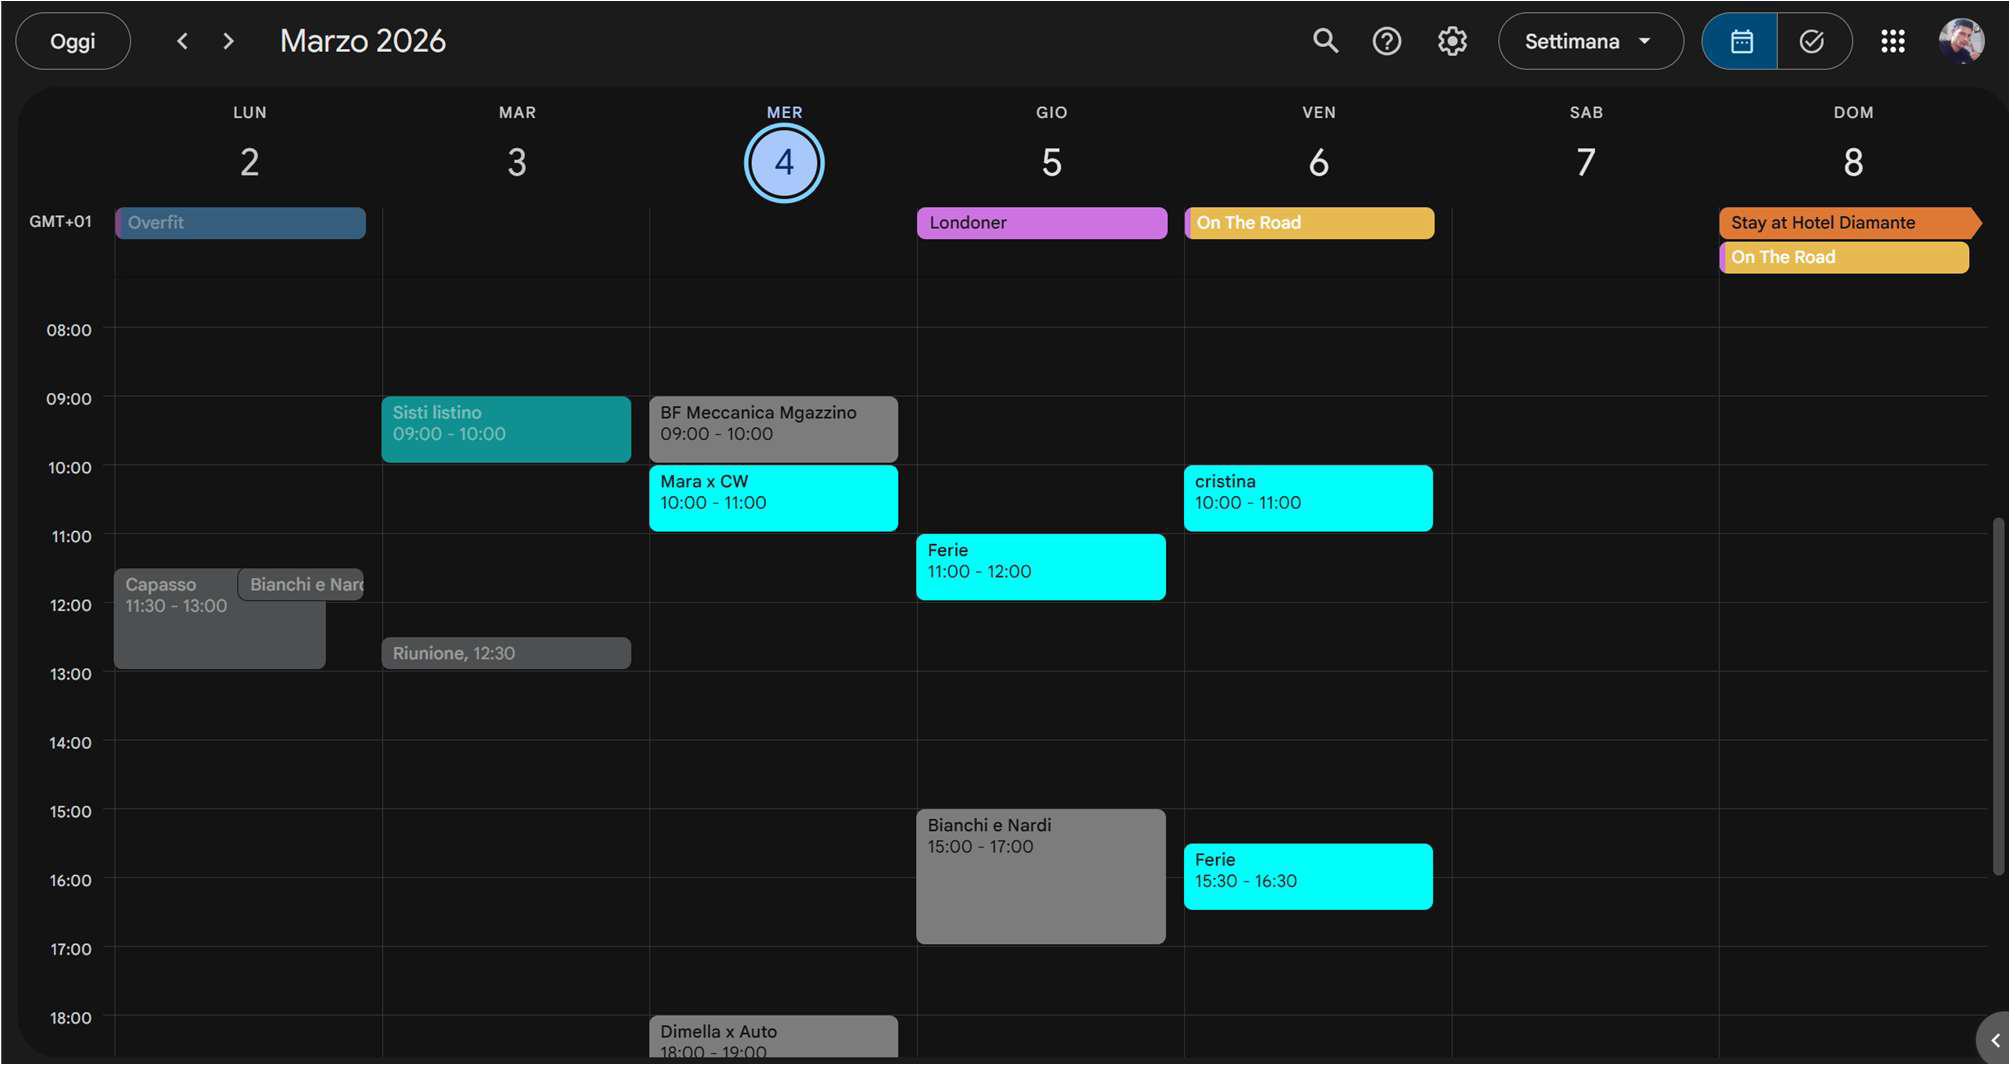
Google Calendar