# 7 Modulo GDPR
# 7. vtenext GDPR Web App
The vtenext GDPR APP is a self-service tool for personal data management by customers.
To allow customers to use this tool, a campaign must be created in vtenext for contacts and leads, with an invitation to access the Web App.
Each contact in the CRM will be able to use the vtenext GDPR App and, after registering and confirming the account, will be able to use all the functions.
The contact can **edit his/her data, give consent for processing** and for profiling operations or **remove his/her details from the databases**. Contacts can also manage any duplicates simply by selecting the main entity to be considered and, automatically, all the data present in the duplicate fields will populate the chosen profile.
The operations performed on the app by the contact and confirmed by means of a link received with a notification email will be updated in real time in the CRM and on the databases of connected systems (ERP, HR applications, etc.)
# 7.1 How to create contact campaigns
**Requirements:**
Use vtenext 19.10, making sure the system is configured for sending emails
**1)** Firstly you must check the GDPR settings by clicking on Settings:
[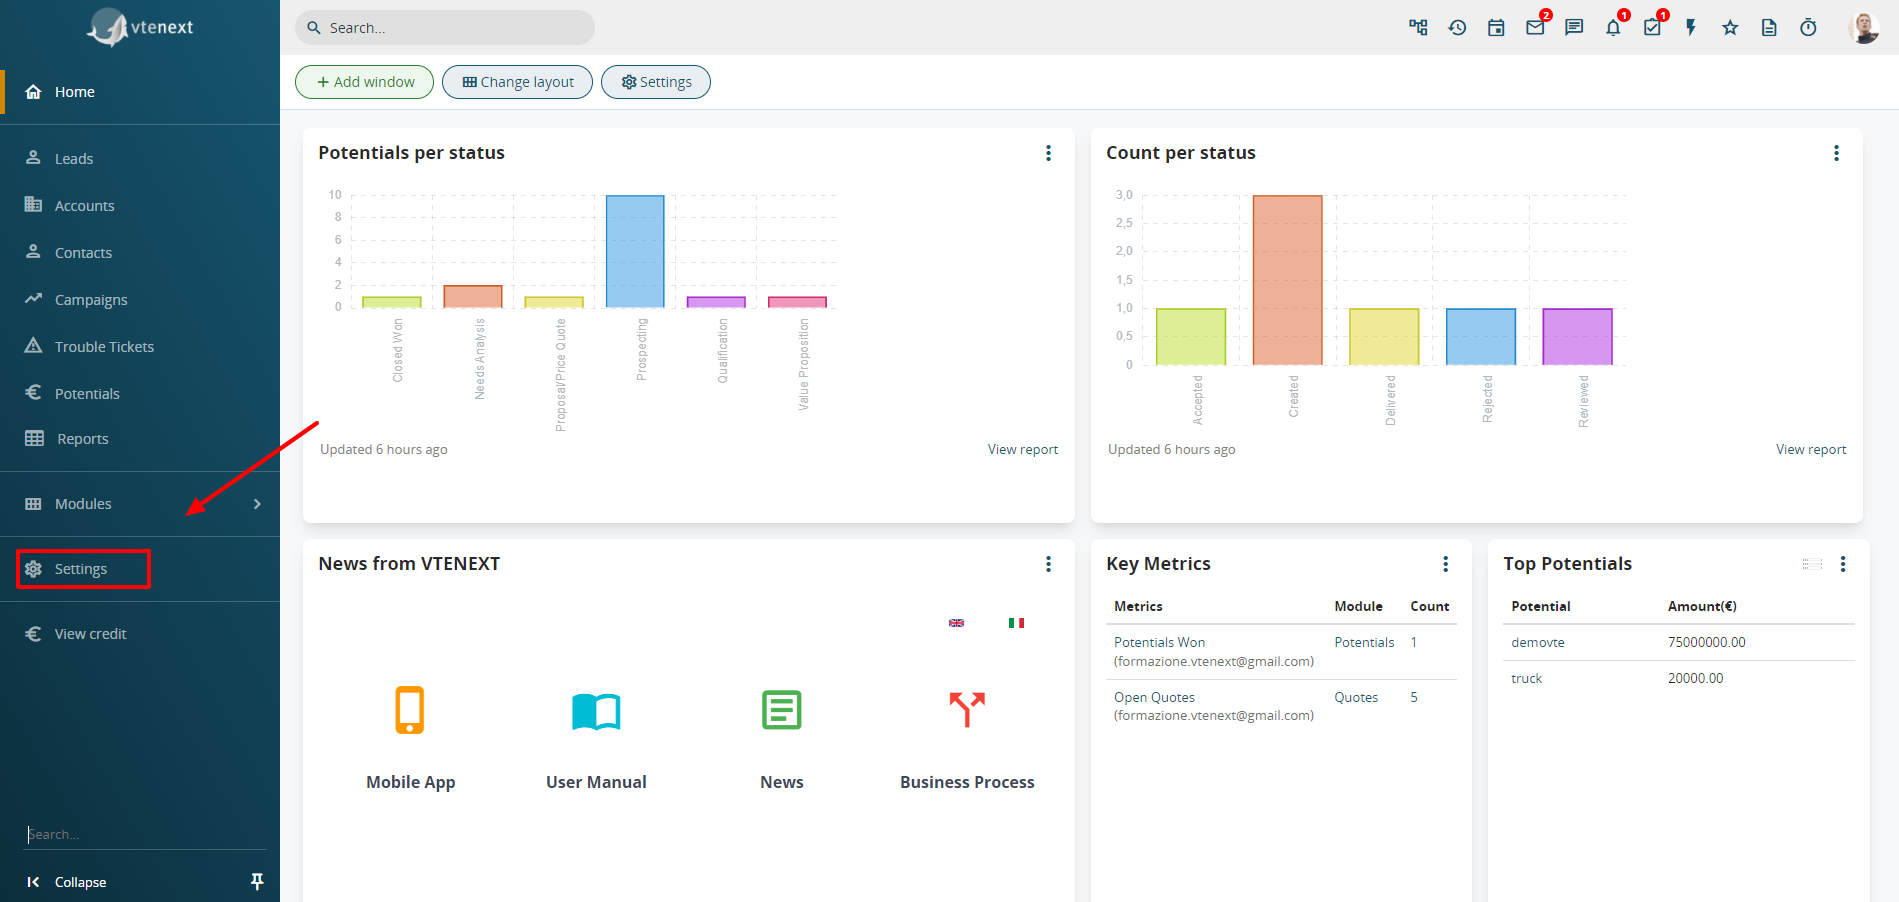](https://usermanual.vtenext.com/uploads/images/gallery/2022-01/how-to-create-contact-campaigns-1.png)
**2)** Click on the ‘Customer tools’ menu and then on the ‘GDPR’ section
[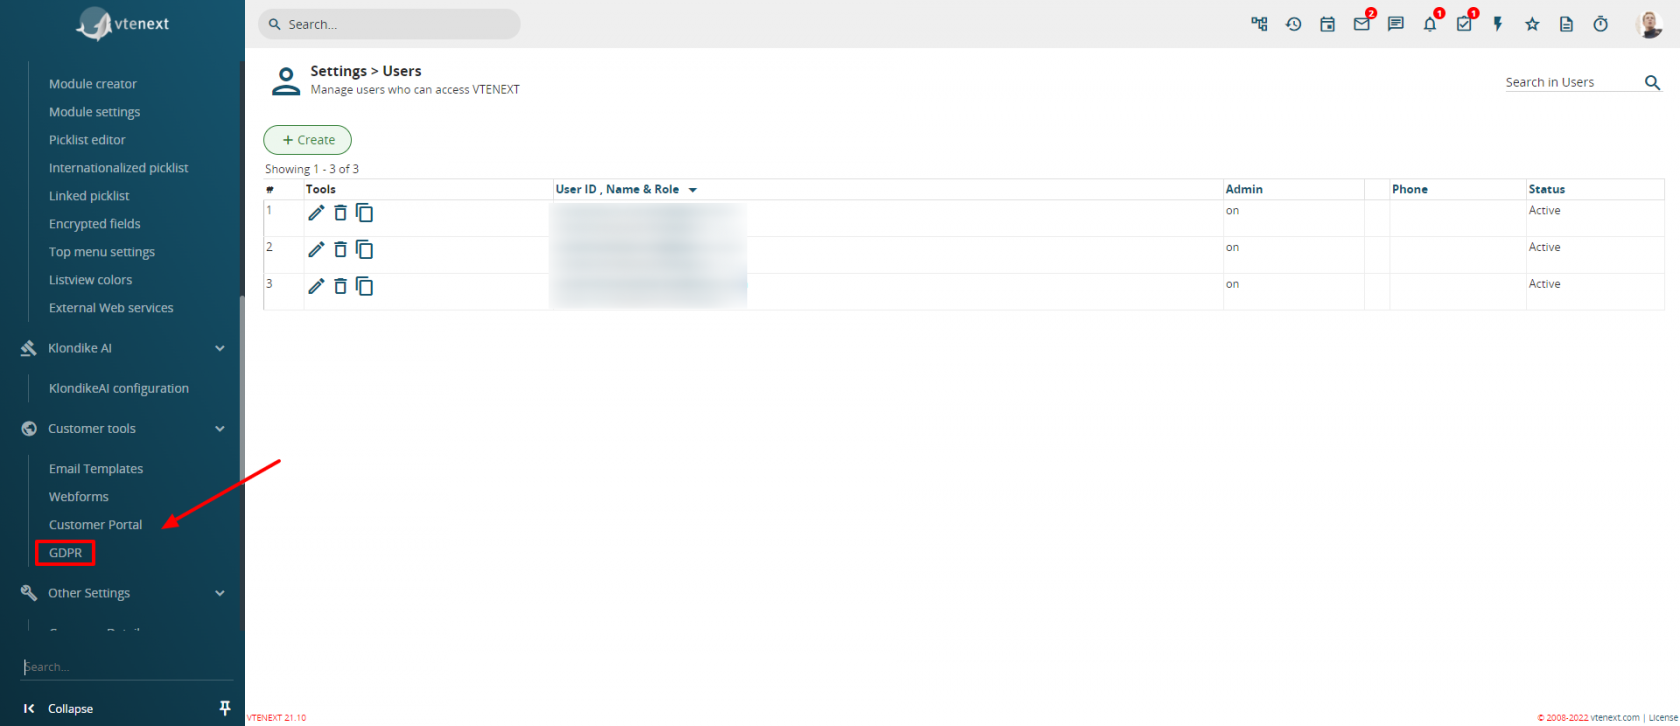](https://usermanual.vtenext.com/uploads/images/gallery/2022-01/how-to-create-contact-campaigns-2.png)
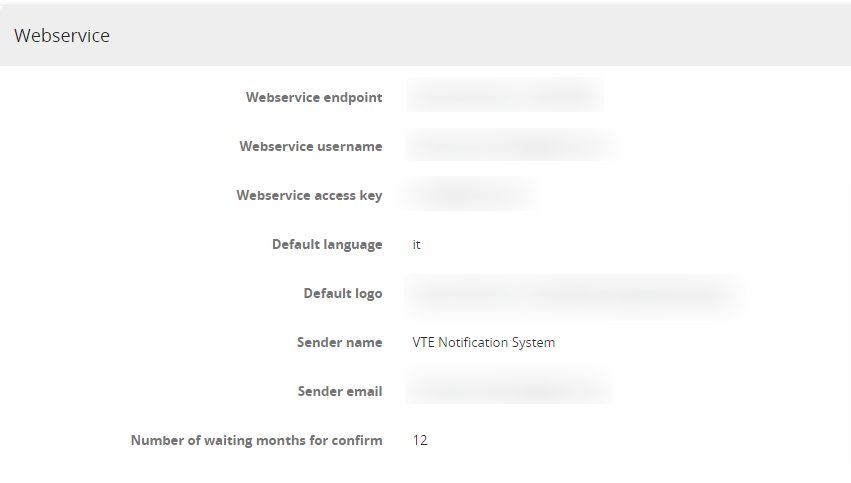
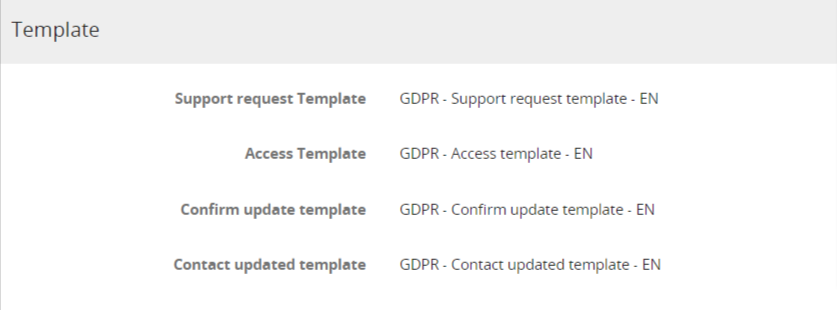
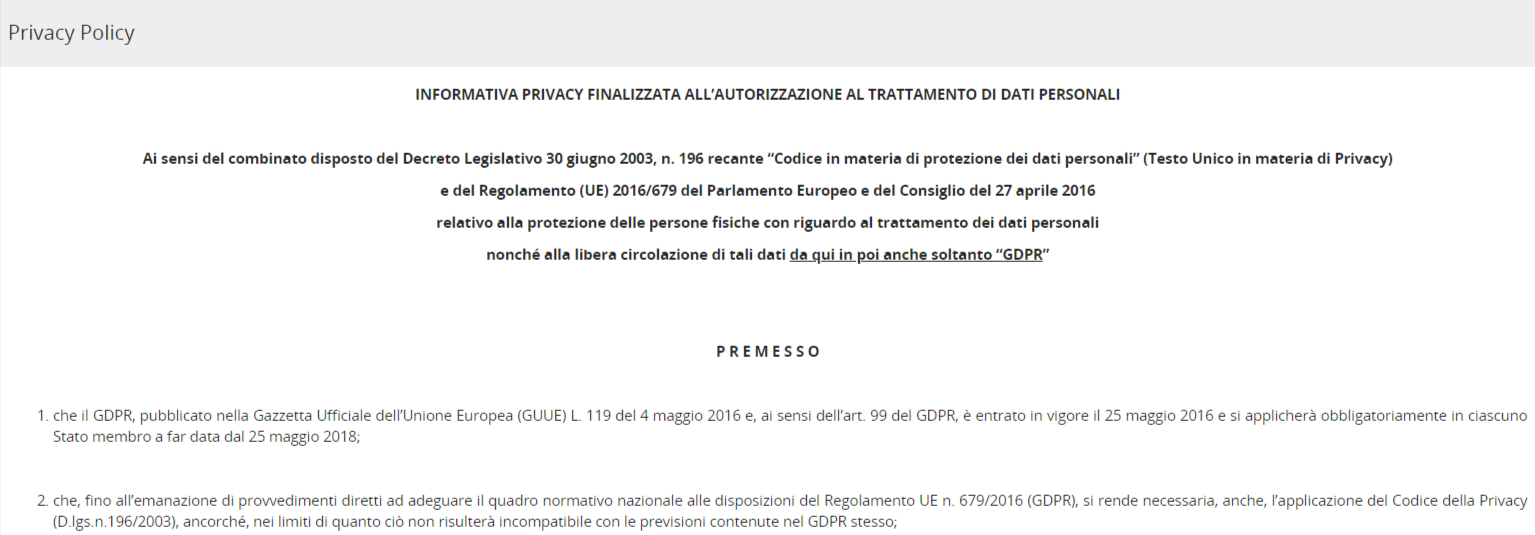
**3)** At this point all the GDPR app settings are shown, divided into blocks:
- **Webservice** – CRM URL, user's access key (default administrator), username, language and app logo are indicated
- **Template** – The templates are selected for various requirements (support, access, confirmation, changes)
- **Privacy Policy** – To specify a customised privacy policy
[](https://usermanual.vtenext.com/uploads/images/gallery/2022-01/how-to-create-contact-campaigns-3.png)
**4)** Click on "EDIT" to change the stored parameters. This screen shows the first block (Webservice)
[](https://usermanual.vtenext.com/uploads/images/gallery/2022-01/how-to-create-contact-campaigns-4.png)
**5)** As already mentioned, you can select different templates in this block (Template) to use for support requests, contact logins, contact update confirmation and contact data update notification.
[](https://usermanual.vtenext.com/uploads/images/gallery/2022-01/how-to-create-contact-campaigns-5.png)
**6)** The company's privacy policy is defined in the last block (Privacy Policy); the fields are pre-compiled with a default privacy policy. Make sure the default policy is consistent with your company privacy policy. You can insert images, tables, text, etc.
[](https://usermanual.vtenext.com/uploads/images/gallery/2022-01/how-to-create-contact-campaigns-6.png)
**7)** At this point, a new Campaign will be created for transmission of a subsequent informative newsletter concerning the GDPR. Click on the **+CREATE** button
[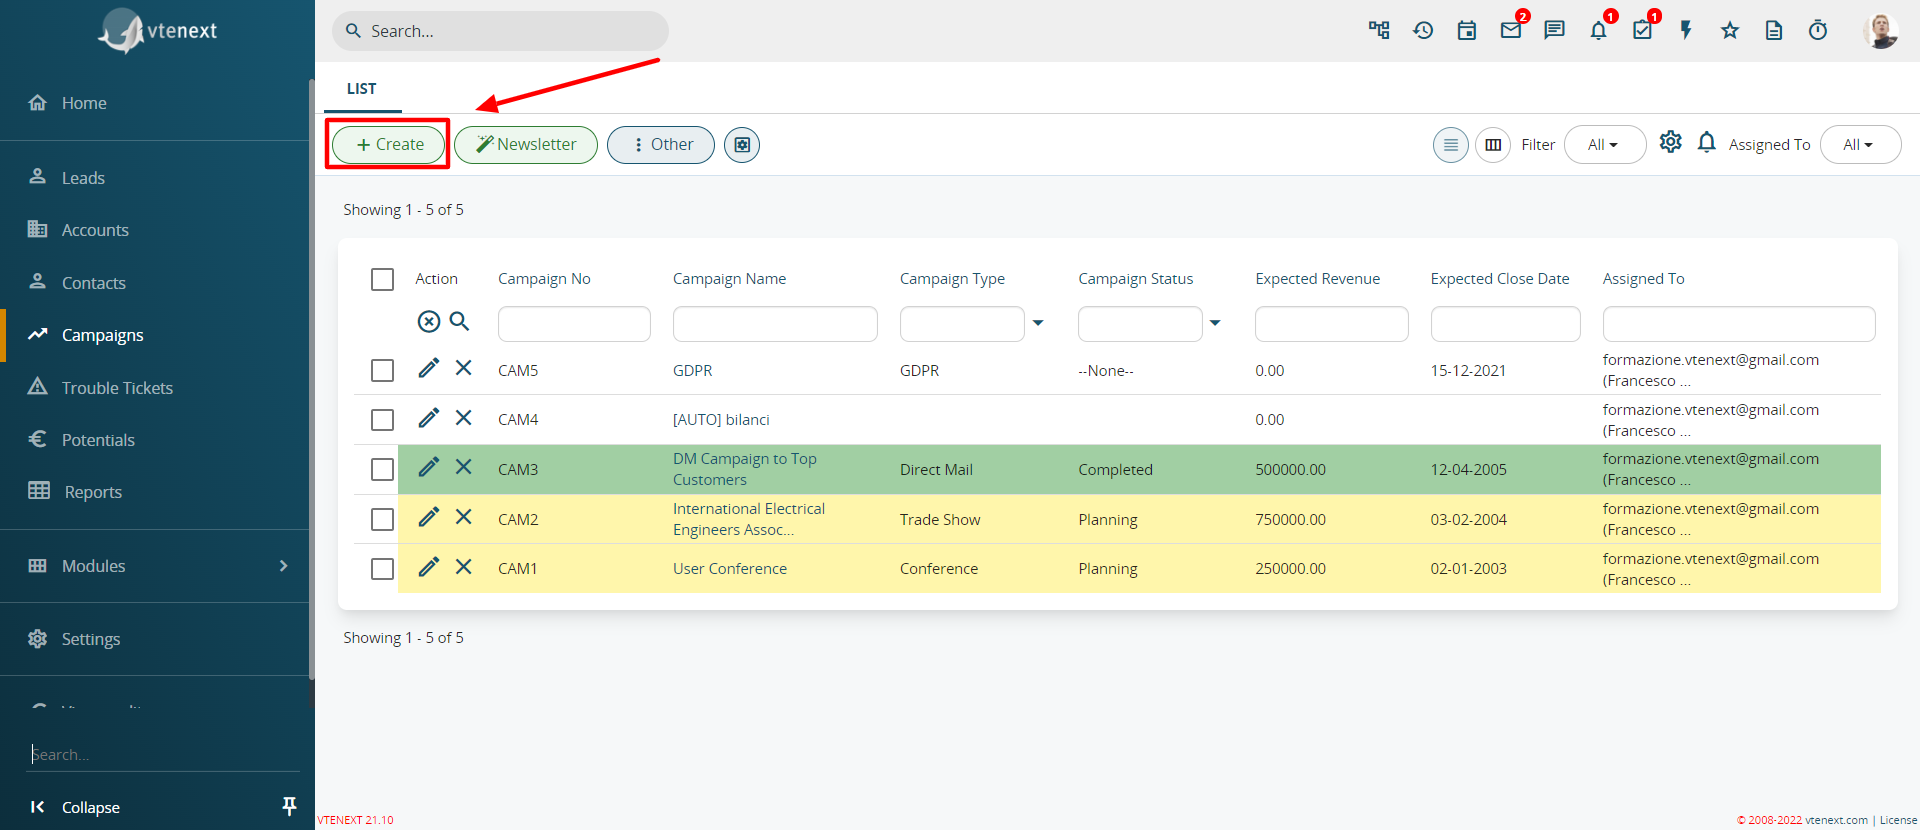](https://usermanual.vtenext.com/uploads/images/gallery/2022-01/how-to-create-contact-campaigns-7.png)
**8)** When creating the campaign the type must be selected (GDPR in this case). Now save the settings
[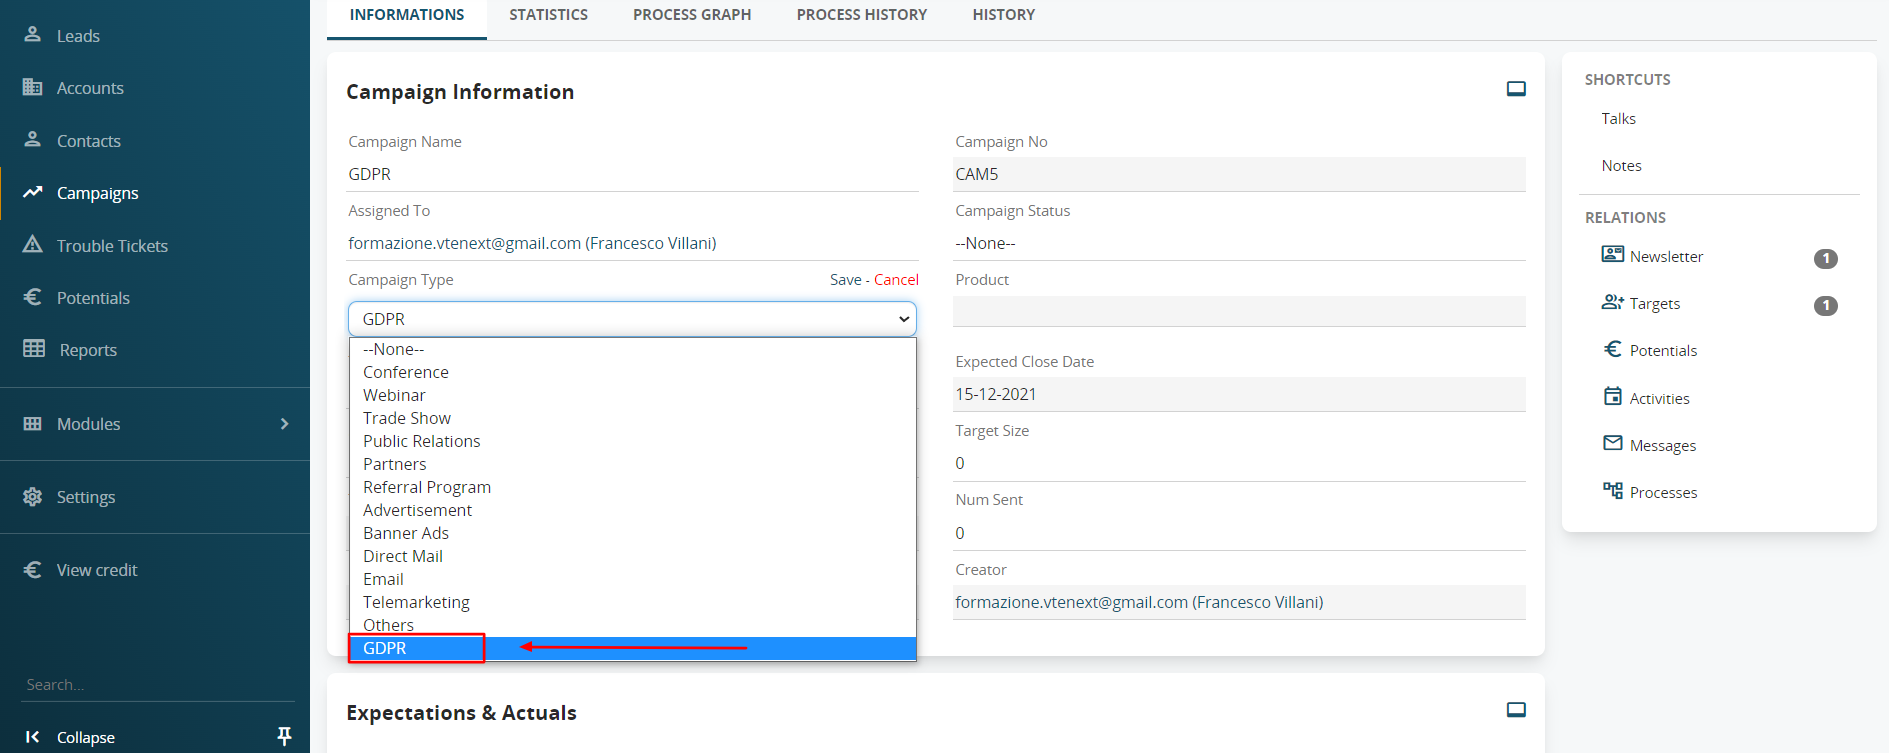](https://usermanual.vtenext.com/uploads/images/gallery/2022-01/how-to-create-contact-campaigns-8.png)
**9)** This will therefore become the new Campaign you have just created
[](https://usermanual.vtenext.com/uploads/images/gallery/2022-01/how-to-create-contact-campaigns-9.png)
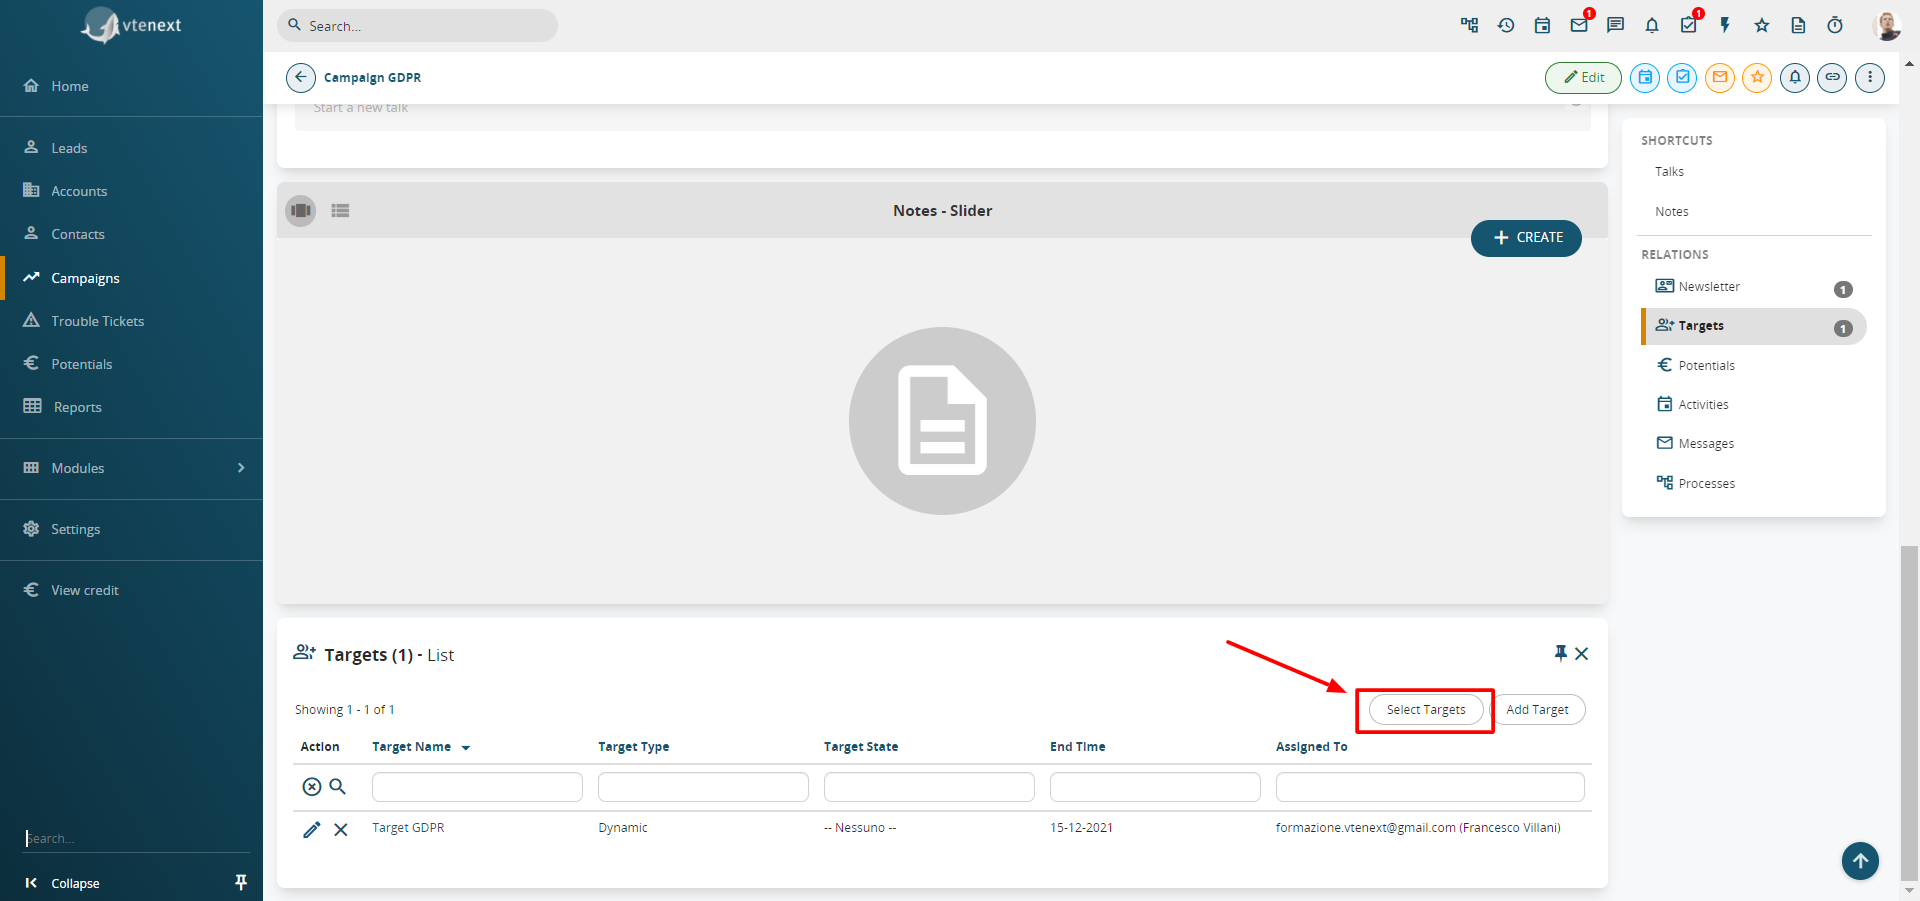
**10)** Now, you must create a new Target to link contacts to the campaign. This can be done from the Target module or directly by clicking on the TARGET relation shown in the details of the CAMPAIGN you have just created and clicking on ADD TARGET
[](https://usermanual.vtenext.com/uploads/images/gallery/2022-01/how-to-create-contact-campaigns-10.png)
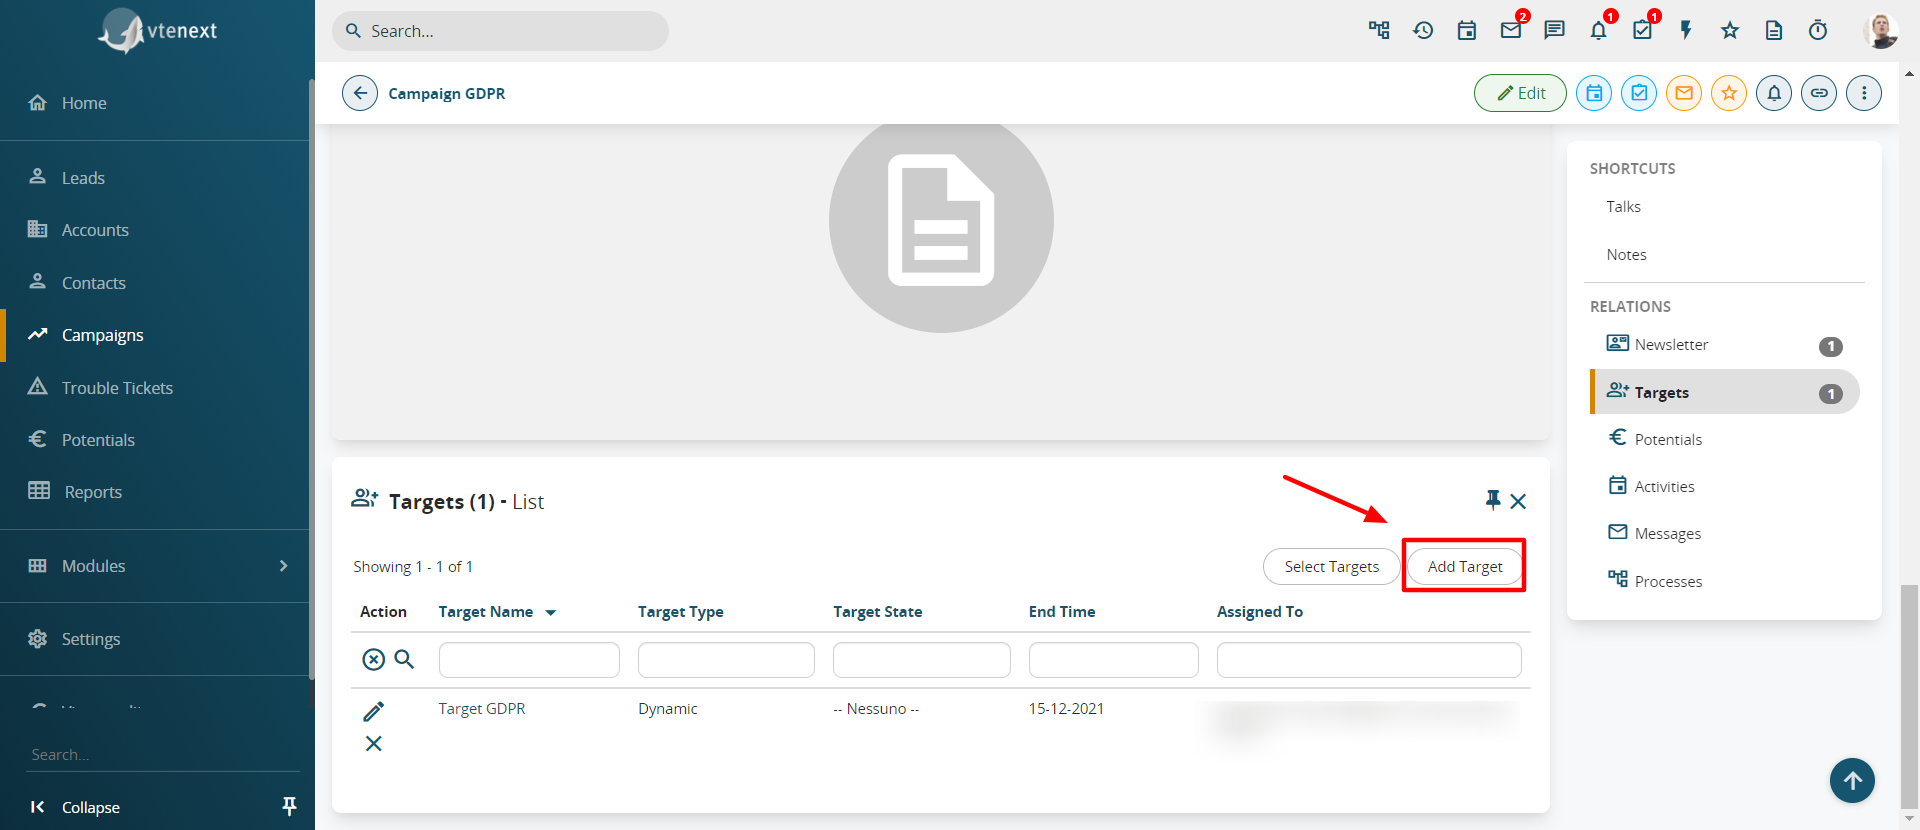
**11)** The required fields must be defined and then the information must be saved
[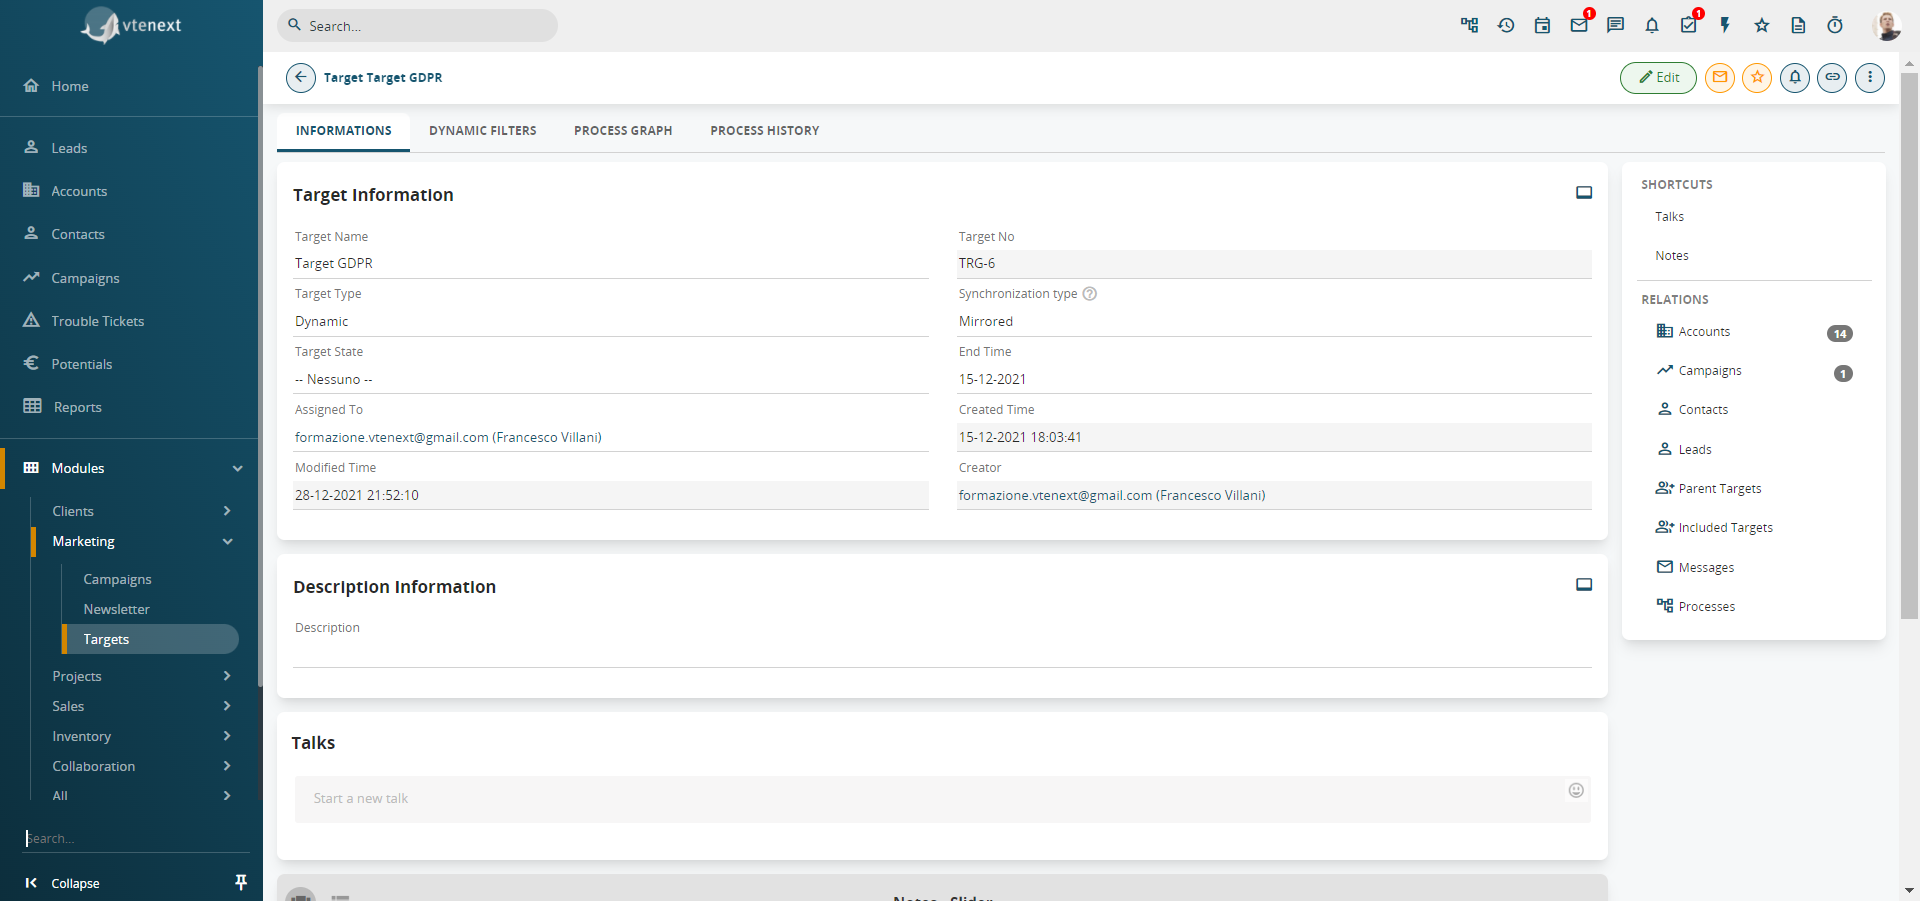](https://usermanual.vtenext.com/uploads/images/gallery/2022-01/how-to-create-contact-campaigns-11.png)
**12)** Once saved, click on Contacts from the Related List alongside to select the contacts. Select a filter and click on "LOAD LIST"
[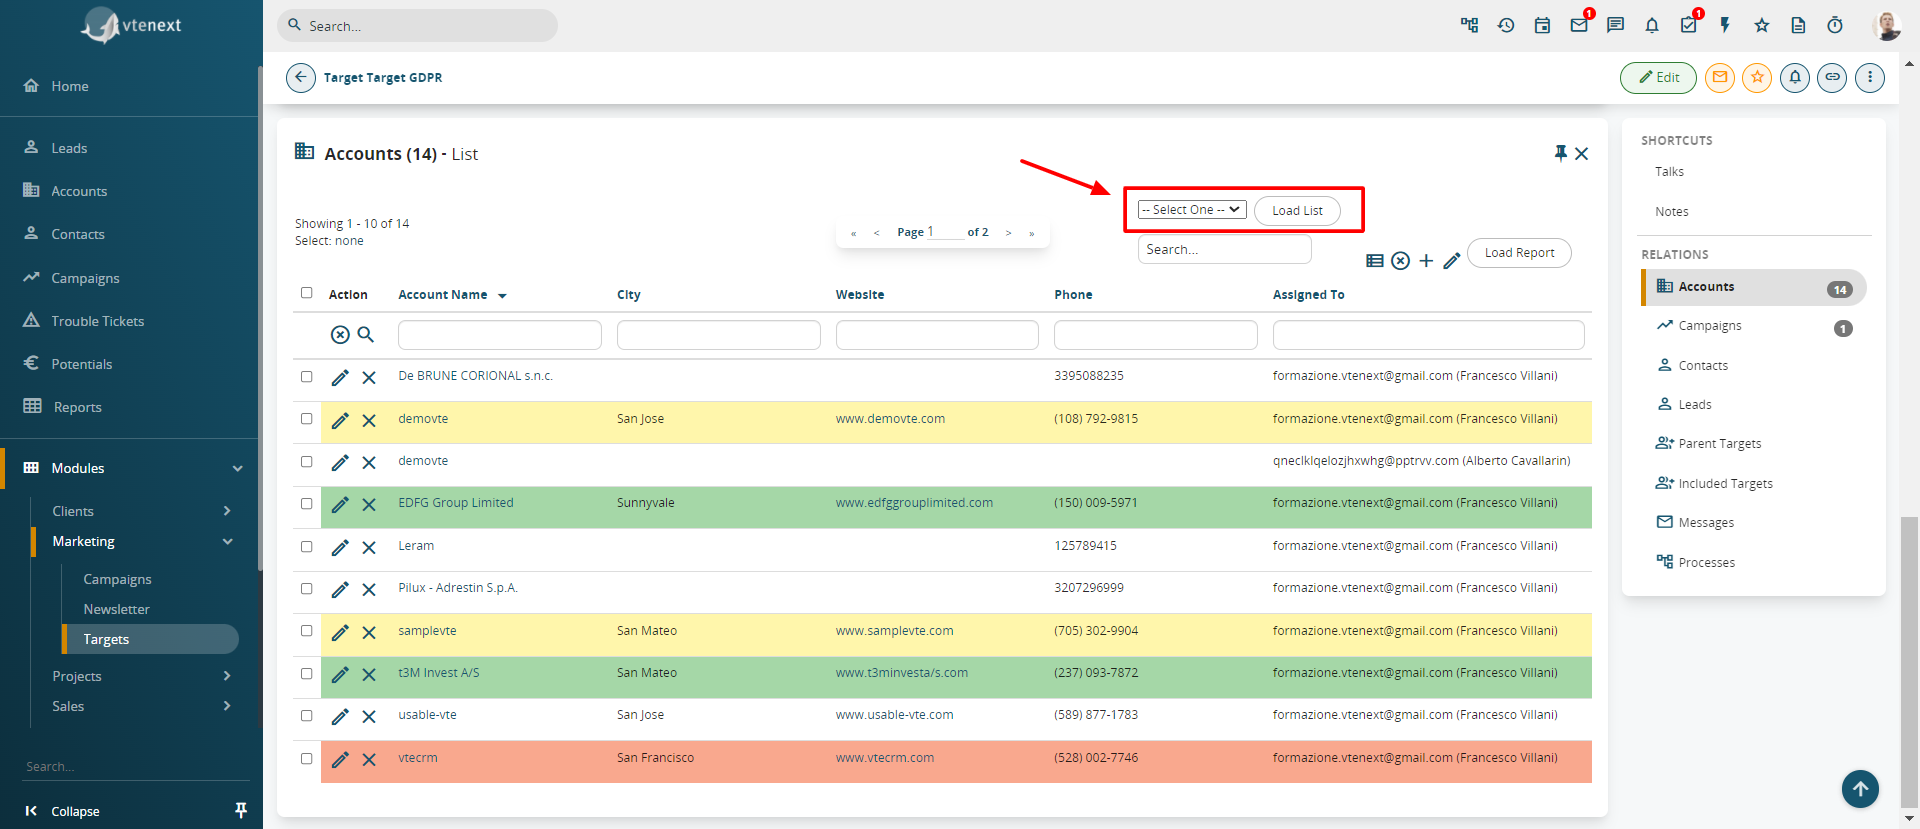](https://usermanual.vtenext.com/uploads/images/gallery/2022-01/how-to-create-contact-campaigns-12.png)
**13)** If you decided to create the Target directly from its module at point 10), you must remember to link it to the previously created campaign. To do this, simply enter the Campaign
[](https://usermanual.vtenext.com/uploads/images/gallery/2022-01/how-to-create-contact-campaigns-13.png)
**14)** A popup will now open showing a list of the Targets present in the system. Select the Target you have just created, in this case GDPR Target, then click on ‘ADD SELECTED’
[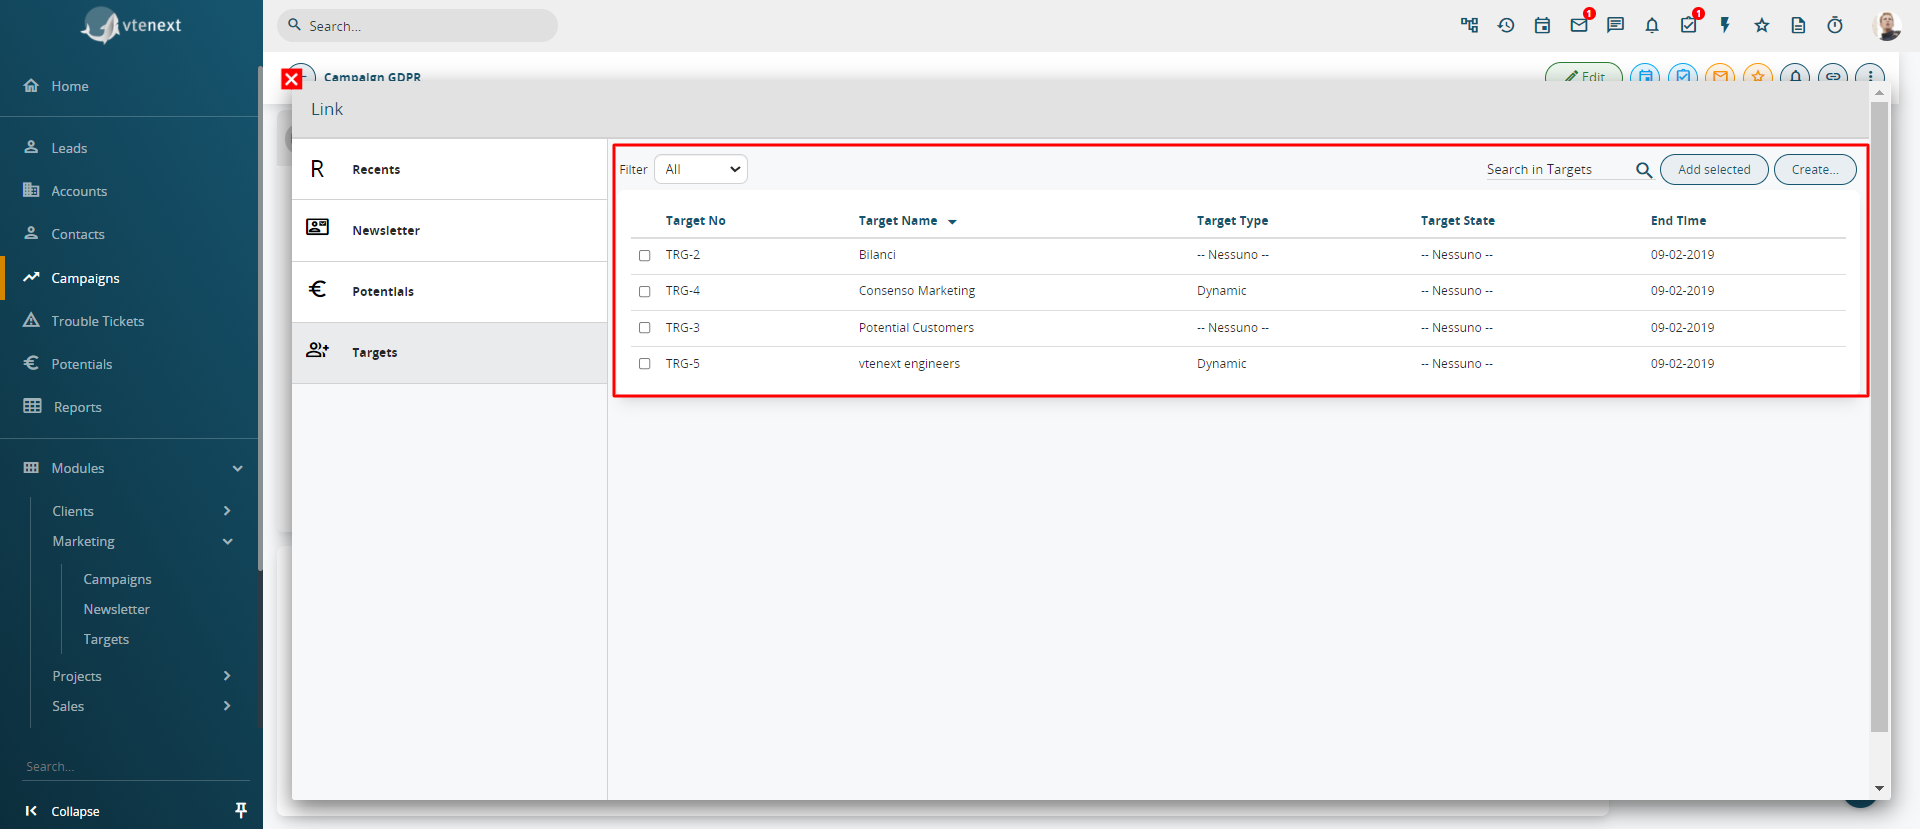](https://usermanual.vtenext.com/uploads/images/gallery/2022-01/how-to-create-contact-campaigns-14.png)
**15)** At this point the Campaign is related to a target, which is in turn related to Contacts. You can now create a Newsletter to send the communication. From the campaign Related List click on Newsletter and then on ADD NEWSLETTER
[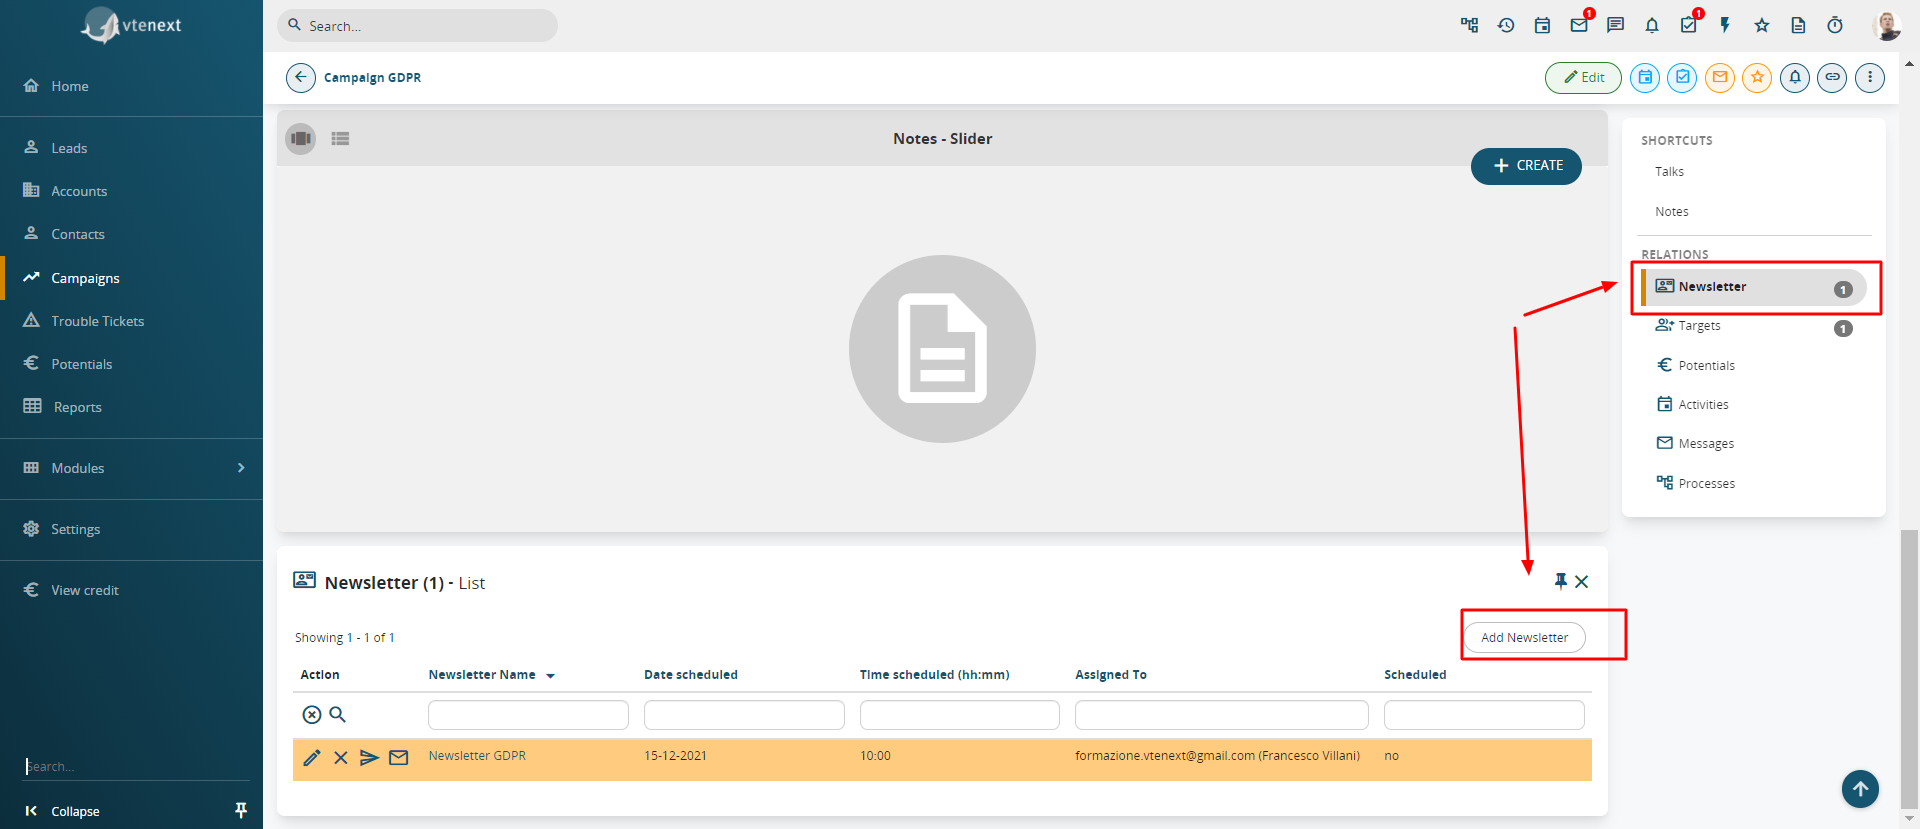](https://usermanual.vtenext.com/uploads/images/gallery/2022-01/how-to-create-contact-campaigns-15.png)
**16)** Proceed by filling in the necessary fields, specifying name, language, sender’s name and email address with which the newsletter will be sent. Once saved, go to the Newsletter Details to select an Email Template as described in the next screen
[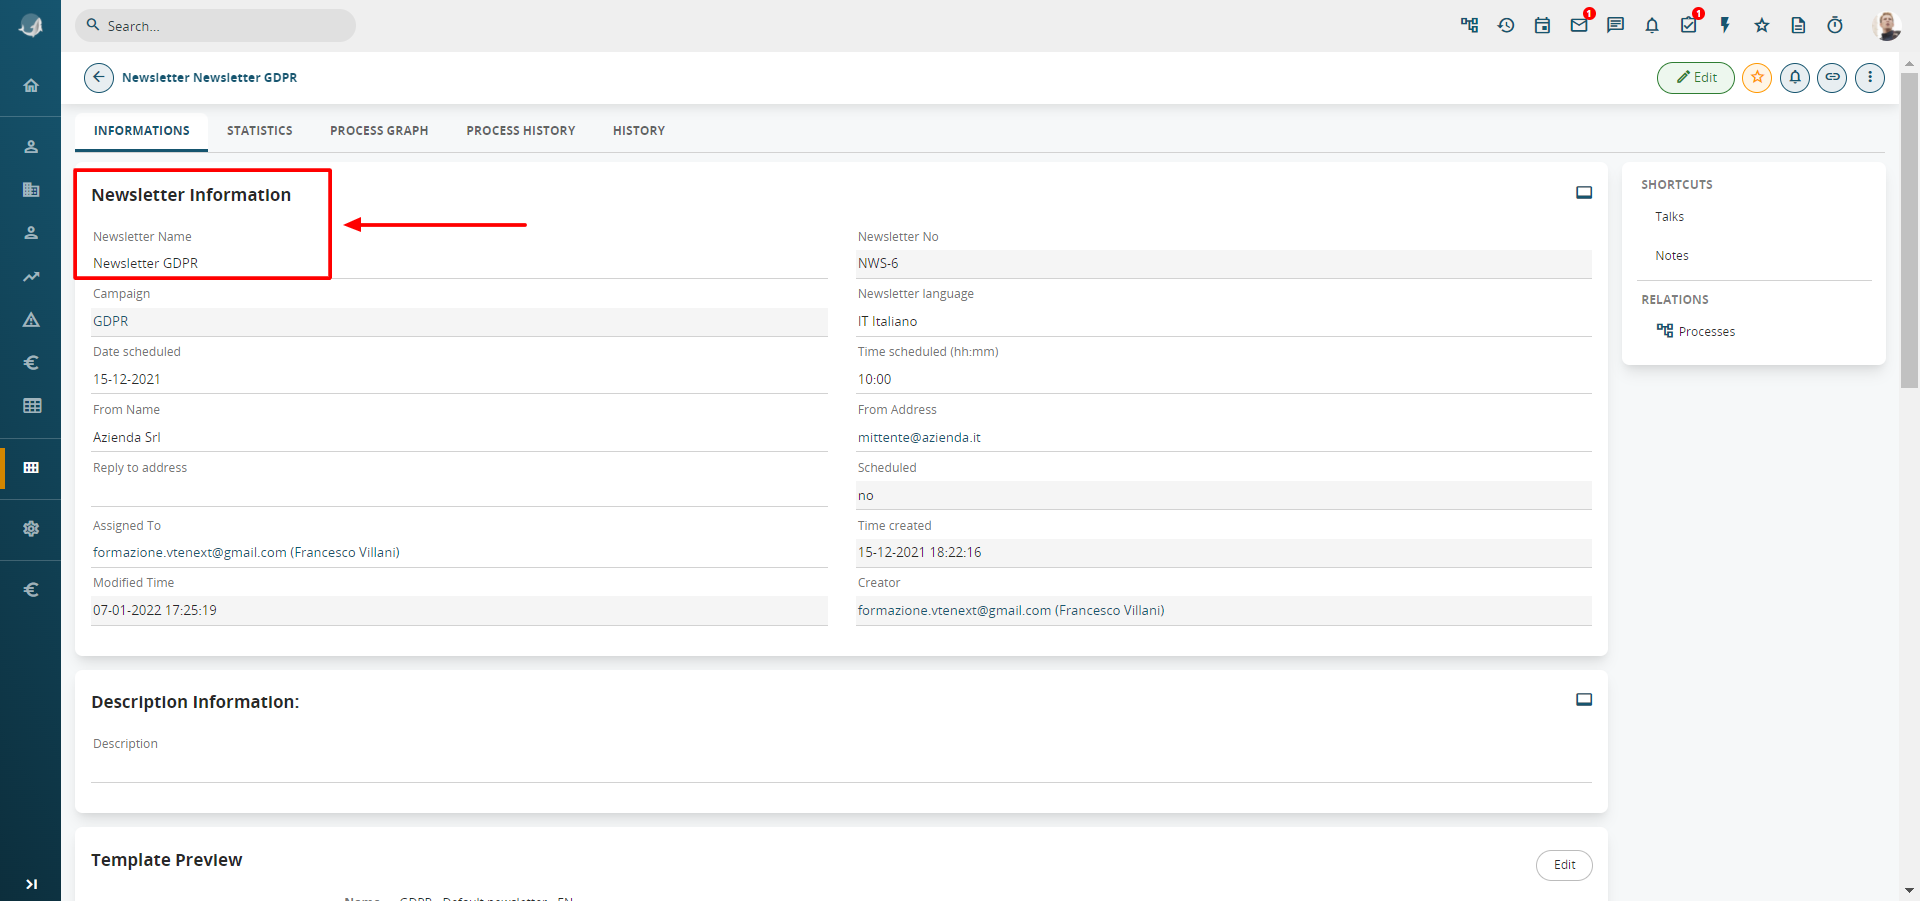](https://usermanual.vtenext.com/uploads/images/gallery/2022-01/how-to-create-contact-campaigns-16.png)
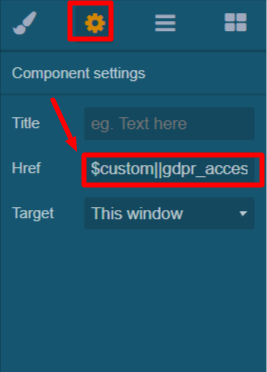
**17)** From ‘Other’ icon, click on the symbol to select a Template Email.
[](https://usermanual.vtenext.com/uploads/images/gallery/2022-01/how-to-create-contact-campaigns-17.png)
**Make sure the variable is present in the template**
[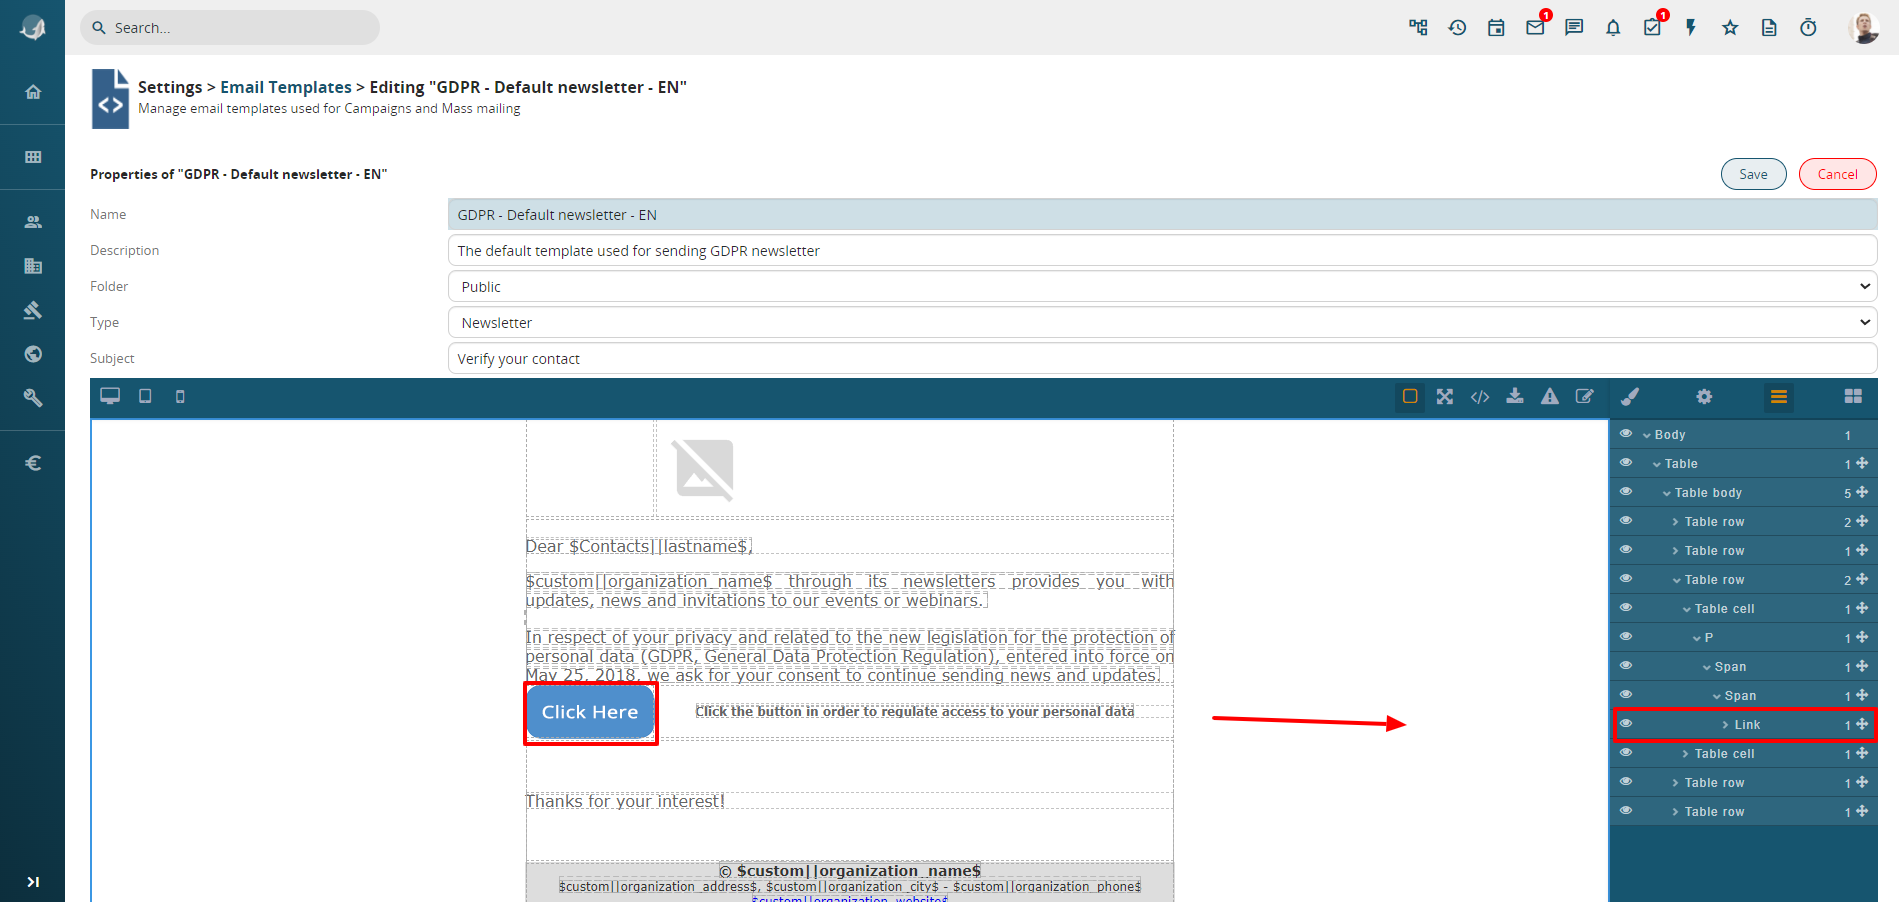](https://usermanual.vtenext.com/uploads/images/gallery/2022-01/how-to-create-contact-campaigns-21.png)
The variable is inserted in a link that can be associated with the following elements:
- **Button**
- **Image**
- **Text**
When the user choose the selected element, in the GDPR template above has been selected the button, paste the variable through the setting option within the Href field.
[](https://usermanual.vtenext.com/uploads/images/gallery/2022-01/how-to-create-contact-campaigns-22.png)
**18)** Select the Template you have just created or the default template entitled "GDPR – Default newsletter
– IT", which contains the link required for the various procedures
[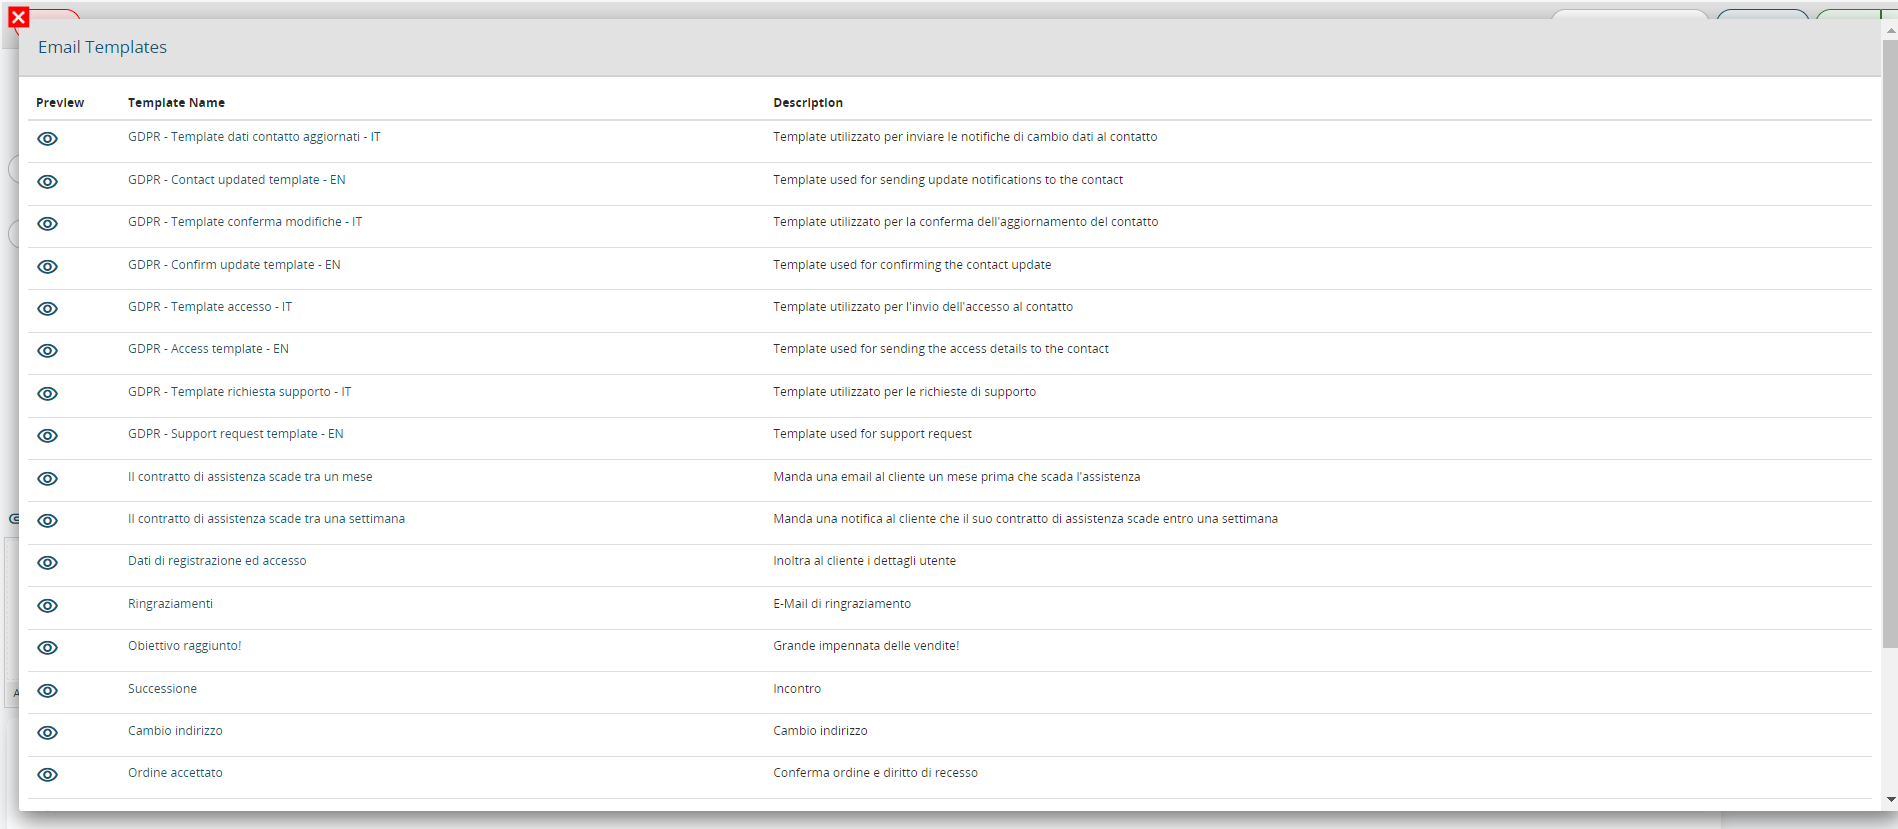](https://usermanual.vtenext.com/uploads/images/gallery/2022-01/how-to-create-contact-campaigns-18.png)
**19)** At this point you can click on Send Email to plan the Newsletter to be sent at a scheduled time. Once it has been clicked, the ‘Scheduled’ field will be changed as shown below
[](https://usermanual.vtenext.com/uploads/images/gallery/2022-01/how-to-create-contact-campaigns-19.png)
**20)** Once the email has been sent to the contact, several fields of the contact record will be updated, namely the newsletter sending date ‘GDPR sending date’
[](https://usermanual.vtenext.com/uploads/images/gallery/2022-01/how-to-create-contact-campaigns-20.png)
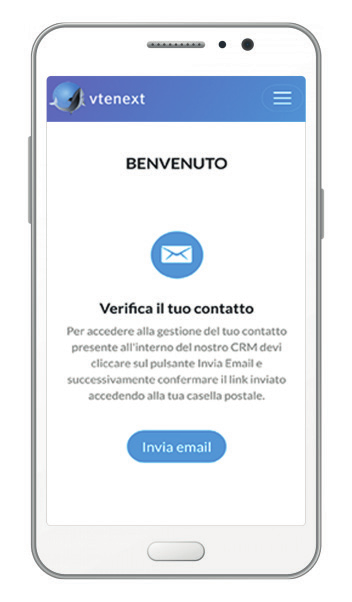
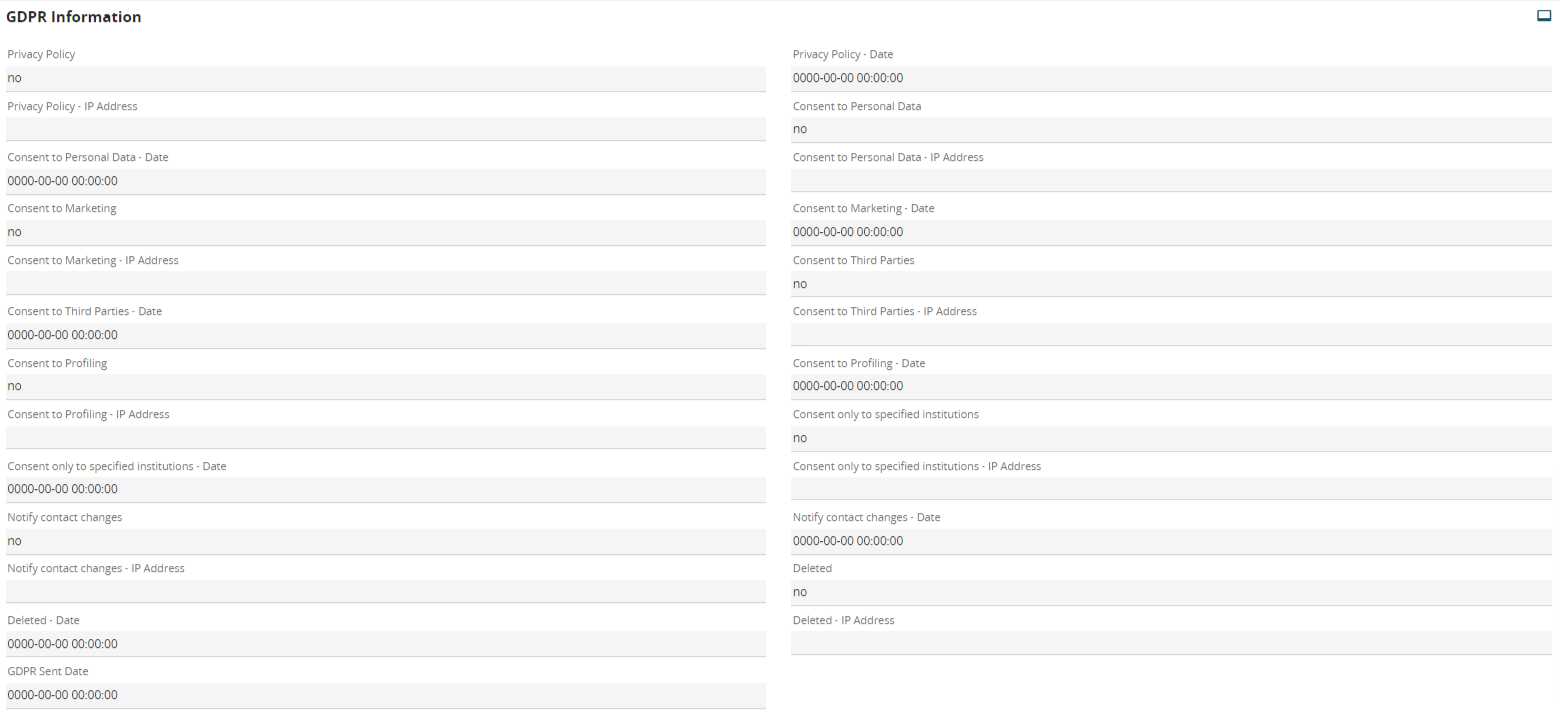
**21)** The contact will receive an email with a verification link. When the link is clicked, an App confirmation page will open. The recipient can tick his/her data security preferences only after completing the access. The associated values will be updated in the contact record
# 7.2 The App in detail
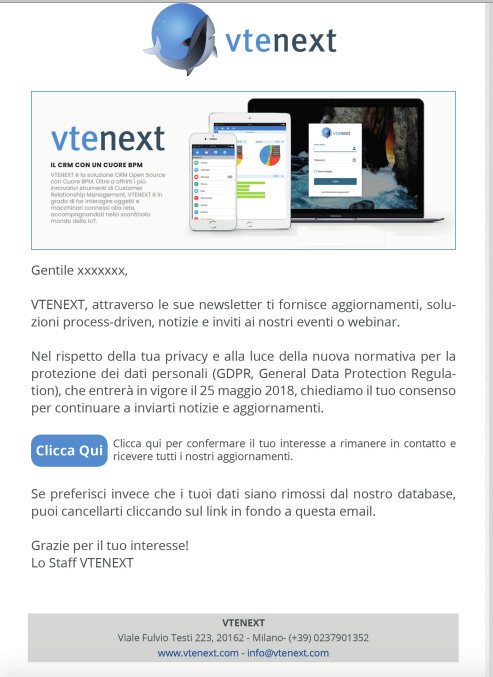
**Process start email**
A pre-compiled email template introduces the requirement to confirm your choices concerning personal data processing.
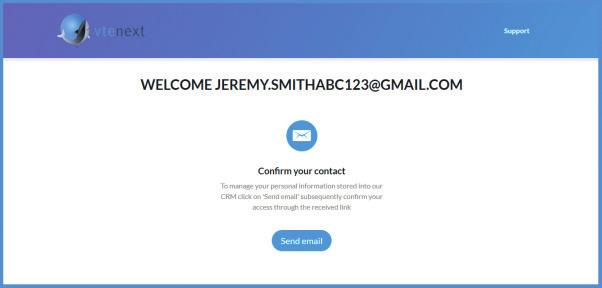
**1 Welcome landing page**
A simple online form is provided for verification of the effective possession of the mailbox in question.

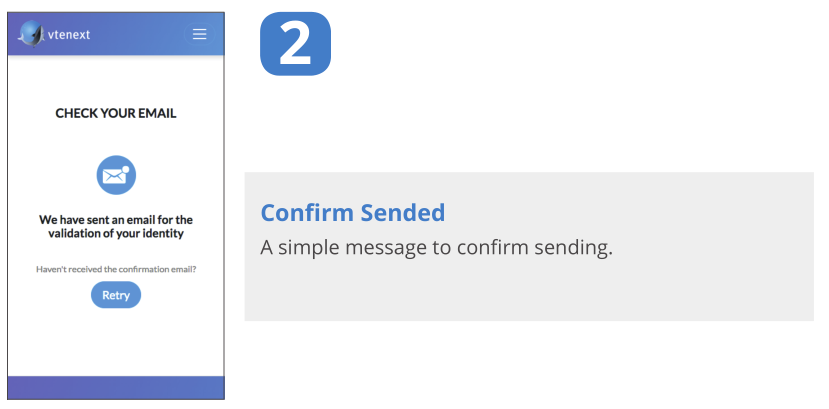
**2 Sent Confirmation**
Message mail has been sent.
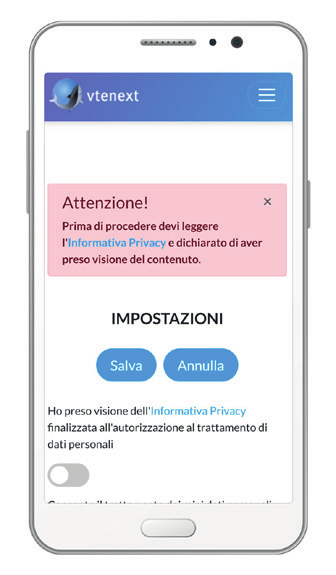
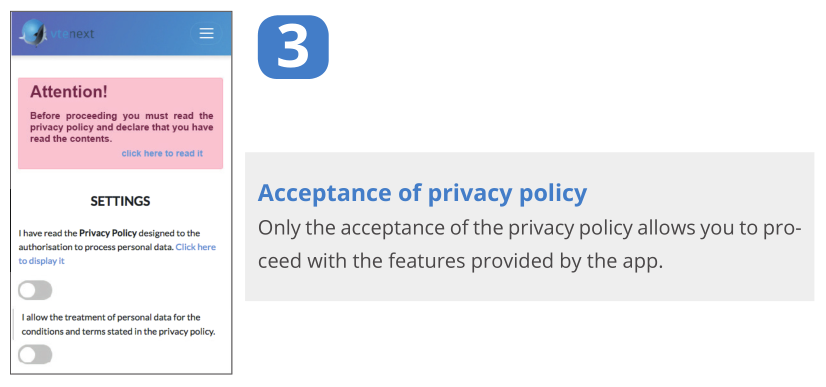
**3 Accept privacy policy**
The functions provided by the app become available only once the privacy policy has been accepted.
**4 Separate “Granular” Consent**
Profiling or data processing options can be confirmed individually.

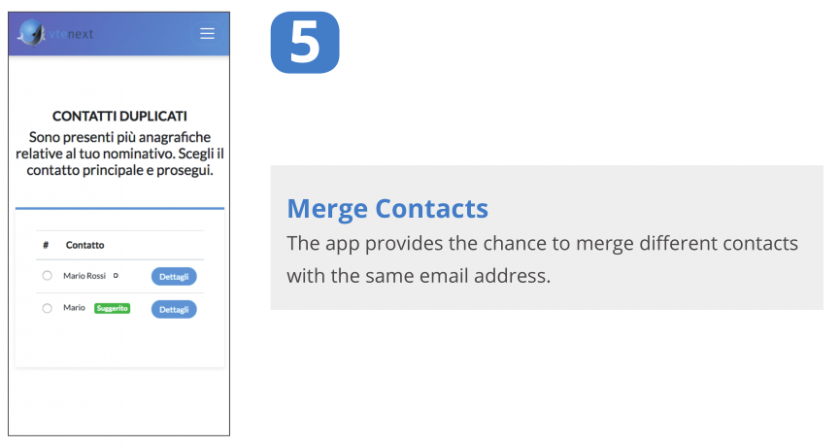
**5 Merge contacts**
The app offers the facility to merge different contacts associated with the same email address.
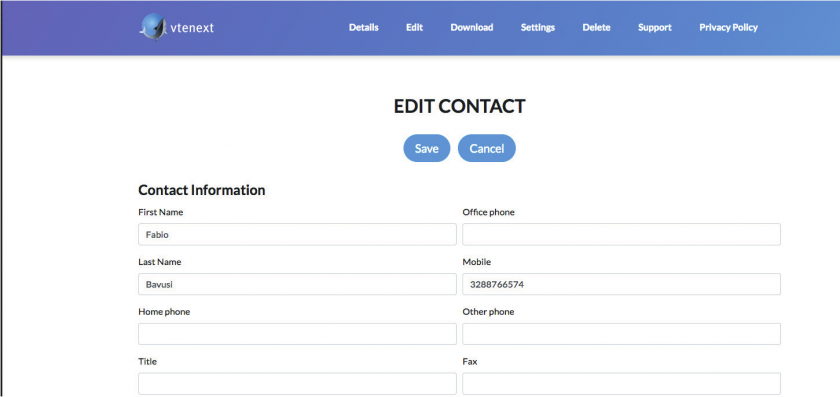
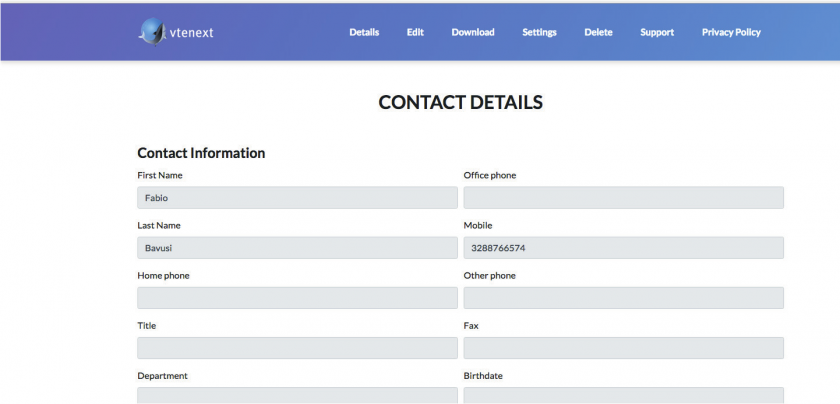
**6 Update your data**
The customer can consult or update his/her personal data completely independently.

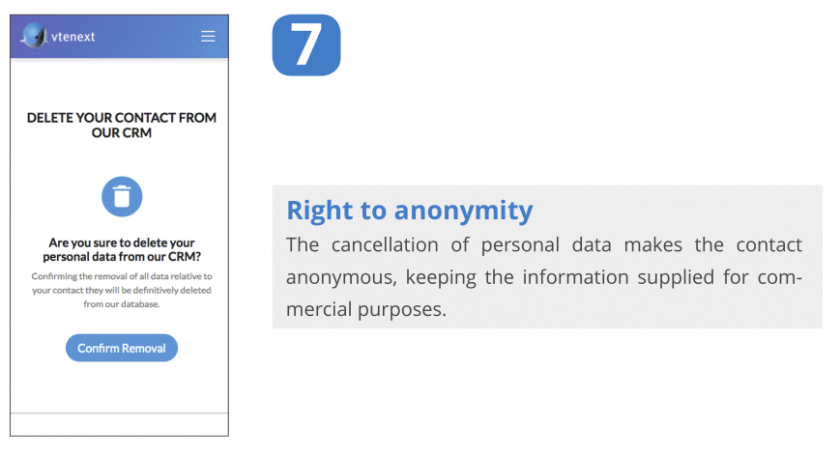
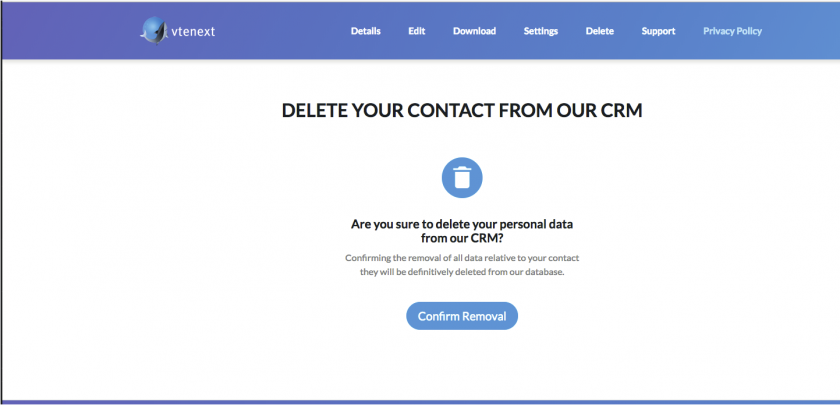
**7 Right to anonymity**
Deleting personal data makes the contact anonymous, keeping the information supplied for commercial purposes.
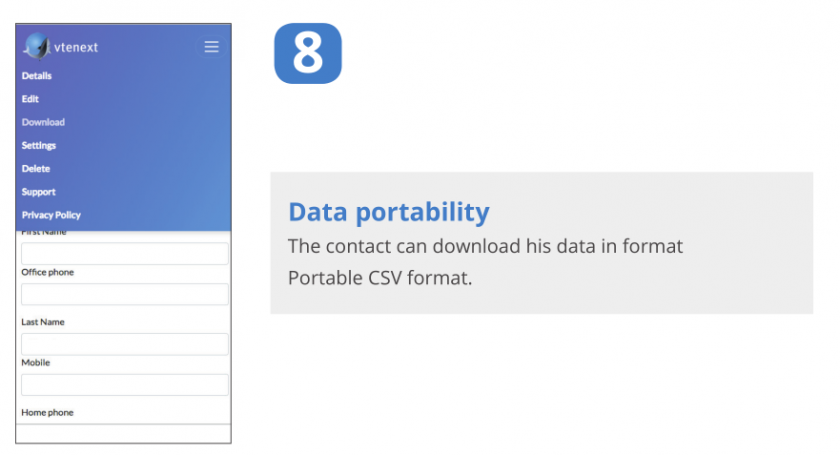
**8 Data portability**
The contact can download his/her data in portable CSV format.
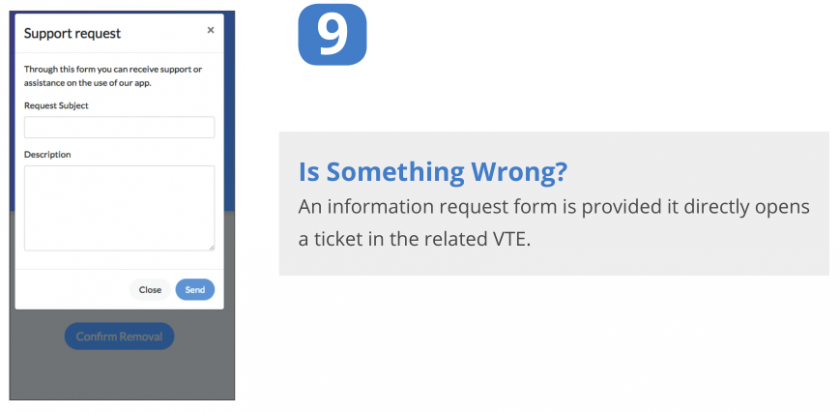
**9 Something wrong?**
An information request form is provided to open a ticket directly in the associated VTE.
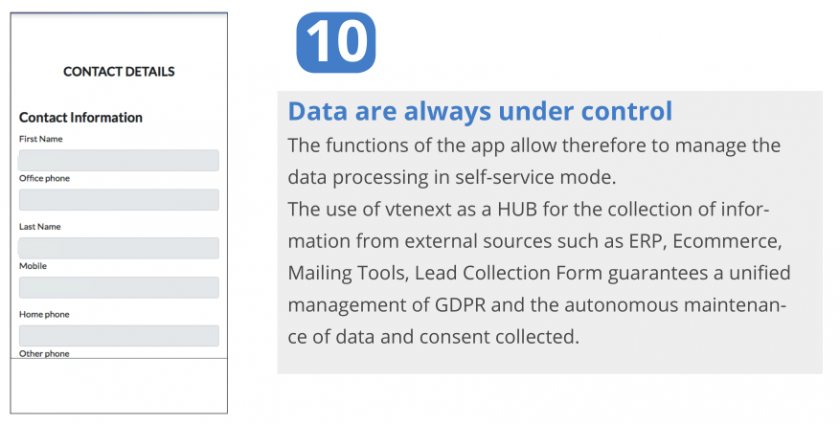
**10 Data always under control**
The app functions therefore make it possible to manage data processing in self-service mode. Using vtenext as a HUB to collect information from external sources such as ERP, Ecommerce, Mailing Tools, Lead Collection Forms, guarantees unified management of the GDPR and independent maintenance of collected data and consent forms.
##### The app can also be used in the desktop version
**vtenext GDPR KIT**
To guarantee correct management of the operations and processes connected to the GDPR directive, vtenext
has developed the **GDPR KIT**: a complete solution that includes an additional module for vtenext, structured in the two sections **“Processing Register”** and **“Assumption Kit”**.
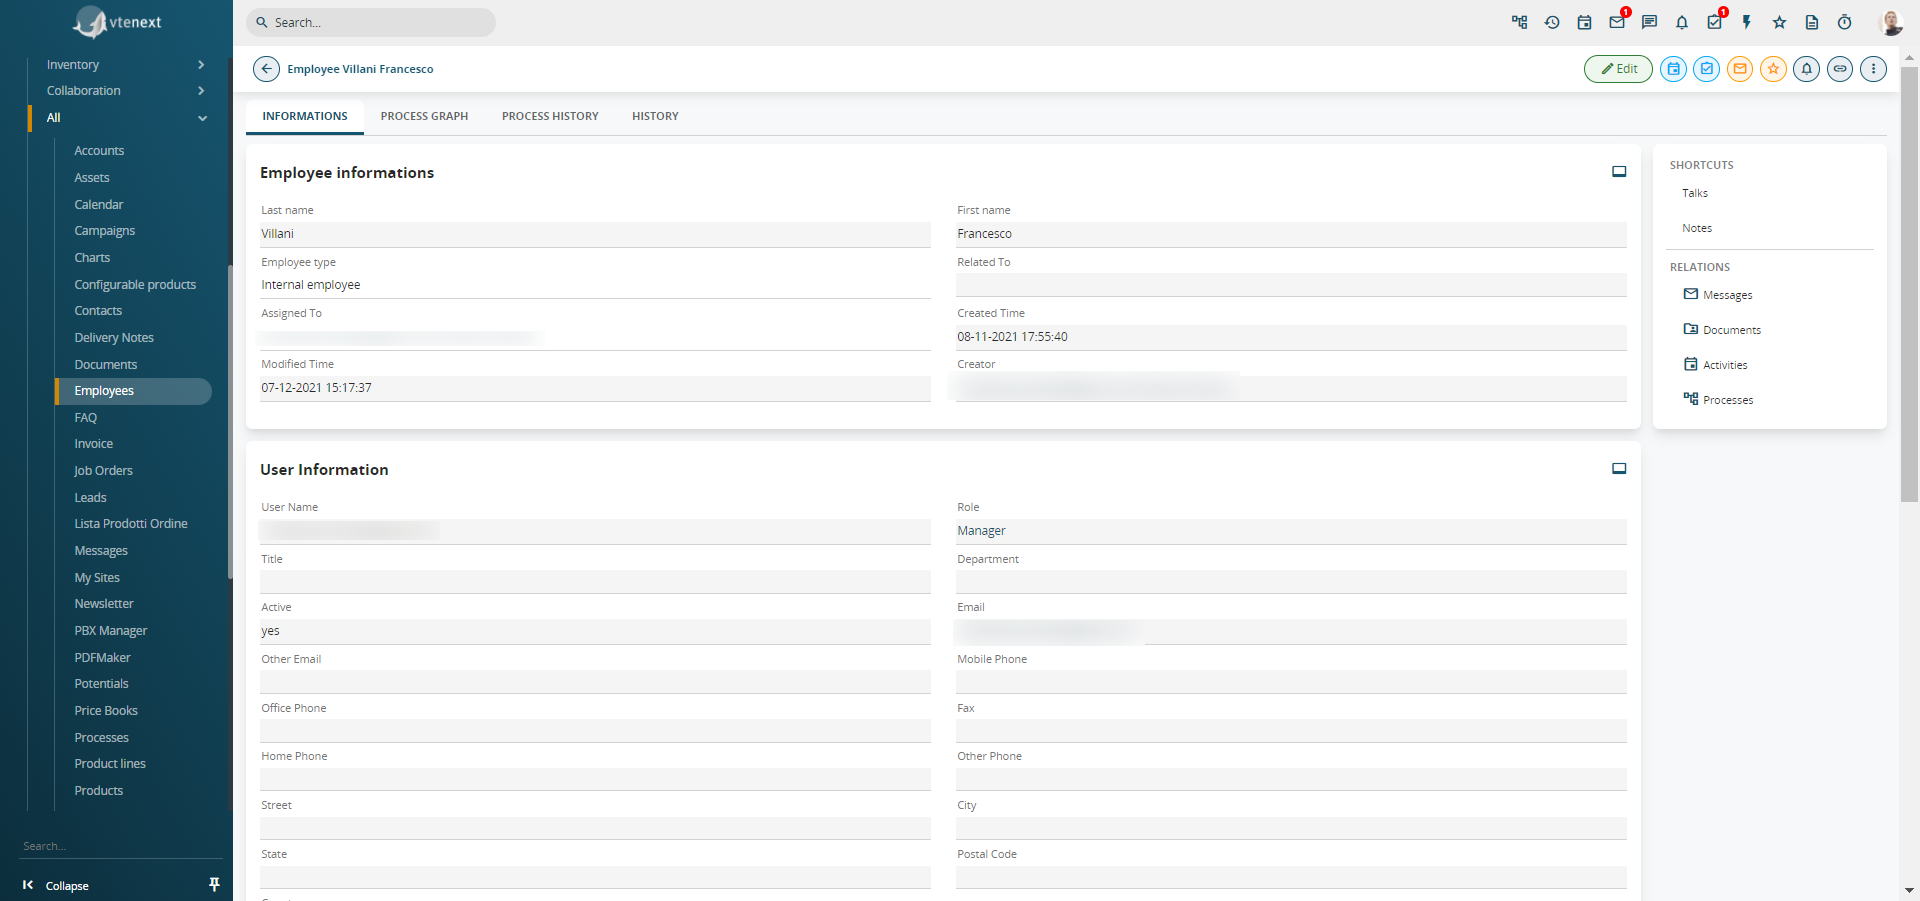
# 7.2.3 Employee Module
The employee module allows you to register your internal and external employees and co-workers in vtenext. Whenever a new user is created, a new employee record is generated automatically.
The module can be managed like all the others, modifying the “employment type” picklist items or adding new fields freely.
The Name and Surname default fields and all those present in “User Information” cannot be changed using this module but only from “User Preferences”. Whenever changes are made from user preferences they are replicated in the Employees module.
The employee record can be connected to one of the four record types in vtenext, namely Lead, Account, Contact or Vendor.
[](https://usermanual.vtenext.com/uploads/images/gallery/2022-01/employee-module.png)
A practical example for the use of this module could be the entry of a personal evaluation for each employee in a field that can be seen only by the Human Resources department (dedicated profile).