2 First steps: how to browse vtenext
- 2 First steps: how to browse vtenext
- 2.1 System login
- 2.1.1 User session duration
- 2.2 Home
- 2.3 Navigation methods: menus
- 2.3.1 Global Search
- 2.3.2 Fixed Icons
- 2.3.3 Contextual Icons
- 2.4 Search in module
- 2.5 Modules structure
- 2.5.1 Record structure (detail view)
- 2.5.2 Quick look relations
- 2.6 Filters
- 2.6.1 How to create a Filter
- 2.7 Users preferences
- 2.7.1 Request Remote Support
- 2.7.2 Two-factor Authentication (2FA)
- 2.8 Access privileges
2 First steps: how to browse vtenext
This section consists in a brief introduction to vtenext for those who are accessing the system for the first time. The goal is to provide to the user with the basic knowledge to become familiar with this tool, which is designed to be intuitive and easy to use.
The following basic horizontal tools will be illustrated:
Login: how to access vtenext;
Home Page: personal splash screen;
Navigation: menus and icons;
Search functions: simple and advanced search, in each module and global;
Modules and records: what they are and how they are structured;
User preferences: personal information, notifications and more.

2.1 System login
To login to vtenext enter your user credentials in the system login page and click on the Login button:
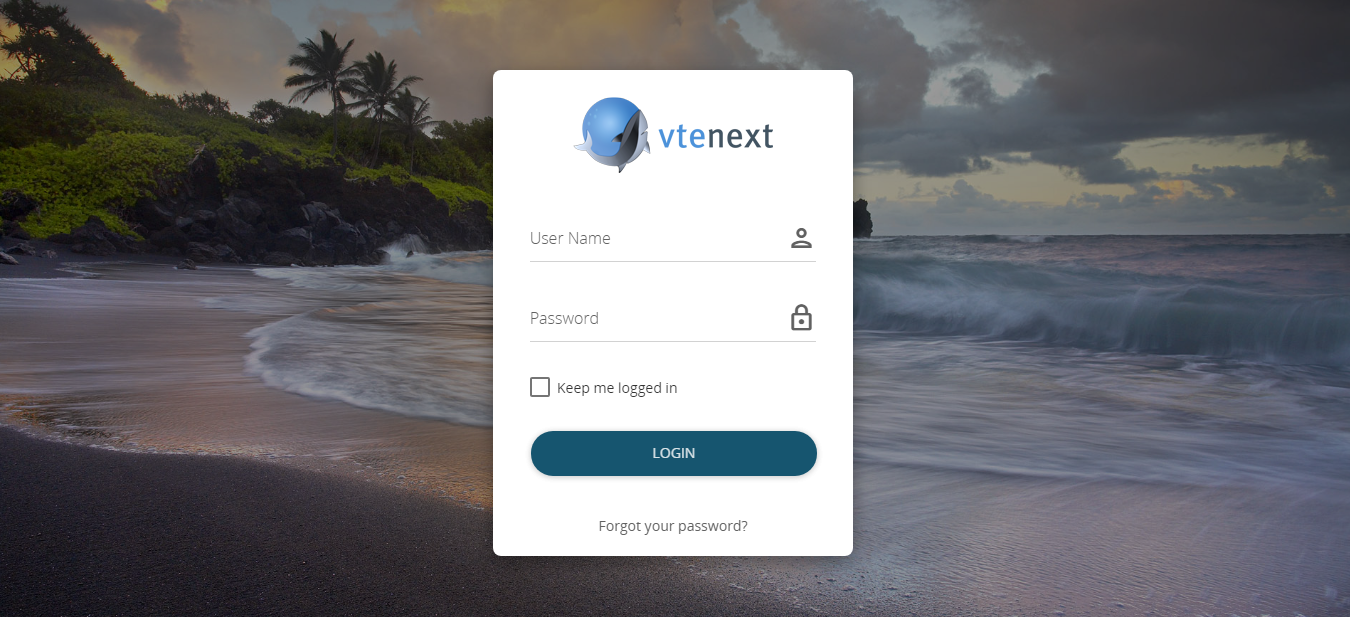
Most browsers can save your “User name” and “Password” credentials to speed up the login process. For data security reasons we recommend not allowing the browser to save your user credentials, especially if you are using a shared computer or a notebook at risk of loss or theft.
The chosen password must comply with the following rules in accordance with the data protection act
- At least eight characters;
- Must not contain the username or name and surname of the user;
- Must be changed every three months;
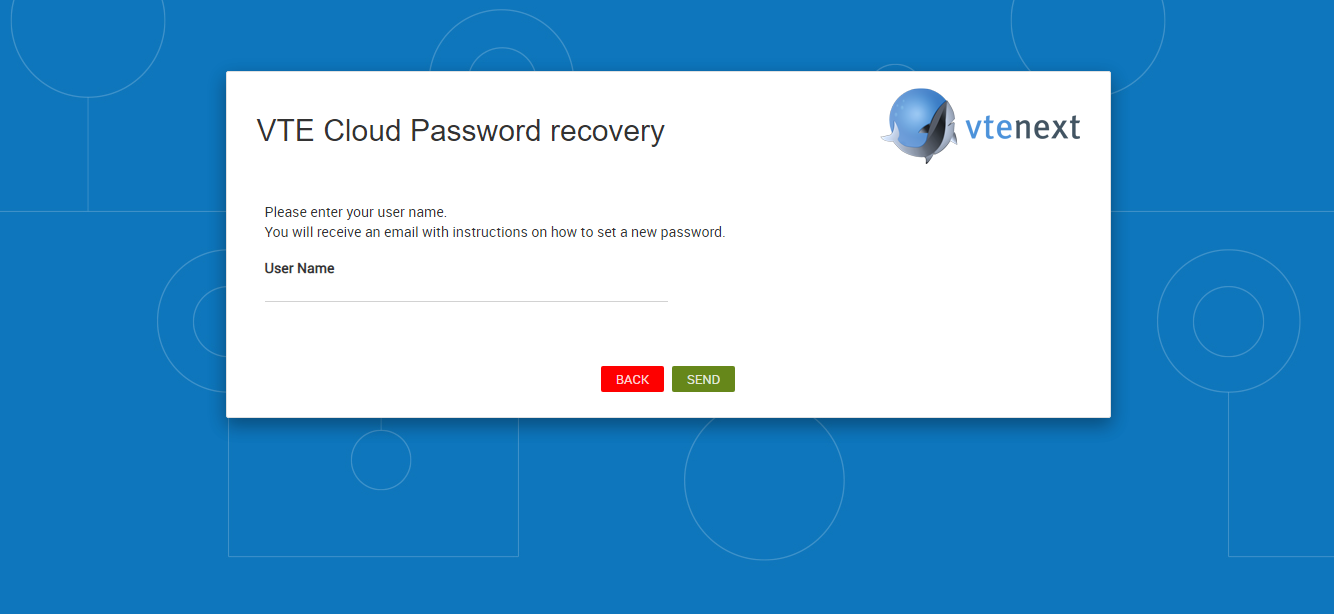
Users can reset their password independently using the “Forgot your password?” link. The password must be reset within 24 hours, otherwise the request must be repeated by clicking on the link again.
N.B.: the password reset procedure sends access credentials to the email address with which the user is registered in vtenext. Note that the password reset email may end up in your spam folder. Admin users can update the user password at any time from the settings menu without having to perform the procedure described above.
Warning! After 5 consecutive unsuccessful login attempts (incorrect username or password) a system security function will block the IP address from which the user is attempting to gain access, thus preventing any further attempts. The vtenext user concerned will also receive a notification email.
If the user ignores the email and continues with login attempts, (via web, web service or from ActiveSync for mobile), after 100 unsuccessful login attempts the source IP address will be blacklisted.
The Admin user can go to Settings > Users login control and reset correct operation by clicking on the “Return to Whitelist” link.
2.1.1 User session duration
The duration of the user session in vtenext depends mainly on the php session, that is on a parameter that is configured in the server where the crm is installed.
In the login page there is a flag field called "stay connected" and once active, the session time is managed on the application side.
The session duration with this function active is one month while in standard, i.e. not flagging the aforementioned field, the duration depends on the operating system installed on the server hosting the crm. For example, Ubuntu (installed in the cloud / onsite which we recommend) the session lasts about 30 minutes.
Finally, it is good to consider that the rules of simultaneous connections per user are always valid: with the same user it is possible to log in at most, in 2 browsers at the same time. If you try to enter the crm with a third browser, one of the other two will automatically be disconnected.
2.2 Home
When the user logs in to the CRM the user-specific home page can be displayed (this setting is editable by individual users in User Preferences).

The Home page is composed of a set of elements (dashboards) that retrieve information from vtenext. The dashboards can be composed of:
- filters from modules
- RSS to receive feeds from your favourite channel
- the graphics from reports
- windows that allow you to view websites
The configuration is at the discretion of the user, who can enable default elements or create new ones. Each user must create his/her own dashboards, which cannot be made public. To enable or disable a preset dashboard click on the  icon to access “my preferences”.
ATTENTION: home graphics have a 24h cache memory so they DON'T refresh everytime the hompage is refreshed.
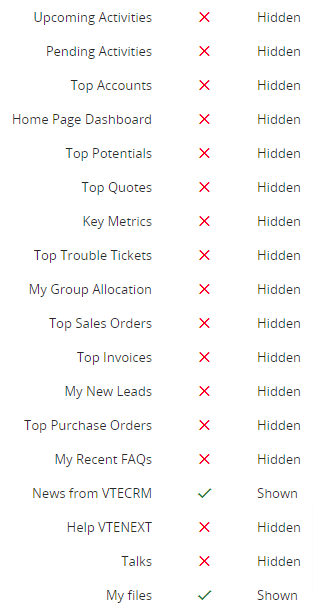
The following is a list of the available blocks (which can be activated from "User preferences"):
|
News and Manual |
The latest vtenext updates box and a link to the Online Manual |
N.B.: My files has been eliminated from the Homepage, all present files were moved in the folder "My private files" inside the module Documents.
To create a new customised element click on  and choose the type of element to add.

For example, if you wish to add a new Module, you will be presented with a screen similar to the following:

You must enter a title for this new window (e.g. All companies), indicate the number of elements to display (e.g. 10), which filter to use for displaying that dashboard (e.g. All filter) and finally, establish which fields are to be displayed, with a maximum of 2 (e.g. Company Name and Phone number).
The result of this configuration can be seen in the following screen:

The order of the boxes can be changed by dragging them to the required position with the mouse.
2.3 Navigation methods: menus
The navigation within vtenext is guided from two menus positioned on the left and right of the screen. It is composed of two different toolbars illustrated below:
 |
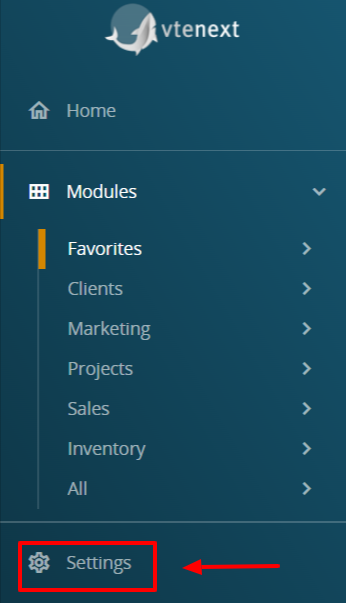
The dark blue navigation bar provides access to all vtenext active modules. Depending on the theme chosen in “my preferences”, the layout of menus and colours may differ, with the related functions. In the case of admin, on the bottom of the left bar , will be available a cogwheel to enter into the system settings.
|
|
Within the bar on the top of screen horizontally there are a series of fixed icons dedicated to commonly used functions, that are notifications of the main modules, like, Messages, Talks, Processes etc. |
|

2.3.1 Global Search
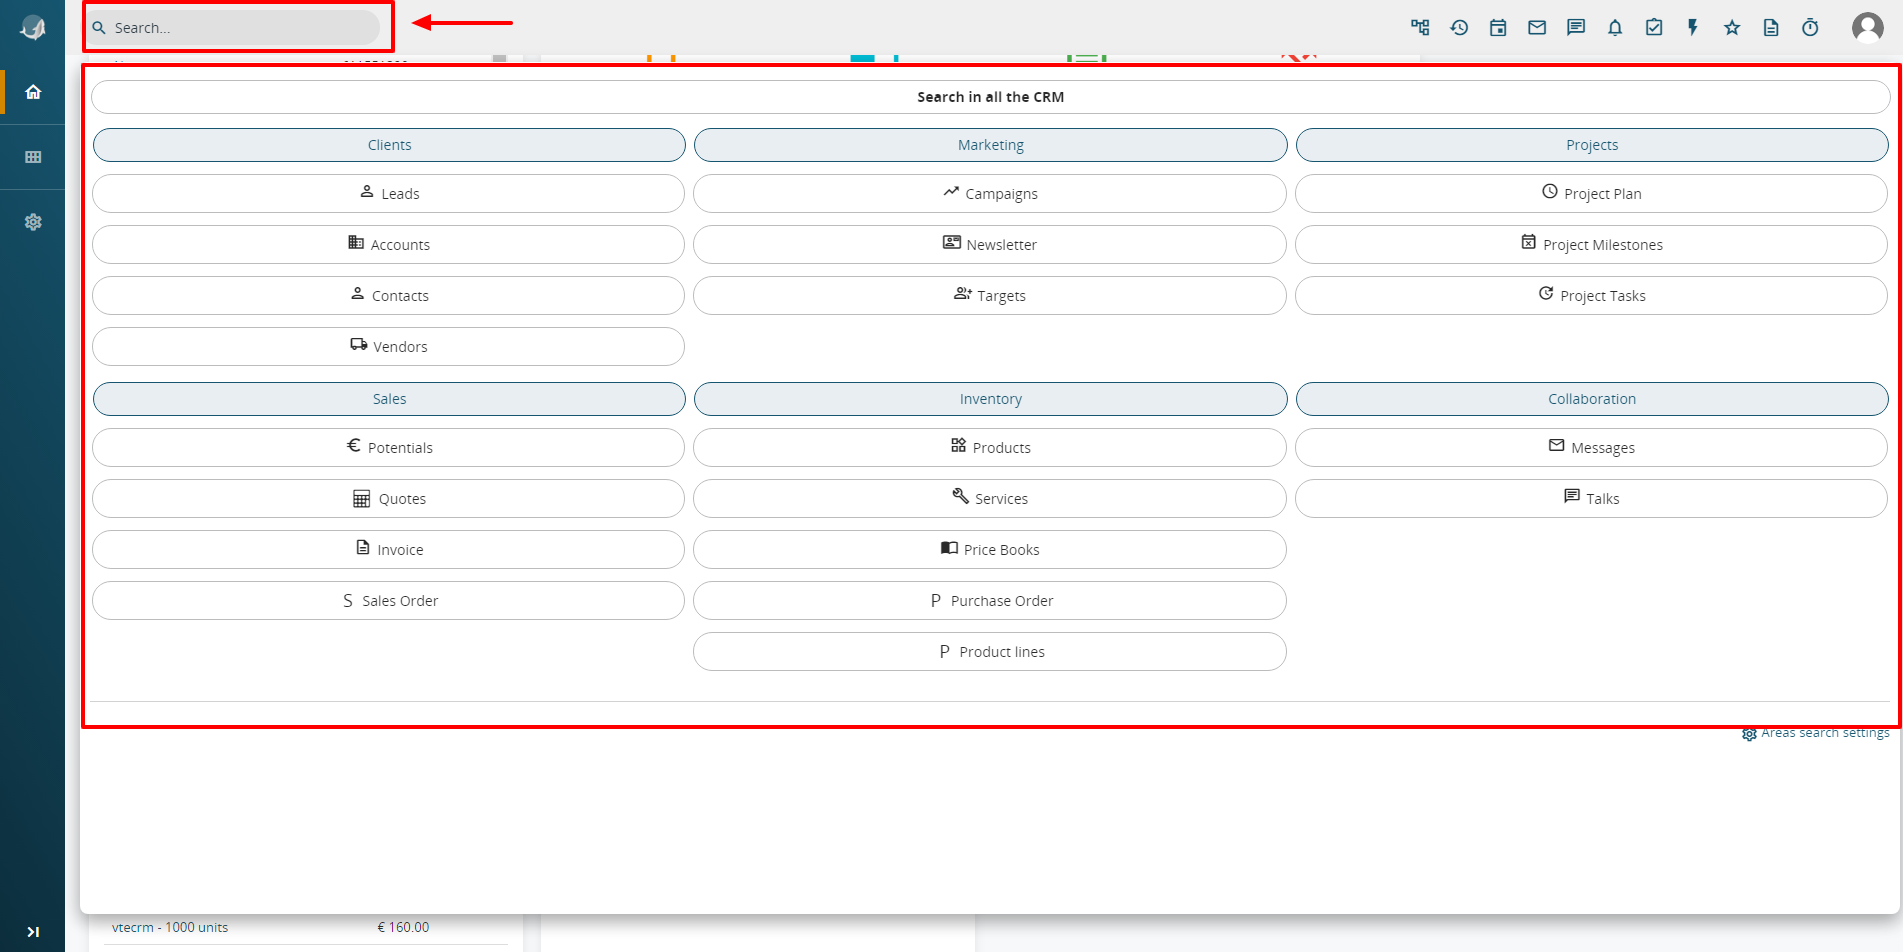
The global search function, located in the first place on the right-hand toolbar, allows interrogation related to words within the system. The search can be carried out either in the module in which you are currently working, in all modules, or in only part of the modules (by macro-areas).
After typing the text to search press the button of the function to be interrogated. A mask with various search options is displayed. The concept of macro-area includes all the modules related to the main business processes. Obviously, some modules have (or can have) a horizontal function.
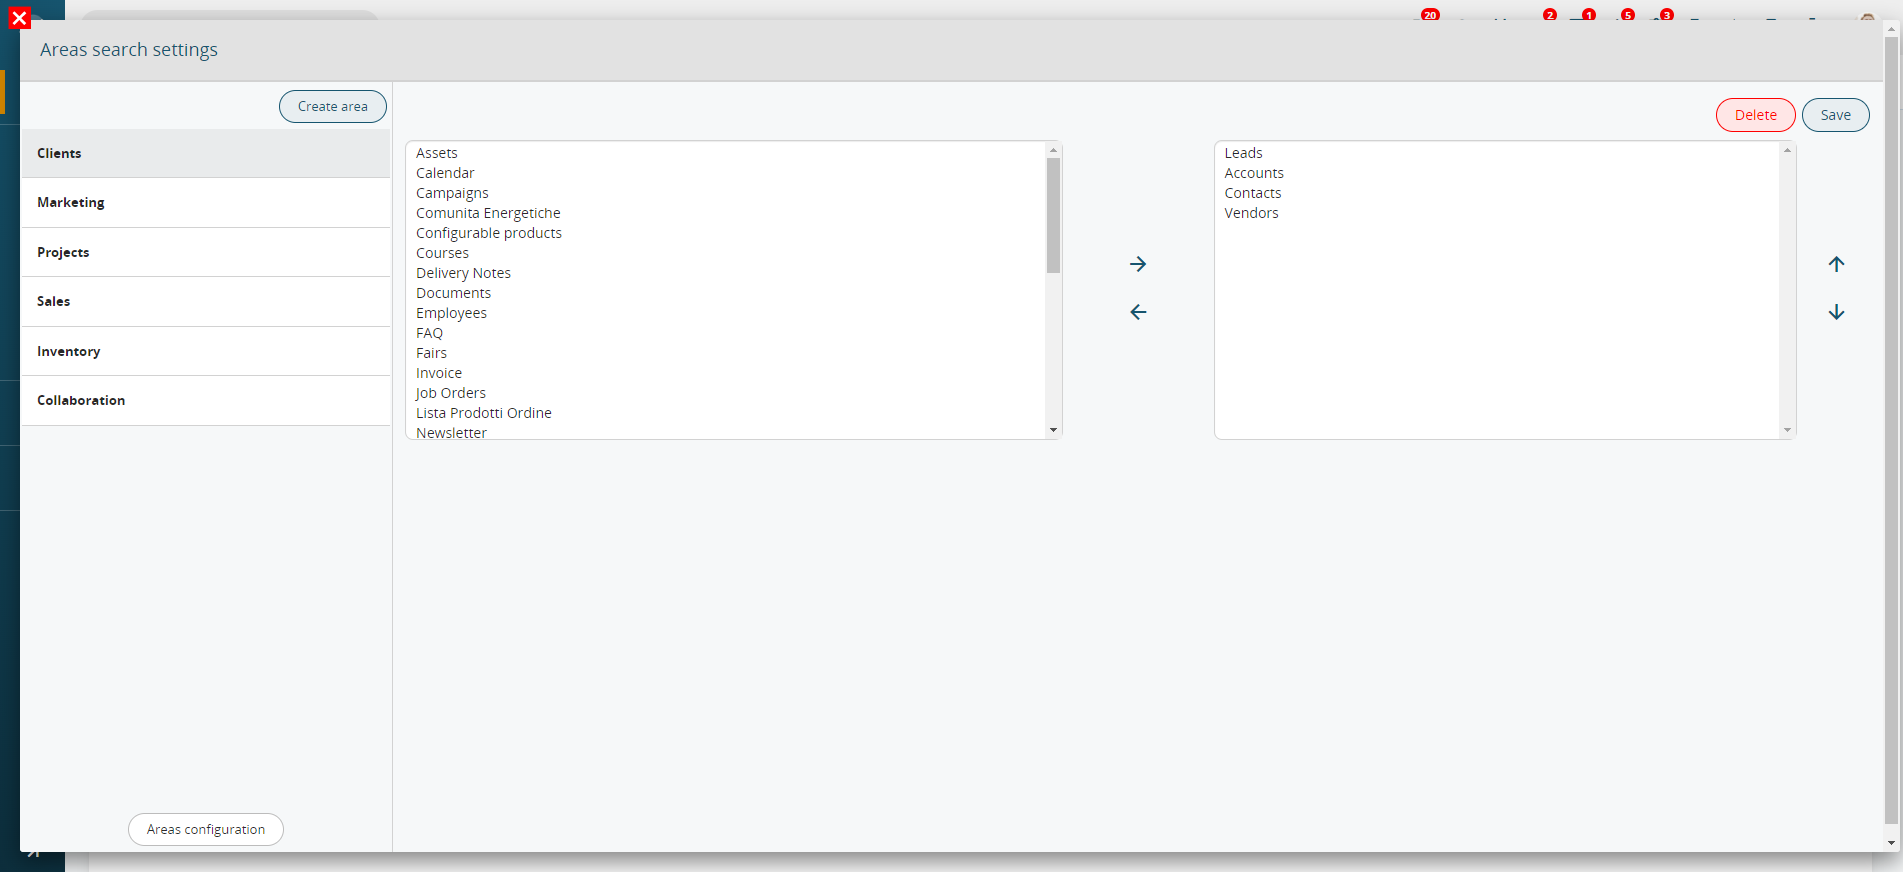
The search macro-areas can be directly customised by individual users by clicking on “Search area settings”, which is on the bottom right in the areas summary window. The search results are displayed in a new browser tab and presented with an overview in order to make the relations existing among the subjects clearer.
Available link to customise areas
The changes made in the search macro-areas will be applied to all the users.
2.3.2 Fixed Icons
 |
Processes: clicking on this icon gives access to the detailed view of all processes implemented in the CRM. |
 |
Last viewed: by clicking on this icon you can visualize the user’s lists consulted recently. |
 |
Calendar: Access to a simplified mini-calendar which allows, at a glance, to visualize all (open and closed) the pre-set commitments in the chosen month. Laterally it is reported the list of all the upcoming events. |
 |
Messages: Direct access to the Messages module and to the composition of a new email. The icon will show, in case of new emails, a number in the upper right corresponding to the number of not read messages. |
 |
Talks: Solution for the handling of information exchanges among the users. Every talk can be published to one or more users. Furthermore it can be related to every other elements of the CRM. |
 |
Notifications: Functionality with the purpose of updating users on issues and data of their interest. The system allows to mark as read or not read the notification, even in massive form. The notifications of invitations or activities allow to accept or not them without positioning on the related reference.
|
 |
Tasks: Direct access to the expiring tasks with the possibilities to create new ones. |
 |
Quick Creation: it allows, in any point, to create a new entity (Account, Contact, Event, Lead, Vendor, Task, Document, Ticket and Potential). By clicking on this entity, a new browser tab containing the creation mask will open. |
 |
Favorites: Quick access to the customers lists through the icon favorites (star). Each user can define his/her own list and modify it constantly. If you want a customer record to appear among the Favorites, it is necessary to turn on the star with a click on the mouse from the detail view. If you don’t want a customer record to appear among the Favorites, turn off the star with a click on the mouse from the detail view.
|
 |
Notes: A panel in which there are summarized all the notes created by the user opens. There is also the possibility to compose new ones and to convert every note in other CRM objects. |
 |
Tracking: accesses the screen that displays the trackings in progress and paused. |
2.3.3 Contextual Icons
The button![]() is used to create a new entity in the module in which you are currently positioned.
is used to create a new entity in the module in which you are currently positioned.
While clicking on  allows to enter in a sub-menu with the following options:
![]()
- Delete: it allows to delete all selected records in the list
- Mass Edit it allows to edit massively all the selected records
- Mail: it allows to send mail massively to the select records in the list (it is suggested for a small number of mail, maximum 20 mail address. For a more consistent number of mail is suggested to use the Newsletter module.)
- FAX: it allows to send fax massively to the selected records in the list (this function works only if your crm is connected with a fax service)
- SMS: it allows to send sms massively to the selected records in the list (this function works only if your crm is connected with a sms service)
- Select all: it allows to select all the records available in all the pages of the module (not only the ones displayed in the first page or in the current page)
- Geolocalization: it allows to localize in the google map the geographic positions of the selected records.
- Import it allows to import data into the CRM from .csv format files (comma separated values).
- Export: it allows to export data from the CRM in .csv format files (comma separated values).
- Find duplicates: it allows to check for the presence of duplicates based on parametrizable research criteria. In addition it is possible to save the desired fields mapping to prevent duplicates in the creation of new records. The fields mapped, are considered by the CRM with an "and" option (if we map the field Email, the system will check the creation of duplicates only for that field but if we map the fields Name + Email, the duplicate will be detected only if both the fields already exist in a module)
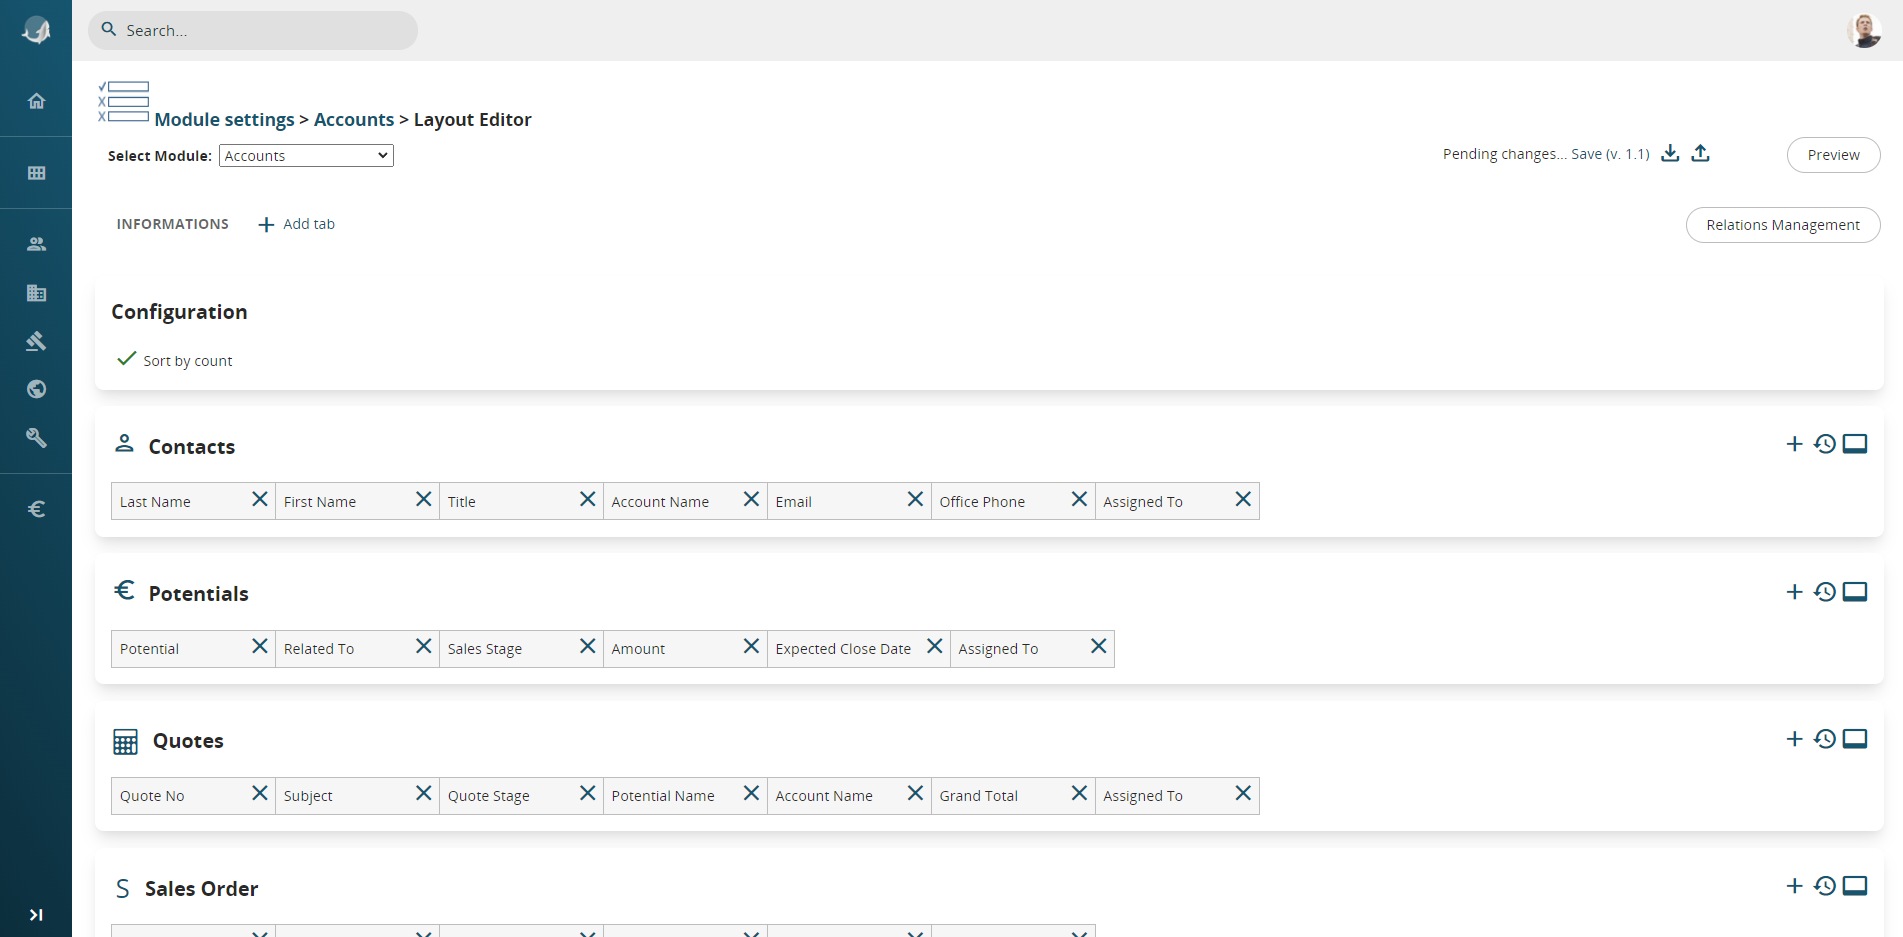
![]() Clicking on the cogwheel in the upper left part of the screen, it is possible to enter in the following sub-menu:
Clicking on the cogwheel in the upper left part of the screen, it is possible to enter in the following sub-menu:
Configure page: it allows to enter in the property of the module to change the layout.
Advanced (available only if the user is a system administrator): it allows to modify the settings (Layout editor, picklist, etc.) of the module where we are.
Use the “Add tab” button to access the following sub-menus:
-
New simple tab: click to insert a new view with a wizard or charts;
-
New list tab: click to add another view linked to an existing filter;
-
New tab with report: click to view an existing report in related to the module in question (e.g. if the report is entered in the Contacts module the results of a report created for this Module can be entered and viewed).
![]()
1 - Click on the blu cogwheel related to page settings.
![]()
2 - Click on "Configure page"

3 - Lastly click on "Add tab" to finalize the configuration and in the end click on DONE
2.4 Search in module
To find a term in a specific module, press the icon search.

The research result is temporary, in fact it is cleared when the page is closed or updated. To perform researches that can be saved and retrieved please refer to the Filters function.
1. Search box on the left above the view filters.

The research is always performed among the fields displayed by the applied filter (table header) and the records that fall within it (see Filters).

If you wish to research in fields that are not included in the filter, click on advanced search (available in all record modules, not available from the Home module).

From the advanced research function you can:
- select any field of the module
- specify several search conditions and link them to the inclusive operator “and”, choosing “Corresponds to all following”, or the exclusive operator “or” by choosing “Corresponds to at least one of the following”.
The research will always be performed among the records of the applied filter.
2. Search boxes above the filter columns.

In this case the search makes it possible to enter elements above the reference columns in order to obtain a temporary and immediate result. For example, in the Trouble Tickets Module you can have all Open and Urgent Priority status tickets among the results of your search.
2.5 Modules structure
The application is structured according to relations between the various modules, based on the process logic. Each module offers the following access views:
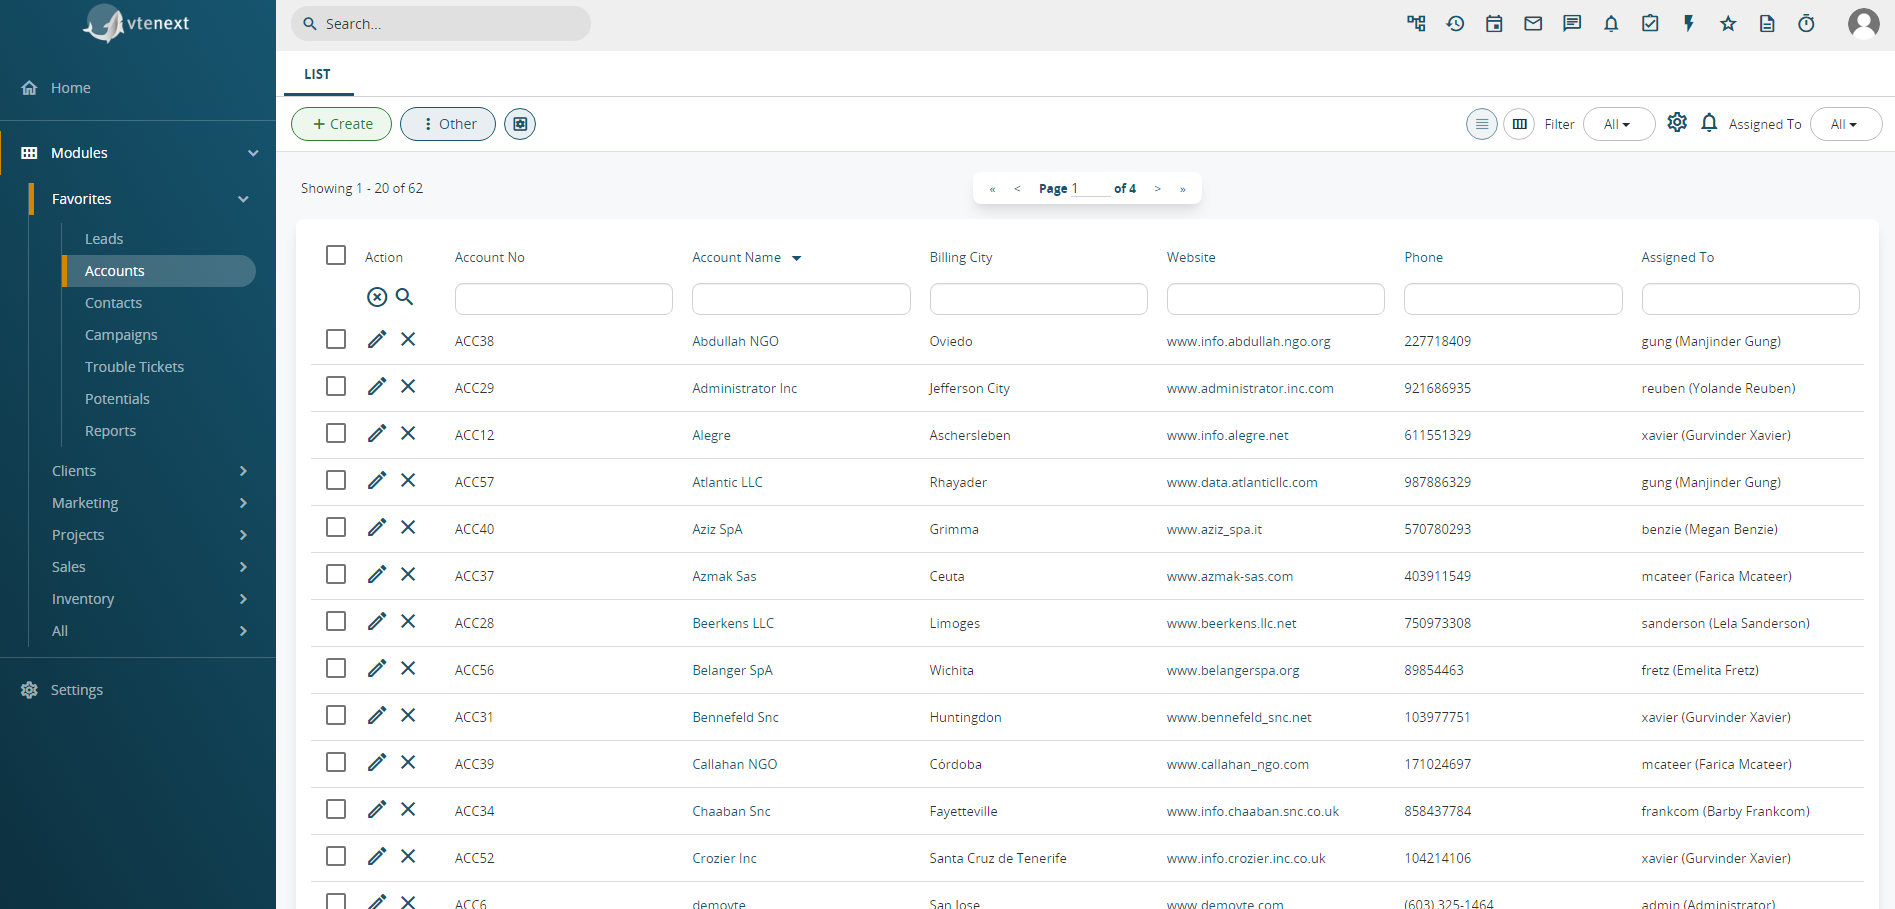
1. List view: proposes the list of data (files) present in the module.

Possible actions from this view are:
|
Delete |
Deletes one or more records by ticking the box at the beginning of the line. |
|
Mass Edit |
To modify the data of one or more selected records. |
|
|
To send emails in a massive way. |
|
Fax |
To send fax in a massive way. |
|
SMS |
To send SMS in a massive way. |
|
Select all/deselect all |
To select/deselect all the records in the filter (in all the pages, not only the |
|
Filter |
To define the active view on modules (see Filter chapter). |
|
Assigned to |
To quickly filter records according to the assigned user. |
The button CREATE is used to add a new empty record to the current module.
Note. The Calendar, Report and Documents modules have an alternative view by default. The List button switches to list view.


2. Kanban View: columns view.

Makes it possible to operate on a picklist value present in the entity, set in the selected filter. The change will be made by simply dragging the record from one column to the next without having to open the single elements. If the selected picklist values are correlated with a view colour (chapter 16.13, page 210), also the columns in the Kanban will be identified by specific colours.
This view type is configured by editing a filter, selecting the “Kanban Setup” tab.

Note. In general, there is only one field that makes it possible to access a detailed summary window on the right (e.g. Trouble Ticket title in Trouble Tickets module), recognisable by the link style formatting (blue text, bold and underlined on mouse-over).
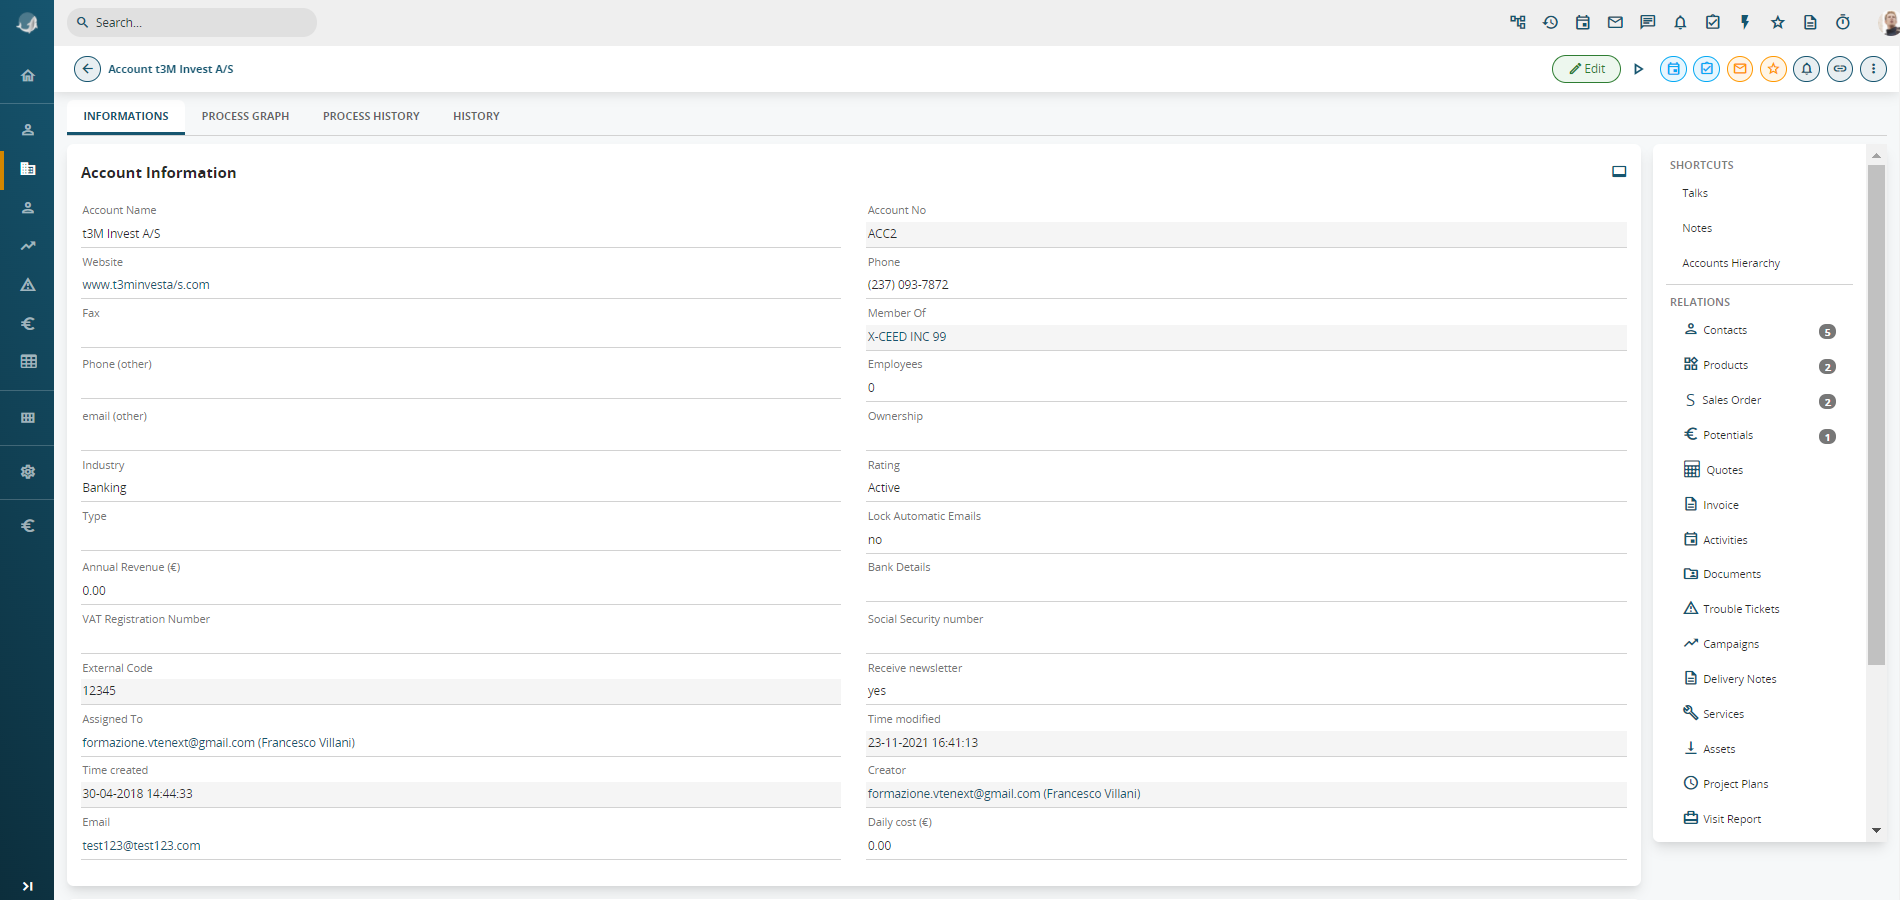
3. Detail view: corresponds to the tab. To gain access, click on the record name.

2.5.1 Record structure (detail view)
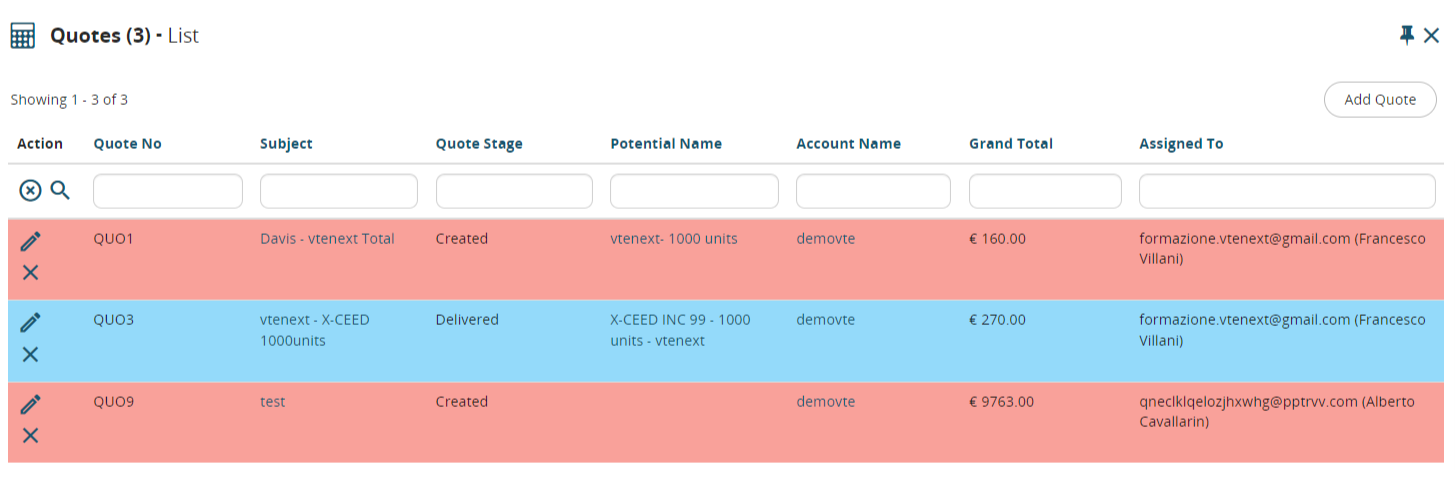
1. Relations with other modules: positioned on the right of the screen, this function summarises all the relations with other modules of the record in which you are operating by indicating the numbers of related elements. To display a related module click on its name. The admin user can change the order of items, decreasing in accordance with the number of Relations, by means of Modules manager > Layout editor.

For example, clicking on Contacts produces the following view:
To create a record of the selected module, in relation to the currently active tab, click “Add“ in the relations box.
Screen that shows how relations of one module can be manage by the user.
Examples of related modules are shown below.
Planned calendar activities

Quotes
Contacts

By default, the relations menu proposes all the existing modules related to the module you are manage.
Certain actions available in the module are accessible by clicking the “Other” button.![]()
The actions are partly general and partly contextual. For example, the Convert Lead option is only present in the Leads module.
Finally, below we provide a list of standard icons located at the top right of the page before the “Other” button:
|
|
- Edit |
|
|
- Tracking |
|
|
- Add Event |
|
|
- New Task |
|
|
- Link new email |
|
|
- Favourite |
|
|
- Notify me of changes |
|
|
- Link |
|
|
- Other |


2.5.2 Quick look relations
In the list view and in the detail view, the CRM allows you to preview several summary items of a related entity (in accordance with the access credentials of the profiles linked to the individual user).

N.B. The visible fields inside the Relational Quick look is not editable by the user.
2.6 Filters
The filters facilitate CRM search activities. Setting up a filter means creating a search system that can be retrieved whenever necessary. Any customised fields you have created in the vtenext modules can also be used as filters for the creation of lists. You will therefore be able to generate ad-hoc search engines.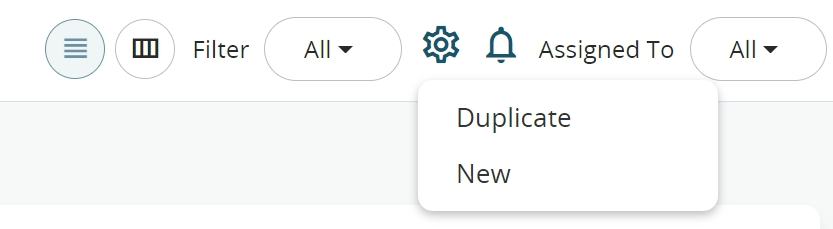
The lists can be used to customise the display of data based on the needs of each user. The lists defined in vtenext can be used by the person who created them and also shared with other vtenext users.
2.6.1 How to create a Filter
The following section explains how to create a customised filter starting from a list of accounts. This procedure can be applied to all the other modules.
Configuration parameters:
- columns content (filter fields displayed)
- any time interval in which the data were created or changed
- search operators including “and”, “or”, “contains”, “does not contain” etc.
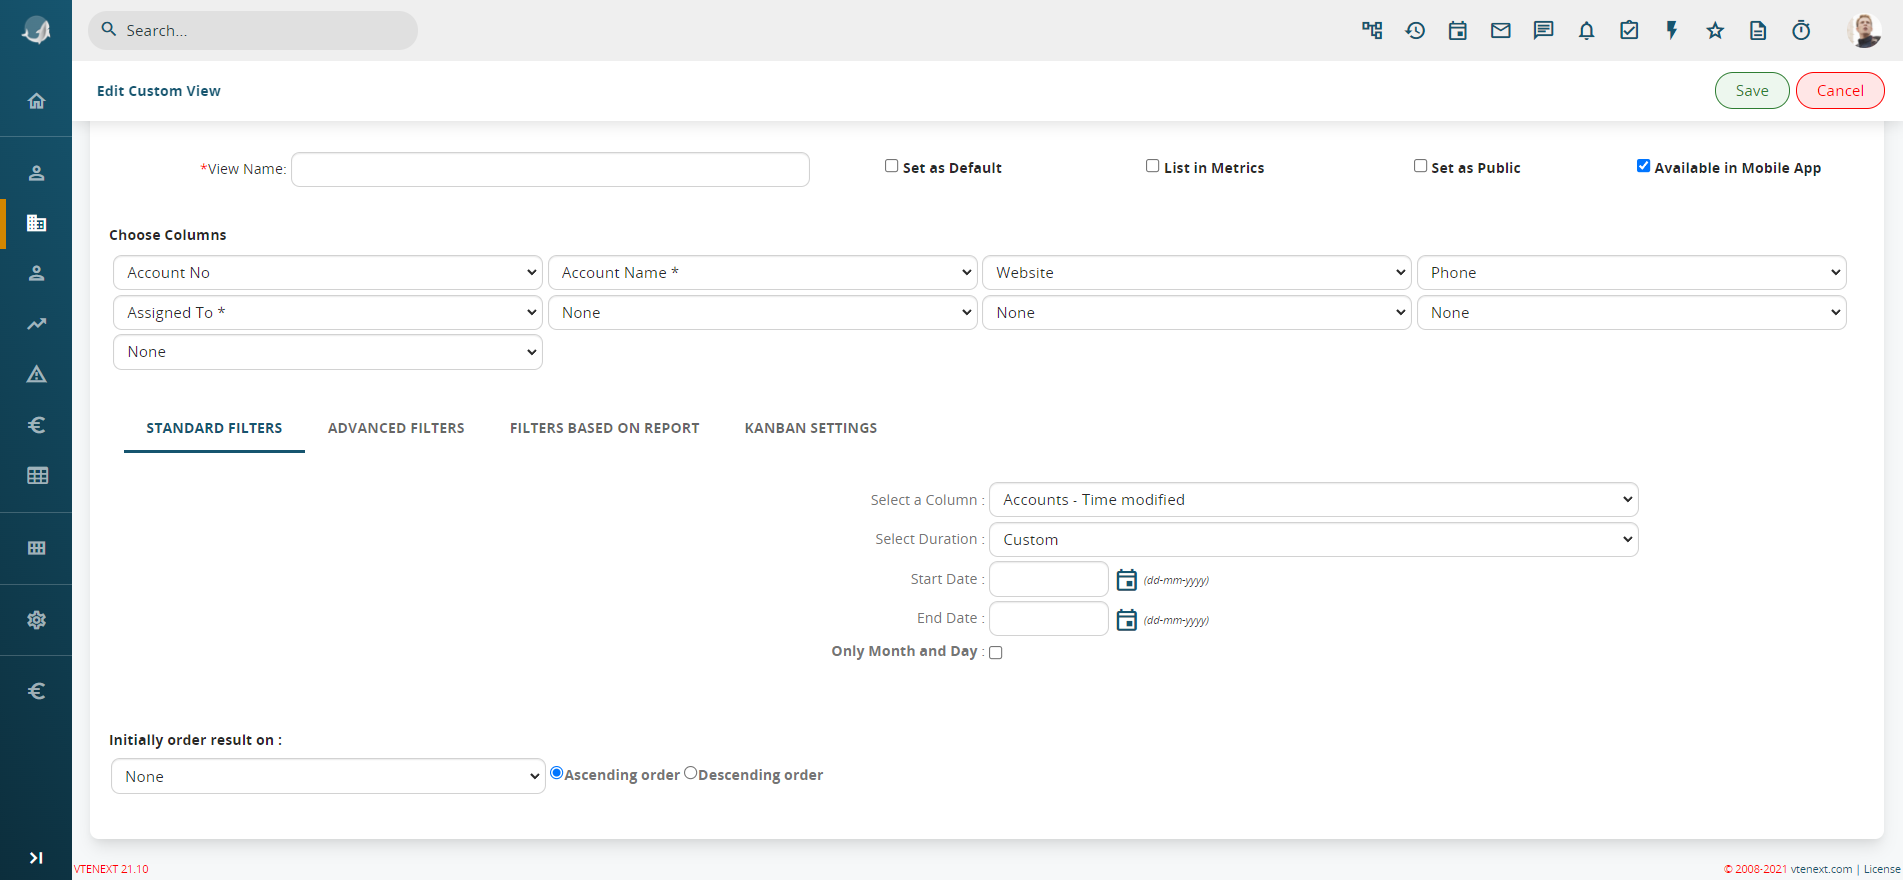
To create a new filter, click on NEW from the cogwheel icon alongside the Filter.
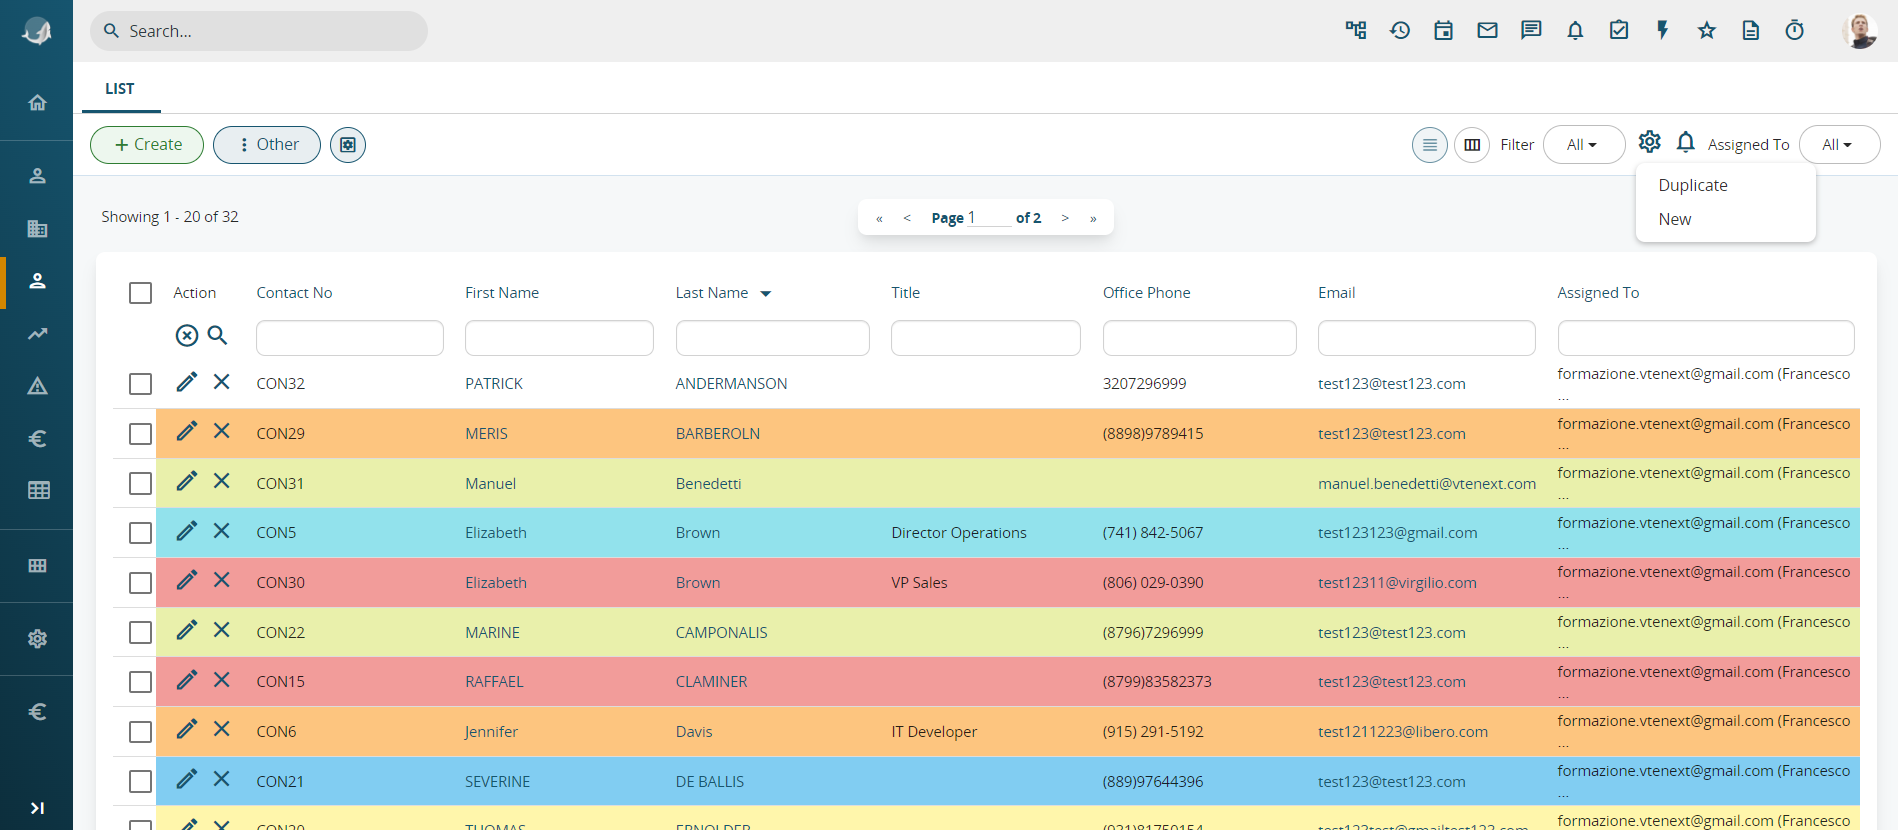
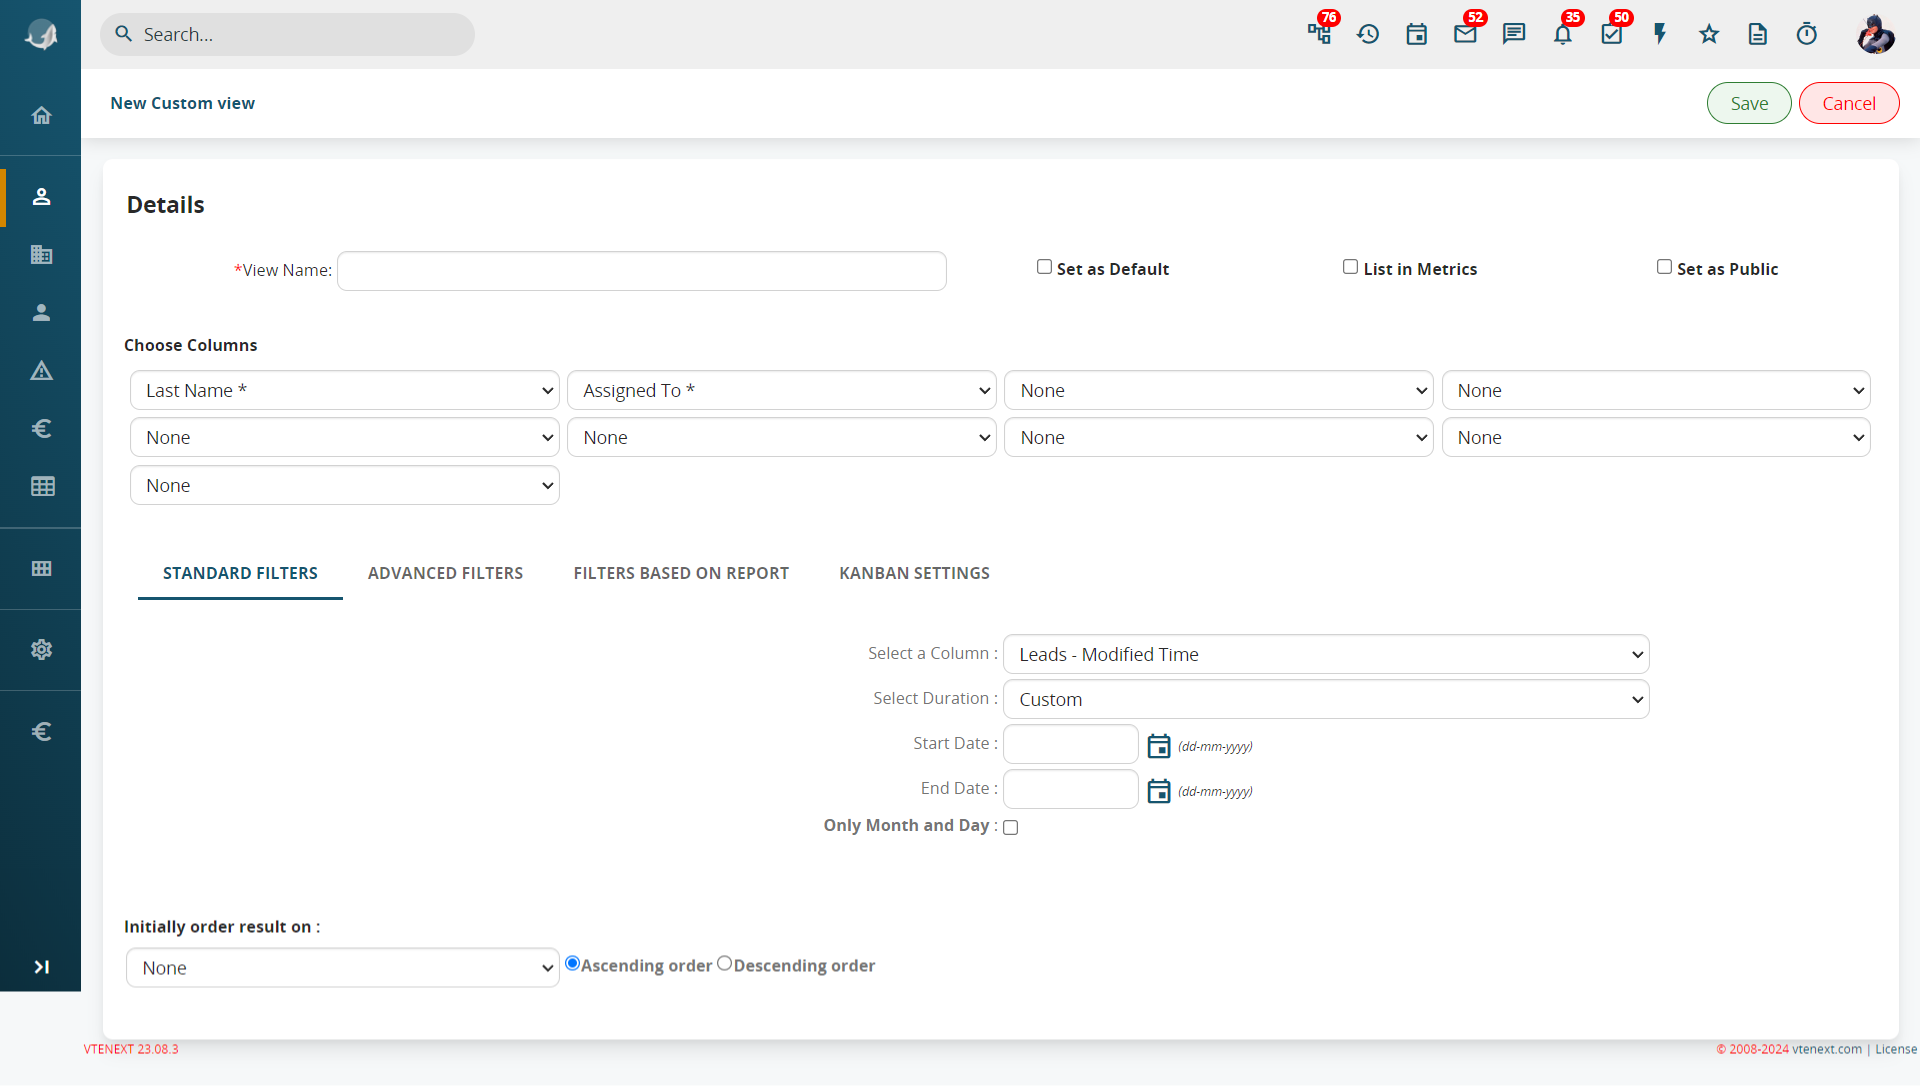
From this screen you can create your customised list.
|
Set as Default |
If you want to apply the filter automatically every time you open the module |
|
List in Metrics |
Not in use anymore, will be removed in the next release |
|
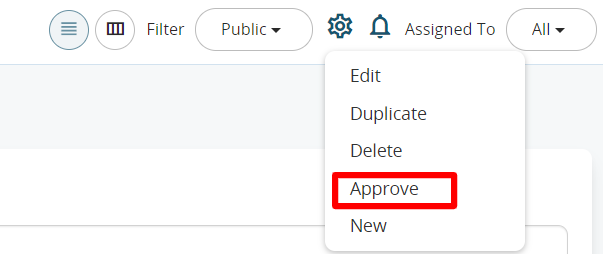
Set as public
|
Option to make the filter public. It must be previously agreed by an admin user in order to be displayed and used by all the other users. |
N.B. The public filter must be approved in advance by an user with the right of Administrator so that it can be visualized and be used by all users.
Standard Filters
|
Select Column |
Select a Date type field to make a time selection. |
|
Select duration |
It allows to set a customized or pre-estabilished time frame related to the field you’ve chosen in “Select" |
|
Starting/ Ending date |
They are automatically set through the option “Select duration”, except for the personalized option |
|
Order initially for |
It allows organize the data in ascending or discending order. |

In the Advanced Filters section you can define certain selection criteria that are not based on the timeline (all other fields: drop-down menu, free text, number, etc.).40
Caution: The “equals” and “contains” operators differ as follows:
Equals: performs a character by character check. The field value must be exactly the same as the term of comparison contained in the filter, including upper case and lower case letters.
Contains: this is a less restrictive check than “equals”, where the field value must contain the text string specified in the term of comparison.
Example: In the Filters Based on Reports section you can extend the filter functions by means of a Report (for use of the Report module refer to section 13.1):

By means of this setting you can link to the filter the conditions set and columns selected previously in the Report.
2.7 Users preferences
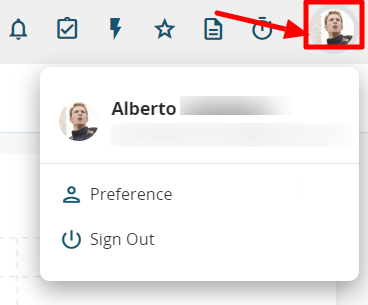
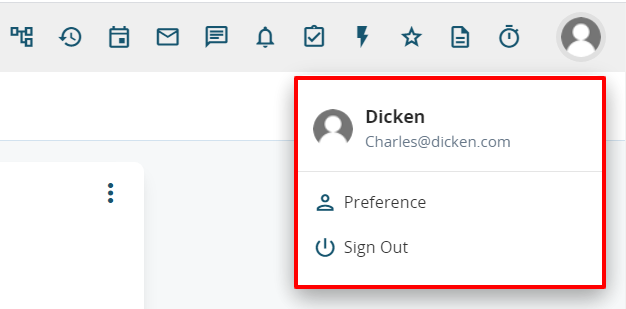
To access user settings click on the icon of your personal avatar and then click on PREFERENCES.
The page appears as shown below:
User login and role
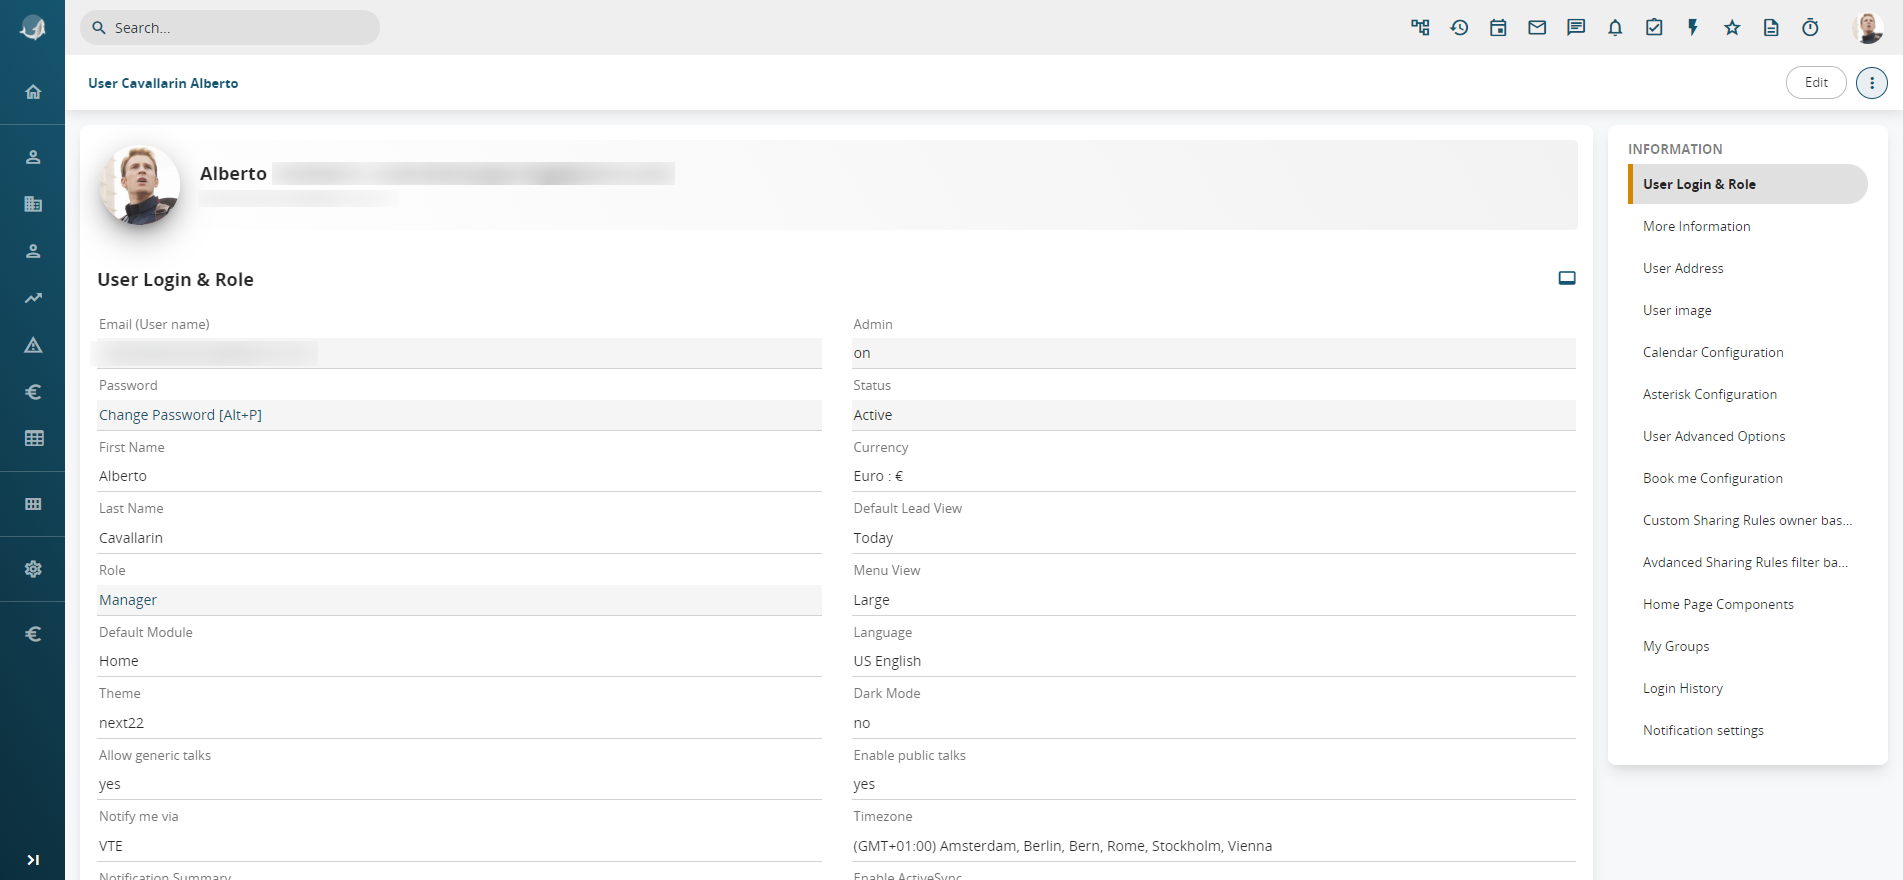
This box is used to:
- change the password;
- configure access via LDAP (only if available in the company and only for on-premise installations);
- select currency type;
- select an interface language;
- choose time zone;
- notification settings for the various modules;
- choose whether or not to receive notifications and the method email/vtenext;
- choose vtenext graphic mode: softed or next.
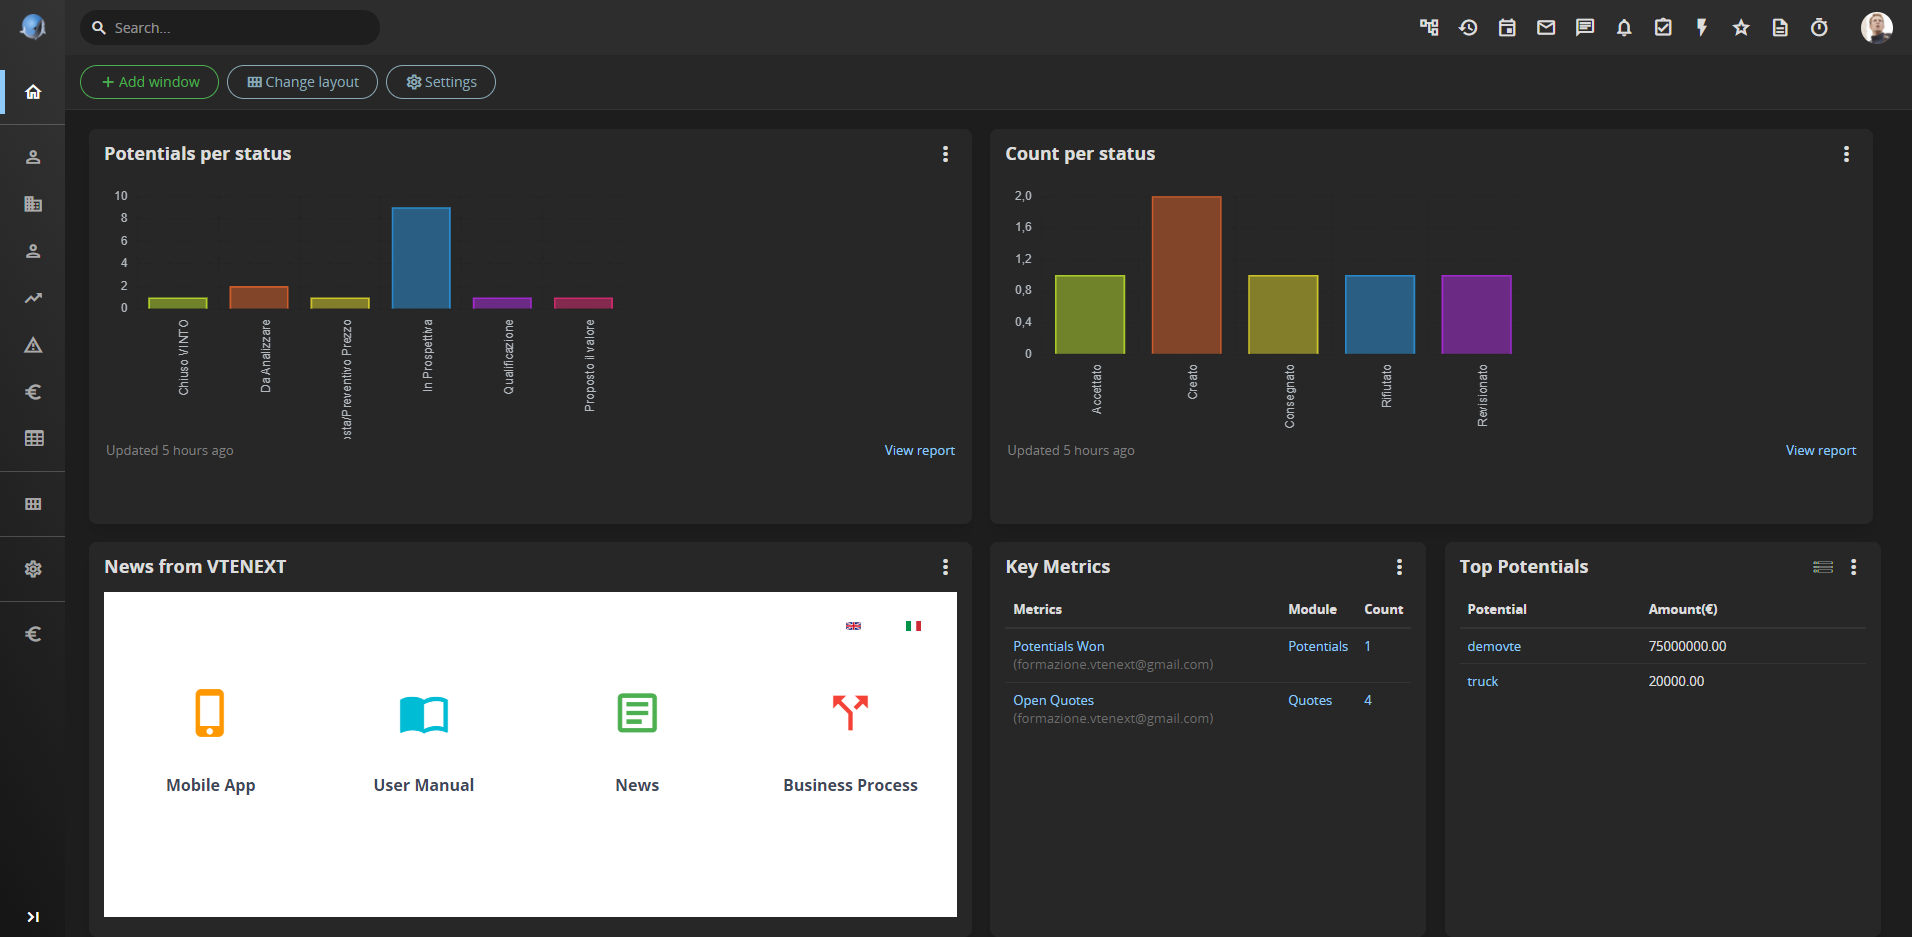
From version 19.10 you can select "Dark Mode” by accessing User Preferences and ticking the field of the same name. This option is available exclusively for the next mode.
Example of Homepage with Dark Mode selected.
More information

This block is useful for:
- Insert all users personal data, as his/her Title ( Director, Manager, etc..), Telephone number, Mobile number, etc;
- The field Reports to, indicates which is the head of that person;
- Internal Email Composer: if enable, allows use of the vtenext internal email composer. When disabled, the default mail client will open.
- Choose how numbers and decimals should be displayed, through the fields Decimal point separator Thousands separator Deciaml places (WARNING: all changes made in this area are applied in all the crm, so all the numeric/ currency fields will be displayed with that logic);
User Address

User photo
Allows a user photo and thumbnail (avatar) to be set. Once you have uploaded the photo, save your changes. Now return to point 4, click on Photo on the right, crop the photo to the square format and save.
- set a thumbnail function to allow immediate recognition of the user;
- change the access module after login (Default module);

Calendar configuration

Asterisk configuration
![]()
|
Asterisk plugin |
If vtenext is integrated with an Asterisk switchboard, indicate here your own internal telephone (es: SIP/111). |
|
Receive Incoming Calls |
Tick this option to enable incoming calls recognition. |
REST webservice configuration
Access key ID token which through webservices indentifies automatically the password associated to the user.
![User - Administrator [1] - VTENEXT 23.08.png](https://usermanual.vtenext.com/uploads/images/gallery/2023-08/user-administrator-1-vtenext-23-08.png)
Because of the sensitive information held by that field, it requires the user password to be unlocked. Once the field is unlocked it is possible to regenerate the token by clicking the "Rigenerate" button. Through the picklist "Access key validity" you can define the behavior ok the tocken.
These are the values selectable on the picklist:
|
Static |
the access key remains unchanged forever |
|
Automatically update on password change |
the access key is recalculated every time you change the password |
|
Disabled |
the access key does not allow any web service access |
PAY ATTIENTION: Once the token is regenerated you must login again in Wilson App
![User - Administrator [1] - VTENEXT 23.08 (1).png](https://usermanual.vtenext.com/uploads/images/gallery/2023-08/user-administrator-1-vtenext-23-08-1.png)
Screen obtained by clicking on "VIEW" in the Access Key field
![User - Administrator [1] - VTENEXT 23.08 (2).png](https://usermanual.vtenext.com/uploads/images/gallery/2023-08/user-administrator-1-vtenext-23-08-2.png)
Screen obtained after entering the password. Notice the remaining time to regenerate the Access Key and the "Recalculate Now" button.
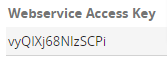
Advanced user option - Web service Access Key
Identification Token: uses the web service to identify the user password automatically associated with user creation
Notifications: makes it possible to define which notifications you wish to receive based on the specified module, with the exception of those defined by the profile rules.

My groups
Shows the groups in which you are a member as defined by the admin user.

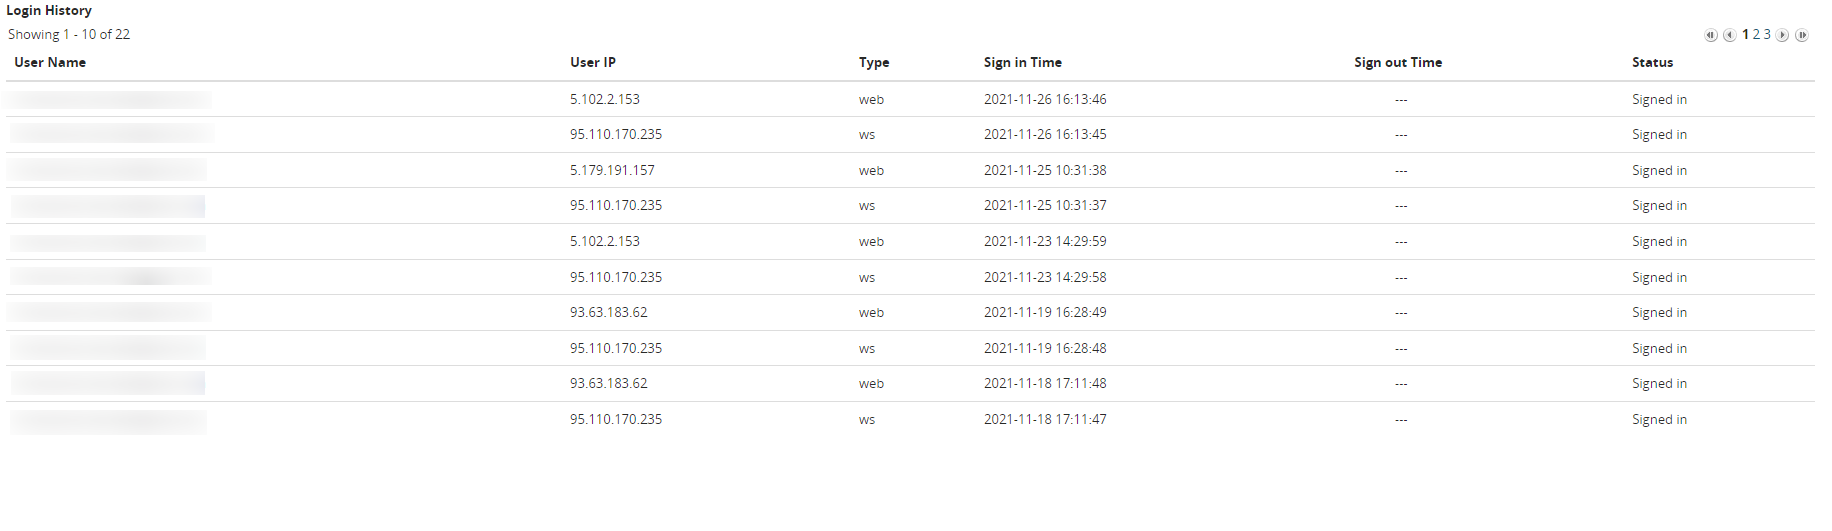
Login History
To check access events

- See user control: see chapter 16.8
- Duplicate: allows the user to be duplicated, inheriting all configurations
- Delete remote data: used to delete remote data in the App connected to the specific user. In practice, this function forces a user logout and deletes cached data.
- Delete: remove user.
2.7.1 Request Remote Support
![User - Administrator [1] - VTENEXT 23.08.png](https://usermanual.vtenext.com/uploads/images/gallery/2023-08/mZsuser-administrator-1-vtenext-23-08.png)
![User - Administrator [1] - VTENEXT 23.08 (1).png](https://usermanual.vtenext.com/uploads/images/gallery/2023-08/jHiuser-administrator-1-vtenext-23-08-1.png)
Here you can select the duration of the validity of these credentials and you can also choose to disable the modules Conversations and Messages for this temporary user. This function is provided to protect your privacy. Once you are done you have to click the Confirm button in the bottom-right pop-up side. After this, a new pop-up will appear. From that new pop-up you can copy your temporary credentials and provide them to the HelpDesk.
![User - Administrator [1] - VTENEXT 23.08 (2).png](https://usermanual.vtenext.com/uploads/images/gallery/2023-08/6y3user-administrator-1-vtenext-23-08-2.png)
Notice that once you have closed the pop-up, the temporary credentials will not be recoverable. So, if you don't copy the credentials before closing the pop-up you need to Regenerate credentials. Infact, if you click again the button "Request Remote Support" and the latest credentials created are still valid, this pop-up will appear:
![User - Administrator [1] - VTENEXT 23.08 (3).png](https://usermanual.vtenext.com/uploads/images/gallery/2023-08/user-administrator-1-vtenext-23-08-3.png)
As you can easily see, you can revoke the credentials or you can regenerate new temporary credentials.
2.7.2 Two-factor Authentication (2FA)
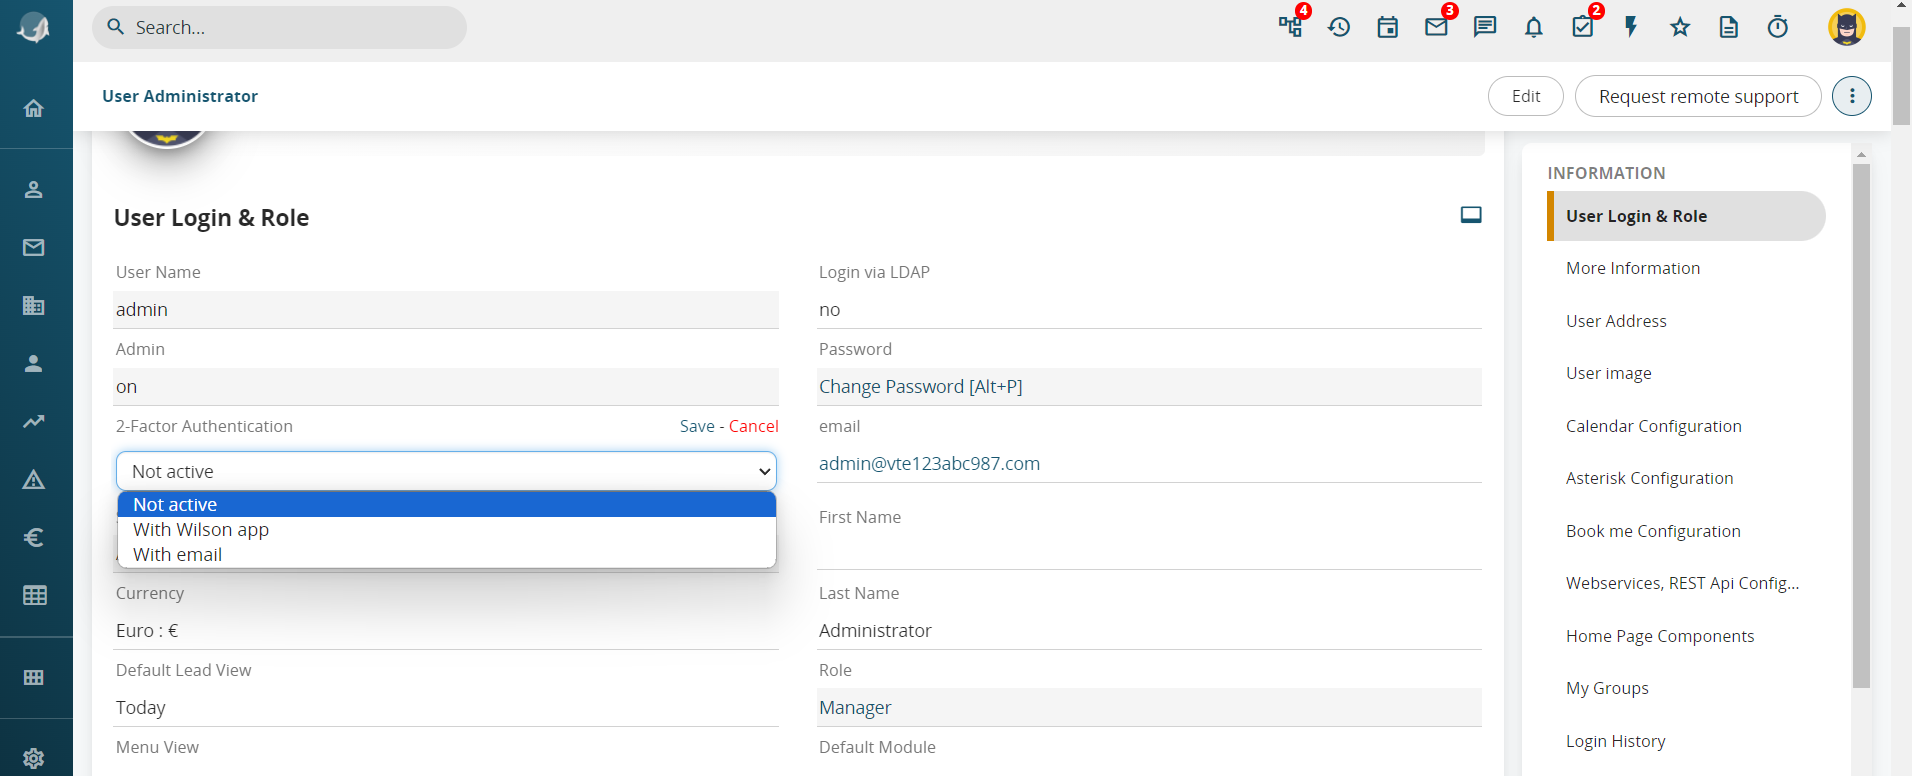
In the User Preferences you can activate the Two-factor Authentication. It can be:
- Not active;
- With Wilson app: in this case, to authenticate in vtenext you must consent it from the app;
- With email: n this case, to authenticate in vtenext you must consent it from an email (with this authentication way you will not be able to access to Wilson App)
WITH WILSON APP
If you select this 2FA way a pop-up appears in which a PIN code is required. The PIN code must be composed between 4 and 8 digits.
![User - Administrator [1] - VTENEXT 23.08.png](https://usermanual.vtenext.com/uploads/images/gallery/2023-08/yH9user-administrator-1-vtenext-23-08.png)
Once clicked the button "Next" you will be asked to type again the PIN code:
![User - Administrator [1] - VTENEXT 23.08 (1).png](https://usermanual.vtenext.com/uploads/images/gallery/2023-08/3dFuser-administrator-1-vtenext-23-08-1.png)
After clicking the "Save" button is clicked, the 2FA will be ACTIVE. After this, once you try to login in Wilson App you must type the PIN code that you have just created.
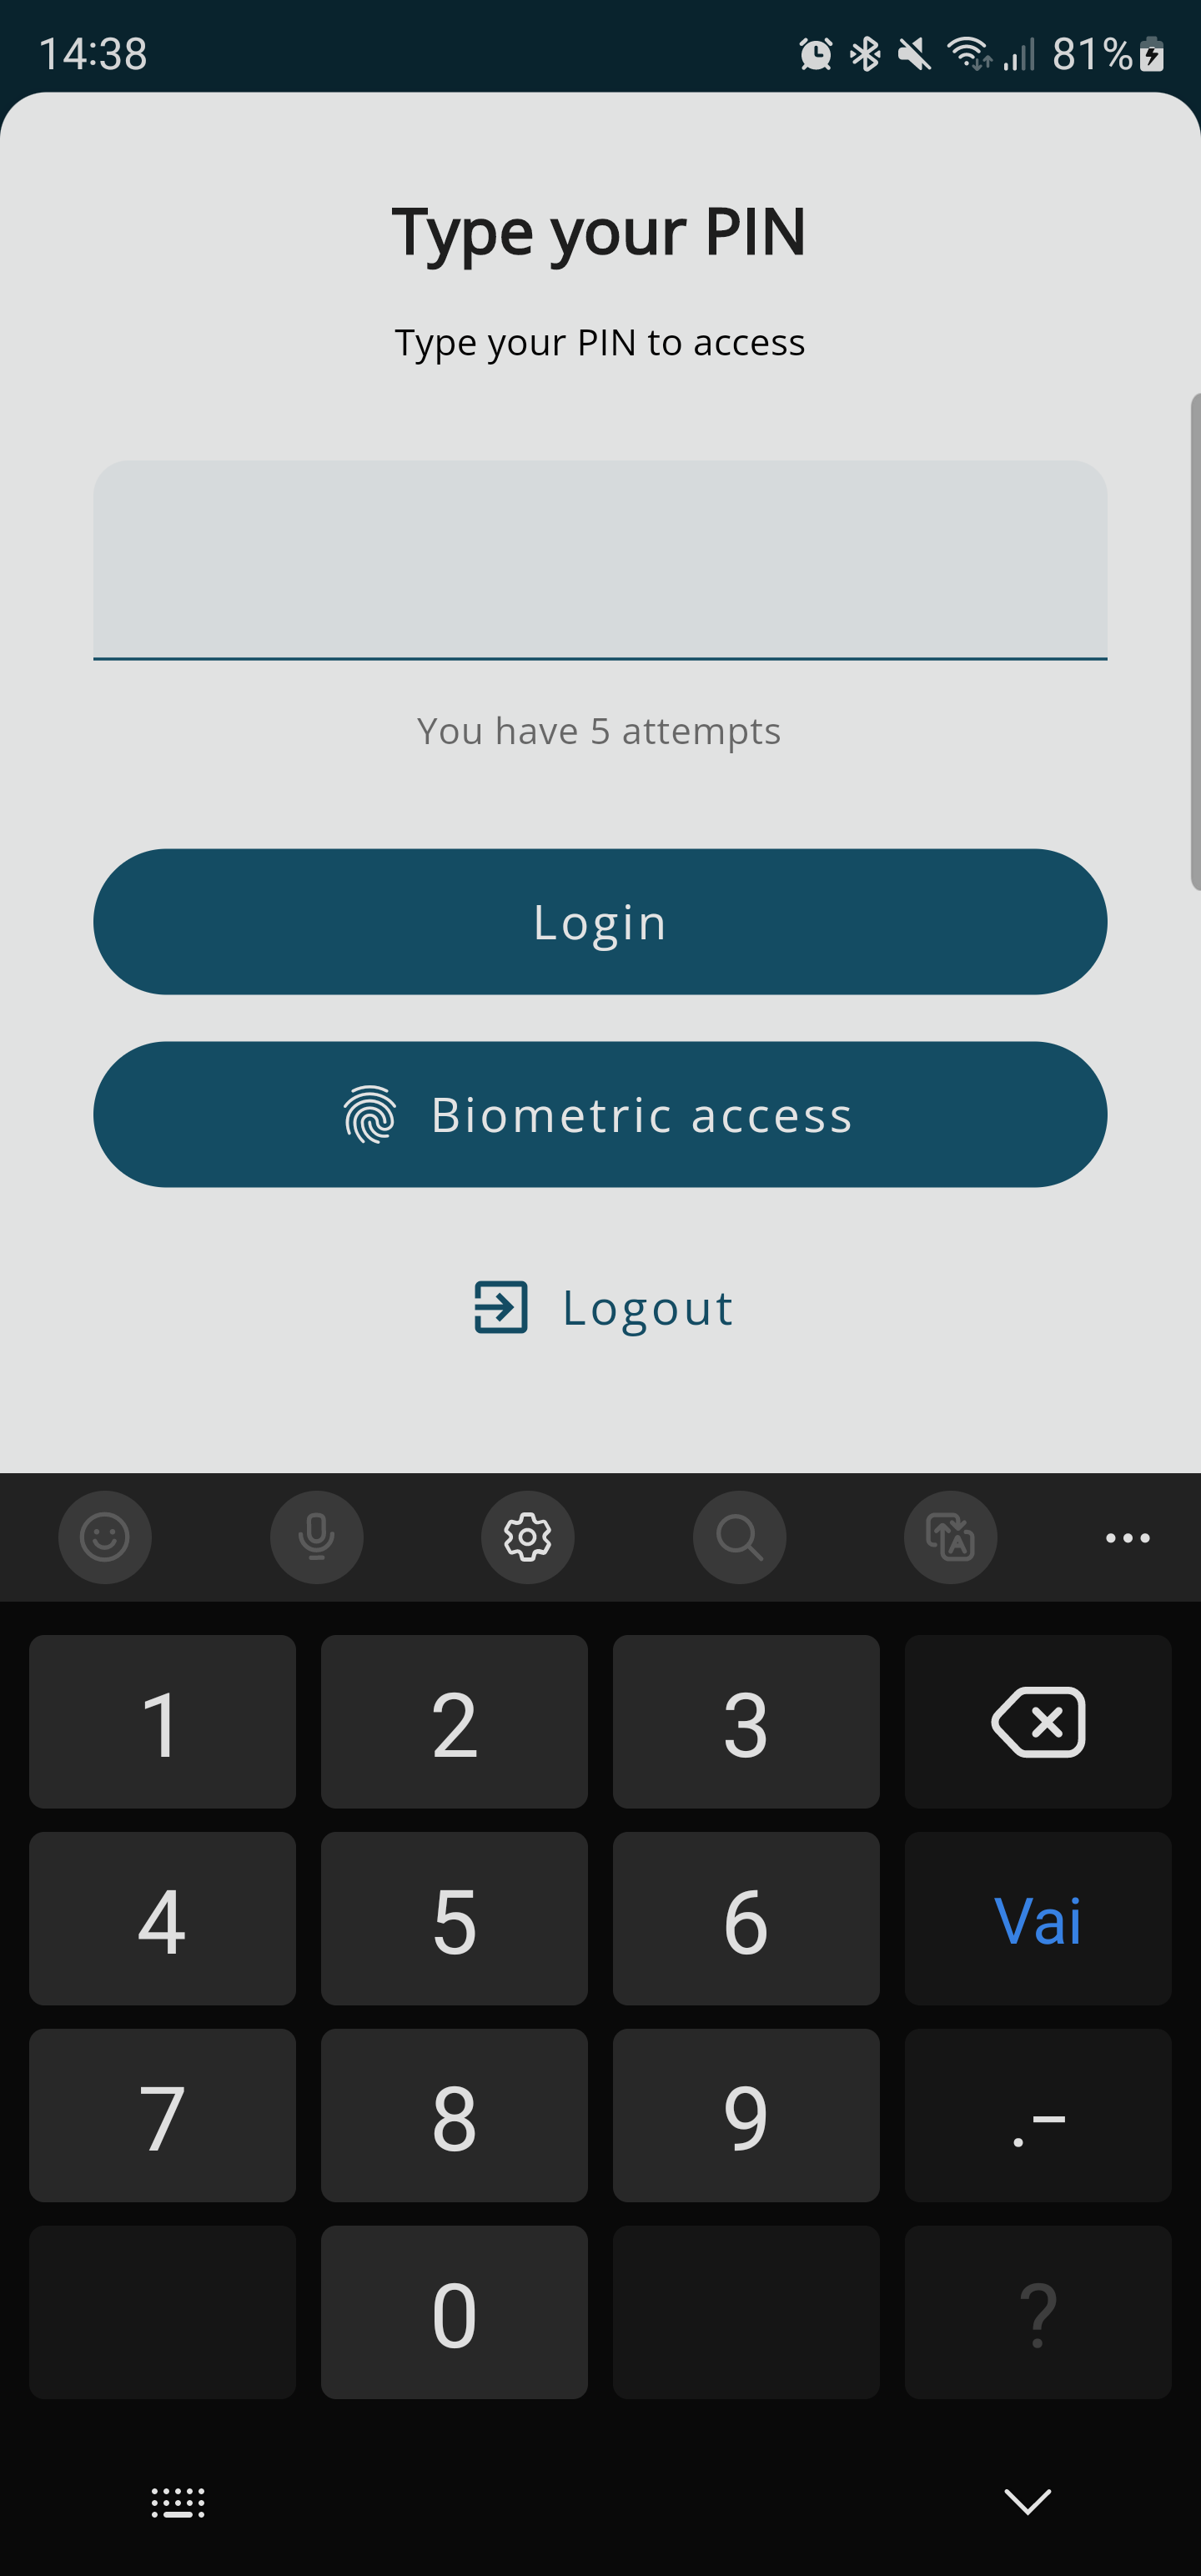
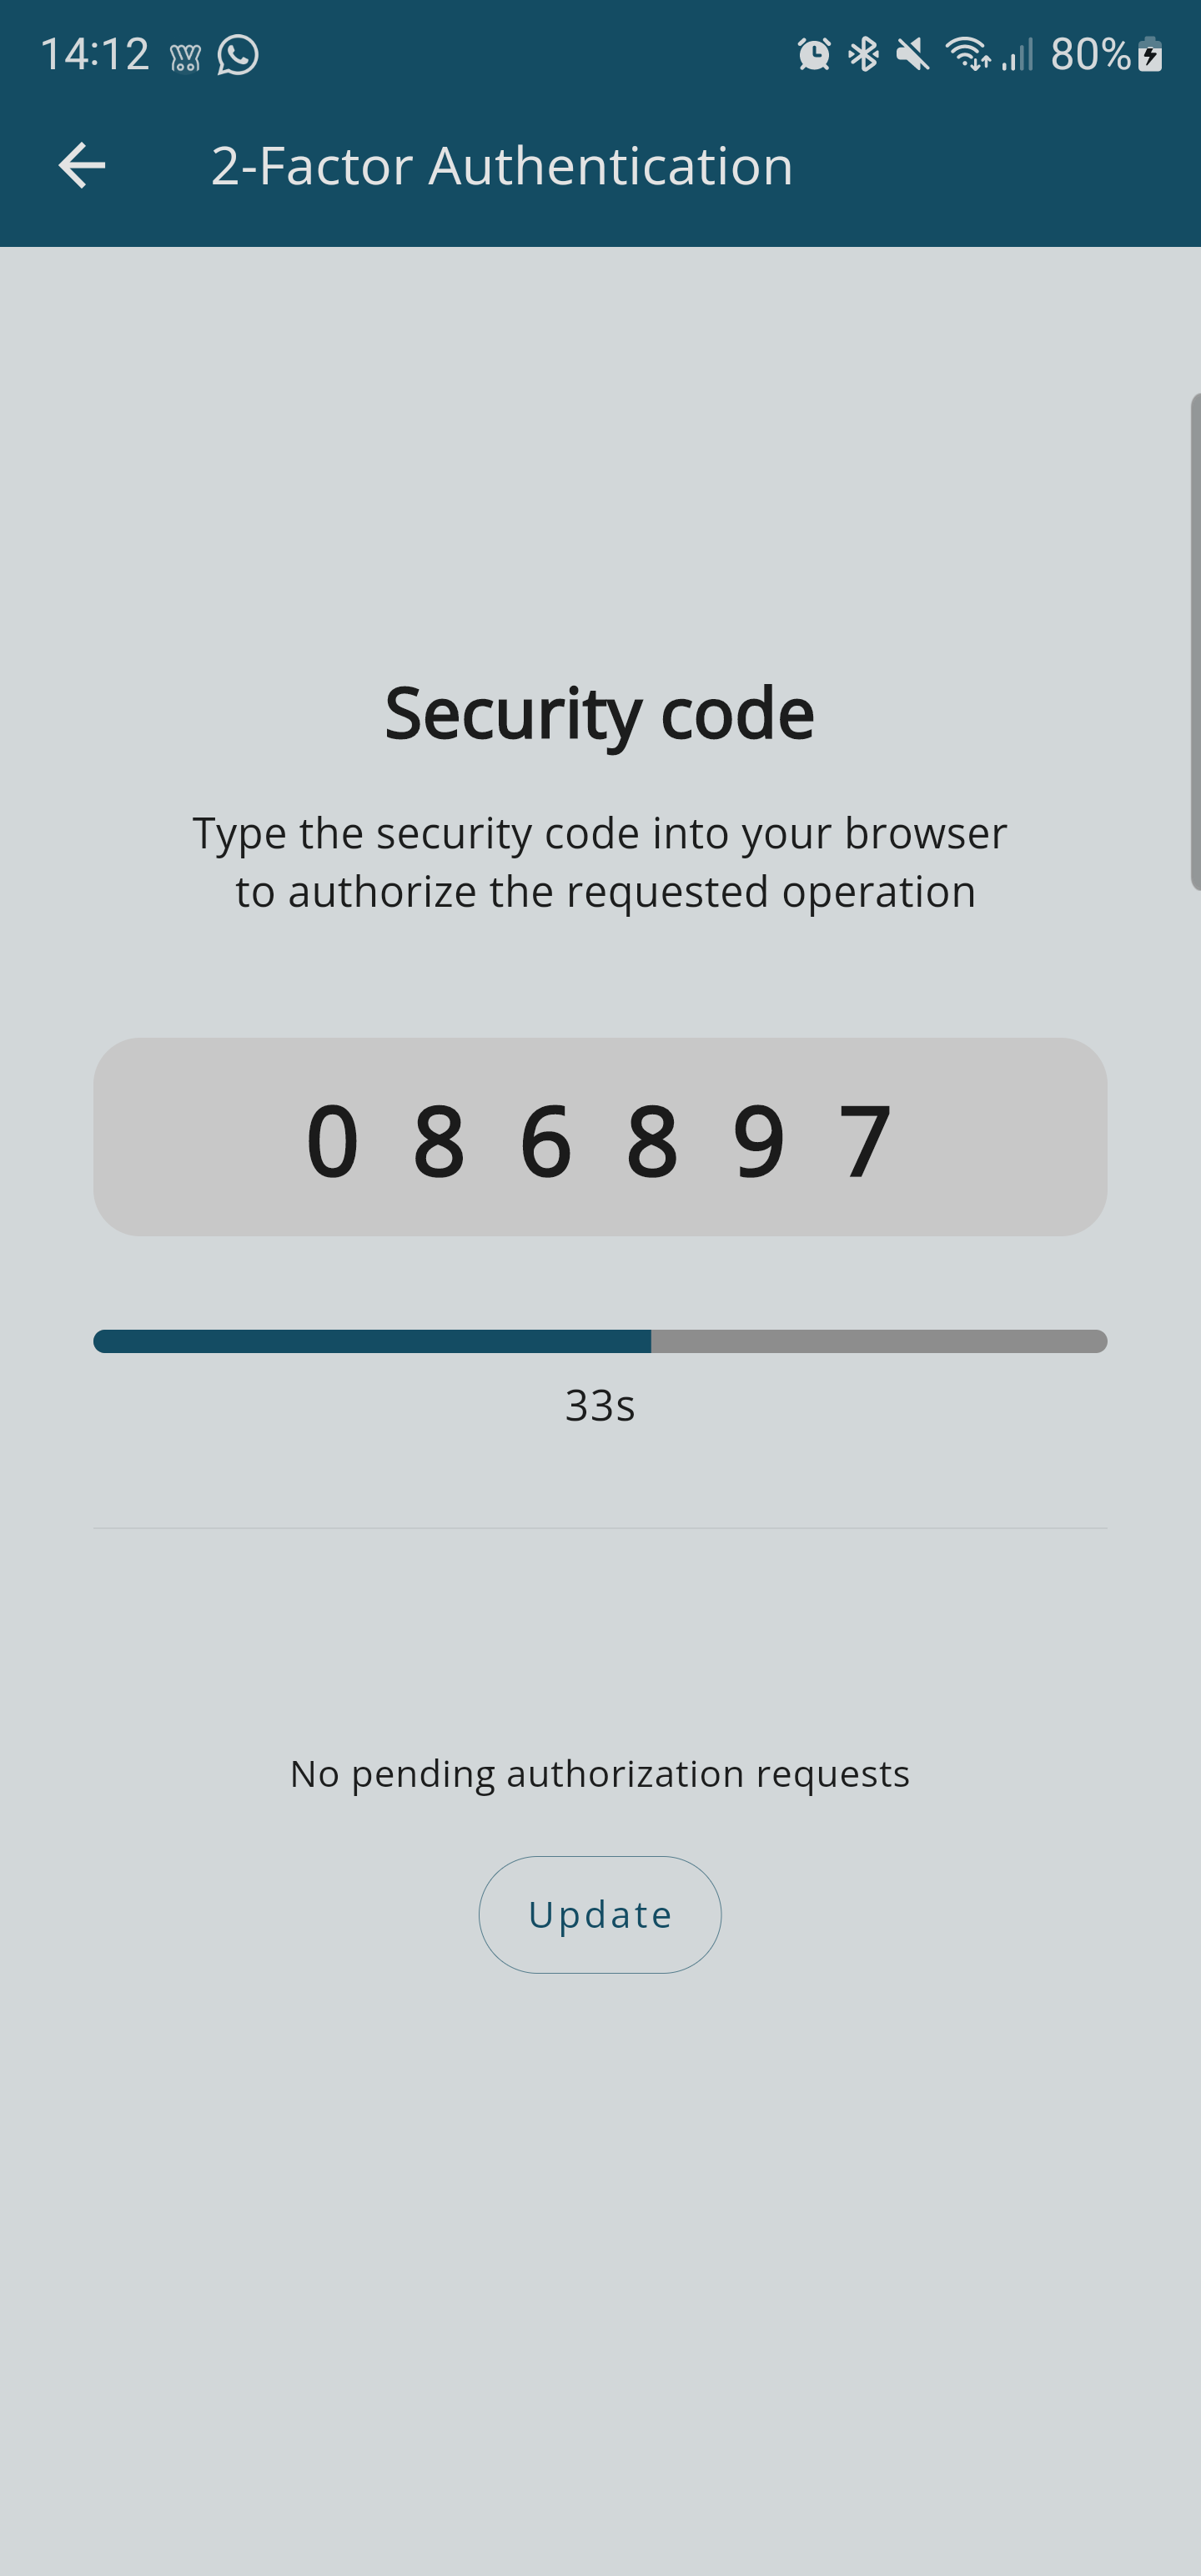
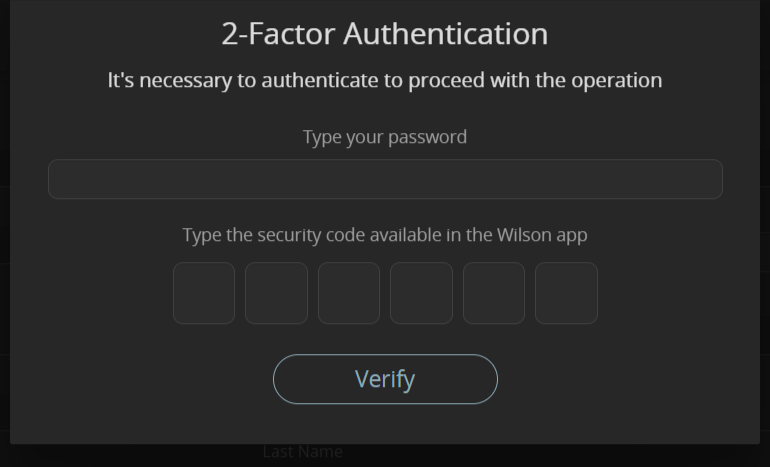
But there is more: if the 2FA is activeted and you want to login via Web you must insert your credentials (as usually) and after that you need to type a Security Code. This security code will be sent by push notification. This is what you will see after opening the notification:
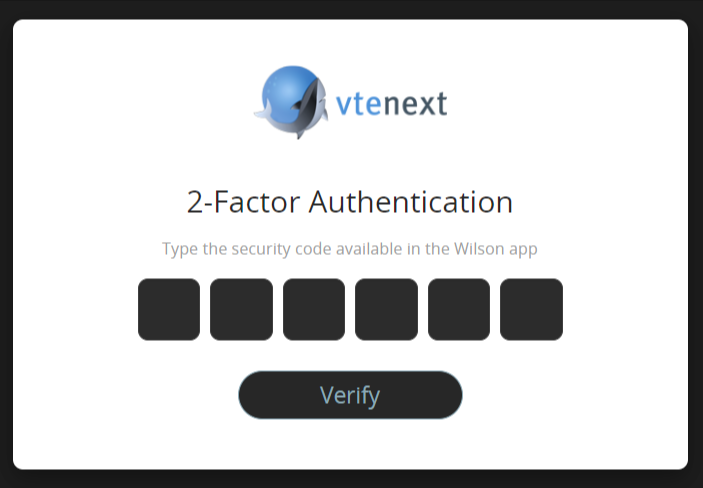
Screen for entering the security code provided by the Wilson app
Screen of the Wilson app providing a security code valid for 60 seconds
WITH EMAIL
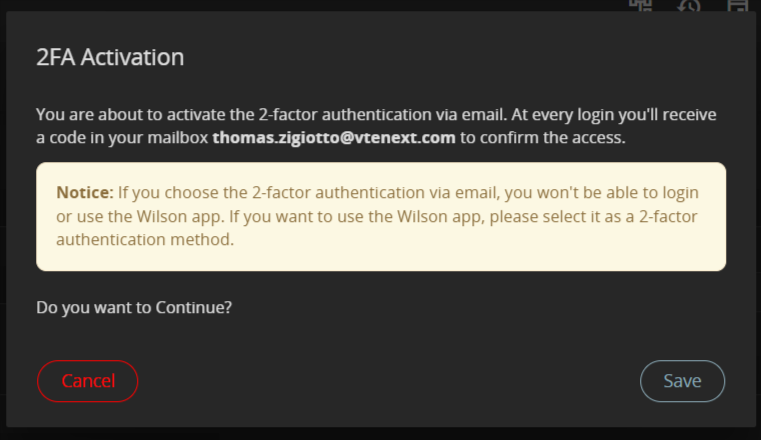
Once you select "With email" a pop-up will appear in which you are asked to insert your password.
The next pop-up will inform you that everytime you want to login you will recieve an email with a code that you have to insert in the login page.
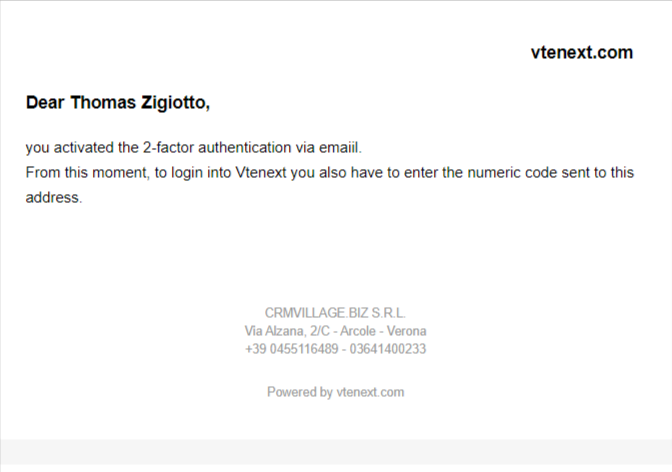
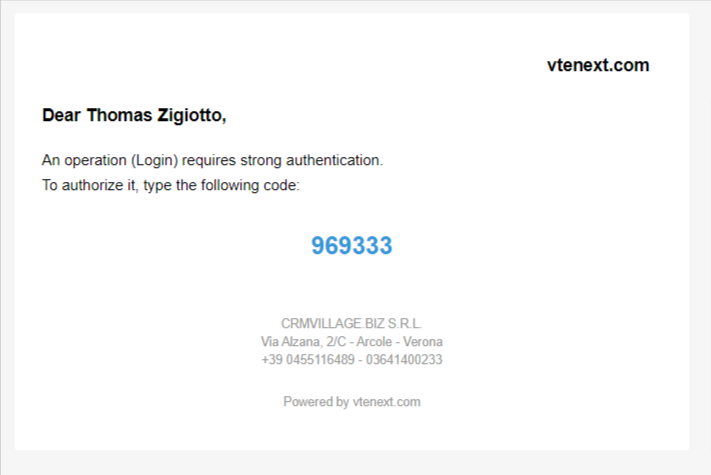
Contextually, this email will be sent to the user (the email template is editable):
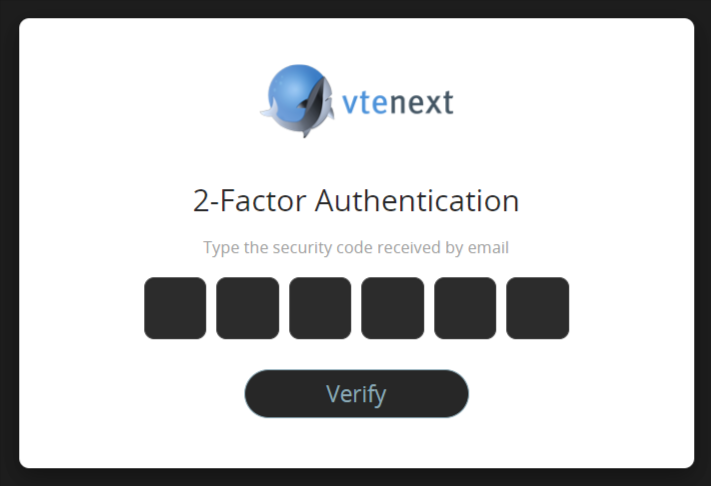
So, everytime you want to login via Web you will see this page in which you have to insert the security code recieved by the email:
Here it is the template email of the security code (the email template is editable).
DEACTIVATION / CHANGE OF WAY TO AUTHENTICATE
If the 2FA is active and you want to change the way you authenticate or disable it you will be asked to type your user password and the security code which will be sent you via Wilson or Email (it depends on the 2FA you have activated)
Screen for deactivating/changing two-factor authentication
2.8 Access privileges
The access privileges associated with the user and used to access vtenext are defined by the admin user.
Based on the selected modules, the following permissions can be granted to a vtenext user:
- view;
- create or edit;
- delete;
- import/export data.
N.B. To depeen your knowledge we suggest reading the chapter 16.1.1 Create new profile.
The admin user can change all the basic settings of vtenext. The core of the CRM is represented by the customer lists. Before creating customer lists it is essential:
to understand how to create processes (purchase, sale, assistance, etc.) with vtenext; to set up the layout and user privileges on the admin side.
The following pages illustrate how to manage macro-areas and the main processes in vtenext. The final chapters contain a detailed explanation of the advanced settings that can be handled only by the Admin user.