10 After-sales: trouble tickets and activity tracking
- 10 After-sales: trouble tickets and activity tracking
- 10.1 Trouble Tickets
- 10.1.1 Service channels
- 10.2 Timecards
- 10.3 SLA
- 10.3.1 SLA configuration
- 10.4 Activity tracking
- 10.5 Services Contract
- 10.6 Installations
- 10.7 FAQs
10 After-sales: trouble tickets and activity tracking
The after-sales phase is focused on customer support and requires:
- Managing any problems or customer requests about the products/services provided;
- Providing the customer with a tool for monitoring the progress of work on each request;
- Providing the sales department with an overview of the requests made by customers for each product/service offered;
- Managing the design phases after the sale (e.g. orders);
- Providing the technician with a tool for completing the intervention report.
The HelpDesk module is based on tickets. The ticket represents the request of a customer referring to a purchased product/service that can be associated with various other vtenext entities (Calendar, Accounts, etc.).
For example:
- To issue a sold license, you can open a ticket that tracks the status and code;
- If a client has a service contract, you can open a one-year ticket to inform whoever is to manage it;
- If a client calls you with a complaint or a malfunction, you can open a ticket and assign it to a free technician who can intervene.
vtenext also offers a FAQ system in which a list of questions and answers for each product/service is available in order to provide guidelines and first level support.
The most common tickets can be managed through the FAQ system.
10.1 Trouble Tickets
A ticket applies across different areas: in HelpDesk it is considered as a request by the client, but after the sale it can also be used for internal company requests (non-conformity management) and for project activities (Planning).
It is advisable, therefore, to provide for personalised fields to categorise the nature of the ticket. As always, to create a new ticket you can proceed with the button from the HelpDesk module, or with Add Ticket from the report menu of another module.

|
Priority |
Customisable: usually on indication of the assistance service |
|
Severity |
Customisable: usually it is by indication of the sales person according to the customer's value |
|
Category |
Customisable: e.g. complaint, service under warranty or internal request |
|
Related to |
Link field with a customer data base (Accounts, Contacts, Leads) |
|
Status |
It is essential to know the progress of the ticket (statuses can be changed by the admin user) |
|
Hours |
Hours spent on the ticket; when a contract service is connected to the ticket (unit of hours), this value updates the progress of the contract (at ticket closure) |
|
Days |
Days used for the ticket; when a contract service is connected to the ticket (day unit), this value updates the progress of the contract (at ticket closure) |
|
Project |
Link to a planning sheet (project) |
|
Project task |
Connection to an operation sheet (project phase) |
Calendar, Documents and other links allow you to centralise the history of the ticket in the appropriate context, in order to rapidly find information in the future to deal with similar cases.
Finally, it is possible to add the client's signature on the intervention report linked to the Ticket. To do this, simply log into vtenext APP and click on the signature icon in the Ticket module. Below is an example of an APP signature:

The signature will be saved and reported to the Ticket. It will be present both in the specific related list, visible from the browser, and will also be integrated in the PDF Maker template for printing the report.
Below you can see an example of signature visualisation via browser and also in the PDF produced by vtenext.
![10.1 [2].png](https://usermanual.vtenext.com/uploads/images/gallery/2022-06/eHW10-1-2.png)
![10.1 [3].png](https://usermanual.vtenext.com/uploads/images/gallery/2022-06/Gtq10-1-3.png)
10.1.1 Service channels
The tickets can mainly come from three different communication channels:
Phone: the client calls your company to request support, in this case the ticket will be created by your operator manually on vtenext.
Email: you can dedicate an email address to the management of support requests (example: support@mydomain.com), by configuring the reading of the box in the HelpDesk module. All emails received in the inbox are transformed into vtenext tickets and sorted manually or automatically (according to workflow). The Mail Converter tool allows this. See the relevant chapter.
Customer Portal: the preferred channel of vtenext, an area reserved to customers where they will be able to open the tickets, which you will receive in real time in the HelpDesk module. You and the customer can have a conversation through comments. The Portal is not only a ticket acquisition channel but also a real management channel for communication with the customer that includes, in addition to the HelpDesk area, FAQs and a series of document-sharing options at the discretion of the admin user. See the relevant chapter for configuration.
10.2 Timecards
It is possible to associate resolution actions with the tickets. This is a second level of detail, if a ticket requires more actions for the problem to be resolved.
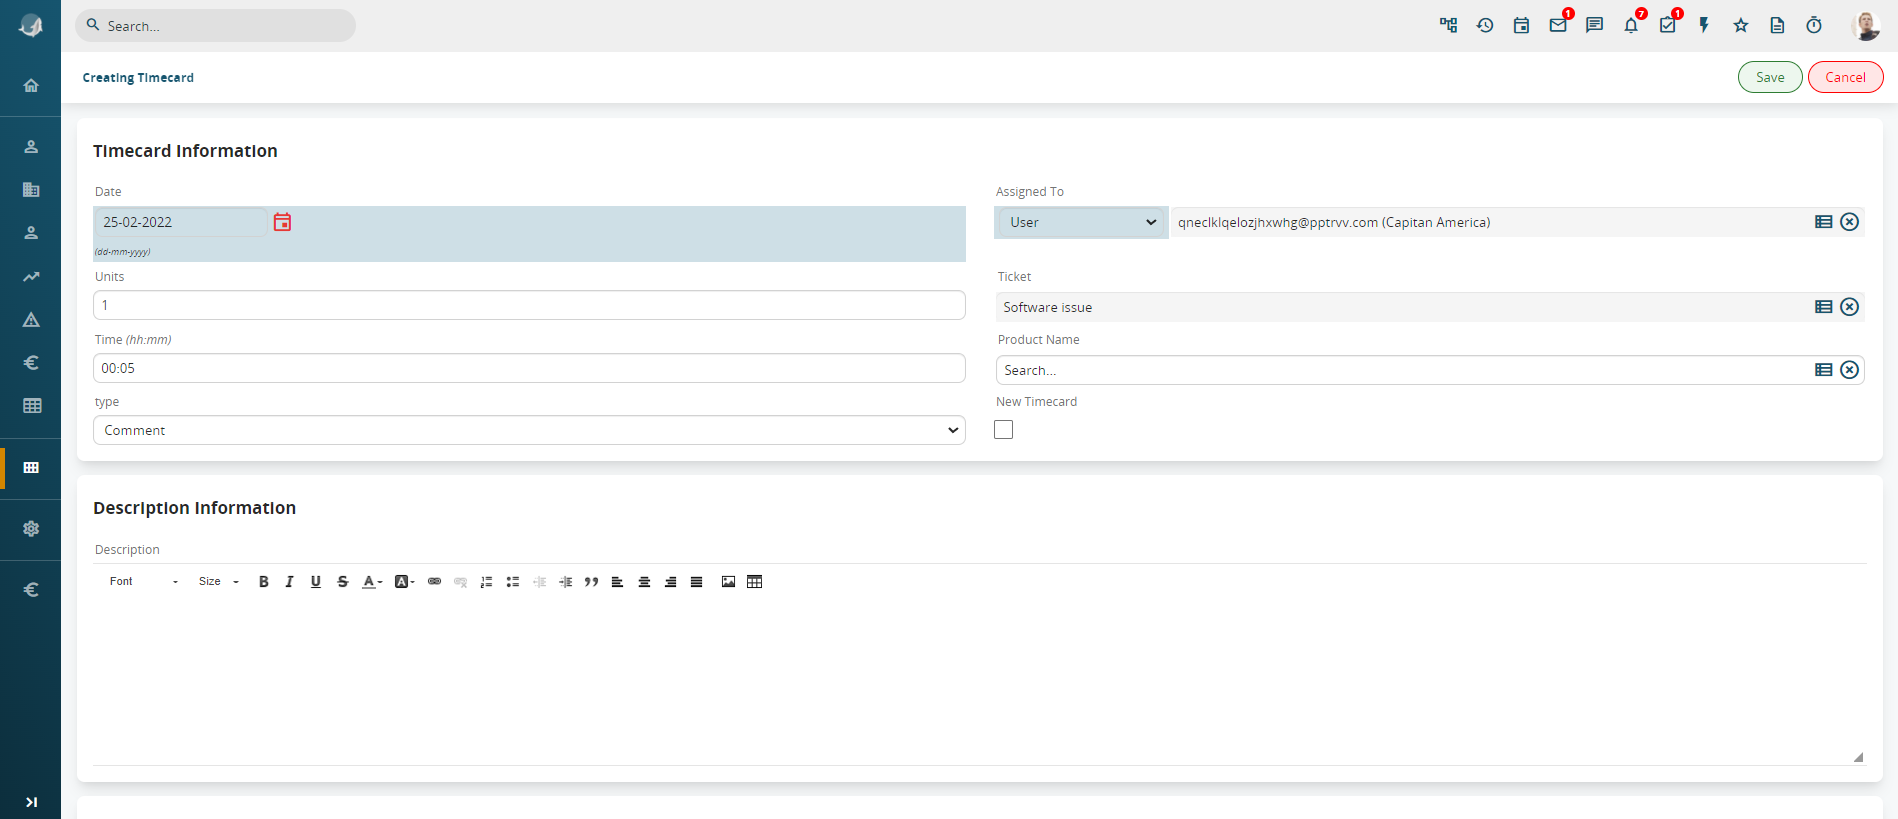
|
Date |
Date of intervention |
|
Assigned to |
User or group of users |
|
Unit number |
Number of units involved in the intervention |
|
Time |
Time spent |
|
Product |
Link to the product concerned |
|
Ticket |
Reference Ticket |
|
Create Timecard |
If active, it allows you to create a new Intervention upon saving |
|
Change Status |
Change reported ticket status |
|
Assign ticket to |
Allows you to reassign the reported ticket |
The sum of the duration of Interventions relating to any given ticket is shown in the Hours or Days field of the ticket.
10.3 SLA
The Service Level Agreement defines the level of efficiency that a company is committed to maintaining in regard to its customers with respect to the provision of a service. The efficiency of the support is measured not only in terms of effectiveness, i.e. the achievement of the objective, but also in terms of level of performance with which the objective is achieved.
SLAs are generally applied to assistance services and define the time taken to take charge of and resolve reported malfunctions. The timing varies according to the categorisation of the problem: for example, if the problem concerns a blockage in the production process, the expected SLA will be lower than the reporting of a non-blocking malfunction. In the first case, the company will have set an SLA of 4 hours, in the second of 12 hours.
The taking charge times consider time slots and working days. For example: the service is guaranteed between 8.00 and 18.00, 365 days/year; the blocking notification (which provides for a 4-hour SLA) is opened at 16.00 on 5 March, thus the expiry of the SLA will be at 10.00 the following day, 6 March.
In vtenext, the SLA functionality is integrated with the HelpDesk module, counting the time from the opening of the ticket to when a user takes charge of it.
It is displayed in the corresponding block:

|
Time elapsed |
Time elapsed since opening the ticket (as explained above) |
|
Time remaining |
Time still available before the expiry of the SLA |
|
SLA start date |
Date and time of counting start |
|
SLA end date |
Date and time when the SLA is expected to close |
|
Update time |
Date and time of the last update of the automatically recognised fields* |
|
SLA Estimated time |
Time allocated to the ticket to resolve and close the problem |
|
Due Date |
The date of closure status is entered automatically |
|
Due time |
Time the ticket is closed |
|
End SLA |
Recognised if the count is completed |
|
Idle Time Elapsed |
Time spent in suspension (see below) |
|
Out SLA Time Elapsed |
Indicates how much time is being spent in excess of the guaranteed SLA |
|
Reset SLA |
Resets and restarts the count |
Warning! The frequency of the update depends on the SLA CRON configuration settings in the operating system. The default SLA CRON is disabled, so it must be activated for the module to work. See the relevant chapter: CRONJOB – Processes to be scheduled.
10.3.1 SLA configuration
To configure the SLA module, access the SLA.config.php file in the subfolder where the CRM modules/SLA is installed.

Then open the file with an editor (e.g. Notepad++):

The file allows you to define a series of settings related to the SLA count; details given below.
Module and status field definition

Suspension statuses
It is possible to define one or more statuses for which the SLA count is interrupted:

In the figure, the SLA count is suspended if the ticket is placed in "Wait For Response" status.
Add a new status for suspension
To add a new state:
(a) add a new line to the configuration file as shown in the figure:

(b) enter the value between quotation marks and then the comma as shown in the figure:

Warning! The configuration is case sensitive so pay attention to upper and lower cases!

Warning! For pre-configured and non-removable values, the value must be entered in English (access the CRM in English and view the values e.g. with the picklist editor):

Warning! For custom values entered through the Standard Picklist Editor, input exactly the value entered:
In the figure, the custom value entered is "Waiting for goods" (all custom values entered through the standard picklist editor remain unchanged even when accessing in different languages. In the example in the figure, the value entered in Italian remains unchanged even when accessing in English).
(c) save changes.
Statuses for counting to the Deadline
It is possible to define one or more statuses that cause an end to counting:

Add a status for the Deadline
To add a new status:
(a) add a new line to the configuration file as shown in the figure:

(b) enter the value between quotation marks and then the comma as shown in the figure:

(c) save the changes
Due date and time
It is possible to define whether the Due Date and Due Time fields should be automatically recognised.

If so, the Due Date and Due Time will be automatically recognised as soon as the Status of the ticket takes on one of the values defined in the Statuses section of the paragraph for Counting to the Deadline.
If not, then Due Date and Due Time will have to be manually recognised.
Time slots
It is possible to define the time slot in which the service is to be considered active for each day of the week (therefore counted in the SLA calculation):

Let's look at the structure of a line in detail. Each line is made up of two time slots, one for the morning and the other for the afternoon; thus each time slot contains an indication of the start time and end time:

Example 1 of modifying a time slot.
Let's suppose we want to change the Wednesday time slot: FROM 8.00-12.00 and 15.00-19.00 TO 8.00-13.00 and 14.30-18.30.
Let’s intervene on the line that corresponds to the day “Wednesday” :

We therefore modify the line that corresponds to Wednesday
the file is then saved.
Example 2 of modifying a time slot.
Let’s suppose you want to set Saturday to work only in the morning time slot 8.00-12.00.
We therefore modify the line that corresponds to Saturday:

and we remove the code that refers to the afternoon time slot:

so:

and we save the file.
Excluded days of the week
It is possible to define which days of the week can be completely excluded from the counts:

Add a day to exclude
To add a day to exclude:
(a) add a new line as in the figure:

(b) indicate the sequence of the day followed by a comma:

Correspondence days and progressives:
|
Days |
Progressive number |
|
Sunday |
0 |
|
Monday |
1 |
|
Tuesday |
2 |
|
Wednesday |
3 |
|
Thursday |
4 |
|
Friday |
5 |
|
Saturday |
6 |
c) save the file.
Holidays in the year
It is possible to define days in the year that should be excluded from the count (public holidays):

Add a holiday
For example, let’s add a Patron Saint’s day and assume it is celebrated on 5 June:
(a) add a new line as in the figure:

(b) Indicate the day between quotation marks according to the 'gg-mm' pattern and then a comma as in the figure:

c) save the file.
Special days
It is possible to define special days. Special days may be: days in the year to be counted, although they are normally skipped; days with a different time window than normal:

Addition of a special day:
Let’s suppose you want to define Christmas Eve as 8.00-12.00 and 14.00-16.00, then:
(a) add a new line as in the figure:

(b) then indicate the day and time slot in the format: 'gg-mm'=>Array(Array("hh:mm", "hh:mm"), Array("hh:mm", "hh:mm")), in the example we will add the following line:

c) save the file.
Calculated fields list
Do not change this section.

SLA Estimated Time
The field SLA Estimated Time field must be valorised with the estimated SLA resolution time associated with the ticket:

Warning! During the insertion phase, the SLA Estimated Time must be stated with the value expressed in seconds:

Automatic reported SLA Estimated Time
It is possible to configure vtenext in such a way as to automatically complete the SLA Estimated Time field through Process manager.
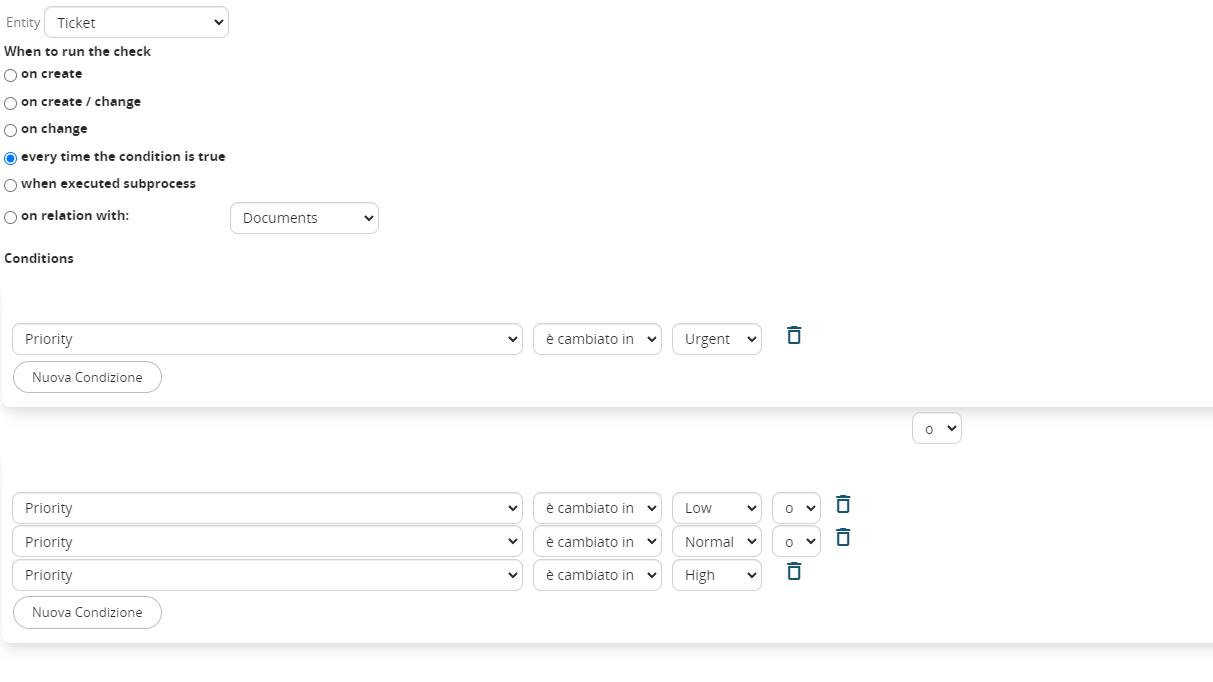
Example:
If the ticket is defined as blocking, then the SLA Estimated Time is 4 hours; otherwise it is 12 hours. We therefore create a Process that sets the SLA Estimated Time on the basis of the blocking Failure Flag by selecting:
1. Move to Settings Business process Manager > Process Manager and click on New in the top right corner of the screen.
2. Insert a title and eventually a descprition alligned to the subject of the process, like in the followin example:

3. Create a process that starts when the field priority is changed. The process has two different paths: urgent priority or other priorities. Now suppose that Urgent ticket set SLA to 4 hours instead other priorities set SLA to 12 hours;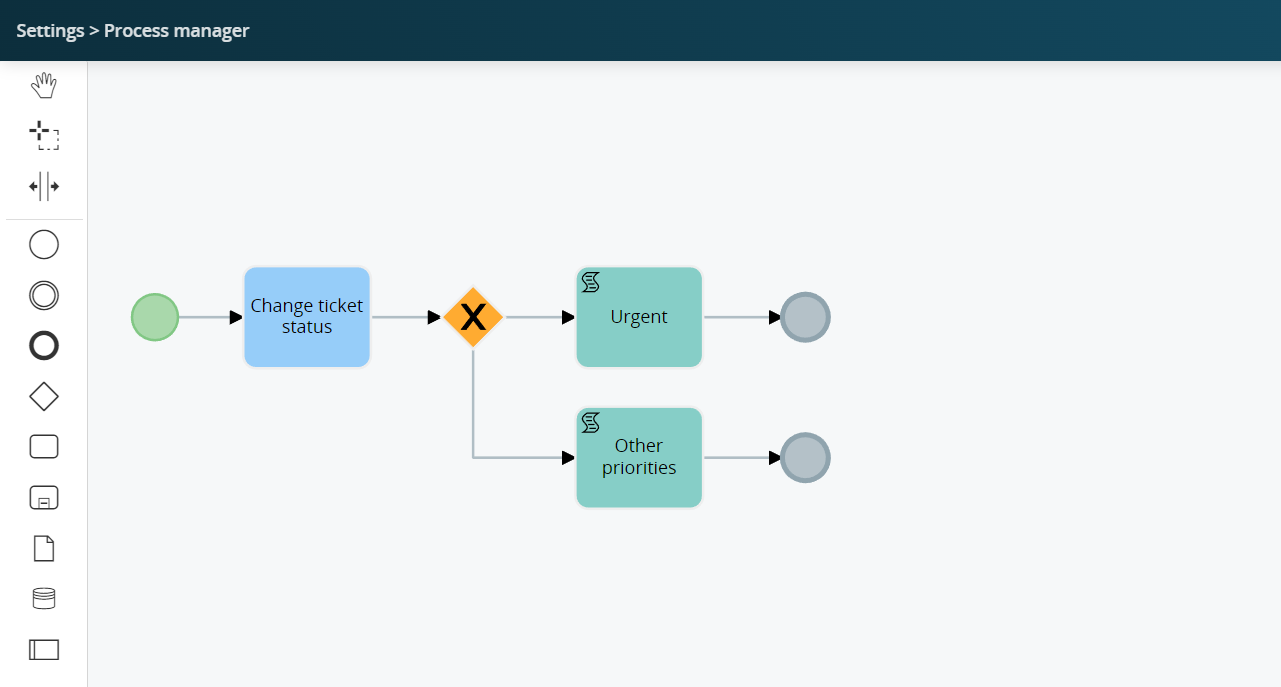 4. Set up the condition inside the task "Change ticket staus" as described below:
5. Now Set up the gateway to address the correct task if the process is urgent:

6. Lastly set up the two task "Urgent" and "Other priorities" in this way:

Urgent priority, set the field SLA estimed time to 4 hours (that is 14400 seconds)

Other priorities, set the field SLA estimed time to 12 hours (that is 43200 seconds)
Reset SLA
The SLA Reset Flag allows you to reset the counts in progress to zero and restart them when the SLA count is set.

Procedure:
- flag the "Reset SLA" field to reset all counts to zero:

- then reload the page to view the new counts:

10.4 Activity tracking
Tracking is useful for always storing and monitoring the time invested on your customers for any kind of activity. The tool is present in the Company, Contact, Ticket sheet and in email (Messages module), in the form of the Play, Pause and Stop buttons.
![]()
![10.4 [1].png](https://usermanual.vtenext.com/uploads/images/gallery/2022-06/t2V10-4-1.png)
As soon as you start tracking, the system counts the time that elapses until it stops. It is also possible to pause the tracking so as not to count any suspensions.
At the end, the creation of a calendar event (Track) or a linked event plus associated Ticket (Track and Ticket) is proposed. Activities created in this mode take on the Track type and can then be reported.
![10.4 [2].png](https://usermanual.vtenext.com/uploads/images/gallery/2022-06/jk310-4-2.png)
The extension of time in the event made with the activity tracking may differ from the time actually spent in recording due to an rounding effect applied to the time recorded. Below list of all cases subject to this phenomenon:
- activity from 0 to 4 minutes will be rounded to 4 minutes;
- activity of 5 minutes are not rounded;
- activity from 6 to 10 minutes will be rounded to 10 minutes.
Please note: the tracking tool can only be activated for one entity at a time.
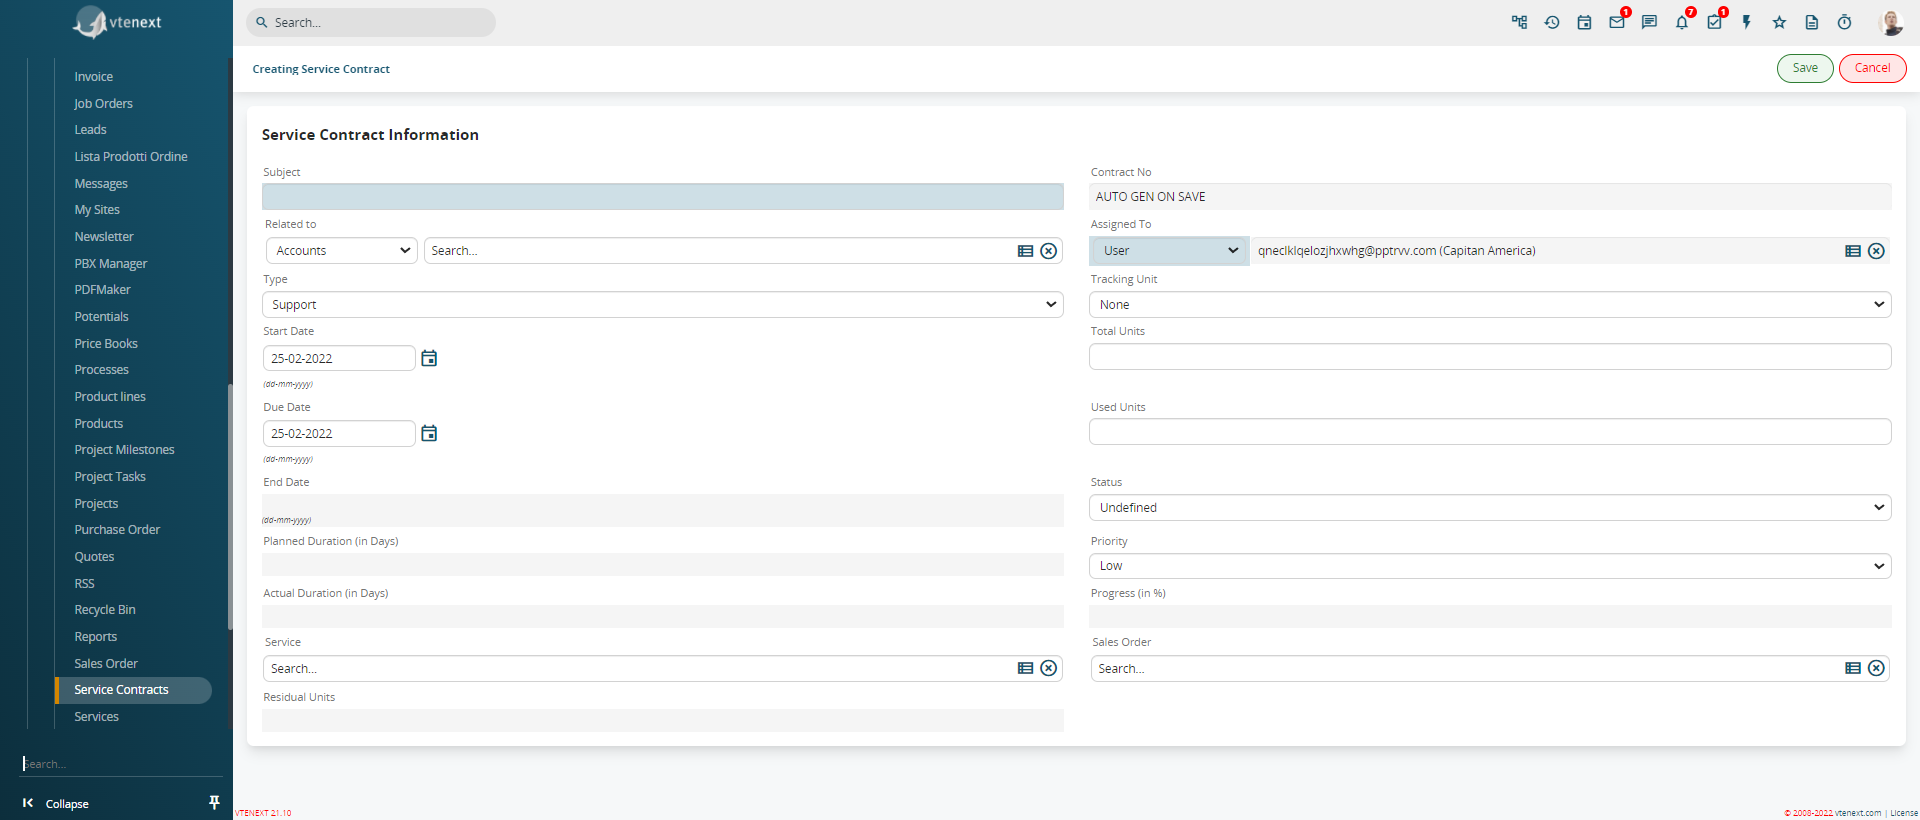
10.5 Services Contract
In vtenext there is the SERVICE CONTRACTS module dedicated to the management of a service sold to a customer, which tracks the provision of the service during the time provided for by the contract.
For example, if you sell a 20-hour service package valid for 1 year, here you can create a package dedicated to the specific client by entering dates and total number of hours, and track the hours through linked tickets.
|
Field |
Description |
Insertion Criterion |
|
Due date |
End date of contract service |
When the status is set on Complete, or when the units used reach or exceed the total units |
|
Planned Duration |
Period in days in which the service is planned |
When saving the record |
|
Current Duration |
Actual period used (in days) |
When saving the record or when the unit used is updated |
|
Progress |
Percentage progress of the service |
When saving the record or when the unit used is updated |
|
Related to |
Connection to company or contact |
Upon creation, manual if you create from scratch, auto-completed if you generate the service from a connected module. Priority is given to Accounts |
|
Tracking unit |
Calculated on the basis of the units used |
When the contract service is added from invoice, quote, |
|
Total Units |
Number of units provided for in the contract |
Automatically reports the value of the No. of units field of the connected service |
|
Used Unit |
Number of units used so far |
Scaled from the related tickets according to the time used on each ticket in closed state |
|
Residual Units |
Difference between total units and used units |
Self-generated |
10.6 Installations
Some companies need to associate a specific serial or registration number to a sold product. vtenext allows you to store this information in a special module that links customer and products. The Installations module allows you to track all the registration numbers that have been sold/hired to customers, while also monitoring the history of any assistance provided on the individual model.
For example, today you sell a "Brand – Model X" boiler to a customer, and you file it away with serial number XYZ1234 that identifies the model and the location (room 1). Tomorrow the same customer buys another boiler from you, the "Brand – Model X" to be located in room 2. It will be stored among the installations related to the customer with the JKW8900 serial line.
When the customer reports a fault in the first boiler, the ticket will be connected not only to the customer and to the generic product Boiler "Brand – Model X", but also to the serial XYZ1234.
An installation must necessarily be linked to:
- A product, with which the article in the catalogue is identified;
- A unique serial/registration number;
- A customer (company);
- An identification name (you can make it match the serial number in order to simplify any search);
- A status to distinguish active machines from decommissioned ones.
From the company registry, it will be possible to view, for example, the fleet of machines sold to the customer.

The historical assistance on the product will be visible from the installation data.

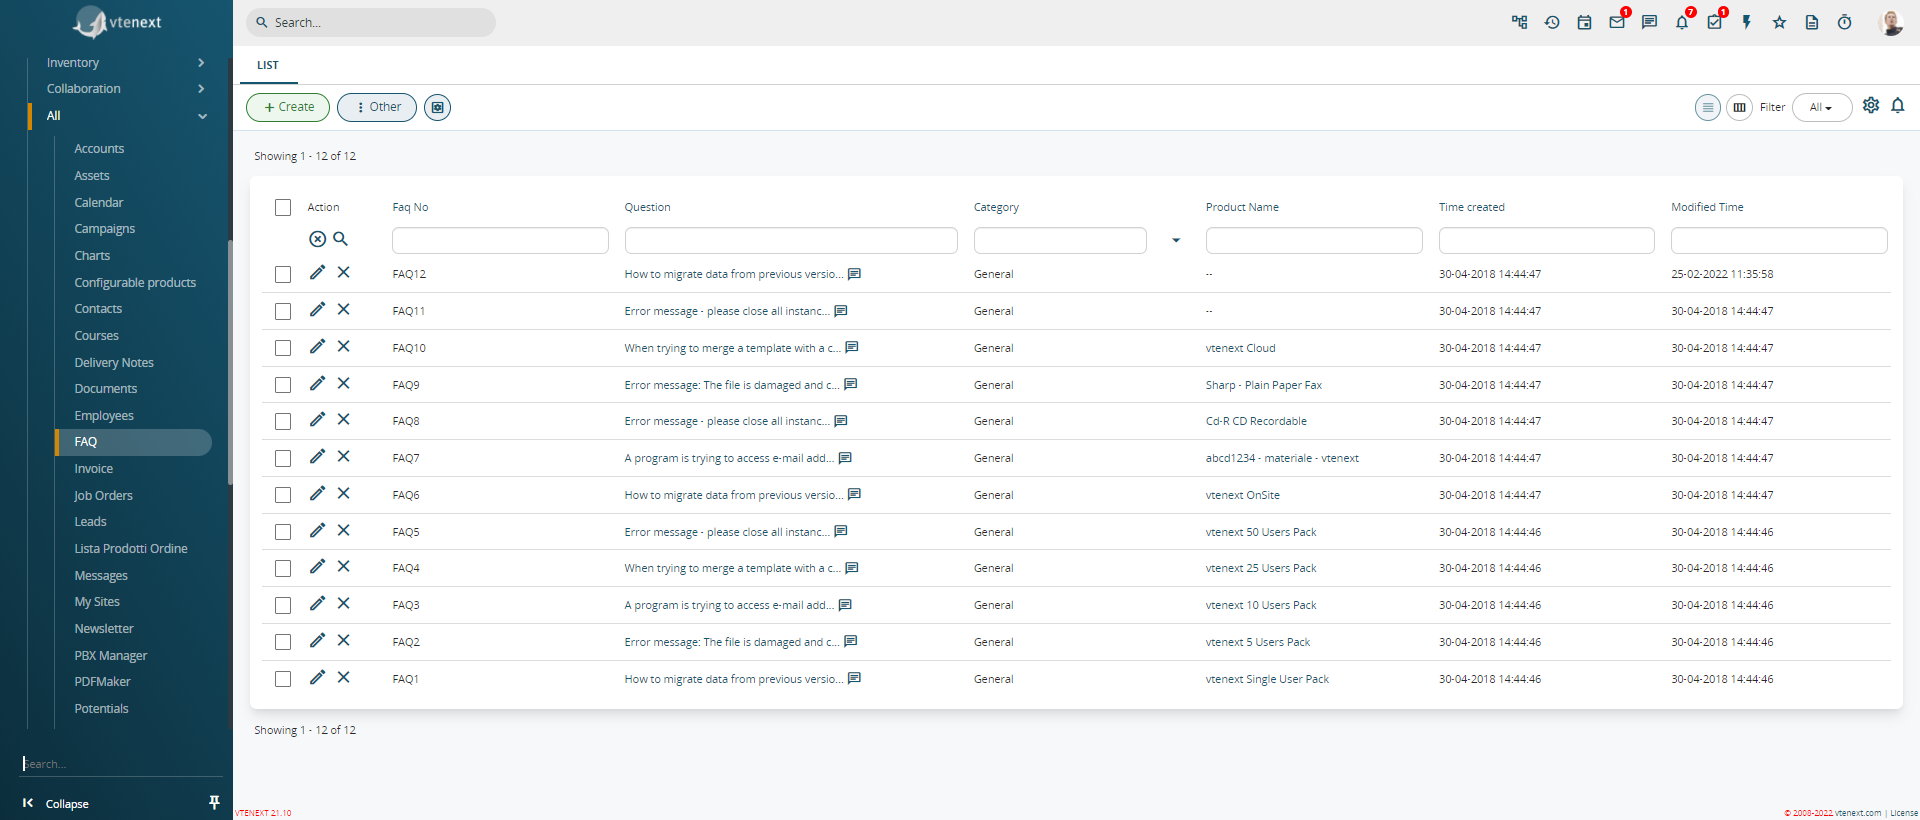
10.7 FAQs
FAQs (Frequently Asked Questions) refers to typical questions relating to the standard scenario, with answers that provide guidelines that can be consulted in a list. In vtenext they can be used:
As basic knowledge provided to your customer on a certain product, service or procedure, through the sharing of FAQs on the Customer Portal;
They can also be used to inform your employees about internal procedures and how to respond to the customer.
The FAQ tab includes fields for linking the question-answer to a product data sheet, categorising it by type and filtering its contents to a list (using Filters, also applicable on the FAQ module), for finding out the status (active or not active) of the question-answer, and more (customisable).

N.B.: FAQs can be generated very quickly by directly converting a ticket into a FAQ. To do this, just enter details of a ticket, click on the OTHER button in the top right corner and then click on the CONVERT AS FAQ button (see figure below).
