17 vtenext customization: advanced settings
- 17 vtenext customization: advanced settings
- 17.1 Process Manager
- 17.2 Workflow
- 17.3 Status Manager
- 17.4 Conditionals
- 17.5 Wizard Creator
- 17.6 Modules Creator
- 17.6.1 Create new module
- 17.6.2 Other functions on modules
- 17.6.3 Import new language pack
- 17.7 Layout editor
- 17.7.1 BUTTON field in vtenext
- 17.7.2 Modules Manager and Layout Editor
- 17.8 Standard Picklist Editor
- 17.9 Multilingual Picklist Editor
- 17.10 Linked picklist editor
- 17.11 Encrypted Field Editor
- 17.12 Menu Settings
- 17.13 List view colours
- 17.14 Field Formulas
- 17.15 Mail Converter
- 17.16 Data Import
- 17.17 Klondike A.I. connector
17 vtenext customization: advanced settings
Customisation features are very important because they guarantee the use of vtenext for a wide range of business processes. It is possible to design the data structure for the vtenext modules via easy-to-use web interfaces: for example, it will be you who will define the structure of your Leads, Contacts and Accounts archives or Trouble Ticket information.
The standard set-up of vtenext presents a wide range of modules that can be subsequently readapted to the needs of specific cases: you can add fields of any kind (text, number, percentage, etc.), compile drop-down menus with values decided by you, set conditions for a greater or lesser restrictive access to fields, set automatic action-reaction mechanisms, and much more.
We recommend that you customise your CRM by following these steps:
- Customise the layout of the modules according to the content you need to load (see Layout Editor);
- Define the lists using the Filters tool (please refer to it for further details) taking into account the custom fields introduced;
- Define (or redefine, if necessary) the access and security privileges of each user, also in the individual field (see Sharing Access, Roles and other tools involved);
- Introduce additional customisations (using the tools listed in this chapter), for example view colouring or workflows.
The tools to customise vtenext can be found in the Business Process Manager section of the General Settings menu:
|
|
Generates the processes that autonomously manage the data flow within the CRM |
|
|
Generates automatic actions in the CRM when predefined conditions occur (trigger > action) - Workflows are available read-only. |
|
|
Generates new wizards, which allow the creation and management of records, belonging to different modules and their relationships. |
|
|
Generates new modules, manages their content and relationships with other modules, with advanced SDK editing capabilities. |
|
|
Accesses the settings of all modules (including extra modules) to enable/disable them and change their layout |
|
|
Customises drop-down menus, to add, delete or overwrite values, change their order and visibility by roles |
|
|
Manages multi-language drop-down menus |
|
|
Creates dependencies between drop-down menus: the choice in the second menu depends on the choice in the first menu |
|
|
Management of status changes of CRM items according to constraints and pre-defined authorisations on roles |
|
|
Controls the behaviour of fields (visibility, modification, etc.) on the basis of certain conditions |
|
|
Protects the values assumed in the fields |
|
|
Selects and orders the modules shown in the main navigation menu |
|
|
Assigns a colour to the data, based on the values of the picklist fields, which is displayed in the list view of the module, in the Kanban, in the related items and in the dashboards of the homepage. Warning! Only one picklist per module can be assigned to the colours. |
|
|
Reads one or more mailboxes and, when a condition occurs, activates automatic mail operations. |
|
|
Imports data from CSV files or databases with the option to schedule the process and create advanced queries for data extraction |


17.1 Process Manager
The Process Manager is the tool that makes it possible to manage processes within a company, interpreting the drawings generated through a Business Process Model and the Notification tool (for example www.bpmn.io).
These tools represent all the automatic processes that will generate the company workflows in charts and diagrams, which will then be generated by the vtenext Process Manager.
Versioning: All settings for processes can be saved, generating a version (e.g. v.1.0). Versions can be exported or imported to ensure a higher level of security during setup.
Import the process into vtenext and Process Helper
![17.1 [1].png](https://usermanual.vtenext.com/uploads/images/gallery/2022-06/3Jk17-1-1.png)
From the screen below, accessible from Settings > Process Manager, you can import the processes created in the BPMN tool.

By clicking on Import BPMN, you can browse your hard disk and load the diagram created. It is also possible to load processes previously carried out with vtenext by clicking on the Import vtenext BPMN button.
Clicking on the task opens the screen where you can set the conditions. Since you want something to happen every time a company is created:
![17.1 [4].png](https://usermanual.vtenext.com/uploads/images/gallery/2022-06/uka17-1-4.png)
- In Entity choose Account
- In "when to check" select "first save only"
- Click on the "New Group" button
- Set "Rating" equal to "Active"
- Click on Save
By clicking on the "gateway" task, you can set if/else conditions. You can then select the following from the respective drop-down menus:
![17.1 [5].png](https://usermanual.vtenext.com/uploads/images/gallery/2022-06/lXa17-1-5.png)
- in Active equals Rating, choose "ScriptTask: create potentials"
- in otherwise go to, select "ScriptTask: send email"
- click on Save
By clicking on the "create potentials" task, you can set the expected actions using the respective drop-down menus:
![17.1 [6].PNG](https://usermanual.vtenext.com/uploads/images/gallery/2022-06/jTb17-1-6.PNG)
- click on New Action
- in Create a new type of action, select "Create Entity"
- click on Create
Clicking on "create" opens the screen that allows you to set the variables that will automatically compile the new Potential.
![17.1 [7].png](https://usermanual.vtenext.com/uploads/images/gallery/2022-06/D8N17-1-7.png)
- Edit the fields using the variables made available by the module
- Once you have completed the fields, click on Save
In the Process Manager you can create entities (processes) associated with any CRM module, which contain a set of instructions that allow you to configure the different phases of the business process.
These phases are managed through dynamic forms, which the user can utilise to move within the flow and which are modified by the Process Manager according to the status of the business process that the user is located in. The Process Helper is a tool that allows you to configure the instructions to be executed at each stage of the business process and to set the conditions that, if verified, carry out dynamic form changes. Through the Process Helper, it is also possible to define the default assignee and the entity associated with the process.
In the "Process Helper", you have the option of inserting the suggestions to be given to the operator in order to be able to follow the work process.
![17.1 [8].png](https://usermanual.vtenext.com/uploads/images/gallery/2022-06/kRH17-1-8.png)
- Under Assigned you can enter a default assignee user
- In Related To you can use the company task variable
- In Instructions there is the option of inserting a comment that will be used by the operator to verify the status of the tasks
You must now set the actions in the "send email" task. By clicking on the task, you can enter the variables concerned:
![17.1 [9].png](https://usermanual.vtenext.com/uploads/images/gallery/2022-06/mBv17-1-9.png)
- In Create a new action type, select Email
- Click the Create button
At this point you can enter the variables by selecting the relevant fields from the drop-down menus (such as From, To, CC, Object, etc.)
![17.1 [10].png](https://usermanual.vtenext.com/uploads/images/gallery/2022-06/KNs17-1-10.png)
In the space for the email text, you can enter a standard text and also use the variables to refer to the recipient by name, enter the company name and much more.
Finally, from the Modules > Processes menu, you can follow all the in-progress processes and check their progress within the initially imported diagram directly. For further information, please refer to the specific BPMN process manual.
17.2 Workflow
The Workflow tool was replaced by the module processes (Process Manager). It is possible to see all the Workflow that were created, but is not possible to create new Workflow.
If an user try to click on New Workflow in the top right corner of the screen, the crm will show the following pop up:
![17.2 [1].png](https://usermanual.vtenext.com/uploads/images/gallery/2022-06/kbk17-2-1.png) Workflow module has been replaced by Processes. Would you like to create a process?
Workflow module has been replaced by Processes. Would you like to create a process?
17.3 Status Manager
This tool makes it possible to implement flow logics in the management of information through the definition of rules for the change in value of a field Status.
A practical example is given below.
A quote must be approved by the sales manager before being delivered to the customer. The agent creates the offer, submits it to the manager, who may decide to approve it or not. The budget cycle will therefore be characterised by the following status steps:

With the Status Manager it is possible to force the user to follow a predefined path, preventing them, for example, from delivering the quote if they have not received approval. This allows for greater control and exploitation of information, as well as making such approval cycles simpler to manage.
In addition, the logics can be defined based on the roles involved in the flow. Let's suppose, for example:

Each step is stored in a history that accurately records the players involved and the actions carried out, allowing for monitoring of the progress of the flow.
Let's see how to implement the above example (via the administrator user).
STEP 1: From Settings > Standard Picklist Editor, set the Quote Status field with all necessary values: Created, Requested Approval, Not Approved, Approved, Delivered, Accepted, Rejected.
![17.3 [3].png](https://usermanual.vtenext.com/uploads/images/gallery/2022-06/nbg17-3-3.png)
STEP 2: Go to Settings > Status Manager, choose the Quotes module, then the Quote Status field, and click on "Enter in management".
![17.3 [4].png](https://usermanual.vtenext.com/uploads/images/gallery/2022-06/sNu17-3-4.png)
Warning! You can configure the Status Manager for only a single module field. If you try to activate the status manager on a second field, the system warns you that the operator is already active by turning the field they are actively working on in red.
STEP 3: Select the role through the relevant picklist. Keep in mind that the rules for change of status will apply to all users associated with this role.
![17.3 [5].png](https://usermanual.vtenext.com/uploads/images/gallery/2022-06/17-3-5.png)
STEP 4: Once the role has been chosen, the table for configuring the rules for value changes appears.
![17.3 [6].png](https://usermanual.vtenext.com/uploads/images/gallery/2022-06/Yyk17-3-6.png)
First define the initial value that the field should take, when the selected role creates a new quote (each role may have different initial statuses). Then complete the configuration table with the status changes.
The table must be completed by line:
the symbol ![]() represents the current status
represents the current status
- activate the flag
 at the allowed changes (from the current status to the destination status)
 - deactivate the flag
 at unauthorised changes
You can activate all status changes or deactivate all changes using the Select All and Deselect All buttons. In the examples below, the configuration is different for manager and agent.
![17.3 [7].png](https://usermanual.vtenext.com/uploads/images/gallery/2022-06/Tyy17-3-7.png)
(final configuration for Agent role)
![17.3 [8].png](https://usermanual.vtenext.com/uploads/images/gallery/2022-06/FuO17-3-8.png)
(final configuration for Sales Manager role)
You can quickly copy a State Manager configuration for another role. After selecting the module, field and role you want to configure, select the role from which you want to copy the configuration and press Copy.
Attention! All roles must have a configured Status Manager.
Example of agent side use
The following is an example of utilising user-side CRM for the quote case, with Status Manager configured.
- Creating New Quote. The new record will take on the Created status automatically and without the possibility of modification.
- Changing the status. To change the field controlled by the Status Manager you must use the panel that is available inside the Other button on the right in the detail view.
![17.3 [9].png](https://usermanual.vtenext.com/uploads/images/gallery/2022-06/Yrd17-3-9.png)
The panel shows the list of possible steps for the user. To change status, click on the new status entry and enter a note if necessary:
![17.3 [10].PNG](https://usermanual.vtenext.com/uploads/images/gallery/2022-06/0Ht17-3-10.PNG)
3. The Status History records each change in value.
The standard field of the entity will therefore not be modifiable via picklists.
![17.3 [11].png](https://usermanual.vtenext.com/uploads/images/gallery/2022-06/gpH17-3-11.png)
17.4 Conditionals
Conditionals allow you to define special permissions to access one or more fields of the same module when a condition defined within it occurs, with the same logic as advanced filters.
When a condition occurs:
- one or more fields are rendered hidden;
- one or more fields are rendered read-only;
- one or more fields are rendered visible and editable;
- one or more fields are rendered mandatory;
- a combination of the above points is created.
These rules can be defined for users who belong to a role, a branch of the hierarchy, or a user group.
Examples of use.
a) In your business activity three types of company are classified (Customers, Partners and Competitors) through the Type field present in the registry. You also need to define an additional specification for each type, by preparing the Specify Customer, Specify Partner and Specify Competitor fields.
You can configure Conditionals as follows:
- if the company is Type = Partner, display the Specify Partner field and hide the Specify Customer and Specify Competitor fields (so that users cannot fill them in incorrectly);
- if the company is Type = Competitor, display only the Specify Competitor field;
- if the company is Type = Customer, display only the Specify Customer field.
b) You have prepared two blocks of information in the registry, one for commercial management and one for technical management. You want to give traders access to technical information, but you do not want to give them permission to change it. Through Conditionals you can redefine the access permissions on the individual fields of the "Technical Information" block by setting them as visible but not changeable for the commercial role.
Let's look at how to create and configure the rules.
Again, only the administrator user can access Settings > Conditionals.
![17.4 [1].png](https://usermanual.vtenext.com/uploads/images/gallery/2022-06/Pr417-4-1.png)
STEP 1: Configuration of the rules.
![17.4 [2].png](https://usermanual.vtenext.com/uploads/images/gallery/2022-06/ygG17-4-2.png)
Enter the name of the rule as you like:
- select the module on which to apply the rule;
- indicate the role or group for which the rule must be valid (the rule will then be applied to all users belonging to that role or group).
The rule can be applied to:
- a specific role (e.g.: Role: Agent)
- a branch of the hierarchy (e.g.: Role and subordinates: Sales Manager)
- a specific group of users (e.g.: Team Marketing Group)
![17.4 [3].PNG](https://usermanual.vtenext.com/uploads/images/gallery/2022-06/lmm17-4-3.PNG)
Then enter the condition(s) that must be checked for the rule to be applied. Remember that you can define the rules only on the chosen module.
![17.4 [4].png](https://usermanual.vtenext.com/uploads/images/gallery/2022-06/LZ917-4-4.png)
It is possible to define multiple conditions (Add Condition): all conditions are linked with AND operator. To activate the rule all conditions must be met.
For checkbox type fields (flag), enter 0 for "no" and 1 for "yes".
STEP 2: To access the field permissions configuration area, press Show. Then define the permissions for each field.
![17.4 [5].png](https://usermanual.vtenext.com/uploads/images/gallery/2022-06/lrc17-4-5.png)
|
Managed |
Means managed by the rule, when it occurs. The fields that you do not have to manage should be left disabled; in conjunction with those to be managed, tick the box and proceed with the others. By enabling only this field, without the subsequent ones, the field will be hidden. |
|
Read |
By enable reading permissions, the field will be visible |
|
Write |
By enable writing permissions, the field will be editable |
|
Mandatory |
Makes the field mandatory (function active only in the event of combined use of Status Manager and Conditionals) |
Configuration examples.
Hide a Field (you set it to be managed but do not enable any of the other available permissions)
![17.4 [6].png](https://usermanual.vtenext.com/uploads/images/gallery/2022-06/t8w17-4-6.png)
Make a field read-only (manage it and enable read-only permission)
![17.4 [7].png](https://usermanual.vtenext.com/uploads/images/gallery/2022-06/xKK17-4-7.png)
Versioning: All settings for Conditionals can be saved, generating a version (e.g. v.1.0). Versions can be exported or imported to ensure a higher level of security during setup.
N.B.: the conditional fields are not managed by the mobile app, so the configurations made are valid only for the web version.
17.5 Wizard Creator
The "Wizard Creator" function allows the administrator to create guided procedures (called wizards to be exact).
You can access this function through Settings > Wizard Creator; you can create your own custom wizard following 4 simple steps as you can see in the following screens.
![17.5 [1].png](https://usermanual.vtenext.com/uploads/images/gallery/2022-06/v4N17-5-1.png)
![17.5 [2].png](https://usermanual.vtenext.com/uploads/images/gallery/2022-06/45K17-5-2.png)
![17.5 [3].png](https://usermanual.vtenext.com/uploads/images/gallery/2022-06/Lnq17-5-3.png)
You will be able to view the created wizard at the end of the four steps.
![17.5 [4].PNG](https://usermanual.vtenext.com/uploads/images/gallery/2022-06/lN217-5-4.PNG)
Once saved, the Wizard can be inserted into a tab in the view by list of a module. In the specific example, a Wizard has been set up for creating technical support tickets. You then go to the specific module and click on the page configuration.
![17.5 [5].png](https://usermanual.vtenext.com/uploads/images/gallery/2022-06/Ak017-5-5.png)
Click on "New simple tab" and choose a name for this new view.
![17.5 [6].PNG](https://usermanual.vtenext.com/uploads/images/gallery/2022-06/pOH17-5-6.PNG)
![17.5 [7].PNG](https://usermanual.vtenext.com/uploads/images/gallery/2022-06/lbz17-5-7.PNG)
When you click the "Create" button, a blank page will appear with the following sentence: “No widgets configured. Click here to create a new one.” This will allow us to choose the Wizard item from among the available options.
![17.5 [8].PNG](https://usermanual.vtenext.com/uploads/images/gallery/2022-06/f9G17-5-8.PNG)
Once this is done, the CRM will ask us to choose the Wizard to display in the newly created tab.
![17.5 [9].PNG](https://usermanual.vtenext.com/uploads/images/gallery/2022-06/ANf17-5-9.PNG)
By clicking on the "Save" button, we can obtain the result as shown below. Clearly, several Wizards and dashboards can be placed on the same page at the same time. This is to allow each user to choose how to configure their display.
![17.5 [10].png](https://usermanual.vtenext.com/uploads/images/gallery/2022-06/17-5-10.png)
Clicking on the "Create Ticket" button in the Wizard, a popup will appear, with the option of creating a ticket via a number of simple steps.
![17.5 [11].png](https://usermanual.vtenext.com/uploads/images/gallery/2022-06/Vr317-5-11.png)
17.6 Modules Creator
This tool allows for the autonomous creation of entire modules integrated perfectly within the standard vtenext setup. Both basic (line header) and commercial (with product block) modules can be generated. Let's look at the step-by-step creation of a new, more advanced, module; in the example shown, we will create the Returns module. To start with the new module creation wizard, click on the Add button.
![17.6 [1].png](https://usermanual.vtenext.com/uploads/images/gallery/2022-06/lGQ17-6-1.png)
17.6.1 Create new module
STEP 1: Module information
The explanation of the individual entries can be found next to the fields to be filled in. Other labels are automatically proposed by typing the name for the new module.
![17.6.1 [1].png](https://usermanual.vtenext.com/uploads/images/gallery/2022-06/kBO17-6-1-1.png)
STEP 2: Blocks and fields
Some of the functions of the Layout Editor (those for creating and moving fields) allow you to fill in the module with the necessary content. Here, however, it is also possible to add relationship fields with other modules via the icon.
![17.6.1 [2].png](https://usermanual.vtenext.com/uploads/images/gallery/2022-06/SXA17-6-1-2.png)
The relationship field allows you to hook a record of the chosen module. In the example, our return can be linked to a sales order in the system; the type of relationship is N to 1 (the return is linked to 1 order only; the order can be linked to several returns).
The result in the returns module will be as follows:
![17.6.1 [3].png](https://usermanual.vtenext.com/uploads/images/gallery/2022-06/AO217-6-1-3.png)
STEP 3: Default filter
![17.6.1 [4].png](https://usermanual.vtenext.com/uploads/images/gallery/2022-06/oGC17-6-1-4.png)
In the first part, you can set the display of the "All" filter by choosing the columns that most interest you (similar to when you create a new Filter on a module).
In the second part, you can choose the Returns columns that will be displayed by a linked module.
The result will be as follows:
![17.6.1 [5].png](https://usermanual.vtenext.com/uploads/images/gallery/2022-06/Pt017-6-1-5.png)
STEP 4: Relations
You will be shown the default present relations and those of type N to 1 created in the previous step. By clicking Add, you can create N to N type relations, i.e. through the relations menu. In our example, we want each return to be related to one or more suppliers, and vice versa. You can also add other N to 1 relations.
![17.6.1 [6].png](https://usermanual.vtenext.com/uploads/images/gallery/2022-06/PL317-6-1-6.png)
![17.6.1 [7].png](https://usermanual.vtenext.com/uploads/images/gallery/2022-06/WZM17-6-1-7.png)
The result will be as follows:
![17.6.1 [8].png](https://usermanual.vtenext.com/uploads/images/gallery/2022-06/FDl17-6-1-8.png)
STEP 5: Labels
At this point you can translate all the module labels into the other languages installed in vtenext. If no changes are made, the new module will always appear in the language in which you are creating it (in our example, English).
![17.6.1 [9].png](https://usermanual.vtenext.com/uploads/images/gallery/2022-06/JrI17-6-1-9.png)
STEP 6: Advanced
Before launching the new module, you can define its main sharing privileges.
|
Shared Access |
Private or public in various ways; see Sharing Access chapter |
|
Enable Quick creation |
Makes the form available for Quick Creation, in the menu of the bar on the right |
|
Enable Import |
Allows data to be imported from an external source (CSV file) into the module |
|
Enable Export |
Allows you to export module data to CSV files |
|
Enable Duplicate Management |
Allows verification of duplicate data within the module |
![17.6.1 [10].png](https://usermanual.vtenext.com/uploads/images/gallery/2022-06/jl317-6-1-10.png)
INSTALL
Once the creation procedure is complete, your new module appears on the home screen accompanied by a series of icons. The module is not yet active: after creating it you need to install it so that it appears in the vtenext modules menu and can be used to interact with others.
To activate the module, press the Play icon 
The system will process the operation in a few moments.
![17.6.1 [11].png](https://usermanual.vtenext.com/uploads/images/gallery/2022-06/H1217-6-1-11.png)
17.6.2 Other functions on modules
Unistall, import, export
|
|
Uninstall the module: it will no longer be usable and the records contained within it will be removed |
|
|
Change the settings related to the module, repeating the previous steps. This function is only available if the module has not been previously uninstalled |
|
|
Export the XML format module (stored in RAR files) |
|
|
Delete the module permanently; before being deleted, a module in use must be uninstalled |
|
|
Import a module saved locally in XML format |


17.6.3 Import new language pack
The module manager allows you to import a new language package. The procedure below sets out the installation steps.


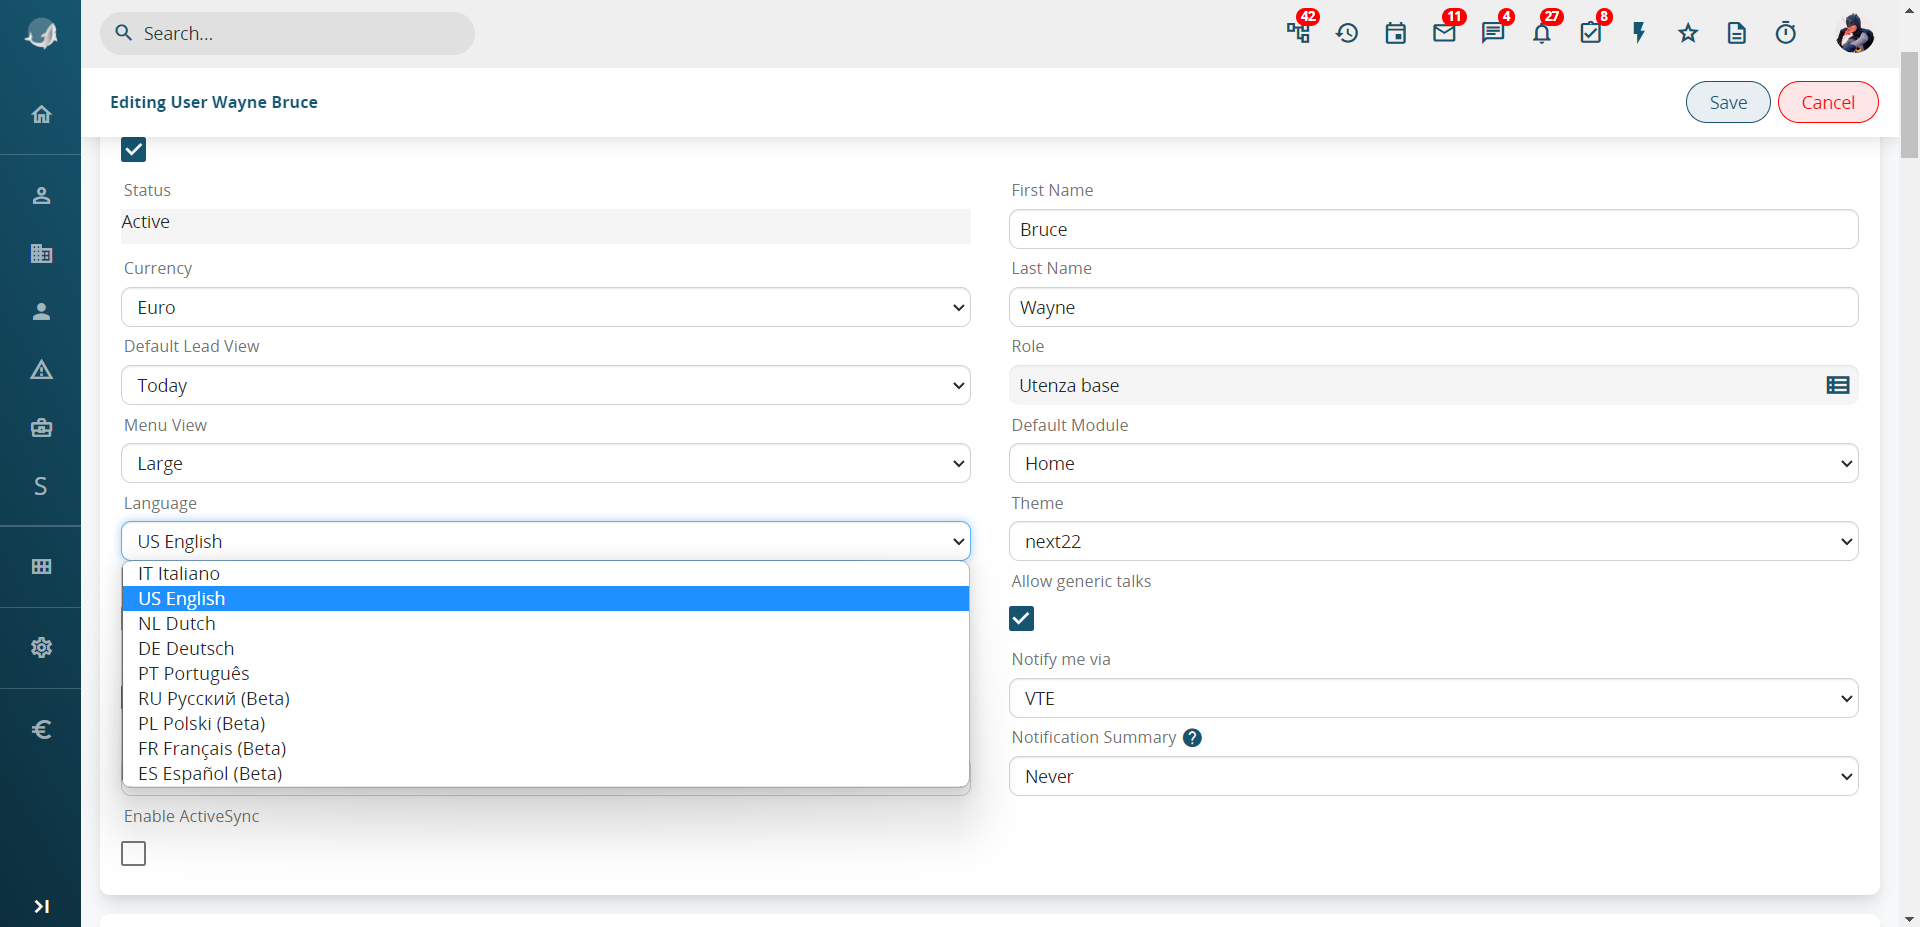
The new language can be changed in the user preferences.
17.7 Layout editor
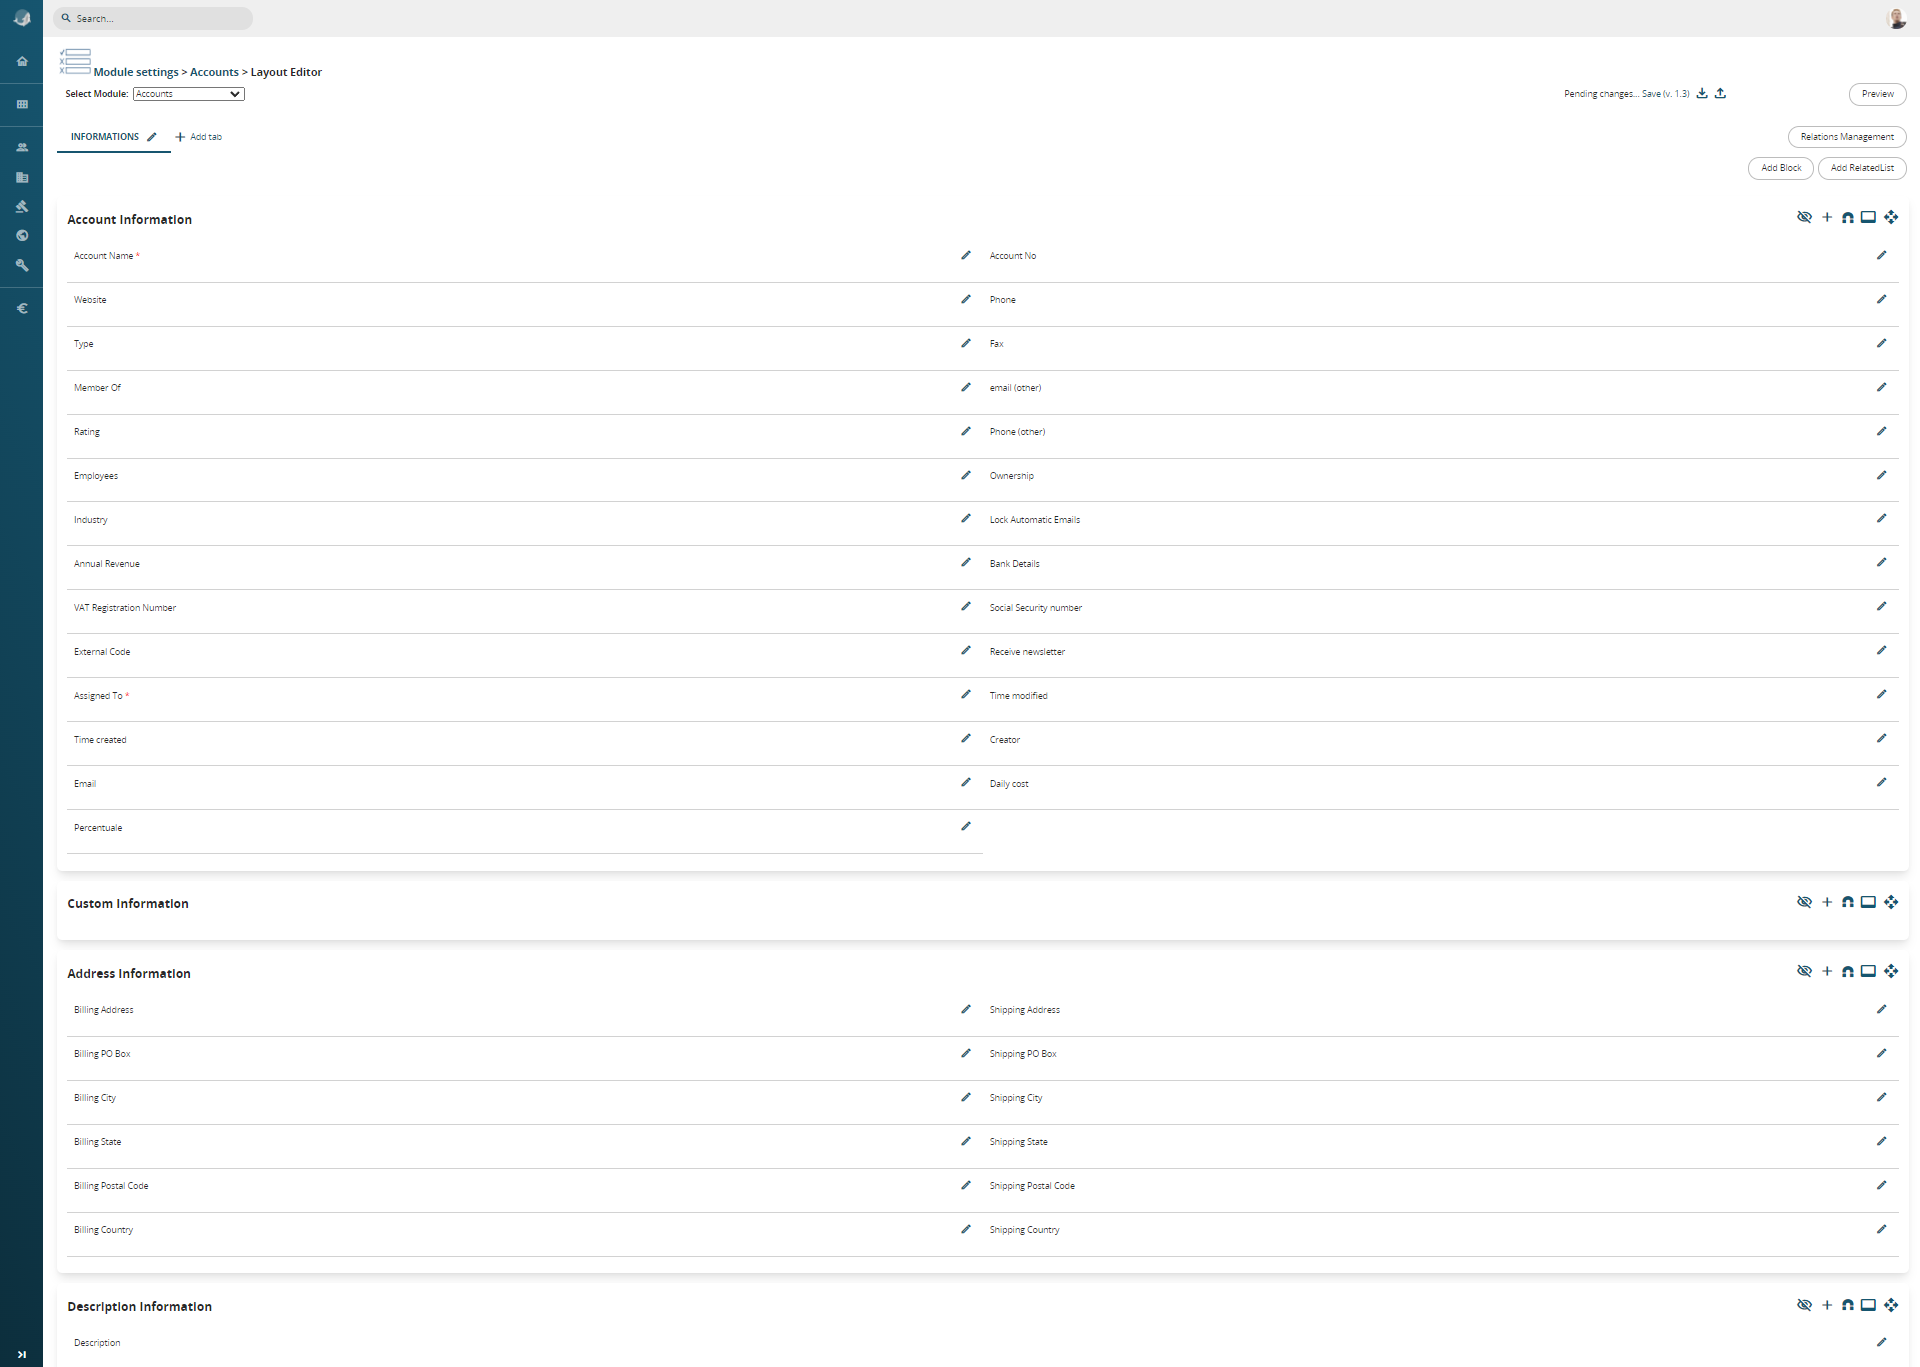
From Settings > Business Process Manager > Module name (es. Accounts) is possible to access to Layout Editor of any module.

|
|
Add custom fields to the module |
|
|
Move fields from another block to the block where the magnet is present |
|
|
Display the fields that were hidden during the layout configuration |
|
|
Use this icon to collapse the blocks. The blocks will appear closed, but if they contain fields, they will still be visible as blocks while hiding the fields they contain. Please note that a block without fields, visible in the Layout Editor, will be entirely hidden and invisible in the module detail view |
|
|
It is used to move an entire block, along with its contents, from the tab where it is located to another tab that has been specifically created or already exists |


It is possible to move a field thanks to the drag&drop function, both inside of a blocka and from one block to another one.

The layout editor allows you to:
- add a custom field within a block
- change the positioning of a field
- edit properties of the field
- display the list of hidden fields, with the option of restoring them
- move fields in other blocks into one block
- add new blocks to the tab (a block is a set of fields, useful for keeping the tab tidy)
- block operations: move above/below, delete (only allowed if the block does not contain fields)
- sort the relationships (serves to define which relationships to keep in the single tab configurator)
- add a new tab with relative blocks and fields
Versioning: all settings for the modules can be saved, generating a version (e.g. v.1.0). Versions can be exported or imported to ensure a higher level of security during setup.
Custom field types
The following are the specifications of the fields available during creation:
|
Text |
It is a field that can contain from 1 to 255 characters (letters and numbers). The desired length and the name to be given therefore need to be defined. |
|
Text Area |
Text field with pre-set dimensions, visual width equal to the card and with a maximum number of characters of 66,000 (letters and numbers) |
|
Number |
It is a field that can contain from 1 to 64 numbers (including decimals). The desired length, the name to be given and how many decimal places to enter and display therefore need to be defined. |
|
Percentage |
The name to be given to the field needs to be defined (it is recommended to insert the % symbol in the label, as a reminder). The field is purely numeric with the impossibility of exceeding 100% |
|
Currency |
The name to be given, the desired length and how many decimal places to enter and display need to be defined |
|
Date |
The name to be given needs to be defined. Activate the datapicker and autocomplete with today's date in the entity creation phase |
|
Hour |
It allows for the creation of a time field, with the option to assign a name, and provides the ability to click on a clock icon to select the time directly from a clock face. |
|
Datetime |
It allows for the creation of a field that captures both the date and the full time. The format will be dd-mm-yyyy - hh:mm, with the option to assign a name. |
|
|
The name to be given needs to be defined. Once the email address is saved, if clicked, it will open the predefined composer window to create a new message |
|
Phone |
The name to be given needs to be defined. Once the number is saved, if the switchboard is configured, you will be able to use click-to-call |
|
URL |
The name to be given to the field needs to be defined. Once saved, the URL address allows you to open it in a new tab |
|
Check Box |
This is a YES/ NO flag field. The name to be given needs to be defined |
|
Picklist |
To create a drop-down menu with the fields of your interest. The name to be given to the field and to the values (one below the other) of the list needs to be defined |
| Skype | Define the name to be attributed. Once the Skype ID is saved, it will open the chat directly with the ID setted. |
|
Combo multisection box |
To create a drop-down menu where, using the CTRL key, you can select multiple values. The name to be given to the field and to the values (one below the other) of the list needs to be defined |
|
Multilanguage Picklist |
To create drop-down menus, whose values will be available for translation into other languages. The name to be given to the field needs to be defined and then the values (with related translations) created through SETTINGS > MULTI-LANGUAGE PICKLIST EDITOR |
|
Skype |
It allows for a direct link with the Skype application, typically used to call the Skype contact entered in that field, with the option to assign a name.
|
|
Related to |
It allows you to create a related field within a module, but it will not be possible to reference the same module multiple times or to reference itself (e.g., within a Support Ticket, it is not possible to link the Trouble Ticket module) |
|
User |
The name to be given needs to be defined. It is used to insert an additional link to the entity with a user |
|
User without filtering permits |
The name to be given needs to be defined. It is used to add a link between the entity and a user by bypassing roles and permissions |
|
User from filtered list |
The name to be given needs to be defined. It is used to add a link between the entity and one of the users defined upstream |
|
Group |
The name to be given needs to be defined. It will provide a drop-down menu with any available groups |
|
Button* |
Allows you to create a button that recalls a custom function. You need to enter the code during creation *see also 17.7.1 BUTTON field in vtenext |
|
Table Field |
It allows you to create table fields, which permit you to insert lines with values of choice, recalling them from the modules or creating them specifically Note: For better usability of the table field, it is advisable not to exceed 60 rows during its use. |
|
Attach documents |
It allows you create a field for adding documents at the same time as creating an entity |
|
Signature |
It allows the creation of a signature field, to which a name can be assigned, and can be used both via the app and as a variable to be called in PDF Maker. |
|
Rating |
It allows the display of a rating system from 1 to 5 stars, to which a name can be assigned. |
|
Media |
It allows the upload of images/videos/audio and displays a preview (if the connected source permits) in the detail view of a record. When filling in this type of field, it is also possible to specify a remote URL. |
In the top right corner of the screen, has been added the button RELATIONS MANAGEMENT. This button allows to modify the relations columns present in the record details of all modules in the crm (For example. we are in the Accounts module, we can modify the columns present in Contacts, Potentials, Sales orders, etc.).


Lastly is possible to see a Preview of the screen based on a certain profile, this function allows to immediately verify if the configuration has be done correctly.

Clicking on Preview, the system will open a pick list
 From the opened menu, it will be possible to choose from which profile see the screen preview

If there will be no available users for the chosed profile, the crm will show the popup above

Example of screen preview
Layout Editor for Products block
There is also the possibility to modify the columns present in the product block in the module Quote, Sales orders, Purchase order and Invoice. The configuration, allows to vary the number of columns with customized fields ( for example unit of measurement, count per package, checkbox, description field or text fields, currency fields or numeric, etc.). The possibility to modify the columns in product block in addition allows, for each created field, to manage also new formulas, giving the possibility to go beyond the classic but however present, PxQ ( Price multiplied Quantity);

17.7.1 BUTTON field in vtenext
The button field, present in SETTINGS > MODULE MANAGER > MODULE NAME > LAYOUT EDITOR, allows us to insert a custom JavaScript function. This gives us the option of creating an automatic process/action on certain fields in the CRM.
To illustrate this, we will give a simple example.
By clicking on a CONTACT button, we want the CONTACT REQUEST checkbox field to go from NO to YES (the field to become flagged).
Here's how to proceed:
- Go to SETTINGS > MODULES MANAGER > ACCOUNTS > LAYOUT EDITOR and create the control box field, called CONTACT REQUEST. Create also the button type field called CONTACT.
- At this point, in the button type field, we will find two variables to enter, in addition to the name that will appear as a label:
- Click confirm_fieldname('Accounts') - the name of the module we are operating in will be between inverted commas
- Code:
var VTUtils = VTUtils || {
saveField: function(module, crmid, fieldname, value, callback) {
jQuery("#status").show();
var data = "file=DetailViewAjax&module=" + module + "&action=" + module + "Ajax&record=" + crmid + "&recordid=" + crmid;
data = data + "&fldName=" + fieldname + "&fieldValue=" + value + "&ajxaction=DETAILVIEW";
jQuery.ajax({
url: 'index.php',
data: data,
type: 'POST',
success: function(response) {
if (response.indexOf(":#:FAILURE") > -1) {
alert(alert_arr.ERROR_WHILE_EDITING);
} else if (response.indexOf(":#:SUCCESS") > -1) {
if (typeof callback == 'function') callback();
}
jQuery("#status").hide();
}
});
},
};
function confirm_fieldname(module){
var url_string = window.location.href;
var url = new URL(url_string);
var record = url.searchParams.get("record");
VTUtils.saveField(module, record, 'fieldname', '1', function() {
location.reload();
});
}In the last part of the code, where 'fieldname' appears, we will replace it directly with the name of the field we want to modify. To find the name of that field, simply use the "inspect" function on the Chrome browser (right mouse button) or "scan item" on the Firefox browser (right mouse button).
Replace also confirm_fieldname with the current fieldname even in the code and in the on click function.
Moving on, lastly, to the Accounts module, we will find the newly created button in the registry details. Pressing it, we'll see the CONTACT REQUEST flag field change from no to yes after a few moments.
17.7.2 Modules Manager and Layout Editor
![17.7.3 [1].png](https://usermanual.vtenext.com/uploads/images/gallery/2022-06/W4j17-7-3-1.png)
The Modules Manager allows for the activation and deactivation of all modules within the CRM, both standard and custom. It also allows us to manage the updating, enabling, disabling and creation of modules in the CRM.
In the list of modules, the green flag means that the module is active as a general CRM setting.
To deactivate it and "turn it off" (acting on all users/profiles/roles except the administrator), just click on the flag and it turns into a red X.
The Layout Editor can be accessed via the gear icon and from the Module Manager.
- Layout Editor: creation of fields, addition of block and shifting of fields already inserted;
- Mobile Layout: configuration of the field layout for access via apps;
- Field Formulas: for calculation functions on custom fields;
- Linked Picklist Editor: Edits the links between picklists;
- Standard Picklist Editor: customises the picklist values in each module.
17.8 Standard Picklist Editor
It allows you to modify the content of Picklists, adding or modifying the values present, and assigning different views by role (i.e.: two users of different roles see different values of the same picklist).
![17.8 [1].png](https://usermanual.vtenext.com/uploads/images/gallery/2022-06/9lK17-8-1.png)
- select module
- choose the picklist field
- add values to the picklist. If the picklist is not a mandatory field, it is recommended to enter a first item which is neutral such as – select – to remind users to enter the drop-down menu and to prevent the first value entered being taken by default
- edit picklist values
- delete picklist values
- use the "Assign" button to enable other roles to view a picklist value or to change the sorting of entries.
![17.8 [2].PNG](https://usermanual.vtenext.com/uploads/images/gallery/2022-06/Xyu17-8-2.PNG)
Warning! Some Picklist contents cannot be changed/deleted as they are set by default. Picklists are accessible from the Module Manager.
17.9 Multilingual Picklist Editor
It is necessary to configure multi-language drop-down menus when you have users accessing vtenext in a language other than Italian (the languages are available in User Preferences), and therefore must see the contents of the picklists translated, in addition to the labels. The picklists are accessible from the Module Manager.
Once the multi-language picklist fields have been created using the normal Layout Editor, the values must then be entered into the Multi-language Picklist Editor to be translated.
N.B.: the multi-language picklist adds the value "Please Select" even if this field is not mandatory.
![17.9 [1].png](https://usermanual.vtenext.com/uploads/images/gallery/2022-06/Zd317-9-1.png)
Enter the values in the different languages:
![17.9 [2].PNG](https://usermanual.vtenext.com/uploads/images/gallery/2022-06/Hak17-9-2.PNG)
17.10 Linked picklist editor
Configuring Linked Picklist fields means establishing a dependency between the values of two drop-down menus.
For example, the Invoice field will propose the content based on the previously selected value in the drop-down Status menu. To create a new link between two picklists from Settings > Linked picklist editor, select the reference module and then indicate the pair of picklists to link.
![17.10 [1].png](https://usermanual.vtenext.com/uploads/images/gallery/2022-06/z3J17-10-1.png)
Fill in the dependency matrix:
![17.10 [2].png](https://usermanual.vtenext.com/uploads/images/gallery/2022-06/S8c17-10-2.png)
The first line (table header, in bold) shows the values of the first picklist. Below each value, you must activate the desired values for the second picklist in the respective column.
For example, when you choose the Invoice value in the first picklist, the second picklist will propose the values you have activated in this matrix in the Status column.
17.11 Encrypted Field Editor
The encrypted field editor allows you to protect the content of a field by means of an access password. The user can only access the contents of the field after entering the password.
![17.11 [1].png](https://usermanual.vtenext.com/uploads/images/gallery/2022-06/7wW17-11-1.png)
Choose the module and the field of interest and enter the password:
![17.11 [2].png](https://usermanual.vtenext.com/uploads/images/gallery/2022-06/dcq17-11-2.png)
Warning! If you forget your password, the data can be recovered through technical assistance.
17.12 Menu Settings
![17.12 [1].png](https://usermanual.vtenext.com/uploads/images/gallery/2022-06/rA117-12-1.png)
This allows you to choose the main modules, and the order of items, of your CRM, which will be displayed directly in the left column.
![17.12 [2].png](https://usermanual.vtenext.com/uploads/images/gallery/2022-06/qbu17-12-2.png)
17.13 List view colours
Allows for the application of custom colours of views by list, or related list, based on the value assumed by a picklist-type field or control box. Note that only one field can be chosen per form.
Furthemore is possible to choose the style through which color records, which are: Full row, Little block on the left or Thin line in the bottom of the record. Lastly is possible to adjust the color intensity, thanks to a slider that manage the percentage value.
|
Full row |
|
|
Little block on the left |
|
|
Thin line |
|


For example, we want to view Accounts records with colour based on the Rating field.

Edit page to change the color of the Accounts based on Rating field
This colour will then be shown on the All filter (no active filter) and on the custom filters created for the module.
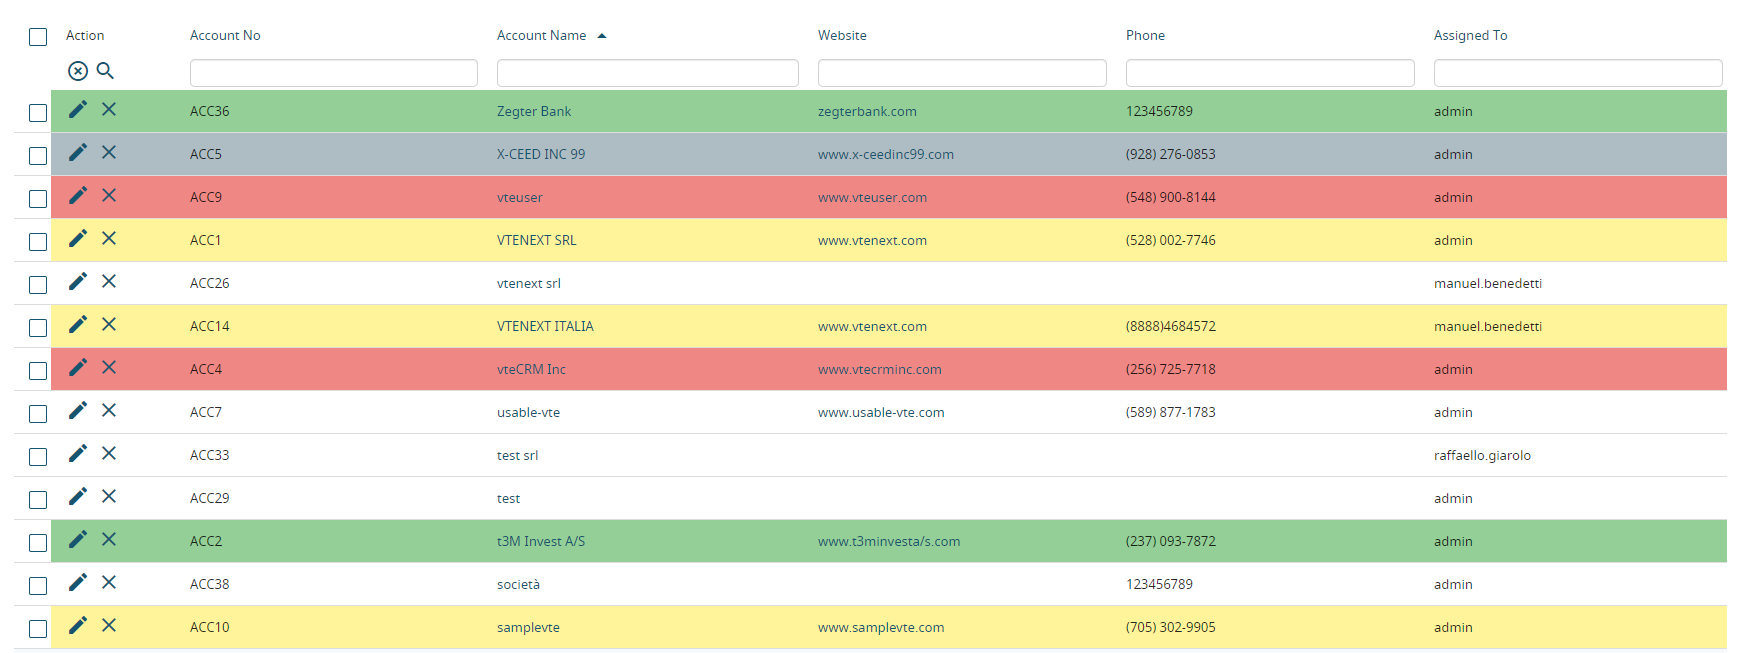
List view with coloring
17.14 Field Formulas
Field Formulas are custom fields that handle simple calculations and generate the result directly in a specially created field. To start, simply go to Settings> Desired Module (e.g. Accounts) and click on "New Field Expression".
![17.14 [1].png](https://usermanual.vtenext.com/uploads/images/gallery/2022-06/6zX17-14-1.png)
This wording will not be present unless we have previously created a field to use for the result. This will be clear because instead of the "New Expression Field" button, we'll find the words "You need to add a string field or an entire Custom Field".
Going to the Layout editor of the Accounts module, you can prepare the fields that are suitable for our purpose, for example, to calculate the total number of employees by adding the internal ones to external ones.
![17.14 [2].png](https://usermanual.vtenext.com/uploads/images/gallery/2022-06/yeV17-14-2.png)
Then, from the Field Formulas, select the Target field (i.e. the field in which the total number of employees will be printed) and set the expression as follows (the fields chosen will be, in fact, Number of internal employees and Number of external employees):
![17.14 [3].PNG](https://usermanual.vtenext.com/uploads/images/gallery/2022-06/UpJ17-14-3.PNG)
In the Accounts module, the result will be as follows:

In the formulas you can use all algebraic operators: plus (+), minus (-), divided by (/), multiplied by (*).
It is also possible to configure If/Else controls following the structure:
if condition then true_case else false_case end
It is also possible, however, to make expressions with date type fields; there are two operators in particular:
![17.14 [5].PNG](https://usermanual.vtenext.com/uploads/images/gallery/2022-06/LKb17-14-5.PNG)
time_diffdays: gives the difference in days between two dates
time_diff: gives the difference in seconds between two dates.
Note. If only one parameter is entered in the time_diff and time_diffdays functions, the value returned in the Field Formula is the difference between the current date and the date entered in the parameter.
For example, for custom field C, you want it to store the number of days since the last phone contact of the Company.
17.15 Mail Converter
The Mail Converter is a tool that allows you to read one or more mailboxes and, when a condition occurs on an email, to activate automatic operations such as archiving the email, linking it to a registry entity, or transforming the email into a Ticket in the HelpDesk module. From vtenext 20.04 it is possible to configure in the mail scanner function also certified mailboxes (PEC). Starting from version 22.05.1, it is possible to use two-factor authentication (OAuth2) for Office365 mailboxes.
Warning: Starting from version 24.xx, for all new installations or updated installations that do NOT yet have the Mail Converter configured, it is possible to trigger a process from the creation/update of a ticket. If a version of vtenext has been updated to 24.xx and there are already configurations on the Mail Converter, please open a ticket with vtenext technical support to enable this update function from the process.
![17.15 [1].png](https://usermanual.vtenext.com/uploads/images/gallery/2022-06/GX917-15-1.png)
Enter your new mailbox data.
![17.15 [2].png](https://usermanual.vtenext.com/uploads/images/gallery/2022-06/prR17-15-2.png)
N.B.: if you want the Mail Converter to update the same ticket each time, linking the replies that arrive via email from the client, you need to insert the "Regex" variable in the subject line and both the "Update ticket" variable and the "Ticket ID" Comparison Key as an action(see image). Regex must be in first position, so that the CRM checks if a Ticket with that title already exists, in which case it updates it, or, if it is not present, creates a new one.
|
Scanner Nome |
Indicate the name, as preferred, to be given to the scanner |
|
Server Nome |
Enter the address of the IMAP mail server, for example: mail.dominiocompany.it |
|
Protocol |
Indicate IMAP4 or IMAP2 |
|
User Name |
Enter the User Name to access the inbox; it usually matches the email address |
|
Password |
Enter the inbox access password |
|
SSL Type, SSL Method |
Indicate the access security protocol information if required |
|
Parameters |
It is used to configure advanced parameters for the imap connection, without using the code.
|
|
PEC |
Indicate that the current email address is a PEC By enabling the flag. In this way the ticket will be created using the original email, that is the one contained in the attatched .eml file. |
|
Status |
Enable = mailbox scan is active; Disable = mailbox scan is not active |
|
Find |
Indicate if:
|
|
After Scanning |
Allows you to indicate whether to change the status of the email after scanning:
|
Warning! The mailbox must be accessible in IMAP mode; you cannot configure access in POP3 mode.
After saving the mailbox data you can:
- Decide which folders in your inbox will be read, using the Select Folders button
- Configure the rules of the Mail Converter, using the Setup Rule button
- Manually launch the scan of the box, using the Scan Now button
![17.15 [3].png](https://usermanual.vtenext.com/uploads/images/gallery/2022-06/LQN17-15-3.png)
Select Folders
Activate the flag at the folder to be scanned.
![17.15 [4].png](https://usermanual.vtenext.com/uploads/images/gallery/2022-06/2OE17-15-4.png)
Setup Rule
Through the Setup Rule button, you can configure the actions to be taken after the email check. Click the Add Rule button on the right and then set the rule:
![17.15 [5].PNG](https://usermanual.vtenext.com/uploads/images/gallery/2022-06/Coy17-15-5.PNG)
|
From |
Indicate a condition in the From field: (sender), if not present leave the field blank |
|
To |
Indicate a condition in the To field: (recipient), if not present leave the field blank |
|
Subject |
Indicate a condition in the Object field, if not present leave the field blank |
|
Body |
Indicate a condition in the body of the email, if not present leave the field blank |
|
Match |
Indicate:
|
|
Action |
Indicate the action to be taken when conditions occur.
|
You can set multiple rules and define priorities using the arrows.

Logic:

Scan Now
You can manually launch the scan box by clicking the Scan Now button.
Warning! To activate the automatic check, you need to activate a job in the vtenext server. See the CRONJOB -– Processes to plan chapter.
What happens to the Trouble Tickets module?
At this point all the incoming emails of the preconfigured box for the Mail Converter, will go directly in the Trouble Tickets module. Note that the tickets created in this way are distinguished from those created directly in the CRM by the small flame icon, which allows us to mark that specific email as "spam" and consequently eliminate the ticket.
![17.15 [7].png](https://usermanual.vtenext.com/uploads/images/gallery/2022-06/v6q17-15-7.png)
When we have to answer to one of those email the procedure is simple.
In the button “Other”, present at the top right of each ticket record, there will be 3 new buttons:
![17.15 [8].png](https://usermanual.vtenext.com/uploads/images/gallery/2022-06/1fl17-15-8.png)
|
Mark as Spam |
In this way the email address of the sender will be put in spam. Furthermore, the ticket will be delated. |
|
Answer by mail |
It allows to reply to the email with the email address of the user that is carrying out that operation and not with the email set in the Mail Converter. |
|
Answer by Mail (Info) |
It allows to reply to the customer directly with the email address set in the Mail Converter. In this way, we will be able to track the exchange of communications in the ticket. |
It's possible to reply to a ticket through the comments system, the crm will send the reply via email exactly as it would by clicking on the "Reply via Mail (Info)" button (only for tickets generated by the Mail Converter).
N.B.: if you reply to the ticket with the "Reply via Mail" function, you exit from Mail Converter system. The question and answer will therefore be managed, in a personal way, between the customer's email address and the user's email address.
There is another way to massively mark as spam a group of emails (tickets). Go to the list view, tick the ticets you want to mark as spam, click on the button “Other”, and chose “Mark as spam”.
![17.15 [9].png](https://usermanual.vtenext.com/uploads/images/gallery/2022-06/ndk17-15-9.png)
17.16 Data Import
This tool makes it possible to import data in vte (if the installation is on-site) from an external source, which can be both CSV (as already occurs through the standard import of master data) and database types.
You can schedule the process according to a certain time frequency and enter advanced queries for data extraction. Let's take a step-by-step look at the import procedure, using a database import case as an example. To configure a new import, press Add.
N.B.: For the import of modules that also have products within them (e.g. Sales Orders or Quotes), the procedure is different.
You need 3 different CSV files to import in the order described:
- A file containing the products inside the block with only the basic data.
- A file for the 'header' of the module containing the product block where only the data related to it will be inserted.
- A file containing essential data for the product block where you will need two identification fields to link the 'header' and the 'products' previously imported; in addition to these you will need, as mandatory, the fields: Product Name, Quantity and List Price.
IMPORTANT: In the corresponding modules of the first two files, a field must be created to be used for the connection between the two in the product block e.g. - external ID
After importing the first two files, remember to map the external ID as an identifier field; with the procedure described above, it will be possible to select 'product block' among the modules available (in the example below it is 'Sales Orders') by creating a third import.
At this point in the mapping of the 'product block' module, you need to set the two previous external IDs – created in the two modules and then inserted with the CSV – as connection fields.
In the event that there is a UI type 10 field with a connection to another entity in the CSV to be imported, the entity with the record connected to it must have been imported first and an external identification field mapped in the same way as previously described for the product block, in order for the UI type 10 field to be imported.
How the import file looks like (for the product block of a Sales Order):
The situation is the following. Suppose you have already imported all the products and therefore need to import the sales orders with related product lines. At this point it is sufficient to create a CSV file like the one shown in the example:
| Order Num. | Product Num | Name | Descr. | Q.ty | Price | Disc. | Total row |
| SO10 | PR07 | TV | Model 123 | 2 | 350,00 | 0 | 700,00 |
| SO10 | PR11 | Mixer | Bland everything | 1 | 90,00 | 15 | 75,00 |
The first row represents the header, that is the columns to be inserted and must contain all the fields that are present in the product block of the Sales Orders to be imported. Using the order number (first column) as import key, you can import in this way, tot rows of the same order. This procedure also works for other modules that contain a product block.
N.B .: the Orders must be sequential in the CSV file. It is not possible to correctly import a CSV when Sales Orders are scattered between the lines of the file itself.
CORRECT
| Order Num. | Product Num | Name | Descr. | Q.ty | Price | Disc. | Total row |
| SO10 | PR07 | TV | Model 123 | 2 | 350,00 | 0 | 700,00 |
| SO10 | PR11 | Mixer | Bland everything | 1 | 90,00 | 15 | 75,00 |
| SO11 | PR05 | Computer | Super PC | 1 | 300,00 | 50 | 250,00 |
| SO11 | PR11 | Mixer | Bland everything | 1 | 25,00 | 0 | 25,00 |
NOT CORRECT
| Order Num. | Product Num | Name | Descr. | Q.ty | Price | Disc. | Total row |
| SO10 | PR07 | TV | Model 123 | 2 | 350,00 | 0 | 700,00 |
| SO11 | PR05 | Computer | Super PC | 1 | 300,00 | 50 | 250,00 |
| SO10 | PR11 | Mixer | Bland everything | 1 | 90,00 | 15 | 75,00 |
| SO11 | PR11 | Mixer | Bland everything | 1 | 25,00 | 0 | 25,00 |
STEP 1: Module.
Select the recipient module of the data.
![17.16 [1].png](https://usermanual.vtenext.com/uploads/images/gallery/2022-06/VI017-16-1.png)
STEP 2: Data source
Select the source type, whether CSV or database.
![17.16 [2].png](https://usermanual.vtenext.com/uploads/images/gallery/2022-06/5j317-16-2.png)
STEP 3: Source parameters
Compile the parameters of the server that contains the DB to make the connection.
![17.16 [3].png](https://usermanual.vtenext.com/uploads/images/gallery/2022-06/pCP17-16-3.png)
STEP 4: Source table
Choose the source table contained in the database; if necessary, set an advanced data extraction query in the space below.


STEP 5: Field mapping
Similar to the standard CSV import procedure, it is necessary to map the data in the source table with the fields in vtenext, so that the information reaches its destination on the CRM in the correct field.
You need to select the key field; you can also choose the format for some fields (e.g.: telephone format) or use simple formulas (e.g.: prefix code). Further down the screen, you can select the default fields in creation and editing.
![17.16 [5].png](https://usermanual.vtenext.com/uploads/images/gallery/2022-06/cJR17-16-5.png)
STEP 6: Schedule import
Schedule the process according to a regular interval.
![17.16 [6].png](https://usermanual.vtenext.com/uploads/images/gallery/2022-06/hUX17-16-6.png)
STEP 7: Notifications
Define which user should receive the notification of data import.
![17.16 [7].png](https://usermanual.vtenext.com/uploads/images/gallery/2022-06/1Uo17-16-7.png)
How do you import configurable products from data importer?
1. use the product module import as a basis
2. add a special interface field, called for example "configurable product name" to be used to create the parent configurable product
3. add special fields for product attributes always from the interface. In this way the import will make the "distinct" of the latter and will create the rows in the table field and it will be possible to map the attribute fields as very normal standard fields.
Other actions
Once the import process has been created, the general menu of the Import Data tool shows the saved imports with information regarding the last/next start. You can take other actions.
|
|
Import enabled/disabled (to change, click on the icon) |
|
|
Start import now |
|
|
Changing the configuration (the previous steps are re-proposed) |
|
|
Reading the last import report |
|
|
Delete the Import |


17.17 Klondike A.I. connector
From vtenext 20.04 in settings is available the new additional plug in Klondike AI. It allows to connect vtenext with the modules of the machine learning engine Klondike:
- Process discovery agents: to analyse and discover the used processes within vtenext. Once discovered they can be imported in the Process Manager in order to be further developed
- Classification manager: uses Artificial Intelligence to guess the value of a field. Example: when creating a ticket its category is guessed by analysing Title and Description.
Please contact the sales department to have more information to enable the plug in

Klondike settings
Classification

Classification configuration detail

Process Discovery Agent

Process Discovery Agent configuration detail

List of managed Processes

Examples of managed Processes