# 2. Instruments

# 2.1 Instrument Bar and Icons

<span style="color: #444444;"><span lang="en-GB">The instrument bar on every page of the App has the following icons.</span></span>

[![image-1657095650554.png](https://usermanual.vtenext.com/uploads/images/gallery/2022-07/scaled-1680-/image-1657095650554.png)](https://usermanual.vtenext.com/uploads/images/gallery/2022-07/image-1657095650554.png)

<span style="color: #444444;"><span lang="en-GB">Starting from the left:</span></span>

- <span style="color: #444444;"><span lang="en-GB">**Homepage:**</span></span> <span style="color: #444444;"><span lang="en-GB">to go to the initial page of the App.  
    </span></span>
- <span style="color: #444444;"><span lang="en-GB">**Processes:**</span></span> <span style="color: #444444;"><span lang="en-GB">to display processes underway requiring the attention of the user.  
    </span></span>
- <span style="color: #444444;"><span lang="en-GB">**Conversations:** </span></span><span style="color: #444444;"><span lang="en-GB">to open the module of the same name and reply to users as required (a notification indicates the number of unread conversations).  
    </span></span>
- <span style="color: #444444;"><span lang="en-GB">**Messages:** </span></span><span style="color: #444444;"><span lang="en-GB">to open the messages module and read your e-mail (the number of unread messages is indicated).  
    </span></span>
- <span style="color: #444444;"><span lang="en-GB">**Others:**</span></span> <span style="color: #444444;"><span lang="en-GB">to return to the page listing all modules.</span></span>

<span style="color: #444444;"><span lang="en-GB">Each module also includes a search field and the </span></span><span style="color: #444444;"><span lang="en-GB">+</span></span><span style="color: #444444;"><span lang="en-GB"> button to add a new record in the current module</span></span><span style="color: #444444;"><span lang="en-GB">.</span></span>

[![image-1657181186381.png](https://usermanual.vtenext.com/uploads/images/gallery/2022-07/scaled-1680-/image-1657181186381.png)](https://usermanual.vtenext.com/uploads/images/gallery/2022-07/image-1657181186381.png)

<span style="color: #444444;"><span lang="en-GB">Entering a module you might see the following icons at the top alongside the logo</span></span> <span style="color: #444444;"><span lang="en-GB">(starting from the left):</span></span>

[![image-1657180360305.png](https://usermanual.vtenext.com/uploads/images/gallery/2022-07/scaled-1680-/image-1657180360305.png)](https://usermanual.vtenext.com/uploads/images/gallery/2022-07/image-1657180360305.png)

- <span style="color: #444444;"><span lang="en-GB">**Settings:** </span></span><span style="color: #444444;"><span lang="en-GB">for accessing the settings for connecting the App to the Cloud</span></span> <span style="color: #444444;"><span lang="en-GB">or On</span></span> <span style="color: #444444;"><span lang="en-GB">Site CRM.</span></span>
- <span style="color: #444444;"><span lang="en-GB">**Exit:**</span></span> <span style="color: #444444;"><span lang="en-GB">to logout</span></span><span style="color: #444444;"><span lang="en-GB"> from the</span></span><span style="color: #444444;"><span lang="en-GB"> Wilson</span></span> <span style="color: #444444;"><span lang="en-GB">for</span></span> <span style="color: #444444;"><span lang="en-GB">vtenext mobile</span></span> <span style="color: #444444;"><span lang="en-GB">App.</span></span>

<span style="color: #444444;"><span lang="en-GB">In the list display mode,</span></span> <span style="color: #444444;"><span lang="en-GB">or when viewing the list of records within a module,</span></span><span style="color: #444444;"><span lang="en-GB"> there are other icons to help navigate and use the </span></span><span style="color: #444444;"><span lang="en-GB">App:</span></span>

<table border="1" id="bkmrk-nella-%E2%80%9Cvista-per-l" style="border-collapse: collapse; width: 100%; height: 316px;"><tbody><tr style="height: 60px;"><td style="width: 16.7901%; height: 60px;">[![2.1 [3].PNG](https://usermanual.vtenext.com/uploads/images/gallery/2022-06/scaled-1680-/2-1-3.PNG)](https://usermanual.vtenext.com/uploads/images/gallery/2022-06/2-1-3.PNG)</td><td class="align-left" style="width: 83.2099%; vertical-align: middle; height: 60px;">Gives access to the list of filters available for the present module</td></tr><tr style="height: 59px;"><td class="align-center" style="width: 16.7901%; height: 59px;">[![image-1657181257020.png](https://usermanual.vtenext.com/uploads/images/gallery/2022-07/scaled-1680-/image-1657181257020.png)](https://usermanual.vtenext.com/uploads/images/gallery/2022-07/image-1657181257020.png)

</td><td class="align-left" style="width: 83.2099%; height: 59px; vertical-align: middle;">Allows creation of a new record within the module</td></tr></tbody></table>

<span style="color: #444444;"><span lang="en-GB">Inside each card (Company,</span></span> <span style="color: #444444;"><span lang="en-GB">Contact,</span></span> <span style="color: #444444;"><span lang="en-GB">Lead,</span></span> <span style="color: #444444;"><span lang="en-GB">etc.)</span></span> <span style="color: #444444;"><span lang="en-GB">there is a series of icons that enable different actions:</span></span>

<table border="1" id="bkmrk-pulsante-presente-pe" style="border-collapse: collapse; width: 100%;"><tbody><tr><td class="align-center" style="width: 19.2593%; vertical-align: middle;">[![image-1655715688557.png](https://usermanual.vtenext.com/uploads/images/gallery/2022-06/scaled-1680-/image-1655715688557.png)](https://usermanual.vtenext.com/uploads/images/gallery/2022-06/image-1655715688557.png)

</td><td class="align-left" style="width: 91.7283%; vertical-align: middle;">Conversations regarding the displayed record</td></tr><tr><td class="align-center" style="width: 19.2593%; vertical-align: middle;">[![image-1655715742070.png](https://usermanual.vtenext.com/uploads/images/gallery/2022-06/scaled-1680-/image-1655715742070.png)](https://usermanual.vtenext.com/uploads/images/gallery/2022-06/image-1655715742070.png)

</td><td class="align-left" style="width: 91.7283%; vertical-align: middle;">Notes about the displayed record</td></tr><tr><td class="align-center" style="width: 19.2593%; vertical-align: middle;">[![image-1655715757376.png](https://usermanual.vtenext.com/uploads/images/gallery/2022-06/scaled-1680-/image-1655715757376.png)](https://usermanual.vtenext.com/uploads/images/gallery/2022-06/image-1655715757376.png)

</td><td class="align-left" style="width: 91.7283%; vertical-align: middle;">Calendar events involving the displayed record</td></tr><tr><td class="align-center" style="width: 19.2593%; vertical-align: middle;">[![image-1655715776765.png](https://usermanual.vtenext.com/uploads/images/gallery/2022-06/scaled-1680-/image-1655715776765.png)](https://usermanual.vtenext.com/uploads/images/gallery/2022-06/image-1655715776765.png)

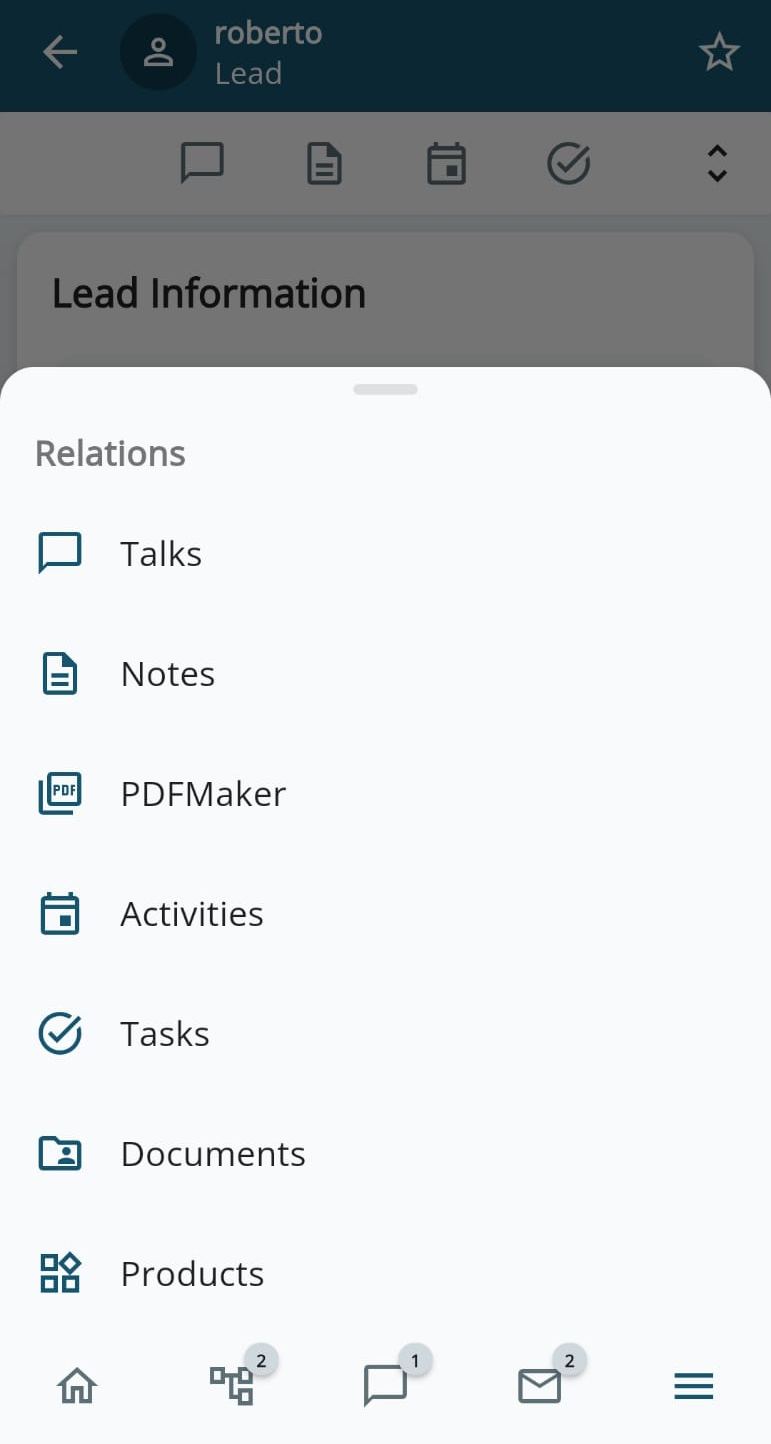
</td><td class="align-left" style="width: 91.7283%; vertical-align: middle;">Tasks involving the displayed record</td></tr><tr><td class="align-center" style="width: 19.2593%; vertical-align: middle;">[![2.1 [5].PNG](https://usermanual.vtenext.com/uploads/images/gallery/2022-06/scaled-1680-/2-1-5.PNG)](https://usermanual.vtenext.com/uploads/images/gallery/2022-06/2-1-5.PNG)</td><td class="align-left" style="width: 91.7283%; vertical-align: middle;">Access to the list of available relations in the displayed record

[![image-1657182106091.png](https://usermanual.vtenext.com/uploads/images/gallery/2022-07/scaled-1680-/image-1657182106091.png)](https://usermanual.vtenext.com/uploads/images/gallery/2022-07/image-1657182106091.png)
</td></tr><tr><td class="align-center" style="width: 19.2593%; vertical-align: middle;">[![image-1657181625809.png](https://usermanual.vtenext.com/uploads/images/gallery/2022-07/scaled-1680-/image-1657181625809.png)](https://usermanual.vtenext.com/uploads/images/gallery/2022-07/image-1657181625809.png)

</td><td style="width: 91.7283%; vertical-align: middle;">Allows modification of the displayed record</td></tr></tbody></table>

<span style="color: #444444;"><span lang="en-GB">The cards contain a number of fields that function as follows:</span></span>

[![image-1657181797918.png](https://usermanual.vtenext.com/uploads/images/gallery/2022-07/scaled-1680-/image-1657181797918.png)](https://usermanual.vtenext.com/uploads/images/gallery/2022-07/image-1657181797918.png) [![image-1655716570154.png](https://usermanual.vtenext.com/uploads/images/gallery/2022-06/scaled-1680-/image-1655716570154.png)](https://usermanual.vtenext.com/uploads/images/gallery/2022-06/image-1655716570154.png)

<span style="color: #444444;">“<span style="font-size: small;"><span style="font-family: Verdana, serif;"><span lang="en-GB">***Assigned to”*** </span></span></span><span style="font-family: Verdana, serif;"><span style="font-size: small;"><span lang="en-GB">*field*</span></span></span><span style="font-size: small;"><span lang="en-GB">*:*</span></span> <span style="font-size: small;"><span lang="en-GB">*it is possible to select/display the assignee of the item, in other words the CRM owner* </span></span><span style="font-family: Verdana, serif;"><span style="font-size: small;"><span lang="en-GB">***User or Group***</span></span></span> </span>

[![image-1657181981808.png](https://usermanual.vtenext.com/uploads/images/gallery/2022-07/scaled-1680-/image-1657181981808.png)](https://usermanual.vtenext.com/uploads/images/gallery/2022-07/image-1657181981808.png)

<span style="font-size: small;"><span style="color: #444444;"><span lang="en-GB">*Text field:*</span></span> <span style="color: #444444;"><span lang="en-GB">*for inserting a name,*</span></span> <span style="color: #444444;"><span lang="en-GB">*number,*</span></span><span style="color: #444444;"><span lang="en-GB"> *information*</span></span><span style="color: #444444;"><span lang="en-GB">*,*</span></span> <span style="color: #444444;"><span lang="en-GB">*etc.*</span></span></span>

[![image-1657182304360.png](https://usermanual.vtenext.com/uploads/images/gallery/2022-07/scaled-1680-/image-1657182304360.png)](https://usermanual.vtenext.com/uploads/images/gallery/2022-07/image-1657182304360.png)

<span style="font-size: small;"><span style="color: #444444;"><span lang="en-GB">*Pick-list*</span></span><span style="color: #444444;"><span lang="en-GB"> *field* </span></span><span style="color: #444444;"><span lang="en-GB">*(drop-down menu):*</span></span> <span style="color: #444444;"><span lang="en-GB">*allows selection of a single value from those in the list*</span></span></span>

[![image-1657182548882.png](https://usermanual.vtenext.com/uploads/images/gallery/2022-07/scaled-1680-/image-1657182548882.png)](https://usermanual.vtenext.com/uploads/images/gallery/2022-07/image-1657182548882.png)

<span style="font-size: small;"><span style="color: #444444;"><span lang="en-GB">*Field for selecting the date* </span></span></span>

[![image-1657182507478.png](https://usermanual.vtenext.com/uploads/images/gallery/2022-07/scaled-1680-/image-1657182507478.png)](https://usermanual.vtenext.com/uploads/images/gallery/2022-07/image-1657182507478.png)

<span style="font-size: small;"><span style="color: #444444;"><span lang="en-GB">*Text*</span></span> <span style="color: #444444;"><span lang="en-GB">*Area*</span></span><span style="color: #444444;"><span lang="en-GB"> *field*</span></span><span style="color: #444444;"><span lang="en-GB">*:*</span></span><span style="color: #444444;"><span lang="en-GB"> *allows, for example, an extended text description* </span></span></span>

# 2.2 NFC Function - Mobile Scans

**NFC (Near Field Communication)** is a short-range wireless communication technology that allows devices to exchange data when they are close to each other, typically within a range of about 4 cm. Here's how it works:

**Basic Principles:**

- **Short-range communication:** NFC devices, such as smartphones, card readers, or NFC tags, must be very close to each other to initiate data exchange.
- **Frequency:** NFC operates at 13.56 MHz, a frequency that allows for fast and secure information exchange over short distances.
- **Active and Passive Modes:**
    - In **active mode**, both devices generate an electromagnetic field to transmit data.
    - In **passive mode**, only one device generates the electromagnetic field (e.g., a smartphone), while the other device (e.g., an NFC tag) uses it to power itself and respond.

---

**How NFC works in vtenext**

---

To activate and use this feature, a few configuration steps are required. First, from vtenext's administration panel, go to **SETTINGS &gt; MODULE MANAGER &gt; COMPANIES** (or another relevant module), and add a related field to the **Mobile Scans** module.

[![image.png](https://usermanual.vtenext.com/uploads/images/gallery/2024-10/scaled-1680-/Skvimage.png)](https://usermanual.vtenext.com/uploads/images/gallery/2024-10/Skvimage.png)

This field will be immediately available on the **Wilson App**, and by clicking on it, the screen to scan the NFC tag with the mobile phone will be activated.

[![image.png](https://usermanual.vtenext.com/uploads/images/gallery/2024-10/scaled-1680-/8Giimage.png)](https://usermanual.vtenext.com/uploads/images/gallery/2024-10/8Giimage.png)  
*NFC scan field on the **Wilson App** to click on in order to activate the NFC tag acquisition.*

[![image.png](https://usermanual.vtenext.com/uploads/images/gallery/2024-10/scaled-1680-/EoCimage.png)](https://usermanual.vtenext.com/uploads/images/gallery/2024-10/EoCimage.png)

*NFC tag scanning startup screen*

[![image.png](https://usermanual.vtenext.com/uploads/images/gallery/2024-10/scaled-1680-/eyximage.png)](https://usermanual.vtenext.com/uploads/images/gallery/2024-10/eyximage.png)

*Screen dialog where the system prompts the user to bring the NFC tag closer for reading*

[![image.png](https://usermanual.vtenext.com/uploads/images/gallery/2024-10/scaled-1680-/Yf7image.png)](https://usermanual.vtenext.com/uploads/images/gallery/2024-10/Yf7image.png)

*The tag is captured, and a record is also written in the related field that was previously created*

[![image.png](https://usermanual.vtenext.com/uploads/images/gallery/2024-10/scaled-1680-/30Iimage.png)](https://usermanual.vtenext.com/uploads/images/gallery/2024-10/30Iimage.png)

*Here is the record as it appears in the related field after being scanned*

[![image.png](https://usermanual.vtenext.com/uploads/images/gallery/2024-10/scaled-1680-/dhYimage.png)](https://usermanual.vtenext.com/uploads/images/gallery/2024-10/dhYimage.png)

*Here is the scanned record in detail (Mobile Scan card as seen from the Wilson App)*

[![image.png](https://usermanual.vtenext.com/uploads/images/gallery/2024-10/scaled-1680-/cn6image.png)](https://usermanual.vtenext.com/uploads/images/gallery/2024-10/cn6image.png)

*Here is the scanned record in detail (Mobile Scan card as viewed from the vtenext web side)*

**Note: The NFC function is also available in the Processes module, allowing a process to be initiated from a scan.**

# 2.3 Barcode Scanning and QR Code Search

**Introduction**

The **barcode** is an information encoding system that uses a series of lines and spaces of varying widths to represent numerical or alphanumeric data. They are commonly used to identify products, facilitate the tracking of goods, and simplify business transactions.

The **QR code (Quick Response code)** is a type of two-dimensional barcode that can be quickly read by a device equipped with a camera, such as a smartphone. It was developed in Japan in the 1990s to track parts in manufacturing processes, but today it is used in a wide range of applications.

A QR code can contain information such as URLs, text, phone numbers, contact information, and more. When a user scans the QR code with a reading app, the device decodes the information contained in the code and can perform actions such as opening a website, saving a contact, or sending a message.

---

**How it works in vtenext**

---

**Barcode scanning**

By going to **SETTINGS &gt; MODULE MANAGER &gt; PRODUCTS &gt; LAYOUT EDITOR**, you can enable the barcode scanning function for the **PRODUCT NAME** field. This is clearly just an example; you can activate this feature on any text field. Therefore, you can create a text field, name it as you prefer, and enable the scanning option for that field.

[![image.png](https://usermanual.vtenext.com/uploads/images/gallery/2024-10/scaled-1680-/7Ndimage.png)](https://usermanual.vtenext.com/uploads/images/gallery/2024-10/7Ndimage.png)

*Screen of the Layout Editor (in the example of the Products module), with Barcode Scanning Enabled*

*Instantly in the Wilson App, the scanning symbol will be enabled directly in that field, and by pressing it, the camera will be activated to perform the scan*

[![image.png](https://usermanual.vtenext.com/uploads/images/gallery/2024-10/scaled-1680-/758image.png)](https://usermanual.vtenext.com/uploads/images/gallery/2024-10/758image.png)

*Note the scanning symbol present directly in the relevant field*

![image.png](https://usermanual.vtenext.com/uploads/images/gallery/2024-10/scaled-1680-/5pXimage.png)

*Acquisition screen, where you are asked to scan the barcode in the highlighted area*

[![image.png](https://usermanual.vtenext.com/uploads/images/gallery/2024-10/scaled-1680-/m56image.png)](https://usermanual.vtenext.com/uploads/images/gallery/2024-10/m56image.png)

*Screen highlighting the acquired code and notifying the user that a new barcode has been found*

---

**Search via QR Code**

*This function is available only upon specific client request.*

It is possible to activate a search via QR Code in vtenext. In practice, in any module, I can use the search engine of the Wilson App to scan a QR Code and search for the code associated with a record (e.g., a Lead, a Client, or a Product).

[![image.png](https://usermanual.vtenext.com/uploads/images/gallery/2024-10/scaled-1680-/vioimage.png)](https://usermanual.vtenext.com/uploads/images/gallery/2024-10/vioimage.png)

*Note that in the search area of the Wilson App, there is a symbol for scanning the QR Code, which will activate the camera to capture the code*

[![image.png](https://usermanual.vtenext.com/uploads/images/gallery/2024-10/scaled-1680-/xiSimage.png)](https://usermanual.vtenext.com/uploads/images/gallery/2024-10/xiSimage.png)

*Once the QR Code is framed, the CRM will perform the search and display the result on the mobile app*

# 2.4 Sorting and Filters

In the Wilson App, it is possible to manage the **sorting** of records and **filters**. Taking the Accounts module as an example, starting from the top left, you can see a button to view the **available filters**, a button to select the **assigned user** to display, and finally, the button for **sorting**.

[![image.png](https://usermanual.vtenext.com/uploads/images/gallery/2025-01/scaled-1680-/7iGimage.png)](https://usermanual.vtenext.com/uploads/images/gallery/2025-01/7iGimage.png)

---

**FILTERS**

By clicking the FILTERS button, you can, as mentioned, view the list of available filters (both created from the web and from the app), and you can also CREATE new ones directly in Wilson. For all filters, whether created from the web or the app, you can click the three dots on the right and select **DUPLICATE**.

Filters created from the Wilson App have a pencil-shaped icon next to the three dots, which allows you to edit the filter directly in the app. Filters created from the web cannot be edited in Wilson.

[![image.png](https://usermanual.vtenext.com/uploads/images/gallery/2025-01/scaled-1680-/xNaimage.png)](https://usermanual.vtenext.com/uploads/images/gallery/2025-01/xNaimage.png)

When the **DUPLICATE** or **EDIT** option is selected, the following screen appears:

[![image.png](https://usermanual.vtenext.com/uploads/images/gallery/2025-01/scaled-1680-/LDOimage.png) ](https://usermanual.vtenext.com/uploads/images/gallery/2025-01/LDOimage.png)[![image.png](https://usermanual.vtenext.com/uploads/images/gallery/2025-01/scaled-1680-/Ul3image.png) ](https://usermanual.vtenext.com/uploads/images/gallery/2025-01/Ul3image.png)[![image.png](https://usermanual.vtenext.com/uploads/images/gallery/2025-01/scaled-1680-/imHimage.png)](https://usermanual.vtenext.com/uploads/images/gallery/2025-01/imHimage.png)

On this screen, the following actions are possible:

- **View Name:** Rename or assign a name to your filter.
- **Set as Default:** Set the filter as the default for the Wilson app.
- **Select Fields to Display:** Choose which fields to display, add new ones, and rearrange their appearance order by dragging them.
- **Subtitle Display:** Decide whether to include a subtitle containing the previously selected fields. These fields can include or exclude their labels for better usability.
- **Initially Sort By:** Choose the sorting of a field in ascending or descending order.
- **Advanced Filters:** Define selection criteria for fields other than Date type (e.g., dropdown menus, free text, numbers, etc.).
- **Time Filter:** Select fields of the Date type, using either dynamic and customizable durations or static ones. You can choose from the dynamic options provided by the app or specify a static date range.

---

**SORTING**  
Sorting is achieved by clicking the corresponding "Sorting" button located in the top menu of the list view for a record.

[![image.png](https://usermanual.vtenext.com/uploads/images/gallery/2025-01/scaled-1680-/WVLimage.png)](https://usermanual.vtenext.com/uploads/images/gallery/2025-01/WVLimage.png)

A dropdown menu appears at the bottom of the screen, allowing you to select your sorting preference:

- **Most Recent:** To display records that have been recently managed.
- **Module Fields:** For example, in the Companies module, you can sort by fields such as Company Number, Company Name, Phone, Email, or Website.
- **Others:** Allows you to select additional fields from all those available in the specific module.
- **Reset:** Resets the view to the default display.