5. Settings
- 5.1 Settings Overview
- 5.2 Applying Changes
- 5.3 Push Notifications
- 5.4 Two-factors Authentication
- 5.5 Mobile Profiles
5.1 Settings Overview
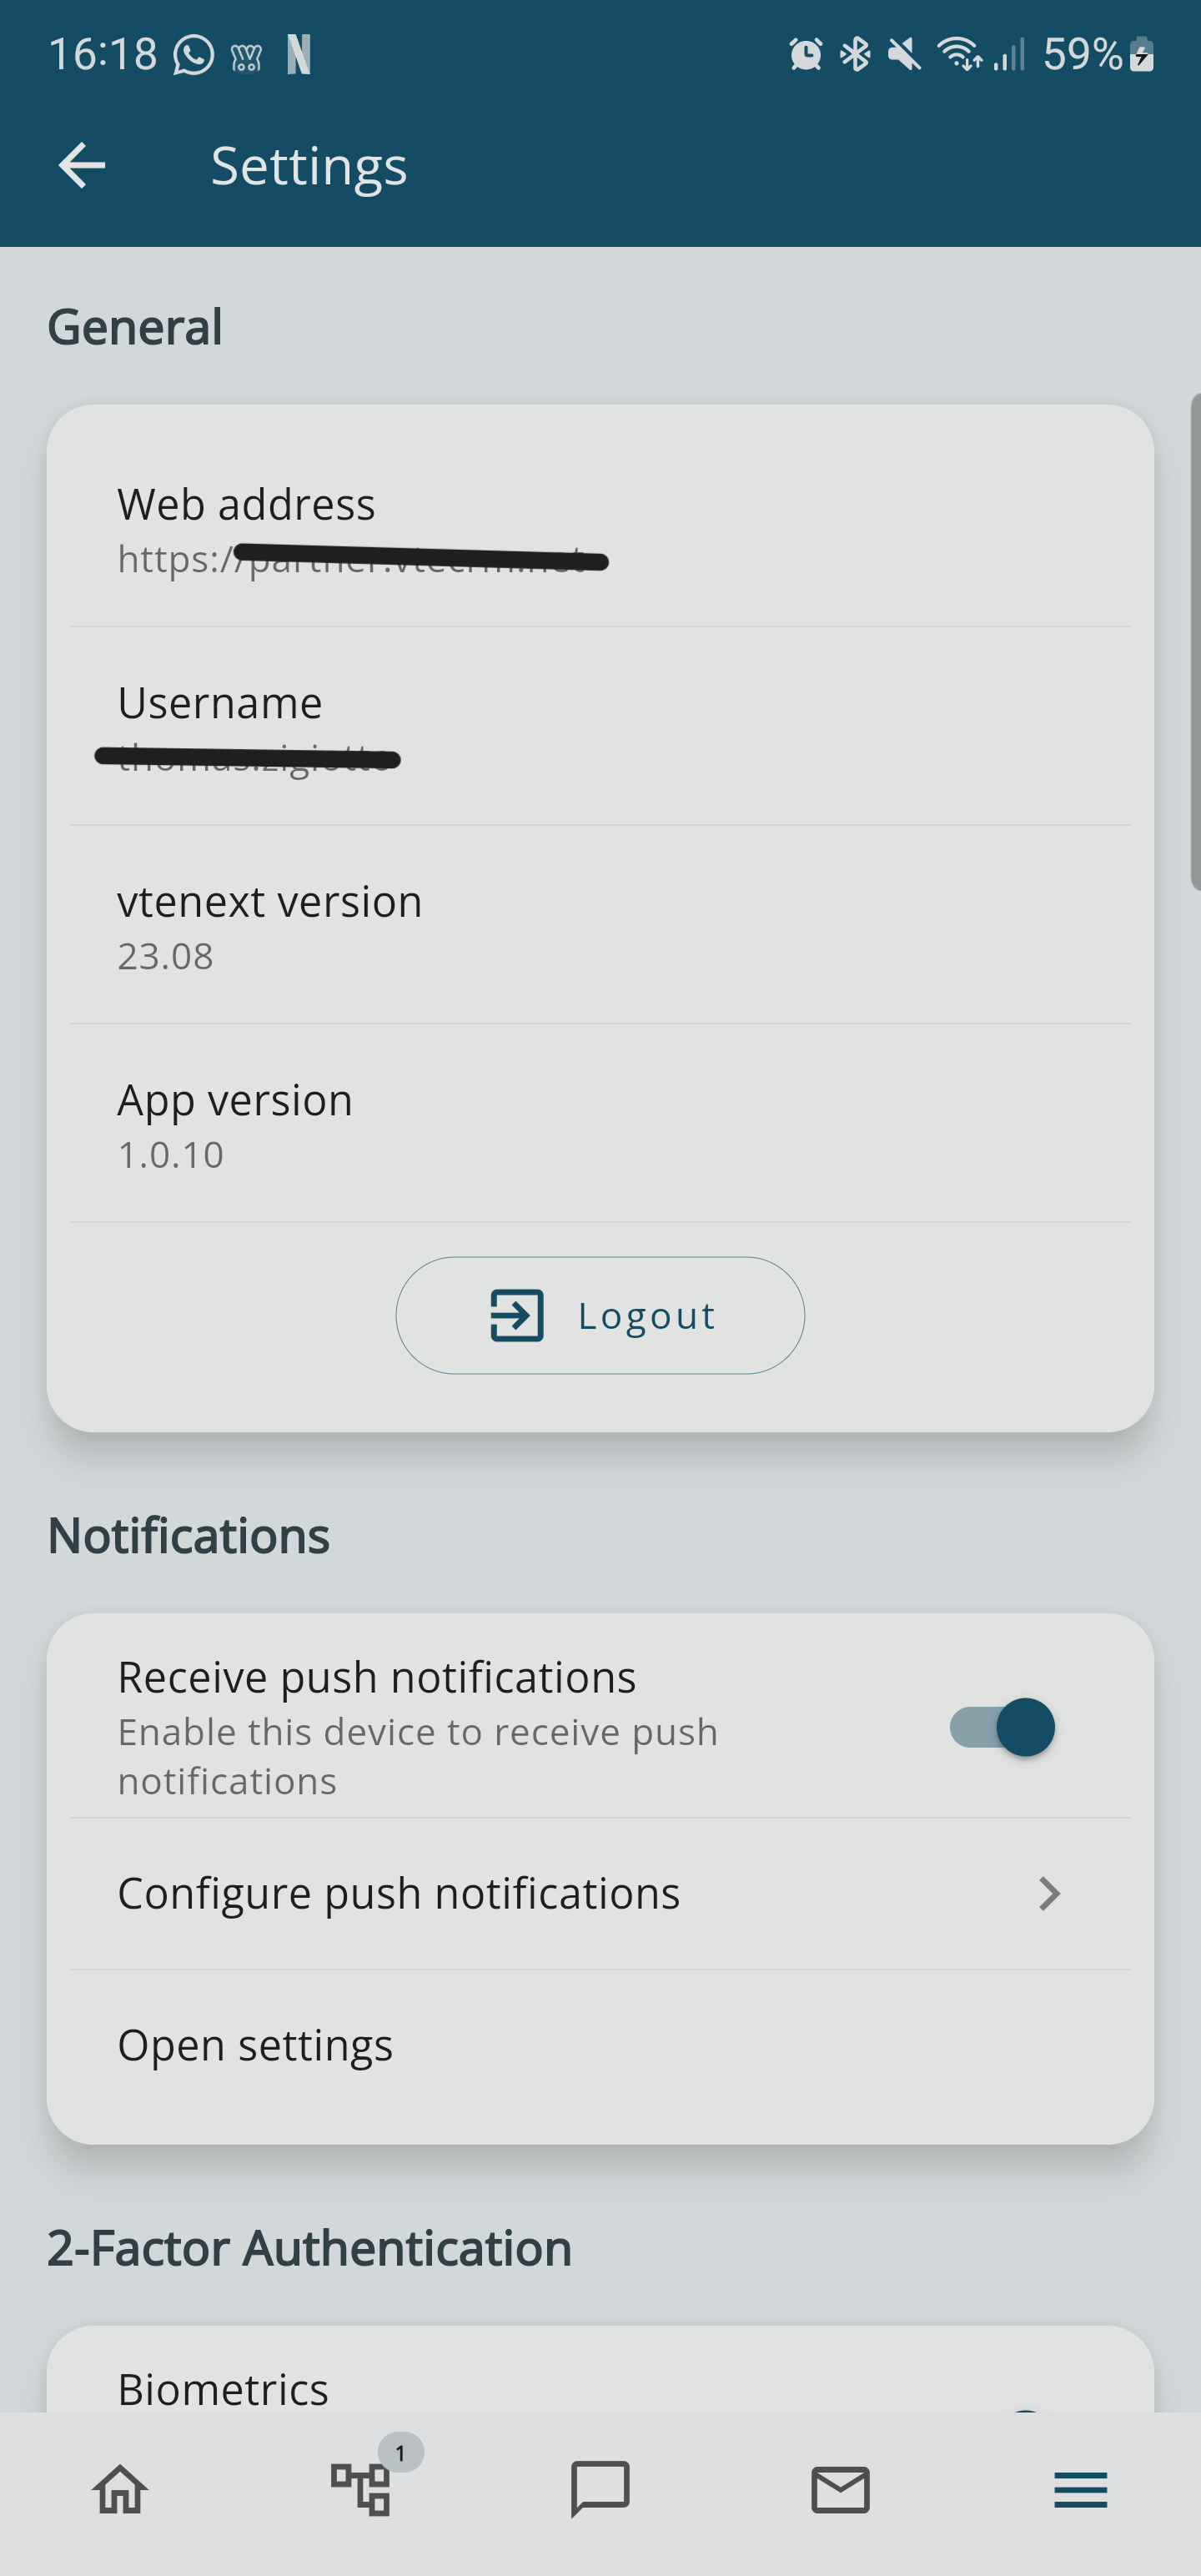
The Settings page can be opened using the icon  at the top right of the Home page, displaying the following information
General Settings (not editable):
- Web address: to which the Wilson for vtenext mobile App connects;
- Username: identity of the user who accessed the App;
- Vtenext version: the currently installed version of vtenext on your server or cloud;
- App version: the version currently in use of the Wilson for vtenext App;
Notifications:
- Receive push notifications: enable or disable push notifications (only if they have been previously activated from the web settings);
- Configure push notifications: you can choose for which modules to receive notifications, set a customized time range to receive them, and choose whether to be simultaneously notified or not when using the web application;
- Open settings: to enable or block notifications and to activate or deactivate the notification badge on the mobile device;
Two-factors Authentication (2FA):
- Biometrics: enable or disable access to the app and other actions that can be performed with the app using fingerprint recognition instead of the device PIN;
Settings detail view 1

Settings detail view 2
5.2 Applying Changes
When customizations are applied in the CRM (server side), it is necessary to close and then reopen the App in order to see and changes (it is not necessary to Logout/Login).
This mainly involves:
- Changing privileges for modules / fields / profiles
- Creation, modification, or cancellation of users / groups
- Filter changes
- Creation, renaming, cancellation, or modification of visibility of fields / blocks
- Changes in relations between modules
- Language changes
5.3 Push Notifications
When you first open the Wilson app, you will be asked whether to activate Push Notifications:

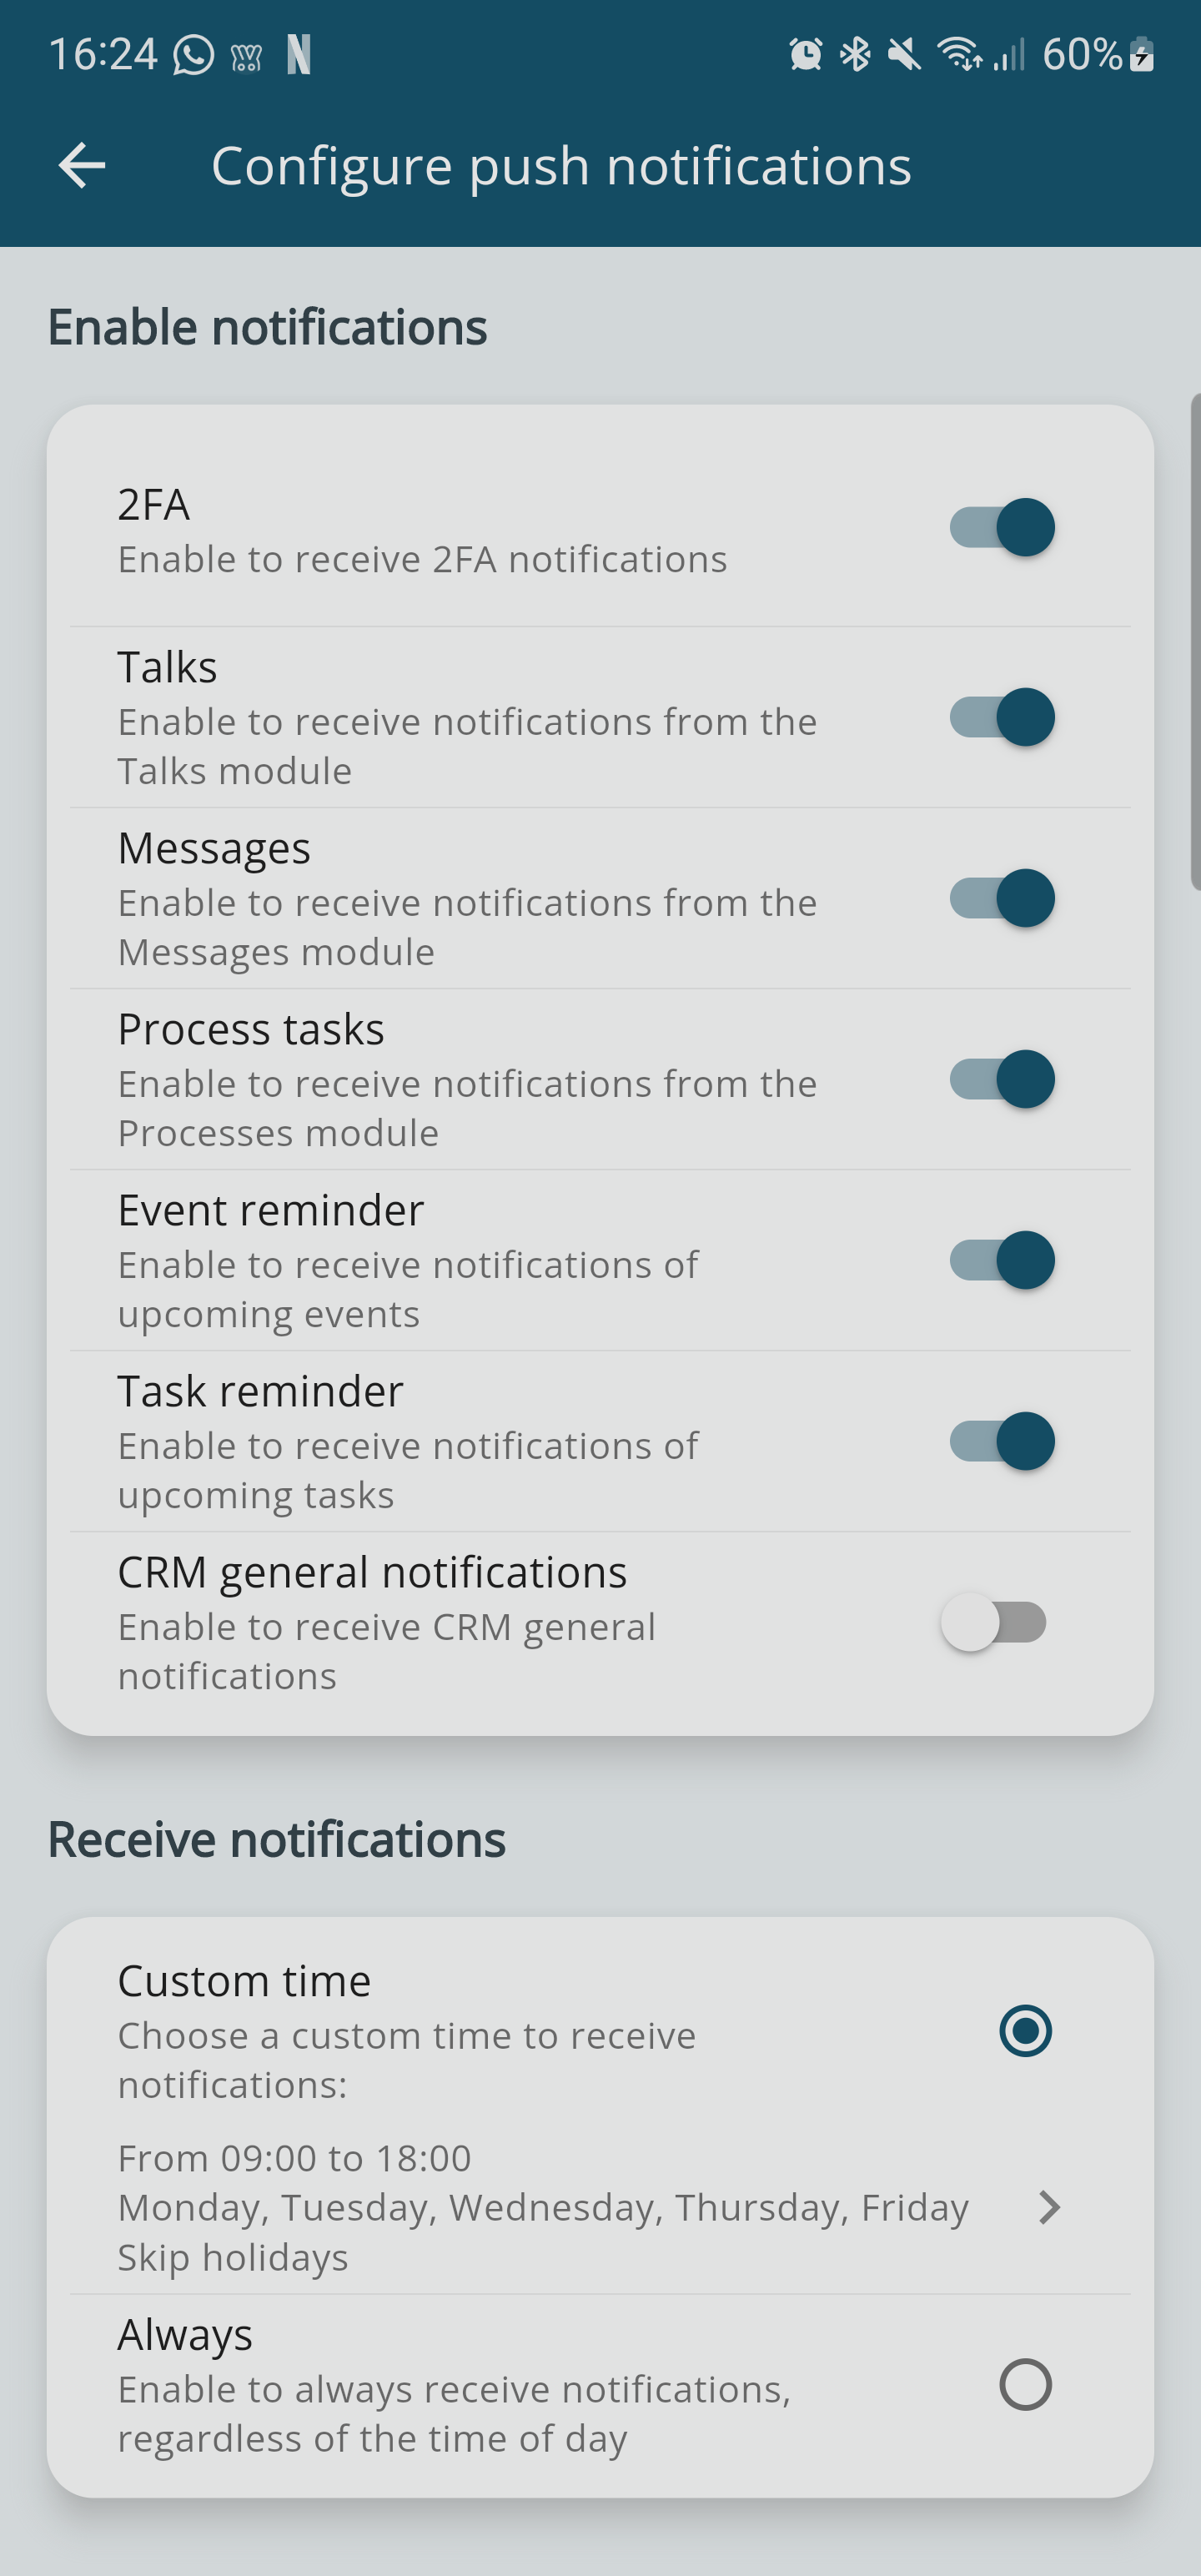
By enabling Push Notifications in the settings, you can configure for which modules these notifications will be delivered. By clicking on CONFIGURE PUSH NOTIFICATIONS in the settings, you can access the following page:
Push notifications settings 1

Push notifications settings 2
ENABLE NOTIFICATIONS
|
2FA |
Enable two-factor authentication notifications |
|
Talks |
Enable conversation notifications |
|
Messages |
Enable email message notifications |
|
Process Tasks |
Enable notifications for process tasks involving the user |
|
Event Reminders |
Enable notifications for upcoming calendar events |
|
Task Reminders |
Enable notifications for upcoming calendar tasks |
|
General CRM Notifications |
Enable all general CRM notifications (those that can be read from the web by clicking the bell icon in the top right) |
|
RECEIVE NOTIFICATIONS |
|
| Custom Schedule | allows you to choose a custom schedule for receiving notifications (time and day) |
|
Always |
allows you to receive notifications at all times regardless of the day and time |
|
ADVANCED |
|
|
Check for concurrent usage |
Push notifications are not sent if the user is concurrently using the web client |
METTERE IN PAUSA LE NOTIFICHE PUSH
It is possible to temporarily stop Push Notifications in the Wilson app. By going into the app's SETTINGS, you can access the page that allows this configuration:
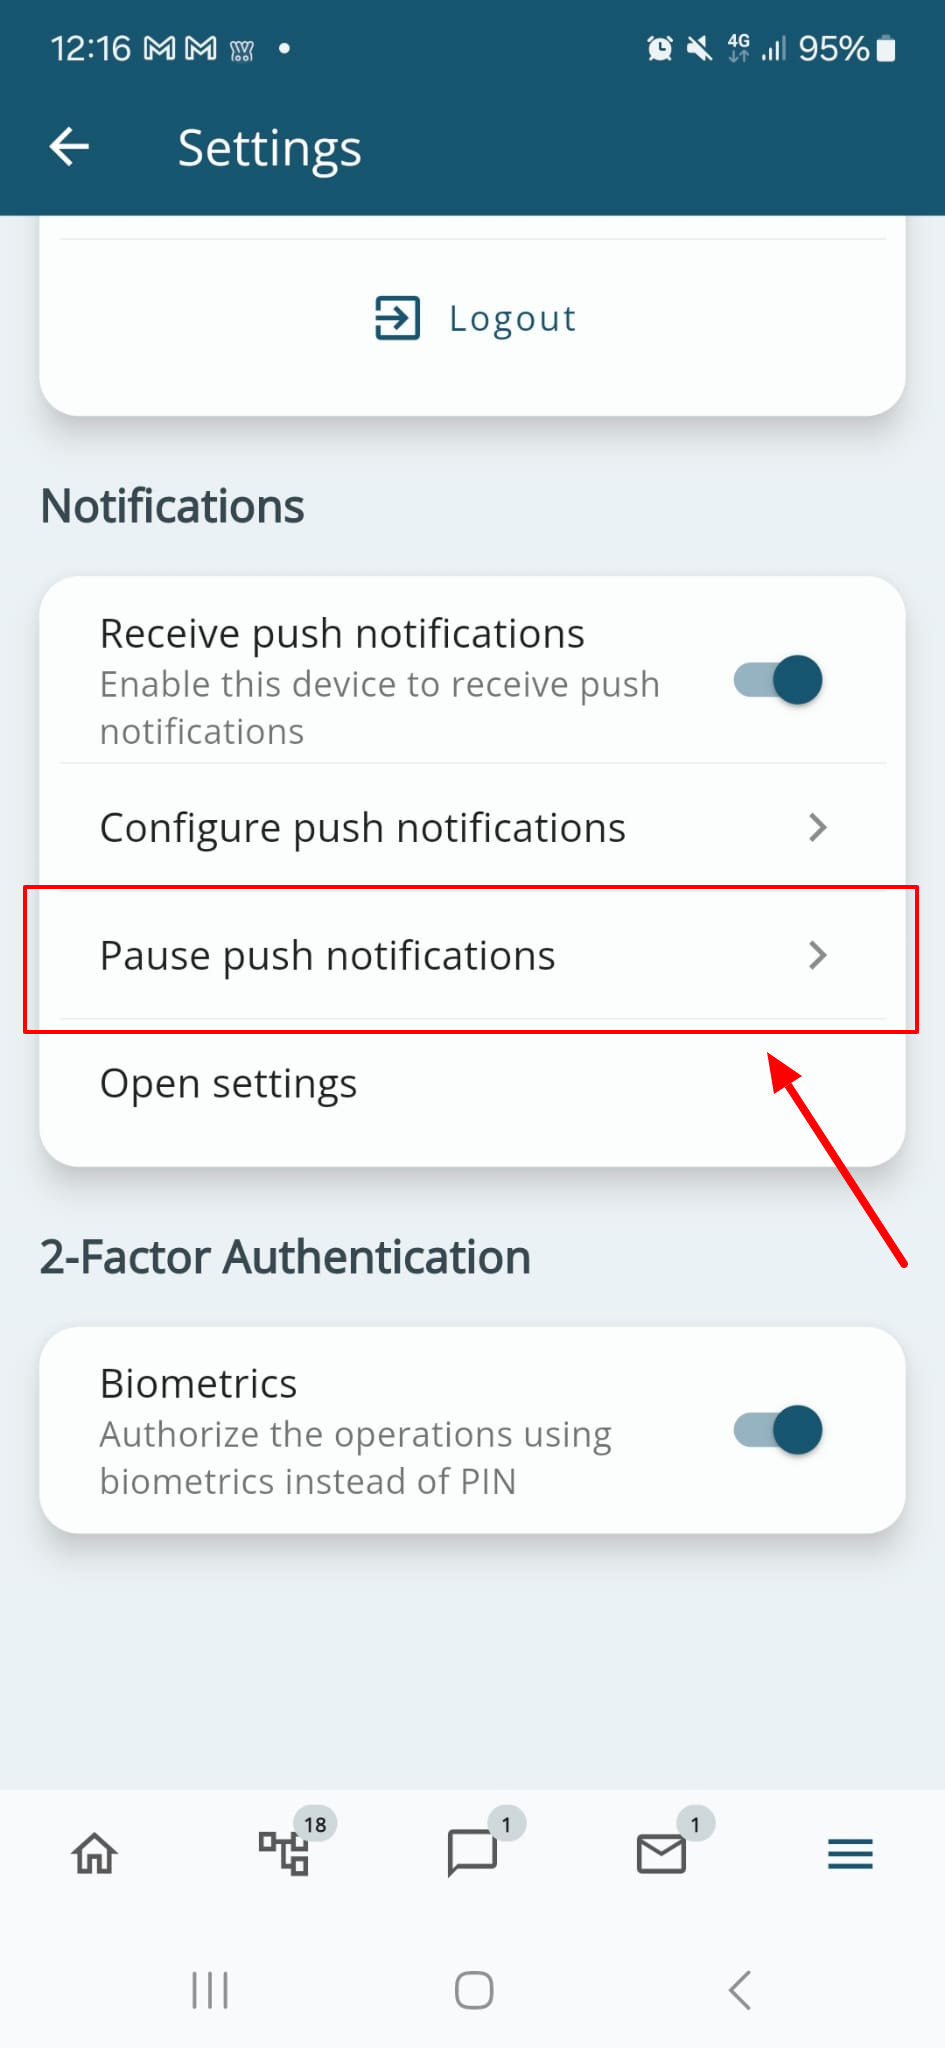
Click on 'Pause Push Notifications' to access the configuration settings.
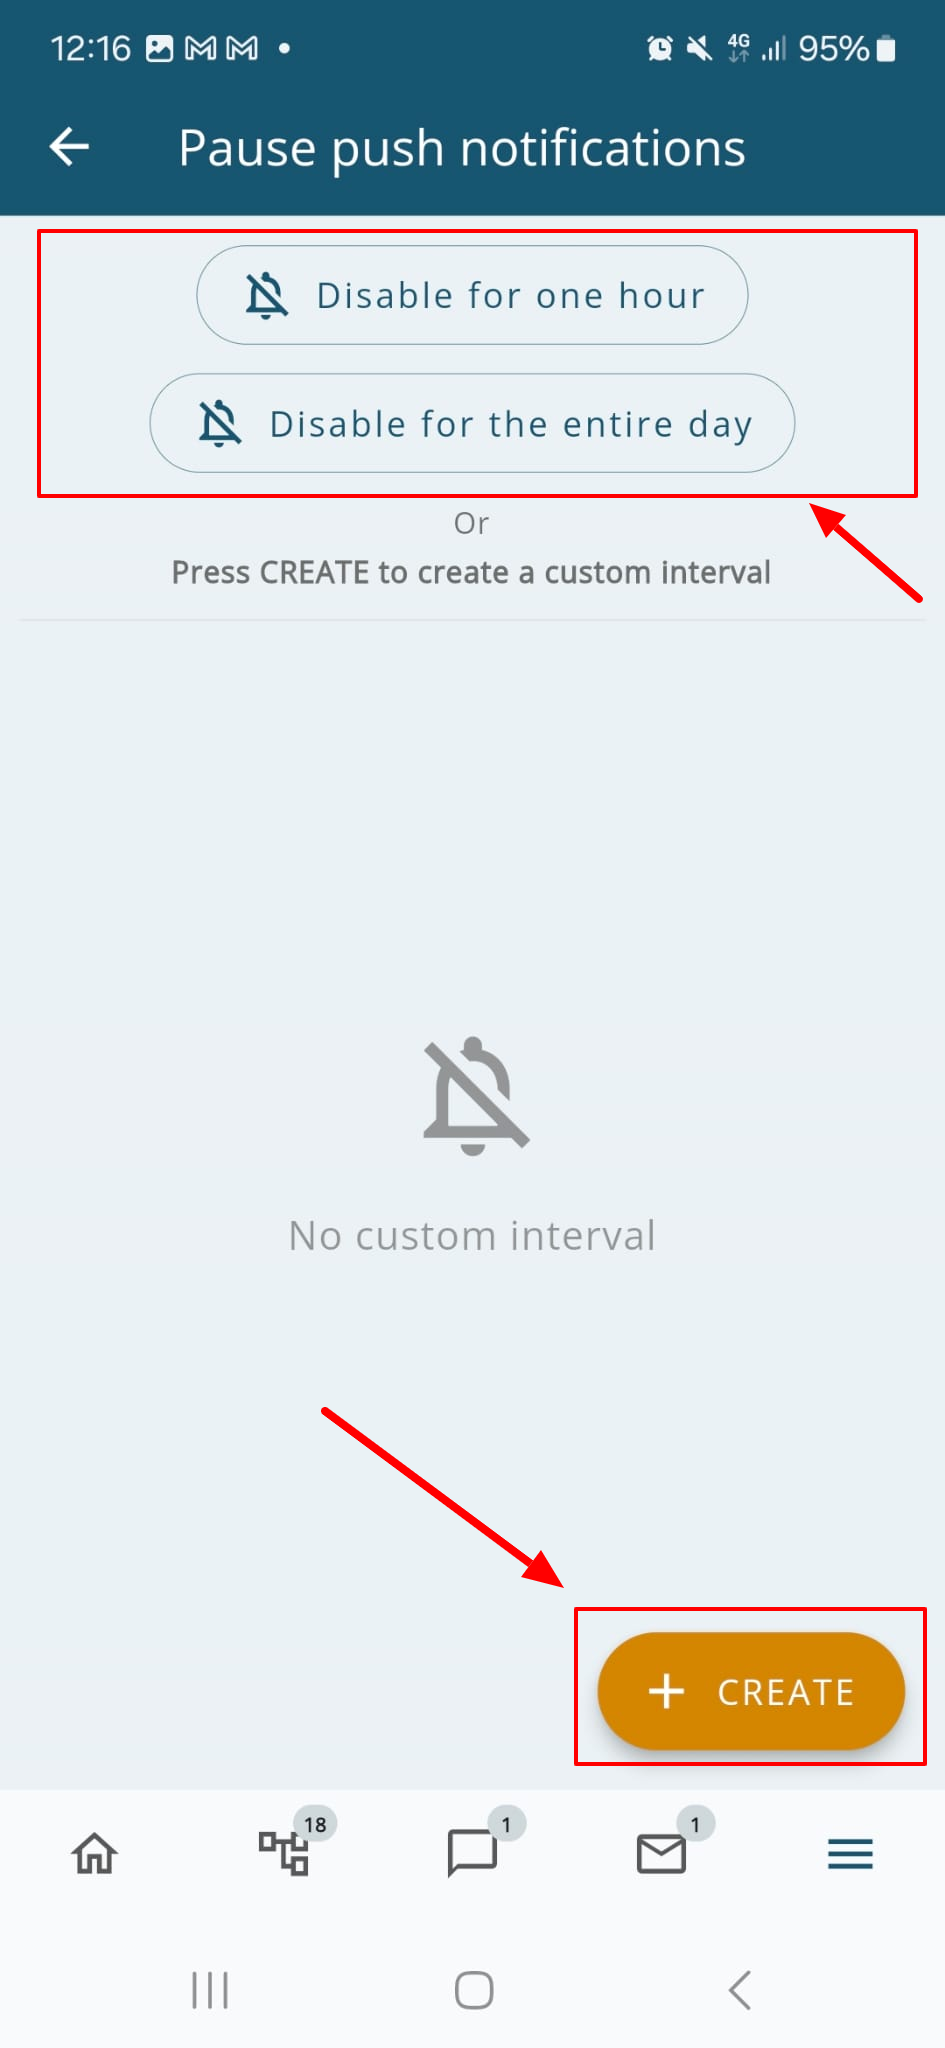
On this page, starting from the top, you can see two buttons to pause notifications for ONE HOUR or for the REST OF THE DAY. Further down, there’s a list of currently ACTIVE pauses, which were previously set. At the bottom of the screen, there’s a CREATE button, which allows you to set up a customized notification pause.
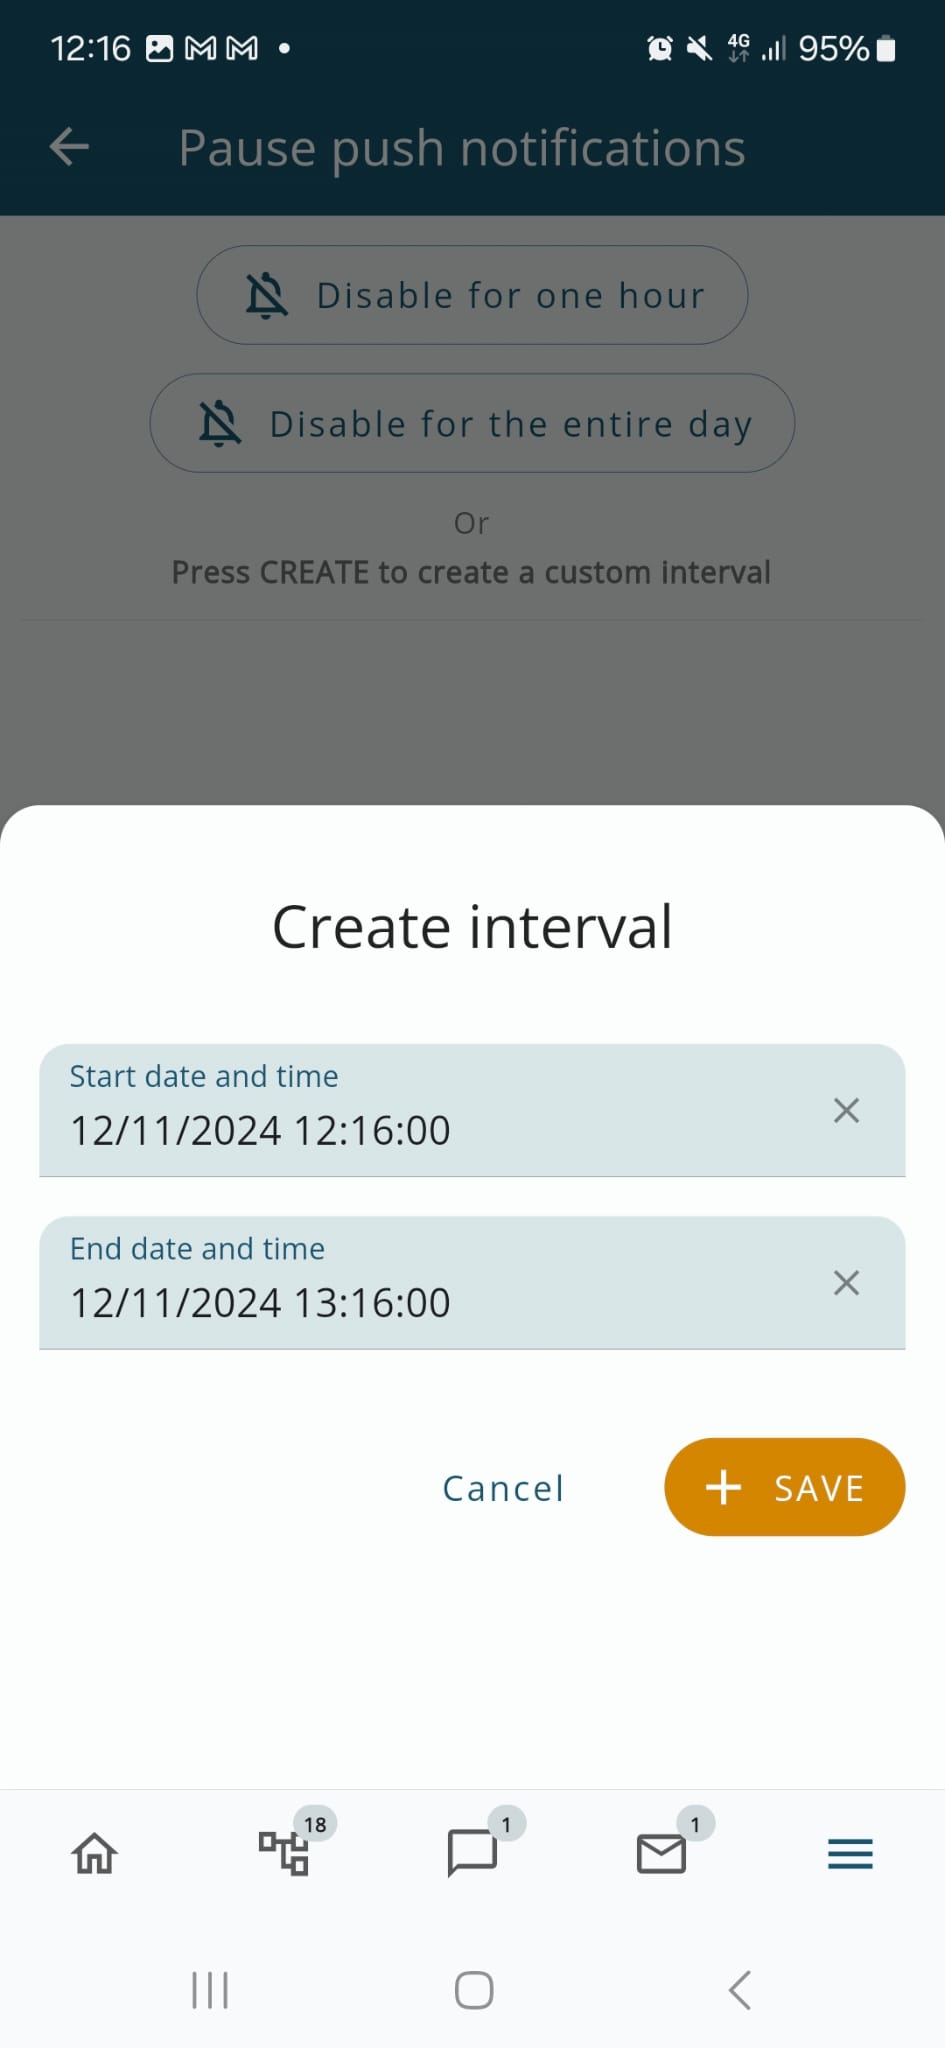
Custom Push Notification Interval Configuration Screen
5.4 Two-factors Authentication
With the Wilson app, you can enable two-factor authentication by first configuring it in the user settings, as explained in Chapter 2.7.2 Two-Factor Authentication (2FA).
Two-factor authentication can be done in two ways:
- via device code sent by email (a 6-digit number to be entered when prompted)
- through biometric fingerprint or face registered on your mobile device
With active two-factor authentication (2FA), when accessing the Wilson app, an action will be required from the user

As a first step, upon login, you will be asked whether to enable biometrics to avoid entering the 6-digit device code that is sent to the user's email address every time.

If you have chosen to access the Wilson app with two-factor authentication from user settings and fingerprint access has not been activated, this is the screen that will appear. In this screen, you need to enter the code that you chose during the activation of the function (ranging from 4 to 8 digits).

If fingerprint access has been activated from the app settings, this is the screen that appears. Click on Biometric Access, and the following screen will appear:
You will then be prompted to place your fingerprint on the sensor of your mobile device to complete the login.
If you wish to reset the PIN for accessing the Wilson App, simply log in from the web interface, go to your User Preferences, click the MORE button at the top right, and then use the CHANGE PIN button, as shown in the figure.

5.5 Mobile Profiles
From the vtenext administration panel, it is possible to set up different profiles that will make work even smarter on the Wilson Mobile App. There is an administration interface for these profiles that allows you to precisely configure the type of display within the app.
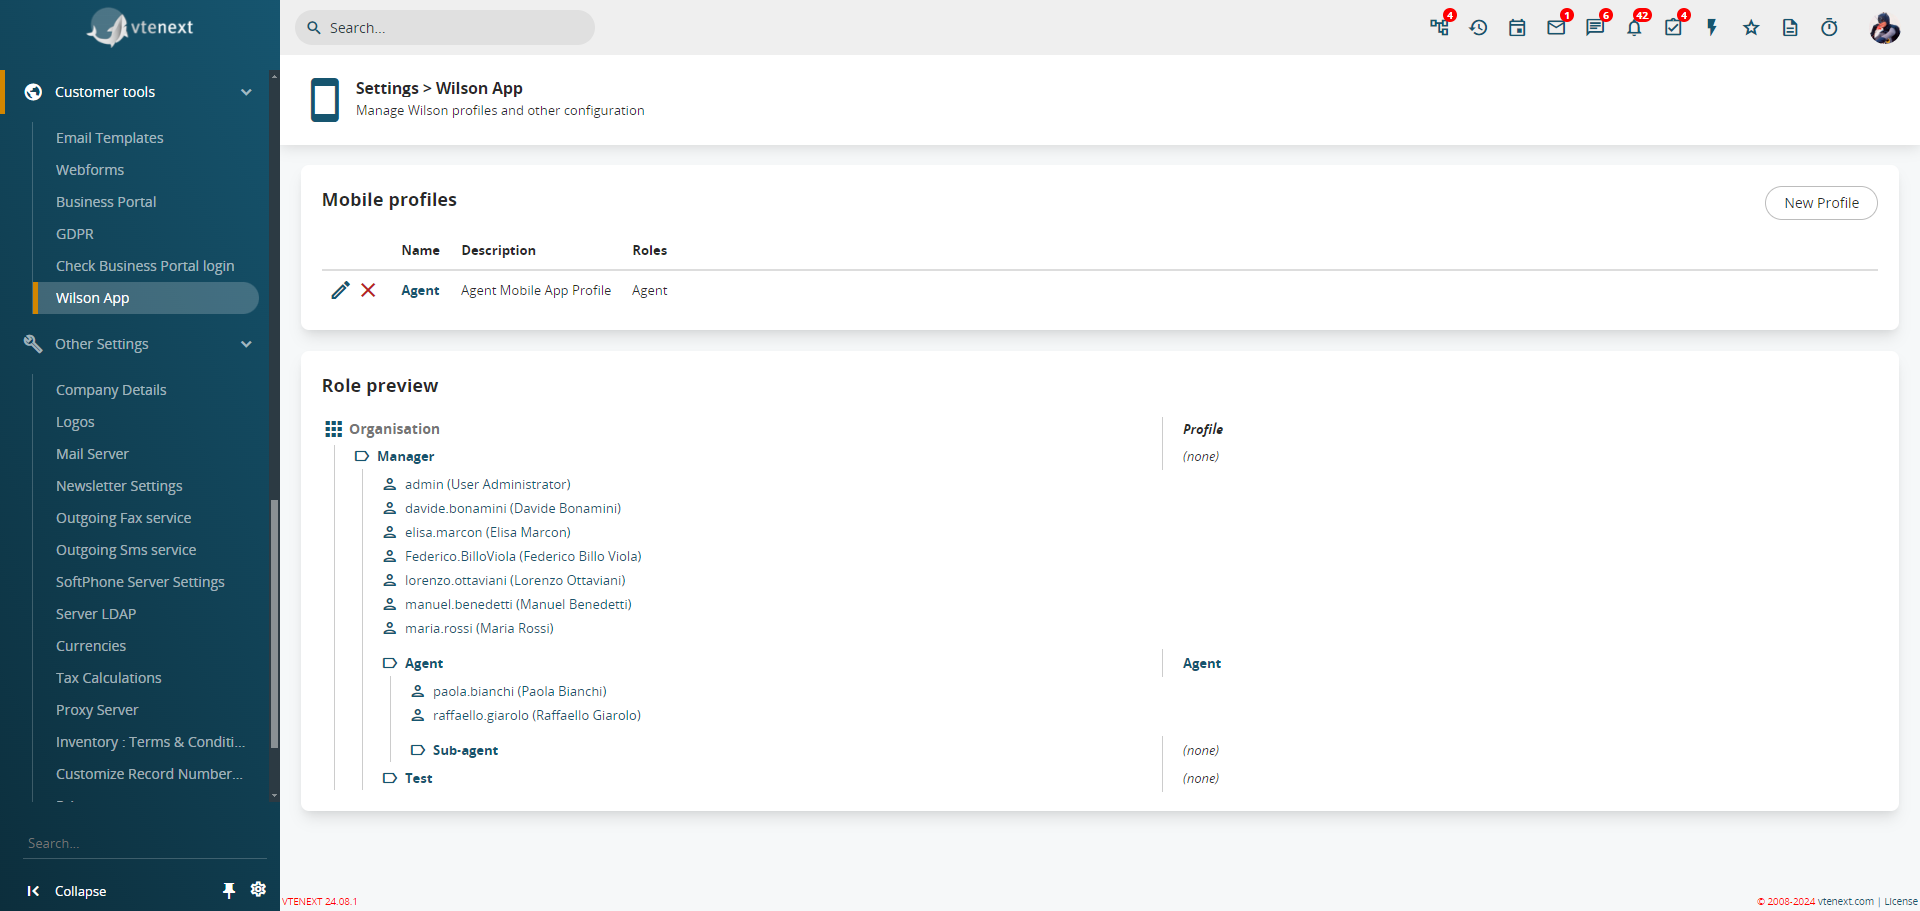
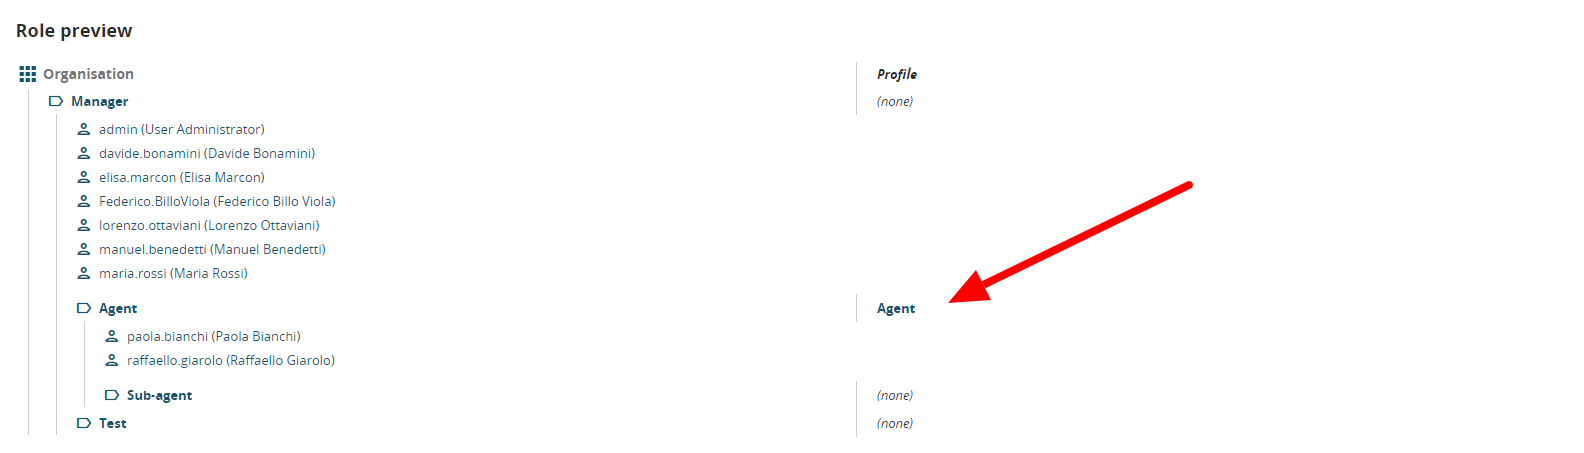
As you can see, there are two sections: one called Mobile Profiles, which will show us the list of profiles set up for the Wilson App, and the other, Role Preview, which will allow us to view the list of all users divided by role, with details of the mobile profile linked to them.
By clicking on the New Profile button in the top right corner, we will access the configuration, which follows the same procedure already explained in Chapter 16.1.1 Creating a New Profile.
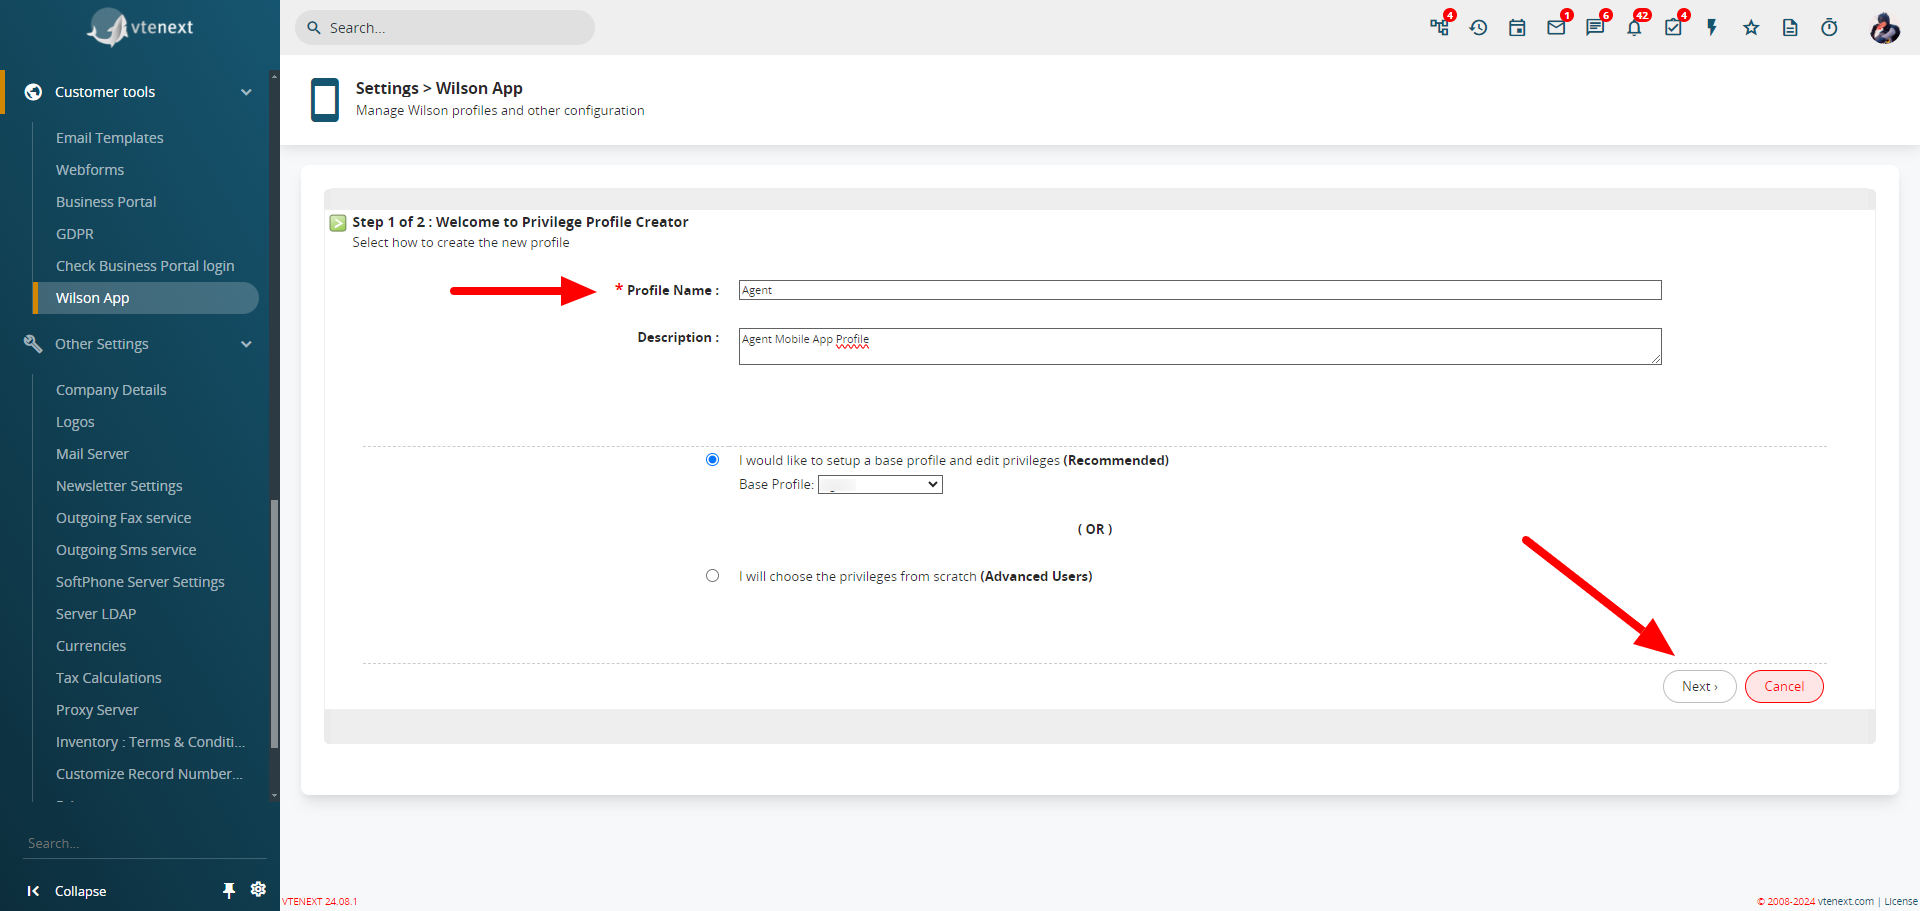
Enter the Mobile Profile name, an optional description, and choose the base profile from which to start the configuration (in case a similar profile has already been set up). Finally, click on the Next button at the bottom right.
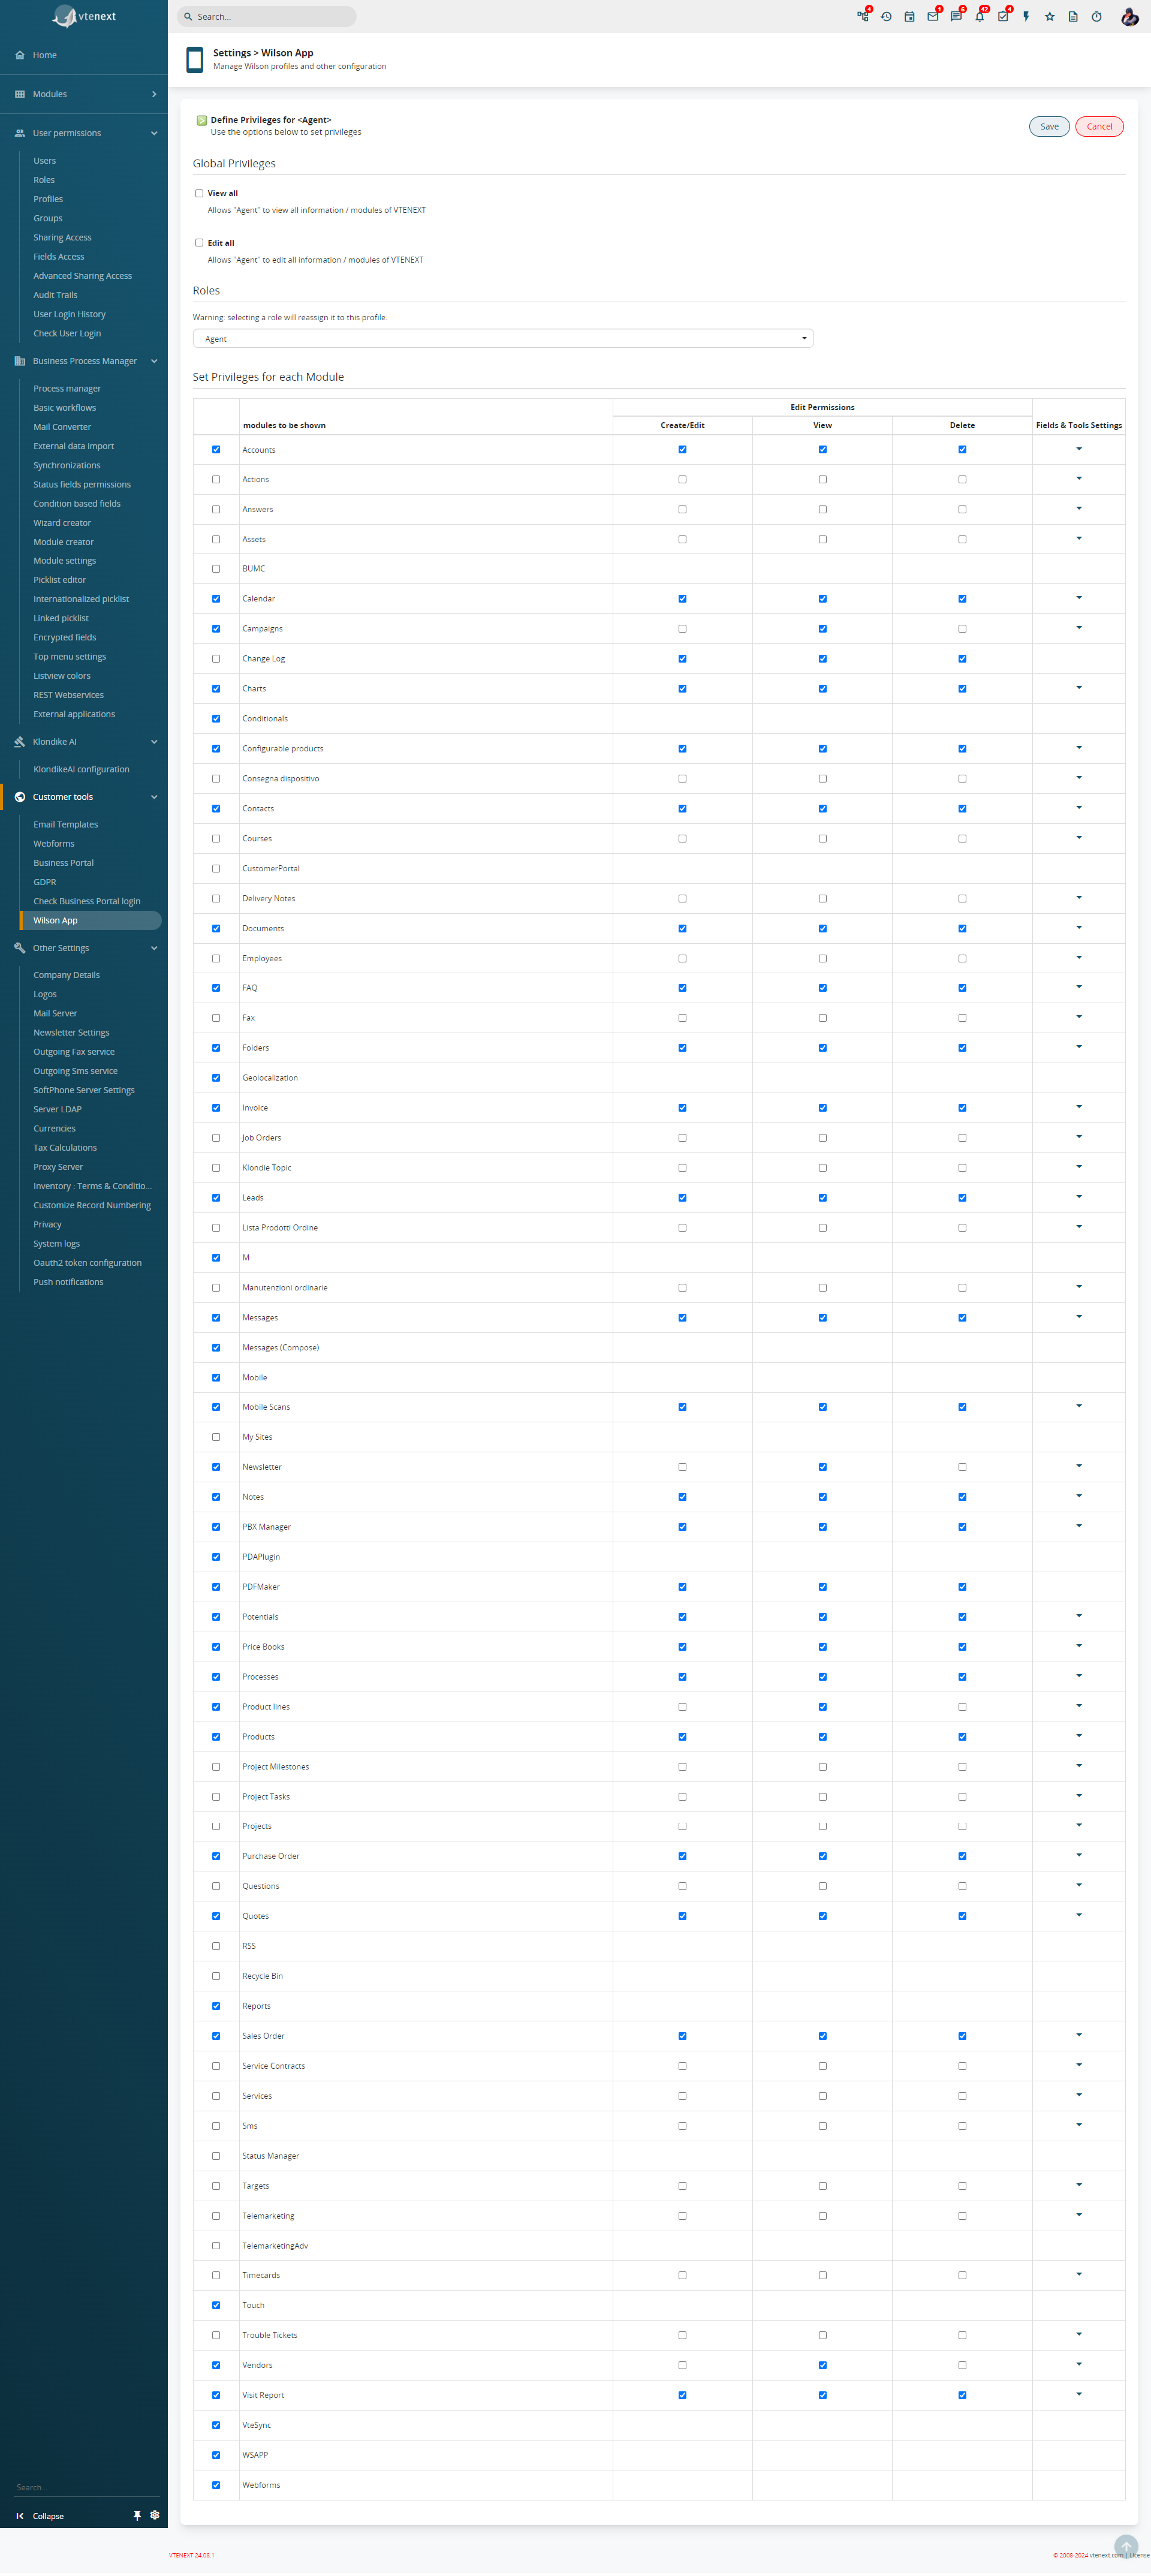
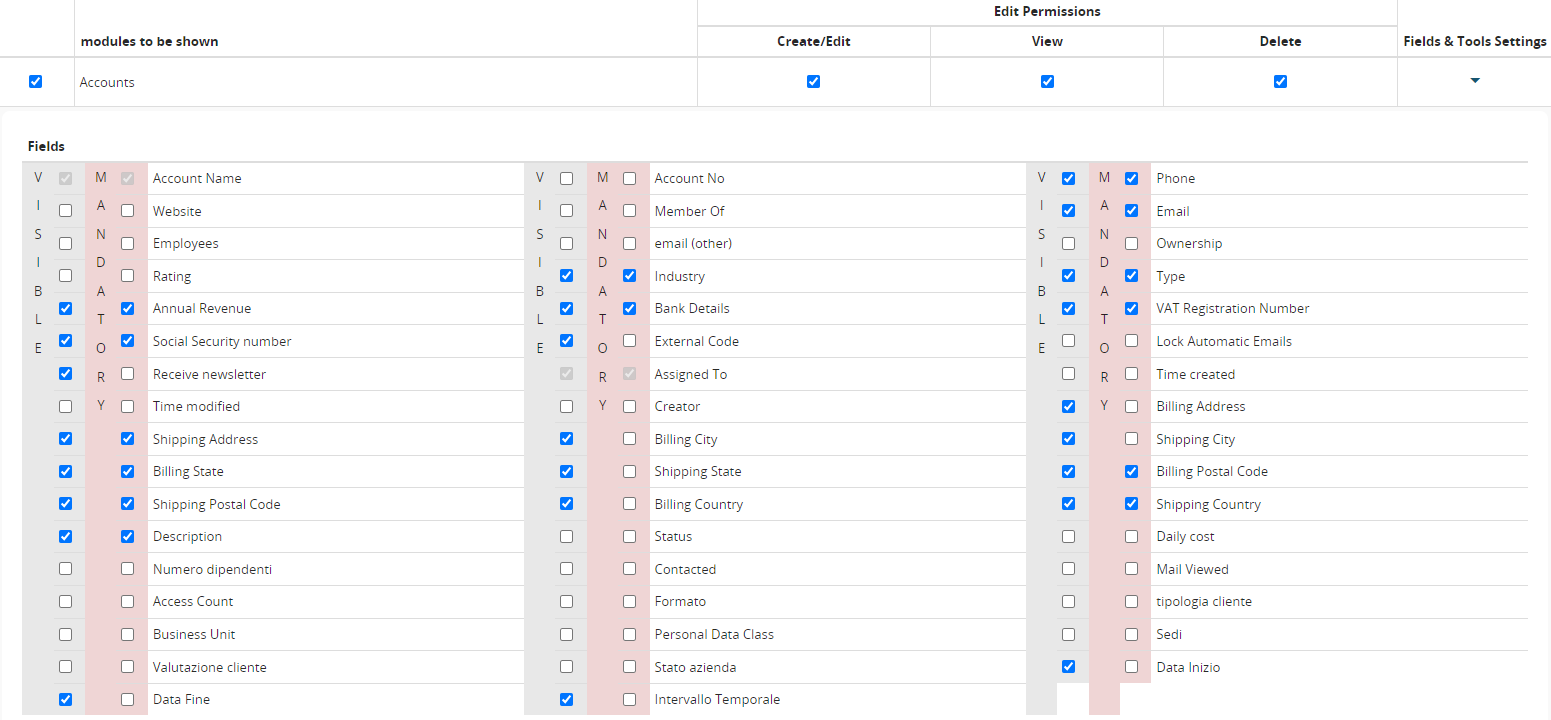
You will then be able to choose which modules to display, which ones to set as read-only, whether a user can create or delete records from that module, which fields are mandatory, and finally, decide which fields of each individual module will be visible from the mobile app.

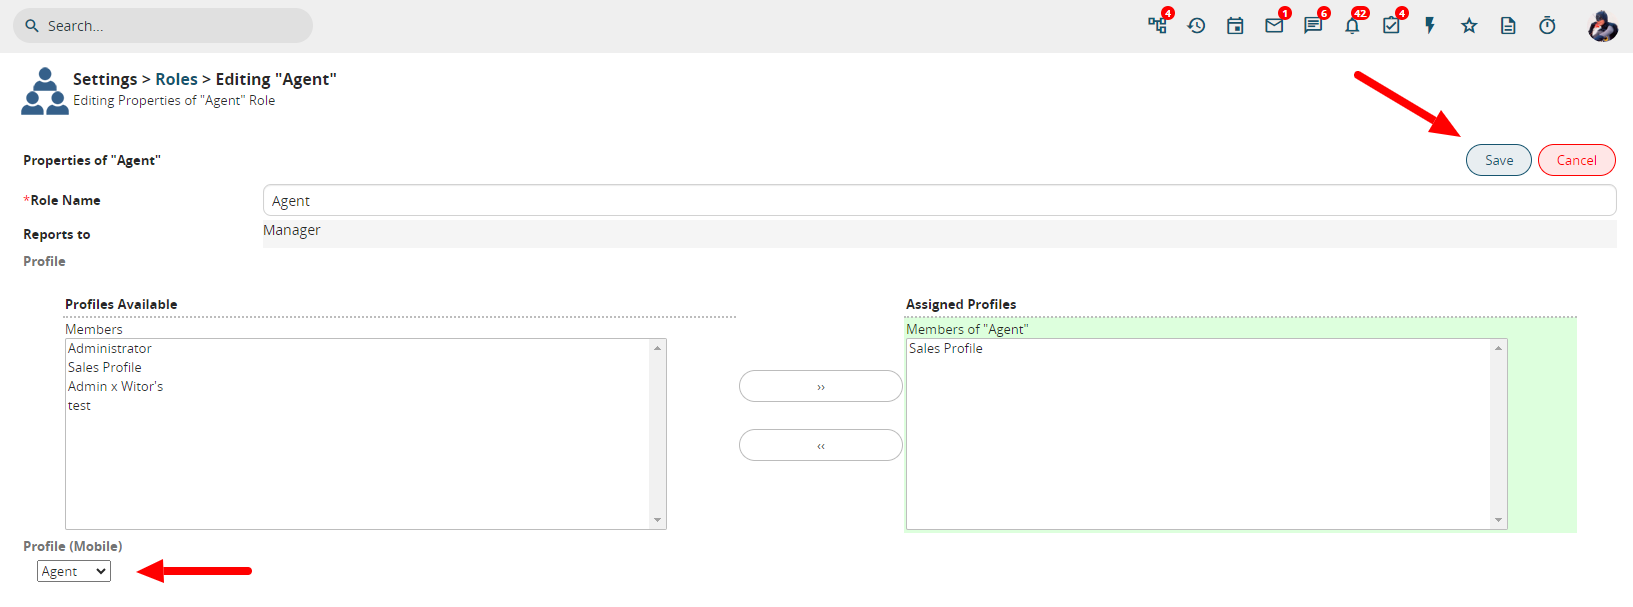
Once saved, the mobile profile will be available in the list of profiles we initially saw. Now it is possible to assign that profile to a specific user. Simply go to SETTINGS > ROLES, click on the desired profile (Agent profile for the example we're using), and modify it by selecting the mobile profile in the bottom left corner. Finally, click the SAVE button in the top right corner.
Finally, by returning to SETTINGS > APP WILSON, it is possible to view the Agent's mobile profile connected to their role in the Role Preview section.