
2.3 Intermediate / Boundary Event Timer
INTERMEDIATE/BOUNDARY EVENT TIMER
It represents an element widely used for managing the timing of task and process execution.

It can be quickly selected from the menu on the left while in diagram editing mode.

There are two groups of timers, which differ based on the actions to be performed and the tasks/elements involved:
1) Intermediate Event Timer
2) Boundary Event Timer
1) INTERMEDIATE EVENT TIMER
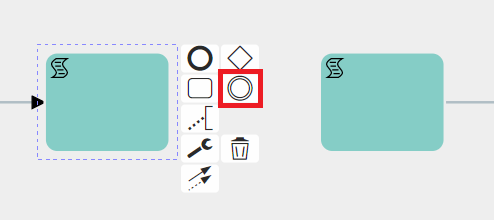
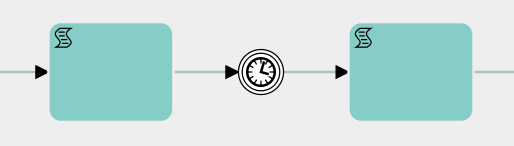
The first group consists of various types of "Intermediate Events" and is used between two tasks/elements.
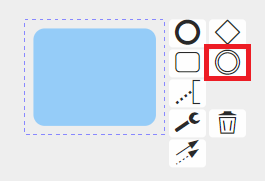
They can be selected in diagram editing mode by first clicking on the task or element from which the flow should then continue to the timer, and then clicking on the icon showing two circles, called "Intermediate/Boundary Event Timer."
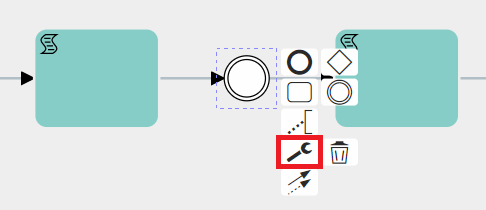
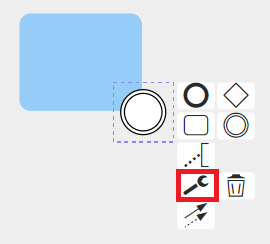
At this point, you need to select the timer just mentioned, click on the wrench icon, and then choose one of the available options.
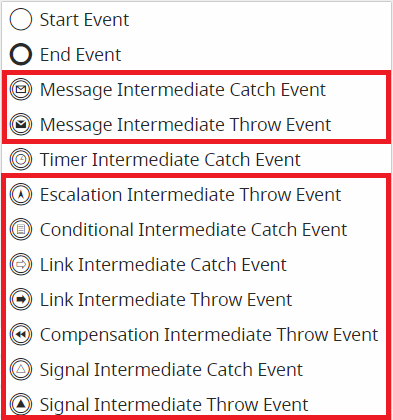
Timer Intermediate Catch Event
This is a type of timer used to wait for a specific period of time before moving on to the next task/element.
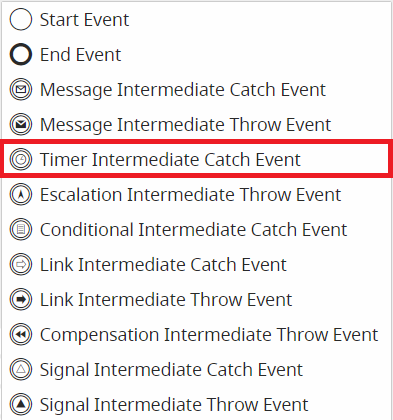
The other selectable types of Intermediate Events are currently not implemented.
IMPORTANT NOTE: As of version 24.08, they have been completely removed.
During the configuration phase, by clicking on the Timer Intermediate Catch Event symbol, a dedicated interface opens where you can enter the waiting time and the date to be used as a reference.

All'internoInside dellathe primafirst picklist partendostarting dafrom sinistra,the èleft, possibileit indicareis sepossible attendereto laindicate tempisticawhether indicatato PRIMAwait ofor DOPOthe rispettoindicated allatiming dataBEFORE dior riferimento.InveceAFTER nellathe picklistreference successiva,date.
Instead, resiin disponibilithe trenext valori:
picklist, three values are made available:
- Adesso -> come data di riferimenti prenderà la data-ora (timestamp) del momento preciso in cui il processo si posiziona sul timer.- Data -> permette di inserire una data-ora statici

AltroNow -> permetteas dithe inserirereference valoridate dinamici,it quindiwill pescatitake daithe campidate-time data(timestamp) deiof modulithe coinvoltiprecise all'internomoment delin processo.which the process is positioned on the timer.
- Date -> allows you to insert a static date-time

Other -> allows you to insert dynamic values, therefore taken from the date fields of the modules involved in the process.

2) BOUNDARY EVENT TIMER
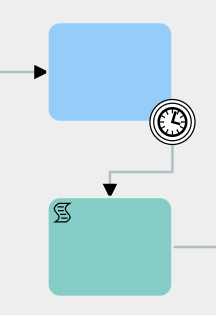
The second group consists of various types of Boundary Events, which are used on control tasks and are triggered when a task remains idle for a specific period of time.
They can be selected in diagram editing mode by first clicking on the task or element from which the flow should then continue to the timer, and then clicking on the icon showing two circles, called "Intermediate/Boundary Event."
At this point, you need to select the timer just mentioned and drag it onto one of the edges of the relevant control task.

(Note: If you simply click on the icon, an “Intermediate Event” will be created and linked to the task with an arrow. If you want to use that timer as a Boundary Event, you just need to delete the arrow and place the timer directly on the relevant task.)
Once this is done, you need to select the timer, click on the wrench icon, and then choose one of the available options.

Timer Boundary Event
Allows the execution of the tasks/elements connected to the timer based on how long the process remains idle on the control task where the timer is placed.


The time interval is predefined during the timer’s configuration.
They can only be used on control tasks.
The other types of selectable Boundary Events are not currently implemented.
IMPORTANT NOTE: As of version 24.08, they have been completely removed.
During configuration, clicking on the Timer Boundary Event icon opens the dedicated interface where you can enter the waiting times.

As of version 25.02, it is possible to specify a reference date on which to base the waiting times.
The configuration of this section is the same as for the intermediate timer, so in the first picklist from the left, you can indicate whether to wait the specified amount of time BEFORE or AFTER the reference date.
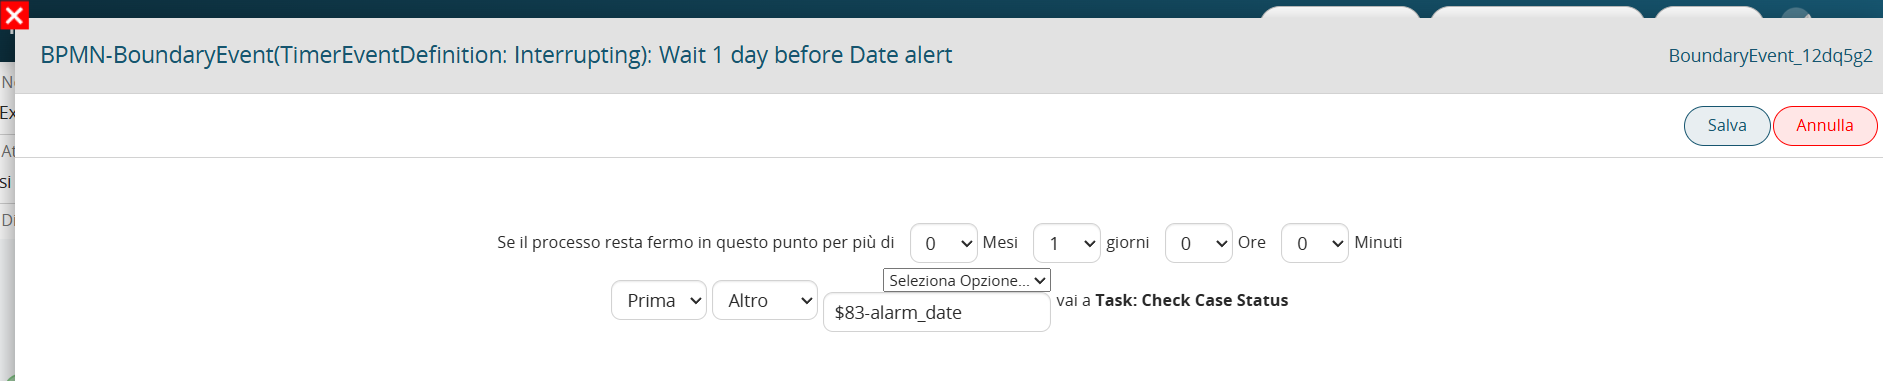
nIn the next picklist, three values are available:
- Now → the reference date will be the date-time (timestamp) of the exact moment when the process reaches the timer.

- Date → allows you to enter a static date-time value.

- Altro -> permette di inserire valori dinamici, quindi pescati dai campi data dei moduli coinvolti all'interno del processo.
