
3.15 Call External Web Service
Allows you to call an external REST-type Web Service previously configured in Settings -> Business Process Manager -> REST Webservice. (Figure 1 and 2)
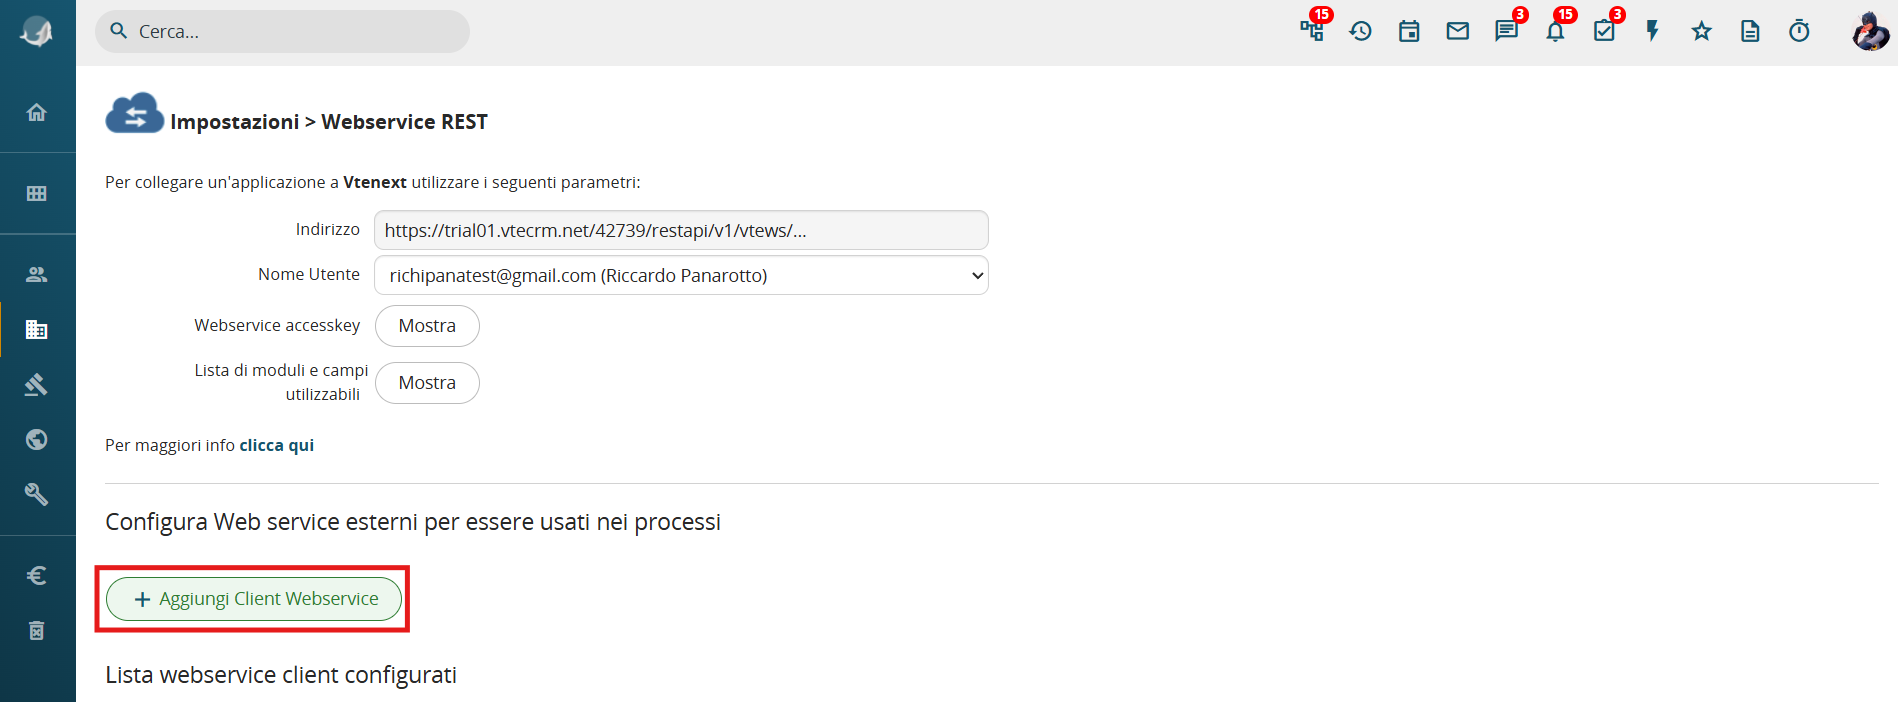
Figure 1
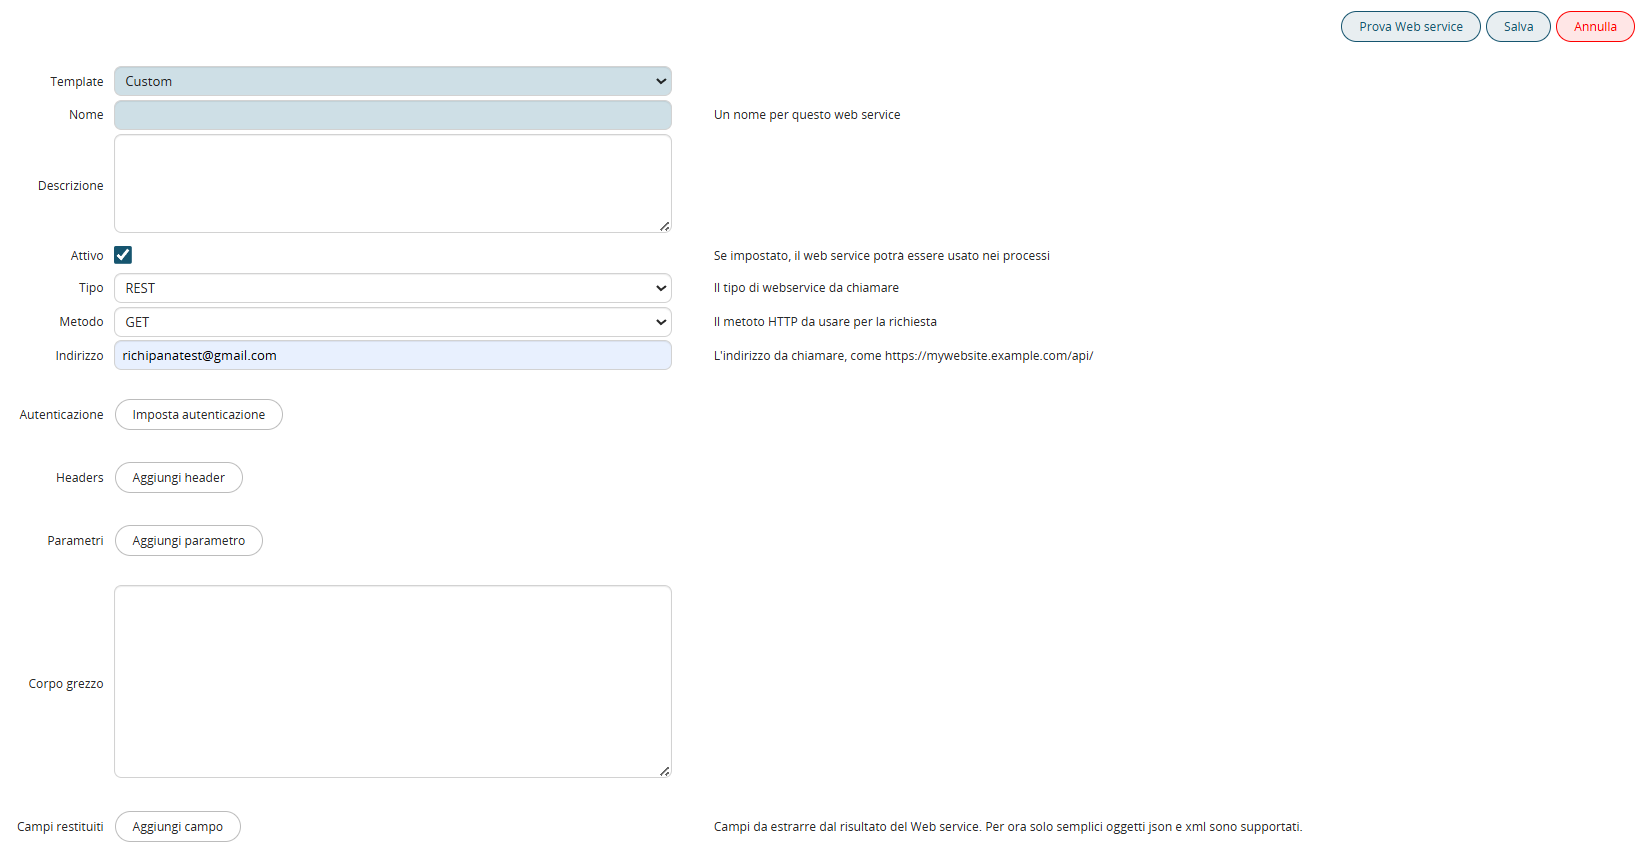
Figure 2
- Name → Allows you to define a name for the WS we are configuring, useful for:
1) making its selection easier and more intuitive on the process side
2) making it easier to recognize in the list of WS for possible modification on the interface side
- Description → Allows you to define a description for the WS we are configuring, useful for entering detailed specifications regarding its operation
- Active → If set, allows its use on the process side
- Type → Allows you to define the type of WS to call; currently, only "REST" is available.
- Method → Allows you to define the HTTP method to use for the request. You can select one of the following values: "GET", "HEAD", "POST", "PUT", "DELETE", "OPTIONS", "PATCH"
- Address → Allows you to define the endpoint of the WS we are configuring, such as https://mywebsite.example.com/api/
- Authentication → Allows you to define the authentication method used to invoke the WS, specifically:
1) Basic: Allows you to define a username and corresponding static password with which the WS will perform authentication
2) Bearer (OAuth2): Allows you to perform two-factor authentication
- Client ID: Represents the ID used to access the application
- Client Secret Authentication: Represents the secret key used for proper authentication
- Private Key Authentication (PEM or JWK): Allows you to upload a PEM or JWK file representing the private key used for proper authentication
- Scope: Allows you to define the scope, i.e., which operations are permitted by the system (read-only, write-only, or read/write)
- Token URL: Allows you to define the URL to use as the token
- Headers → Allows you to define the header parameters required by the WS we are configuring
Typically, the need for These parameters depend on the structure of the WS and are therefore defined in its dedicated documentation.
- Parameters → Allows you to define the input parameters required by the WS we are configuring.
Typically, the need for these parameters depends on the structure of the WS and is therefore defined in its dedicated documentation.
- Raw body → Allows you to pass a single string in JSON format containing all the input parameters required by the WS we are configuring.
Usually, the need to map this section depends on the structure of the WS and is therefore defined within its dedicated documentation.
- Return fields → Allows you to save N parameters returned as output by the WS.
Usually, the need for these fields depends on the structure of the WS and is therefore defined within its dedicated documentation.
- Test Web Service button → Allows you to run a test call, returning a popup with the Return Code, Response Message, Status, and the expected Output from the WS.
Therefore, once the WS has been configured in Settings -> Business Process Manager -> REST Web Service, it will be possible to call this WS within processes (Figures 3, 4, and 5).
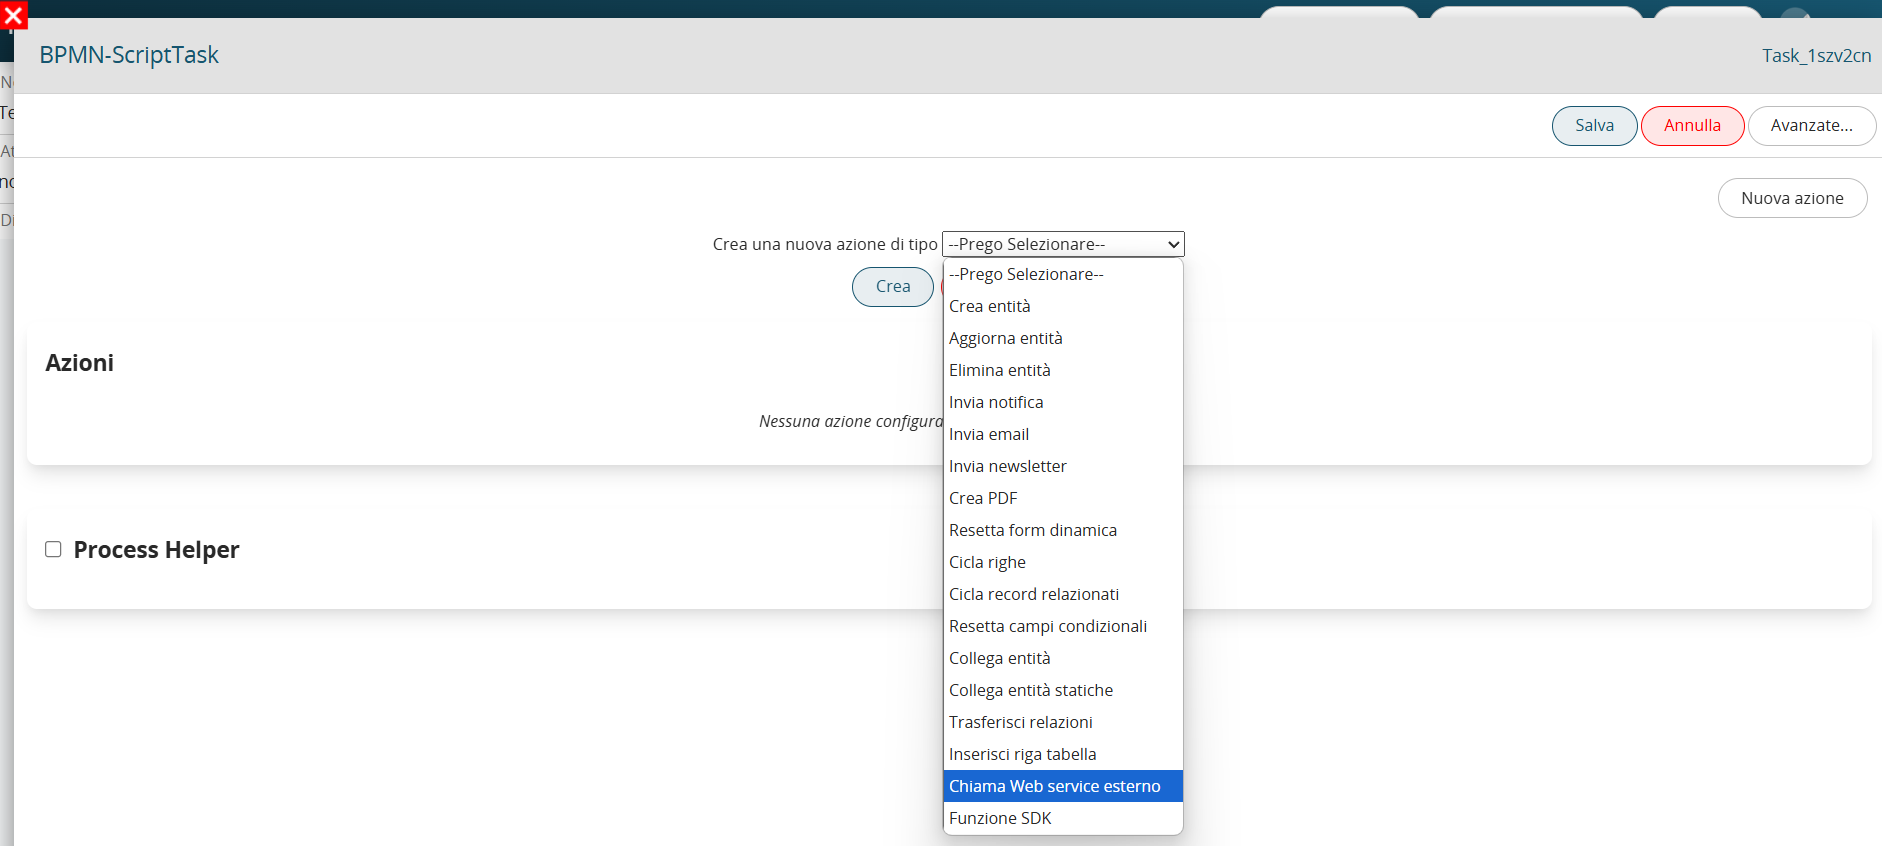
Figure 3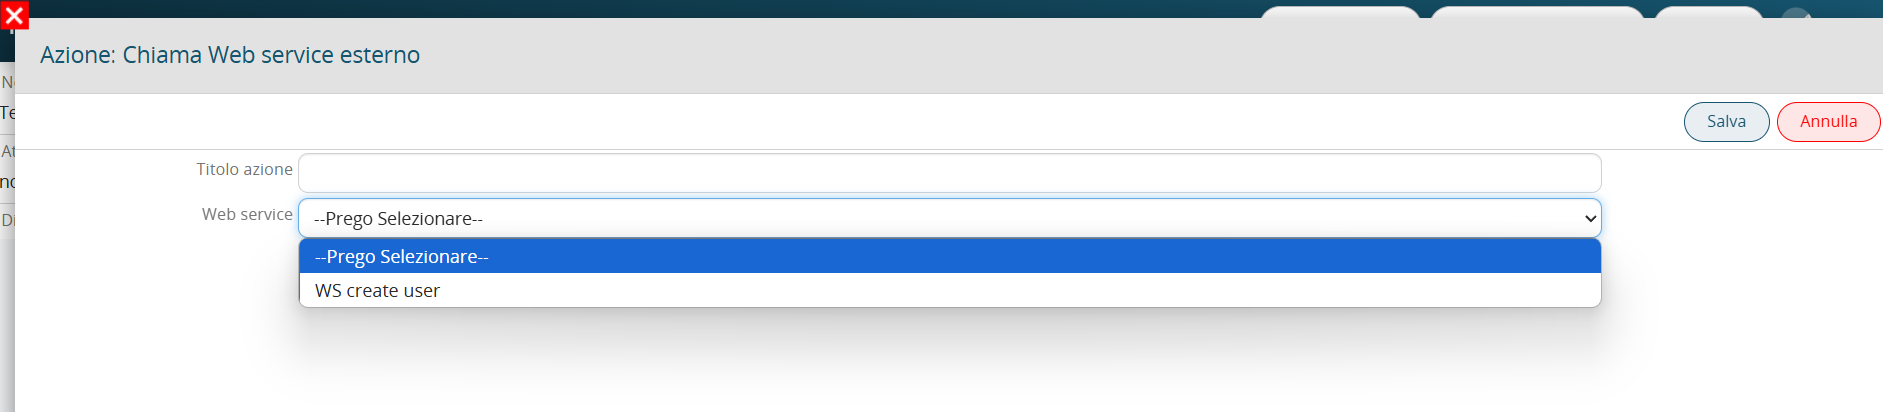
Figure 4
To better explain how to configure this action within a process, an example of configuring a WS call is shown below.
The goal of the process is to generate, upon activation of a collaborator on Vtenext, a user on an external system associated with it.
The WS requires input of JSON with the following structure:
{
"firstname": "Mario",
"lastname": "Smith",
"type": "Internal Employee",
"email": "mariorossi@test.com",
"status": "Active"
}
If successful, the response code = 201 will be returned, along with a JSON output containing several variables, including the ID of the created user. Below is an example of the JSON:
{
"firstname":"Mario",
"lastname":"Smith",
"type":"Internal Employee",
"email":"mariorossi@test.com",
"status":"Active",
"id":"532",
"createdAt":"2025-07-03T13:05:11.752Z"
}
First, in Settings -> Business Process Manager -> REST Web Service, we perform the initial configuration. of the WS (Figure 5)
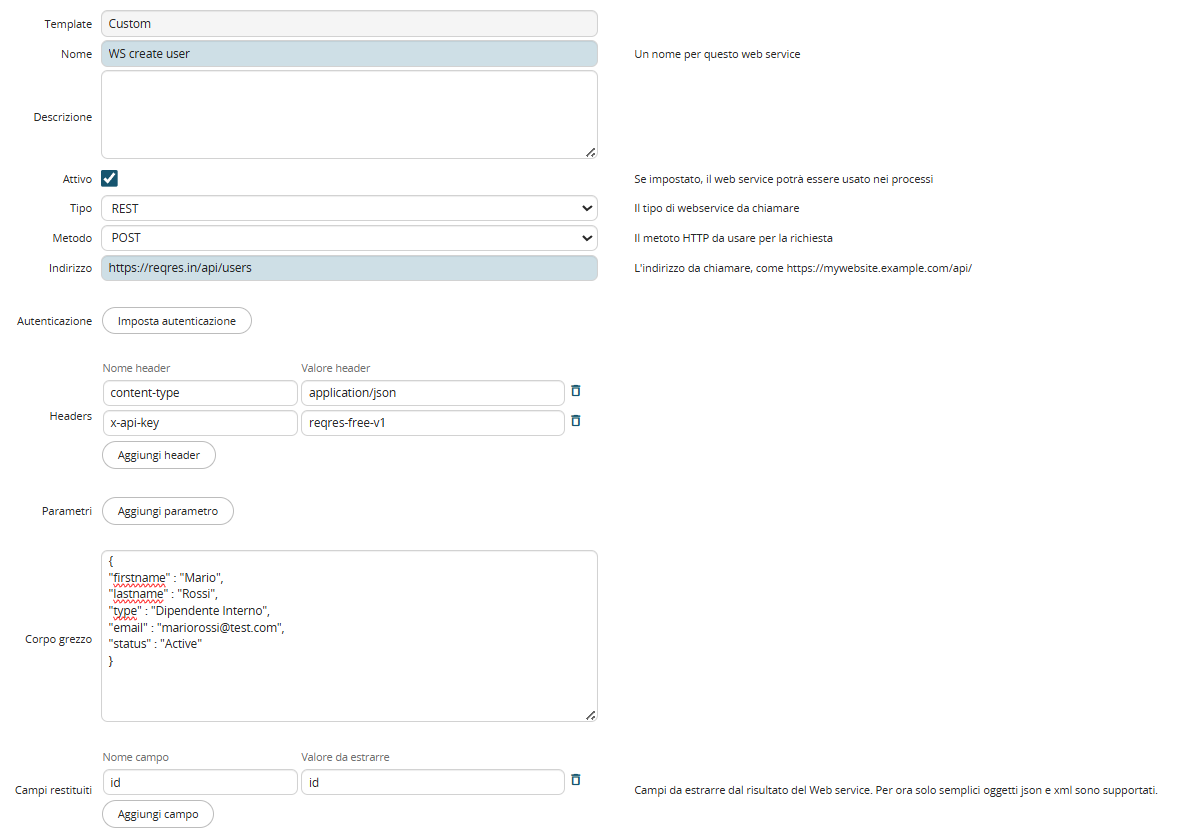
Figure 5
Next, we create a process having the flowchart shown in Figure 5:
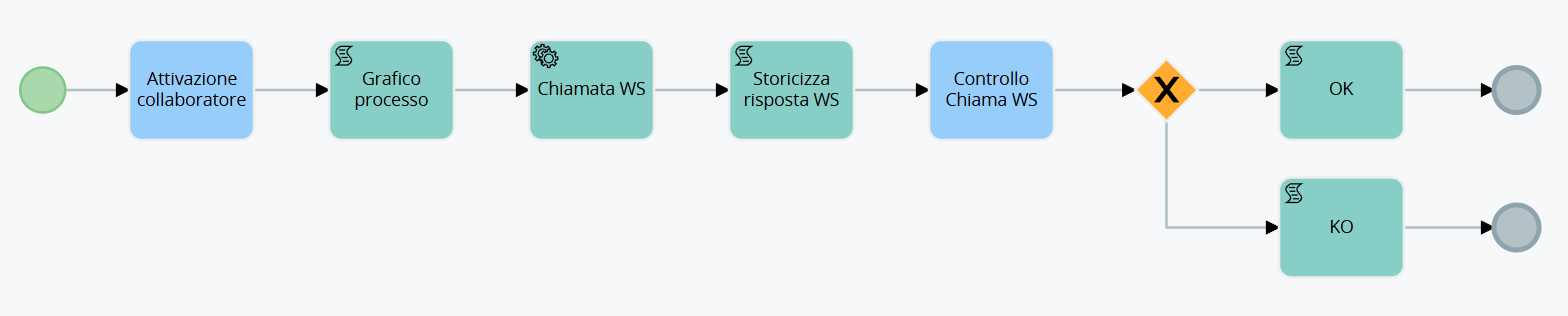
In the "WS Call" ServiceTask, we configure the external WS call action. (Figure 6)
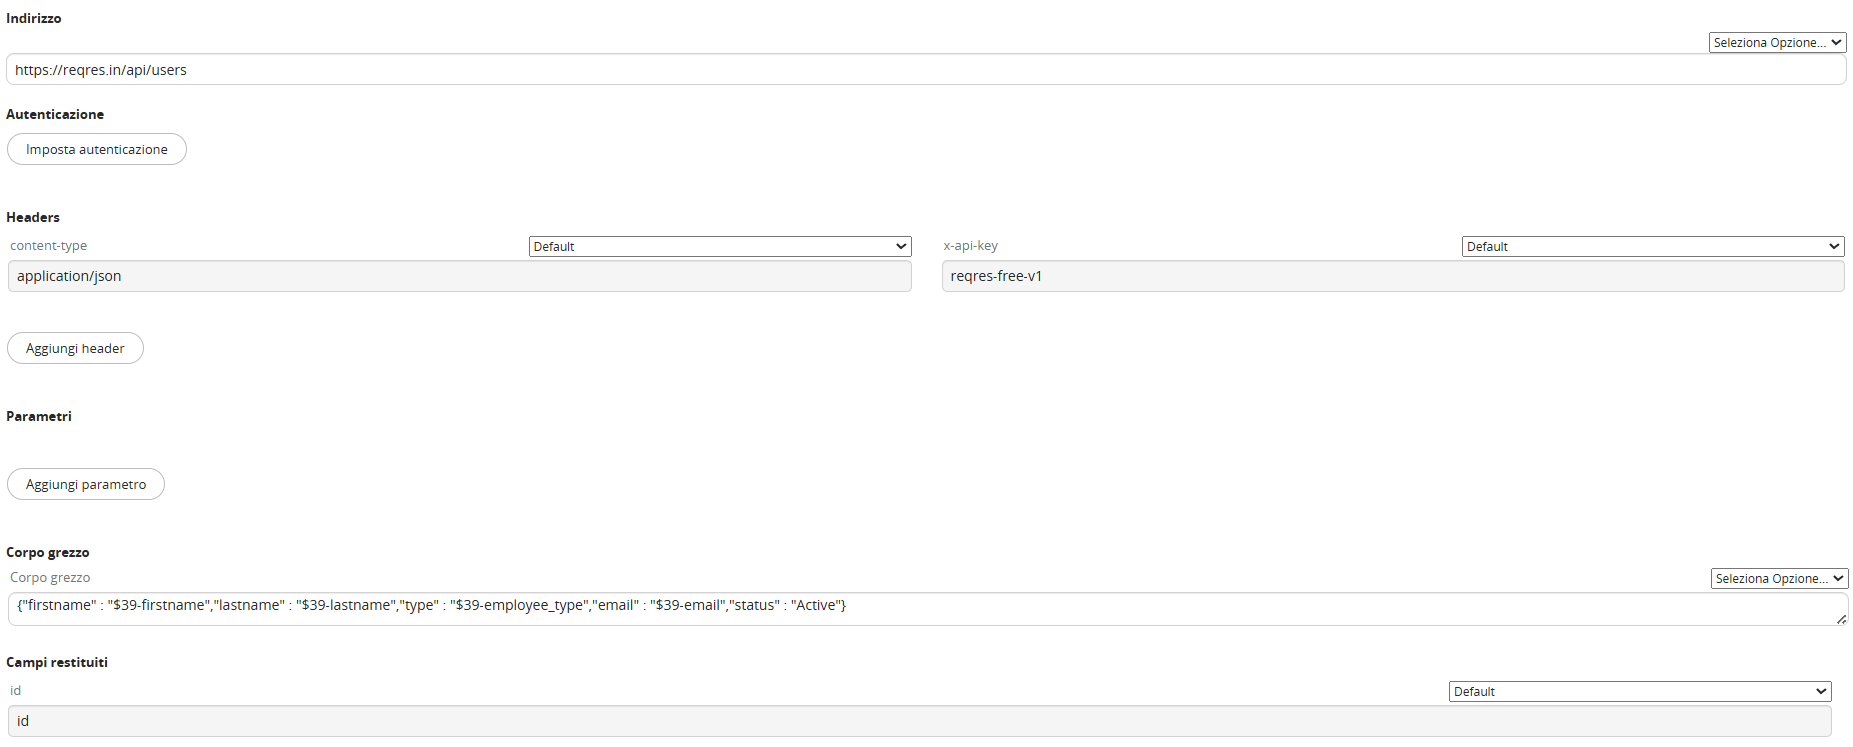
Figure 6
The system automatically returns all the elements configured in Settings -> Business Process Manager -> REST Webservice.
In addition, you can define additional Headers, Parameters, and Return Fields, allowing you to pass dynamic values from the records involved in the process.
WARNING! → In some cases, the Header parameters inherited from the configuration performed in Settings -> Business Process Manager -> REST Webservice will be set to blank by default (Figure 7).

Figure 7
Therefore, for the WS call to work correctly, you must select one of the "Default" options available in the "Select Options" picklist at the top right of each field. (Figure 8)

Figure 8
In the Raw Body, we modify the original JSON by dynamically inserting the content of the fields in the Collaborator form associated with the process.
In the "Historicize WS Response" ScriptTask, we activate a process helper and create four text fields in its dynamic form (Figure 9).
In fact, the default WS call returns the variables "Response Code," "Response Message," and "Successful Outcome?" (1 if the call was successful, 0 if it was unsuccessful).
Finally, we create the "id" field, in which we will store the expected output from the WS in question, i.e., the external ID of the created user.
N.B.: For complex responses (objects with multiple attributes), it is possible to extract up to a maximum of one escalation level (specifying the returned field name and attribute, e.g., object.attribute).
WARNING! → Reading attributes is not supported for object lists such as response.

Figure 9
To map the content, within the "Select Options" picklist, the system provides a dedicated section for WS calls with their corresponding metaID (Figure 10).
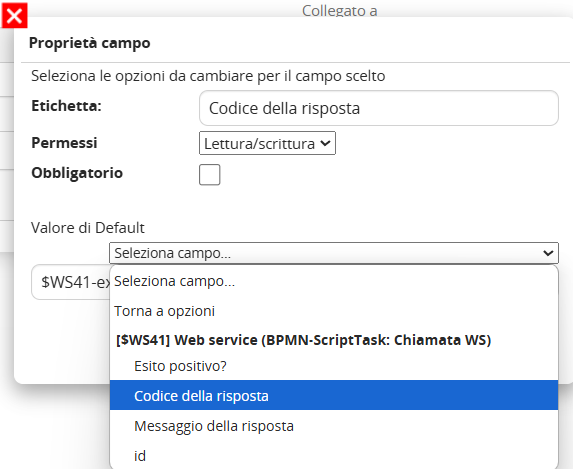
Figure 10
In the "WS Call Check" task, we check the contents of the "Response Code" and "Successful Result?" fields and route the process into two different branches (Figure 11).
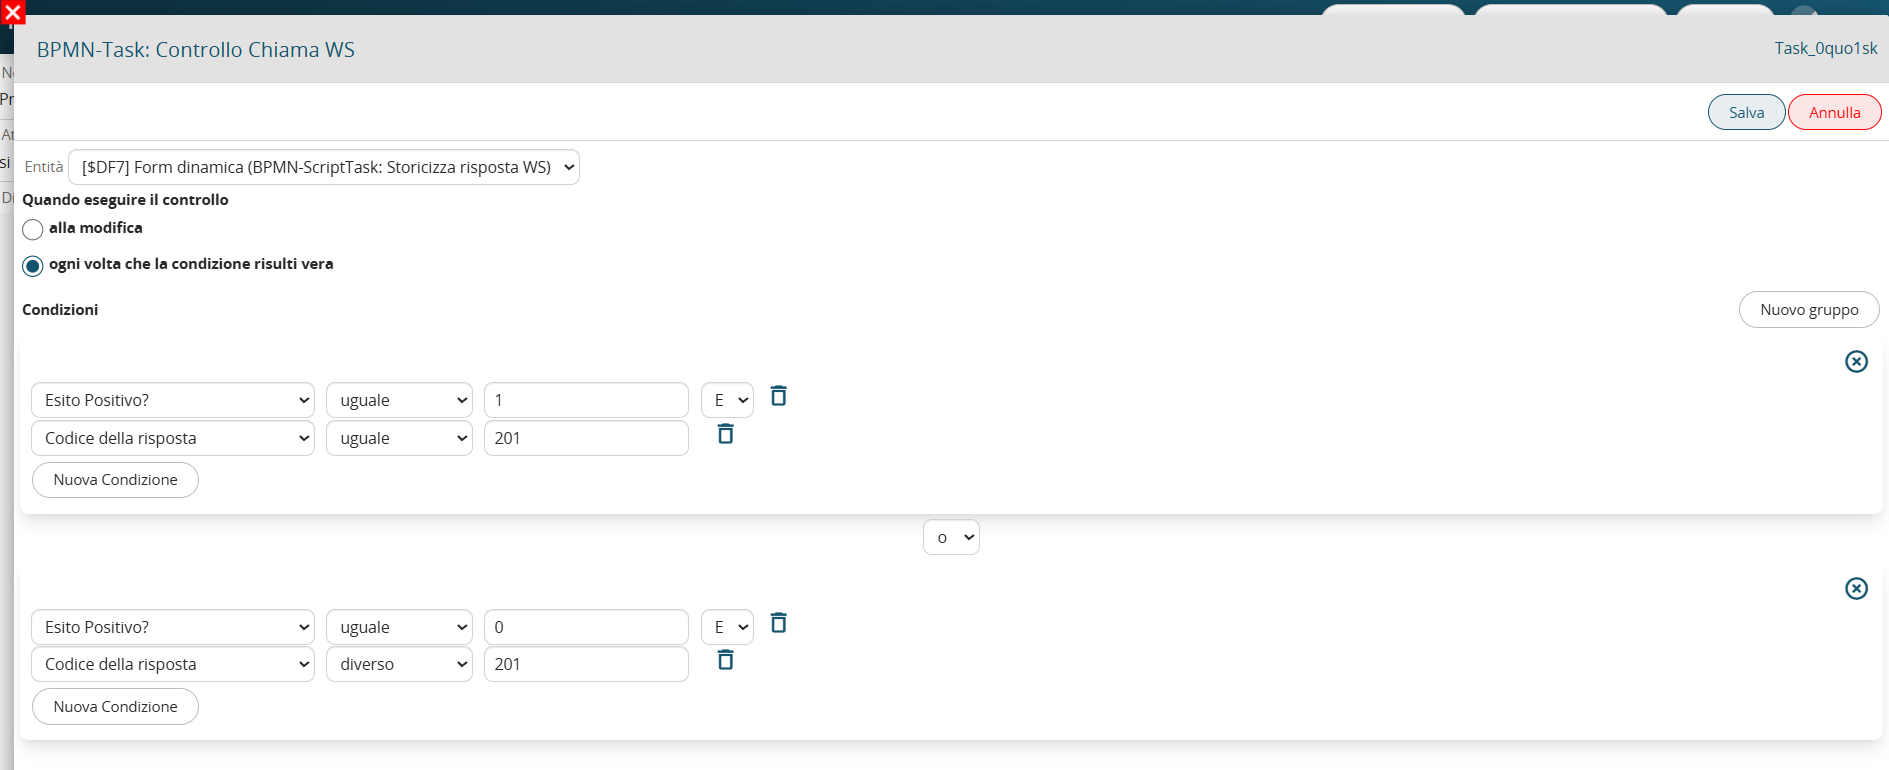
Figure 11
The final "OK" and "KO" ScriptTasks shown in the process flowchart can be configured as desired, for example, to log the WS output (i.e., the ID of the user created in the external system) in a dedicated field in the employee's profile, or to send an email/notification to the IT department in the event of a failed call.