
3.5 Send Email
This action allows you to send automatic emails with the possibility of attaching documents and linking the mail to an entity (standard or custom) in such a way that it remains historicized.
In the body of the email, it is possible to report on the classic static and/or dynamic values other general functions such as the current date/time, the link to the desired entity (internal for users or external for portal-side customers) (Figure 1)
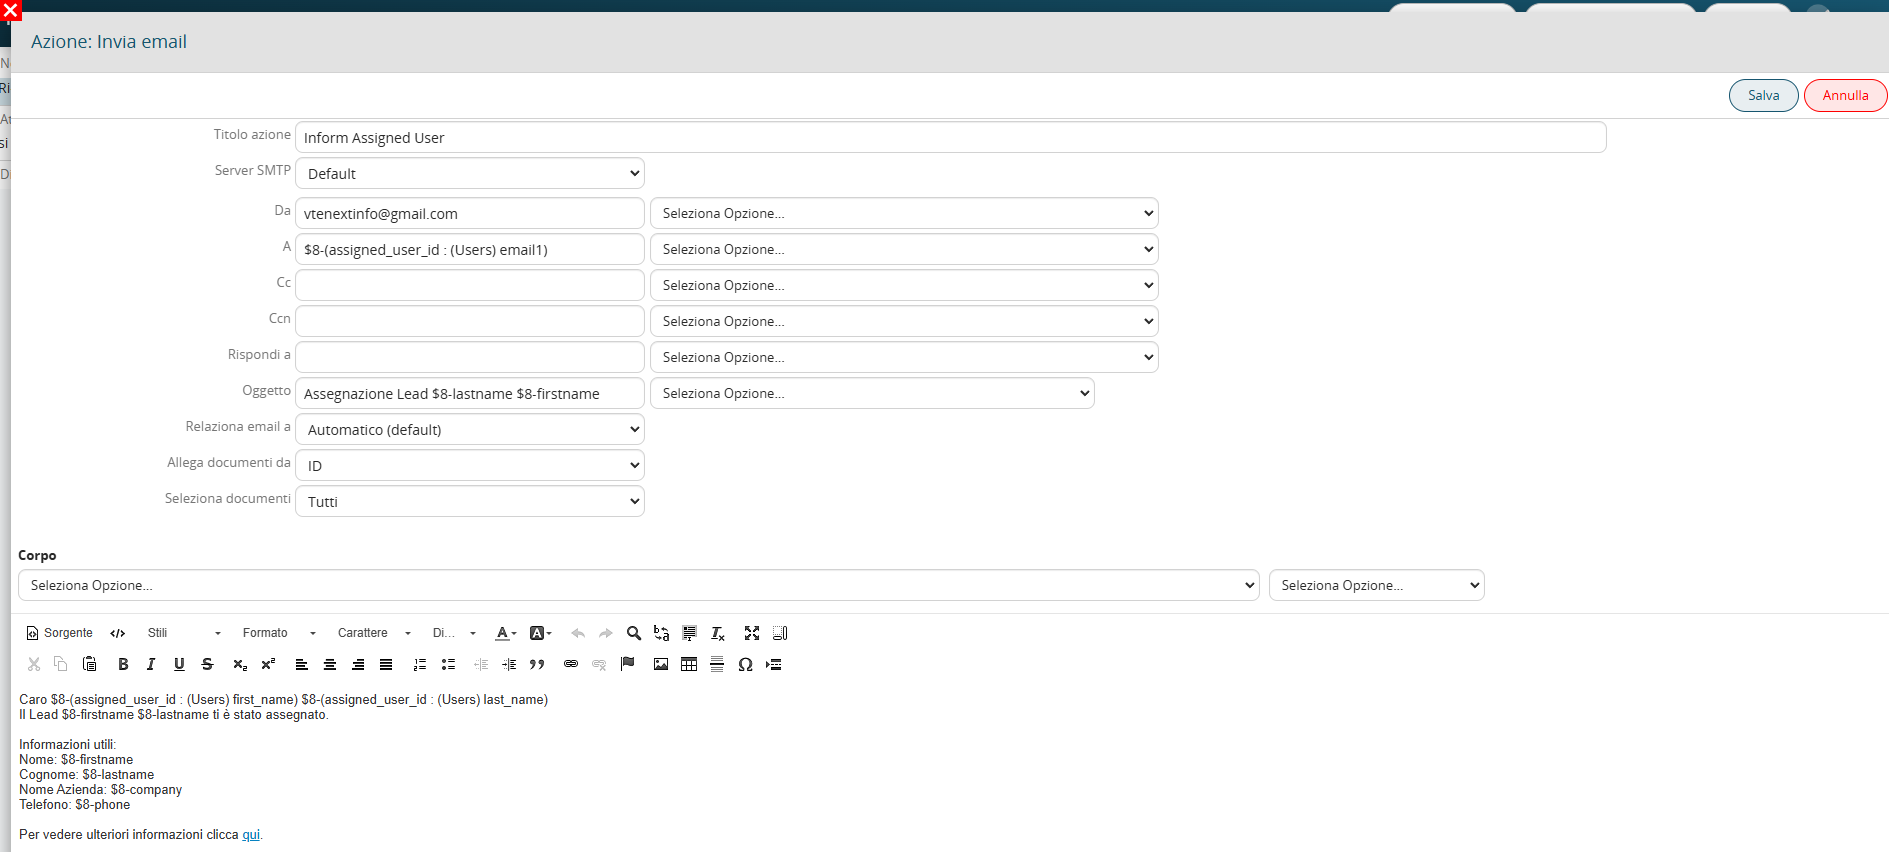
Figure 1 (click on the image for a higher graphic resolution)
MAIN FIELDS
- SMTP Serve → -> from version 23.08 you can specify how to use the outgoing mail server account to be used as sender. (Figure 2)
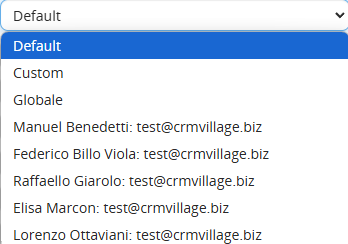
Figure 2
- Default -> in the case that in the module Messages of the user indicated there is a configured account, the system will use the server associated with it, in the case that no account is configured the system will use the server present in
Settings -> Mail Server.
- Custom -> you can configure an outbound mail account directly within the email sending action. (Figure 3)
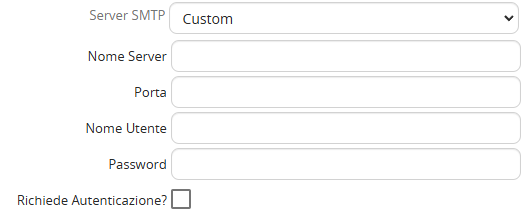
Figure 3
- Global -> the system will use only the server configured in Settings -> Mail Server.
In addition to the three modes described above, you can select one of the accounts configured in the Messages module for the currently active users on your system.
-From -> represents the sender of the mail
-To -> represents the recipient of the mail
-CC -> represents copied addresses
-CCN -> represents the addresses in hidden copy
-Reply to -> represents the address to which a possible answer to the automatic mail would be sent
-Subject -> represents the subject of the mail
-Link email to -> it is possible to indicate the entity to which to link the automatic mail.
The item "Automatic (default)" allows to associate the mail with the entity on which the process has been triggered
-Attach documents from -> you can select the entity from which to take the documents linked to it and attach them to the mail.
By clicking on "All" the system will attach ALL documents related to the entity. (Figure 4)
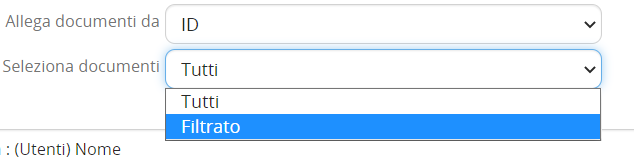
Figure 4
Ticking the "Filtered" the system will attach documents that meet the conditions inserted in the section "Conditions" (Figure 5)

Figure 5 (click on the image for a higher graphic resolution)