
6.1 Example of using Process Helper to request internal user data
As anticipated in the introductory chapter, one of the most common uses of the process helper concerns the creation of customized forms that can be presented to internal users of the CRM in order to request and save information.
The blocks and fields that make up these forms are called "dynamic forms".
PREMISE: In order for a user to be able to view and fill out a dynamic form, he/she must have enabled the appropriate permissions on the profile side (Figure 1)
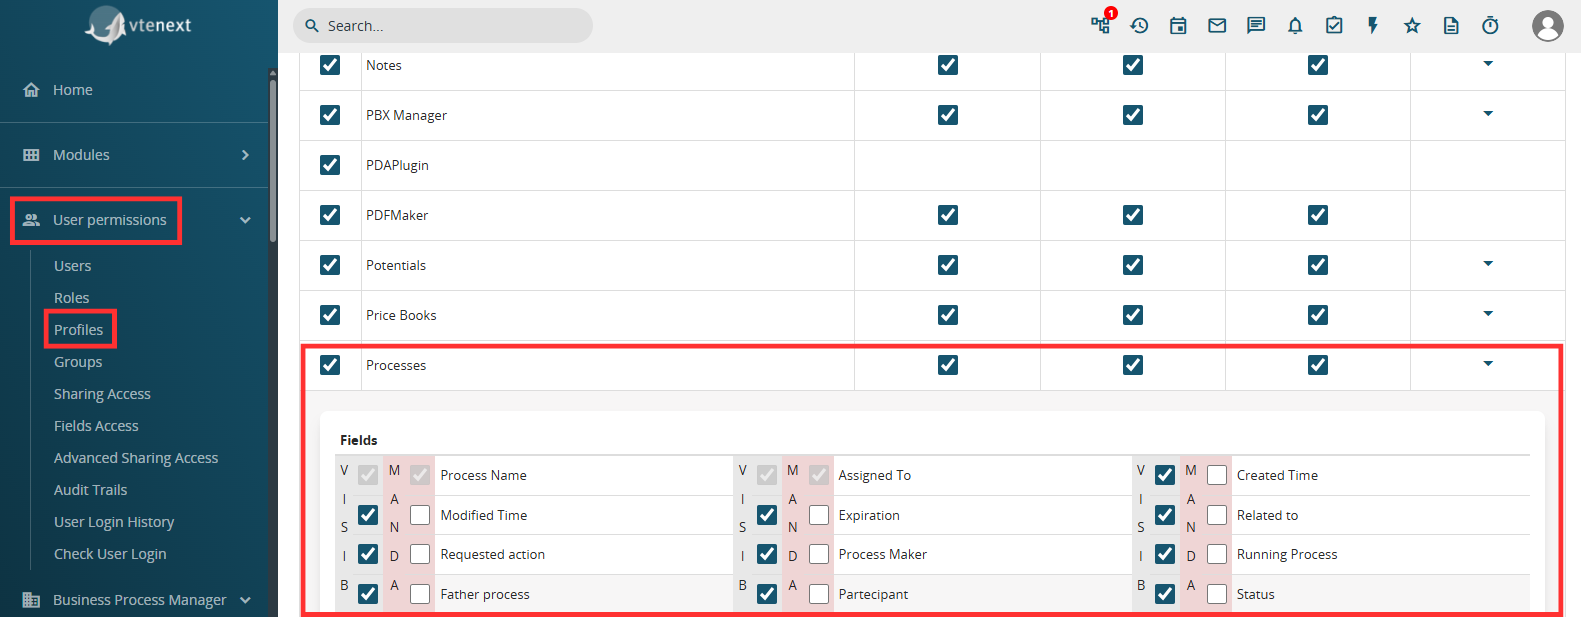
Figure 1
In order to configure a process helper, you must first configure an Action Task (create a link with a dedicated section) following the dedicated procedure (Figure 1).
NOTE: it is advisable to use the User Task symbol, as we are indicating an activity that will be charged to the user.
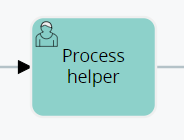
Figure 2
After the User Task, in this specific case it is essential to create a Task within which to perform some checks to allow the process to stop and present the dynamic form (Figure 2).
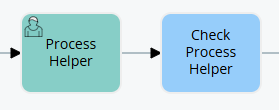
Figure 3
Once inside the User Task (in our example “Process Helper”) in configuration mode, we will find the section called “Process Helper” with all the related fields (Figure 3)
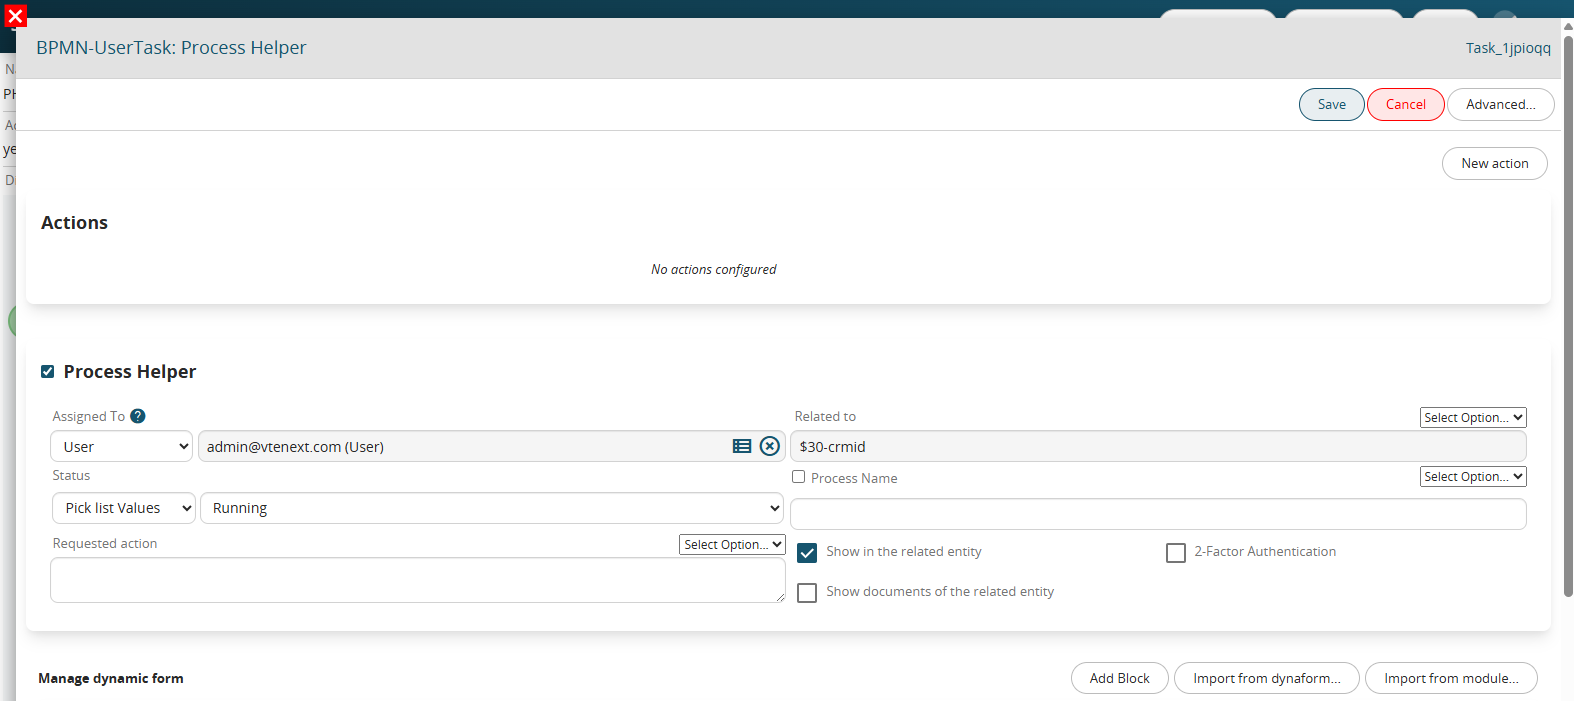
Figure 4
Once the main fields have been configured (Assigned to, Linked to, Action requested) we will create the necessary blocks and fields in the dynamic form in order to save the information that will be entered by the user (for more information on their configuration, see the chapter ...).
To better understand how it works, below is an example of a process helper aimed at requesting approval of an internal flow by filling in a single field called "Action" (Figure 4).
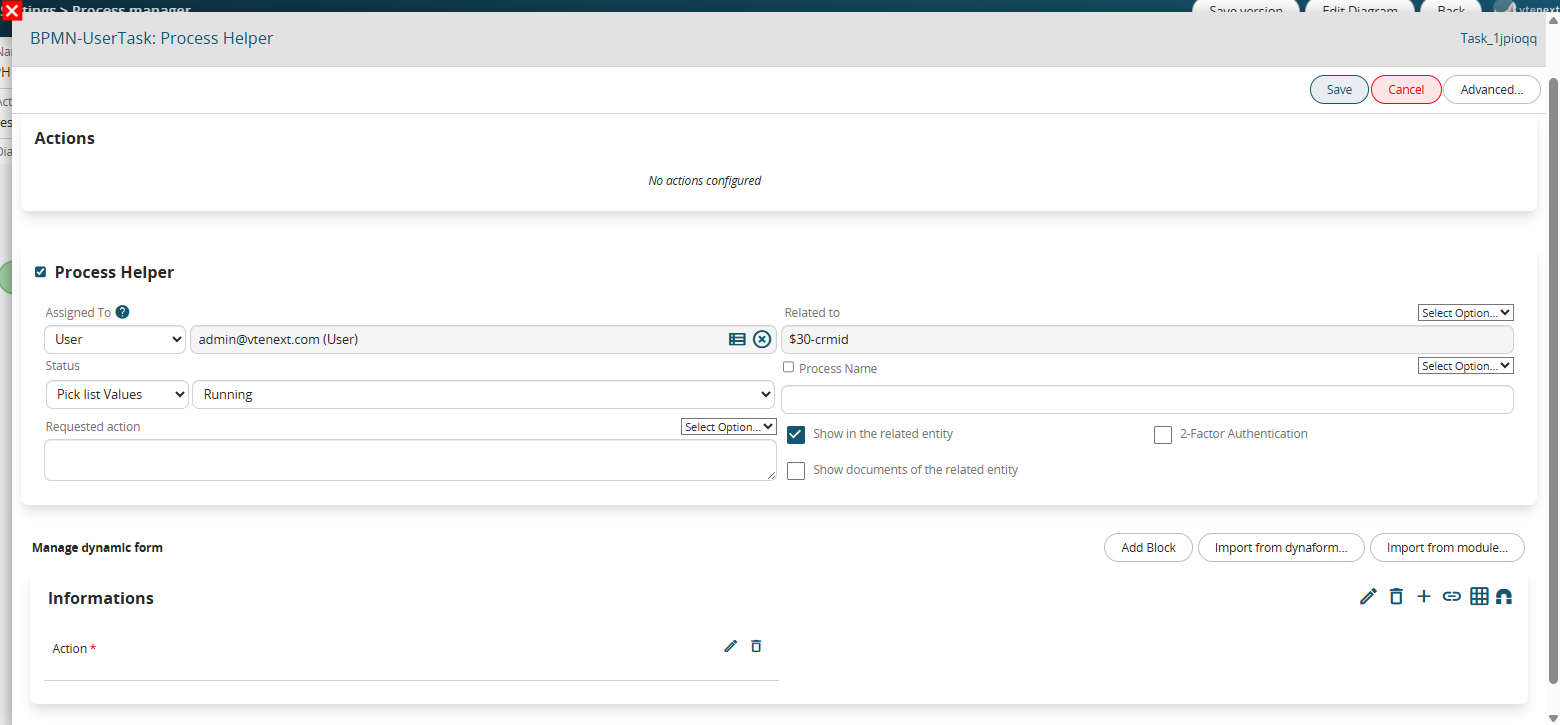
Figure 5
This is a picklist type field with the following 3 static values: “empty”, “APPROVATE” and “DO NOT APPROVE” and with mandatory permissions as Default (Figure 5)
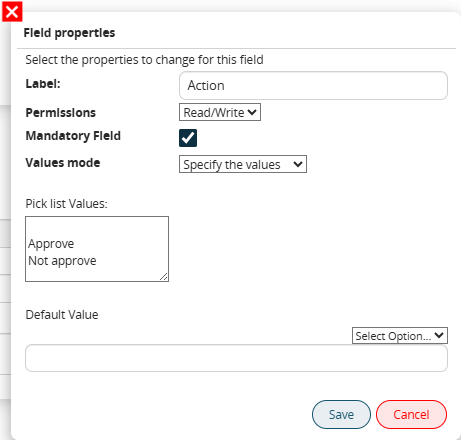
Figure 6
In the associated Control Task (called “Process Helper Control”) a condition is indicated that allows the process not to continue with its flow until a value other than blank has been entered (which instead represents the default value of the picklist) (Figure 6)
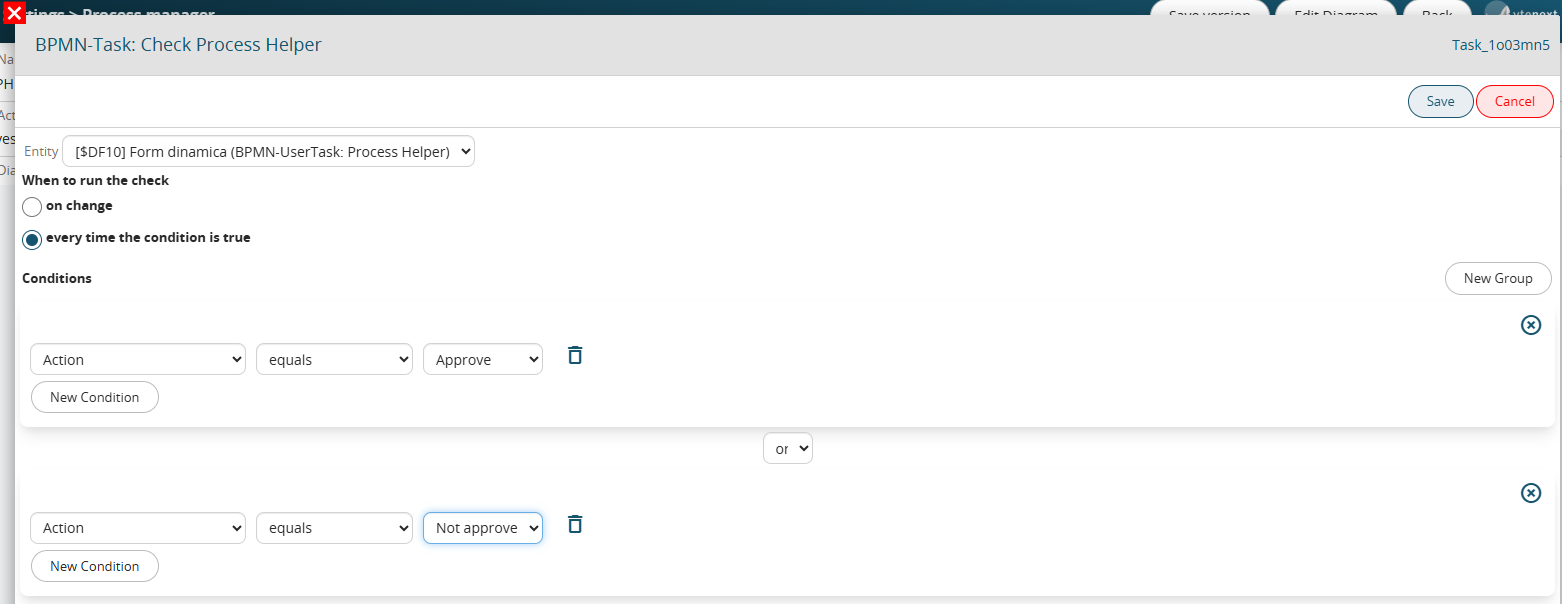
Figure 7
The two conditions inserted in separate groups allow the flow to be routed in two different paths based on the item selected by the user.
On the operational side, the process helper presents itself with a preview mask as shown in Figure 7, this is because the “Show in the linked entity” flag has been activated.
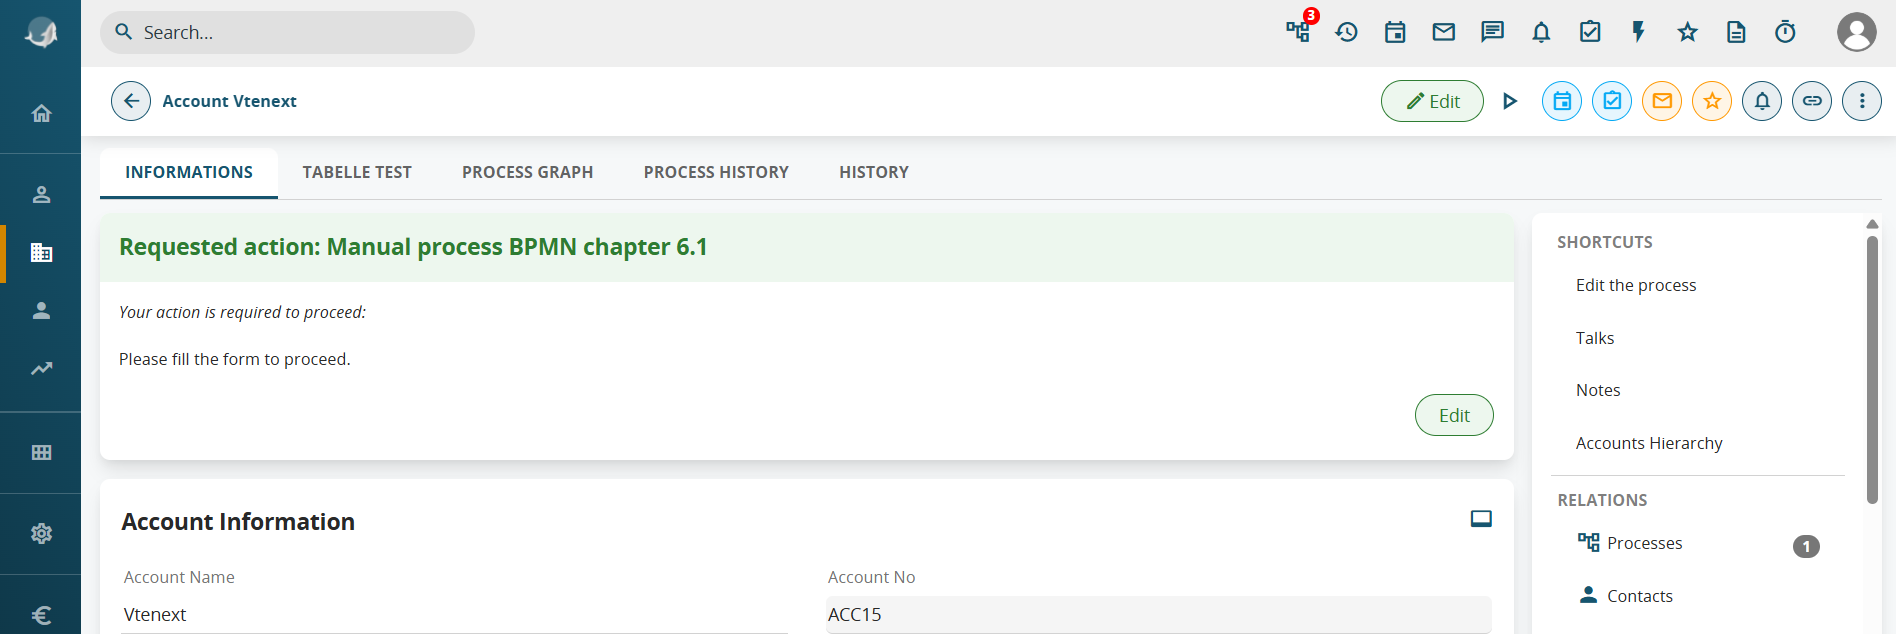
Figure 8
Alternatively, it will always remain visible and fillable in the section accessible via the dedicated button in the top-right menu (Figures 9 and 10).
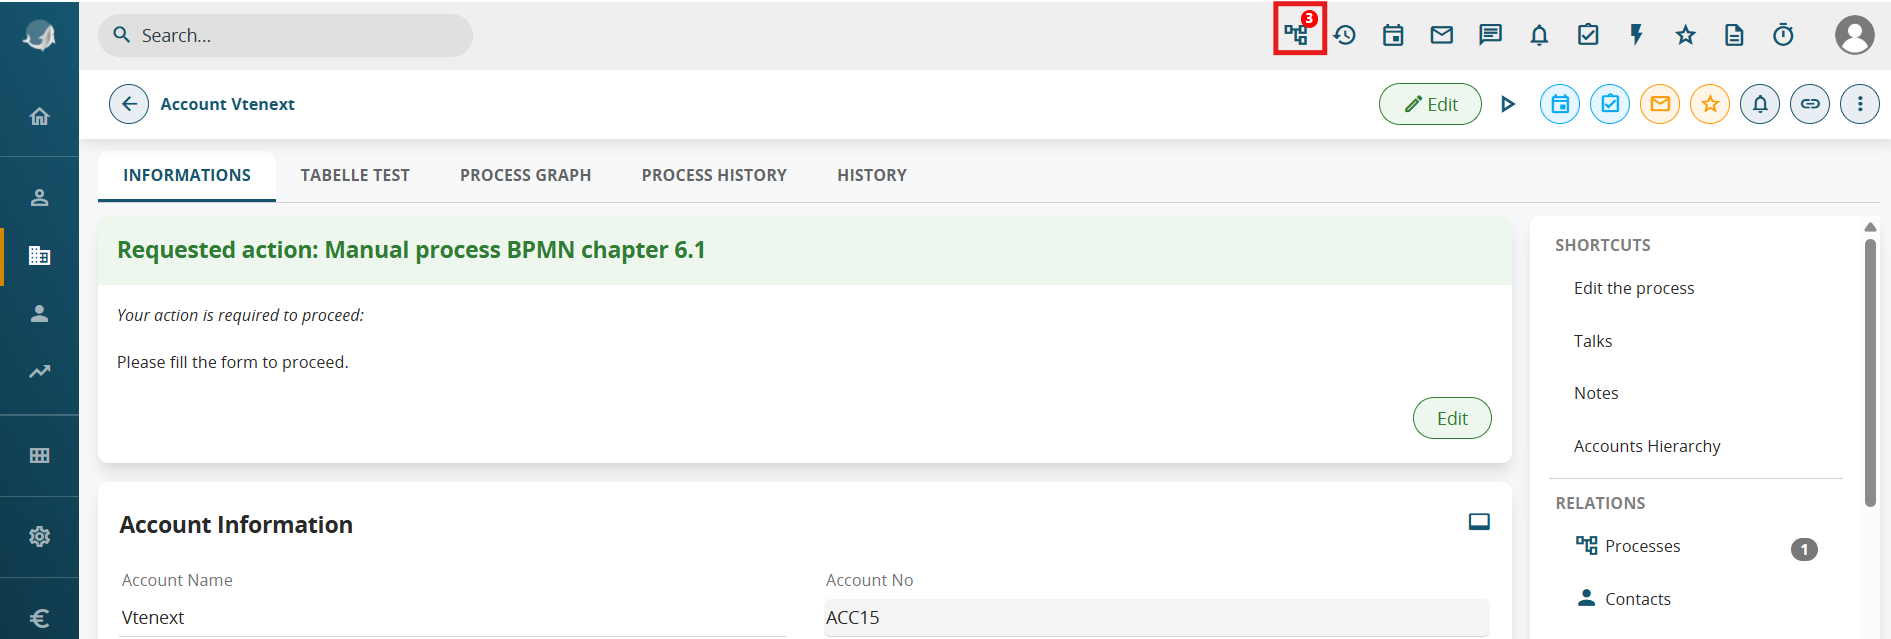
Figure 9
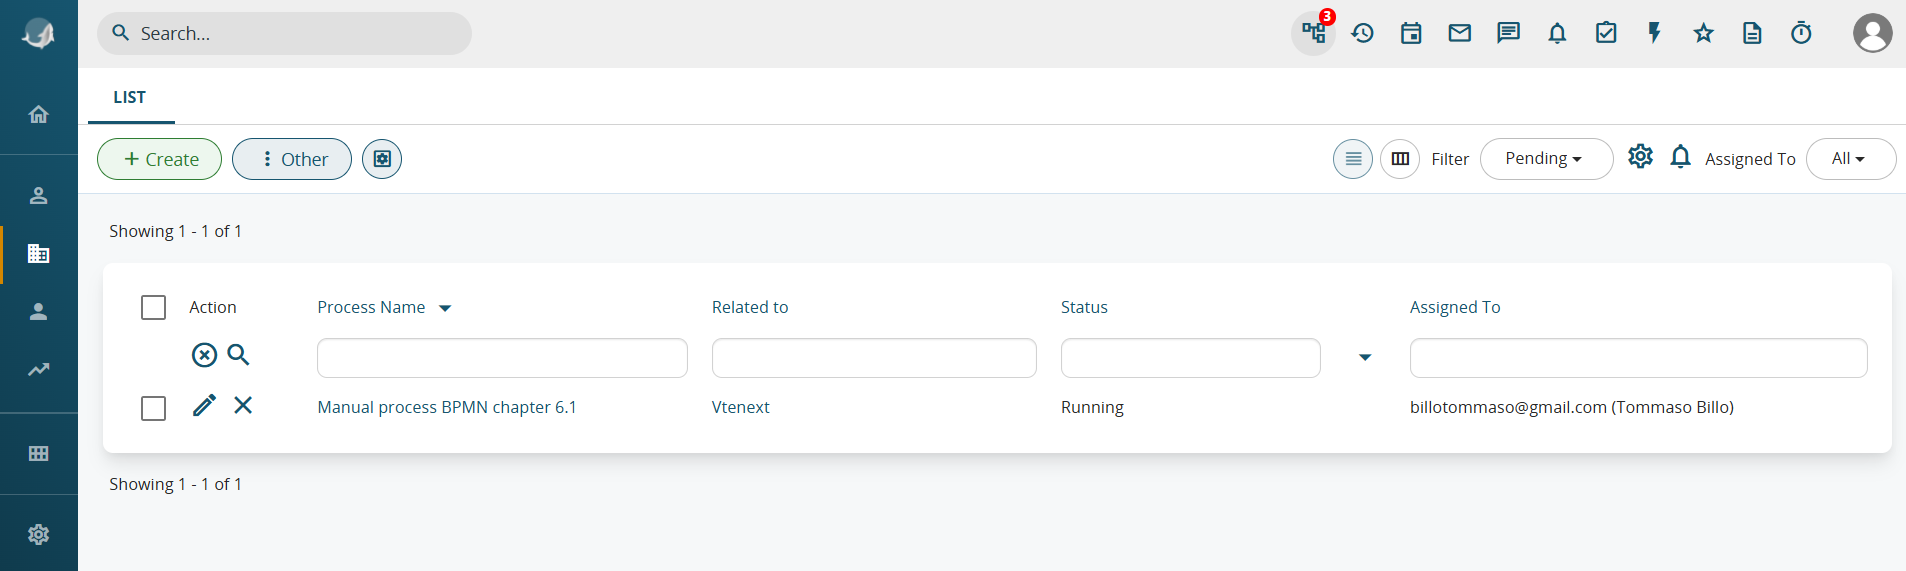
Figure 10
As of version 26.04, the preview display interface has been modified to correctly handle multiple dynamic forms active simultaneously on the same record.
By default, they are displayed in "Slider" mode. (Figure 11)
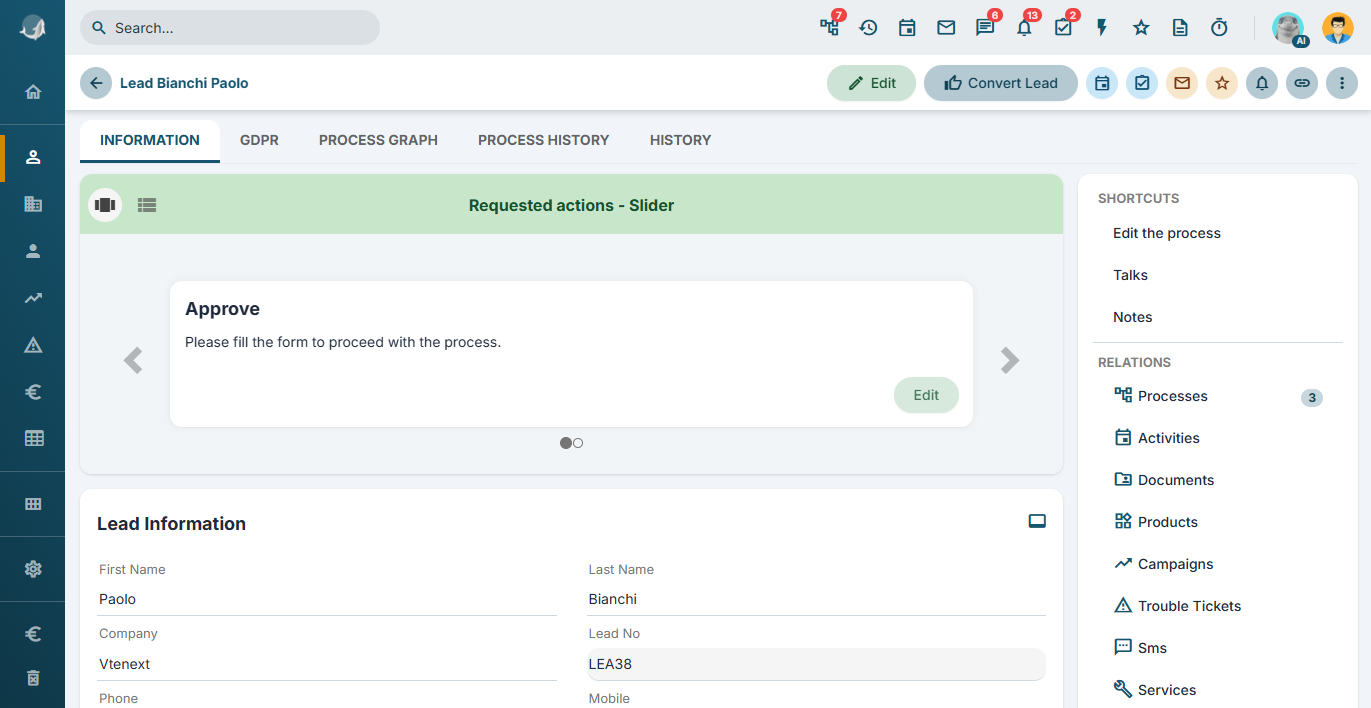
Figure 11
By pressing the dedicated button, they can be viewed in "scroll" mode. (Figure 12)
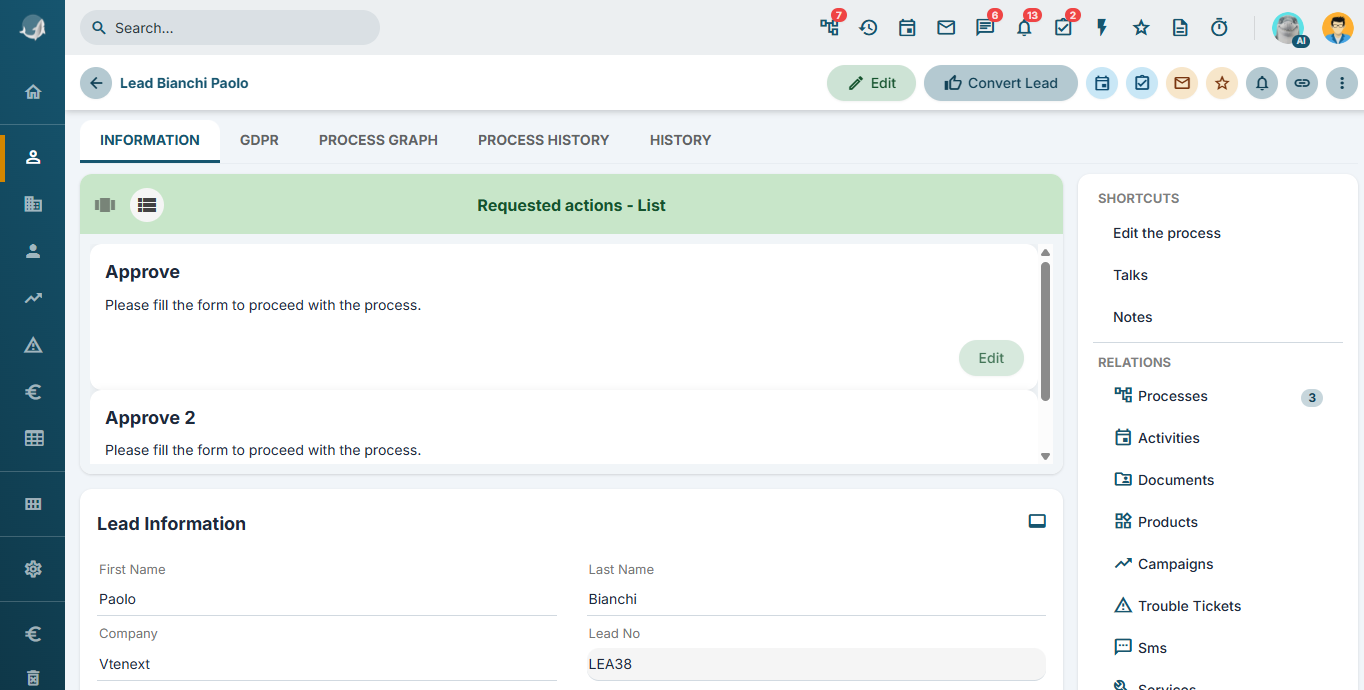
Figure 12
The section accessible via the dedicated button in the top-right menu has also been modified, making it visually more striking and comprehensive. (Figure 13)
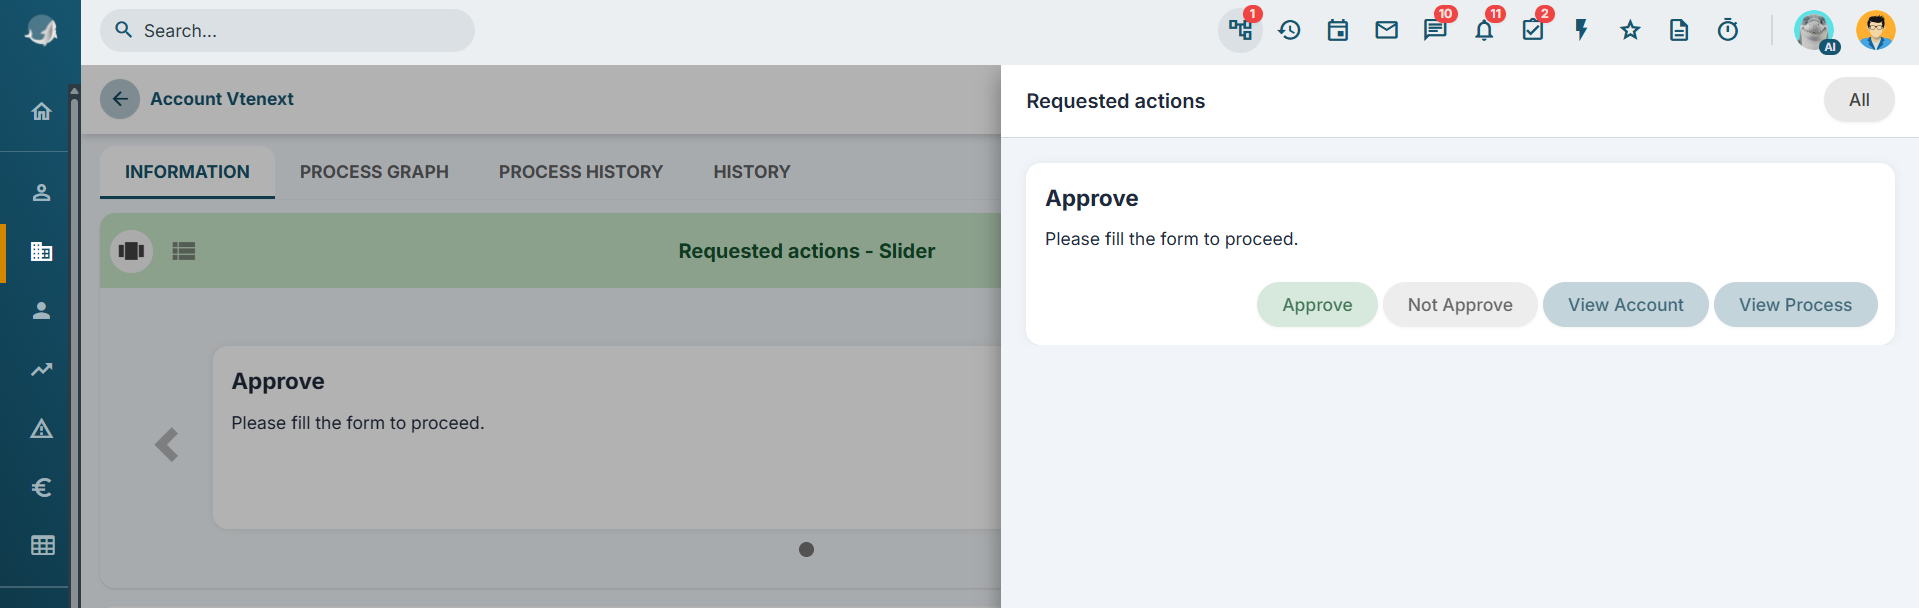
Figure 13
Clicking the "All" button redirects the user to the legacy process screen, which has nevertheless been improved in terms of both graphics and functionality.
Specifically, the following buttons have been added to the list:
- preview button: allows the content of the dynamic form to be viewed in the middle of the panel and enables the user to proceed with filling it out (Figure 14)
- direct fill button: allows the dynamic form to be opened directly as a pop-up (Figure 15)
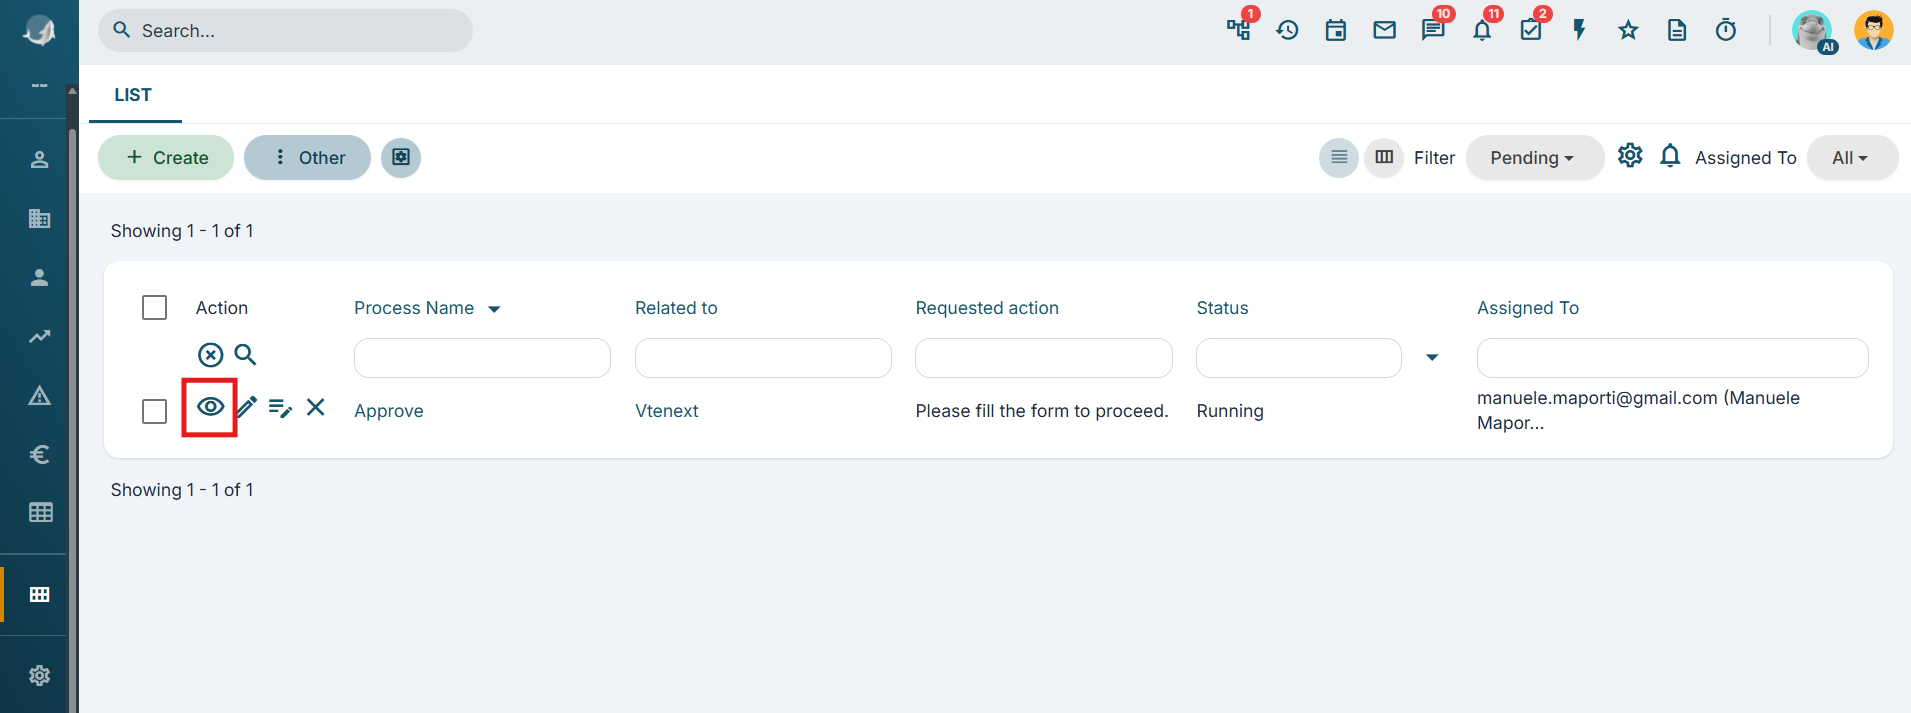
Figure 14
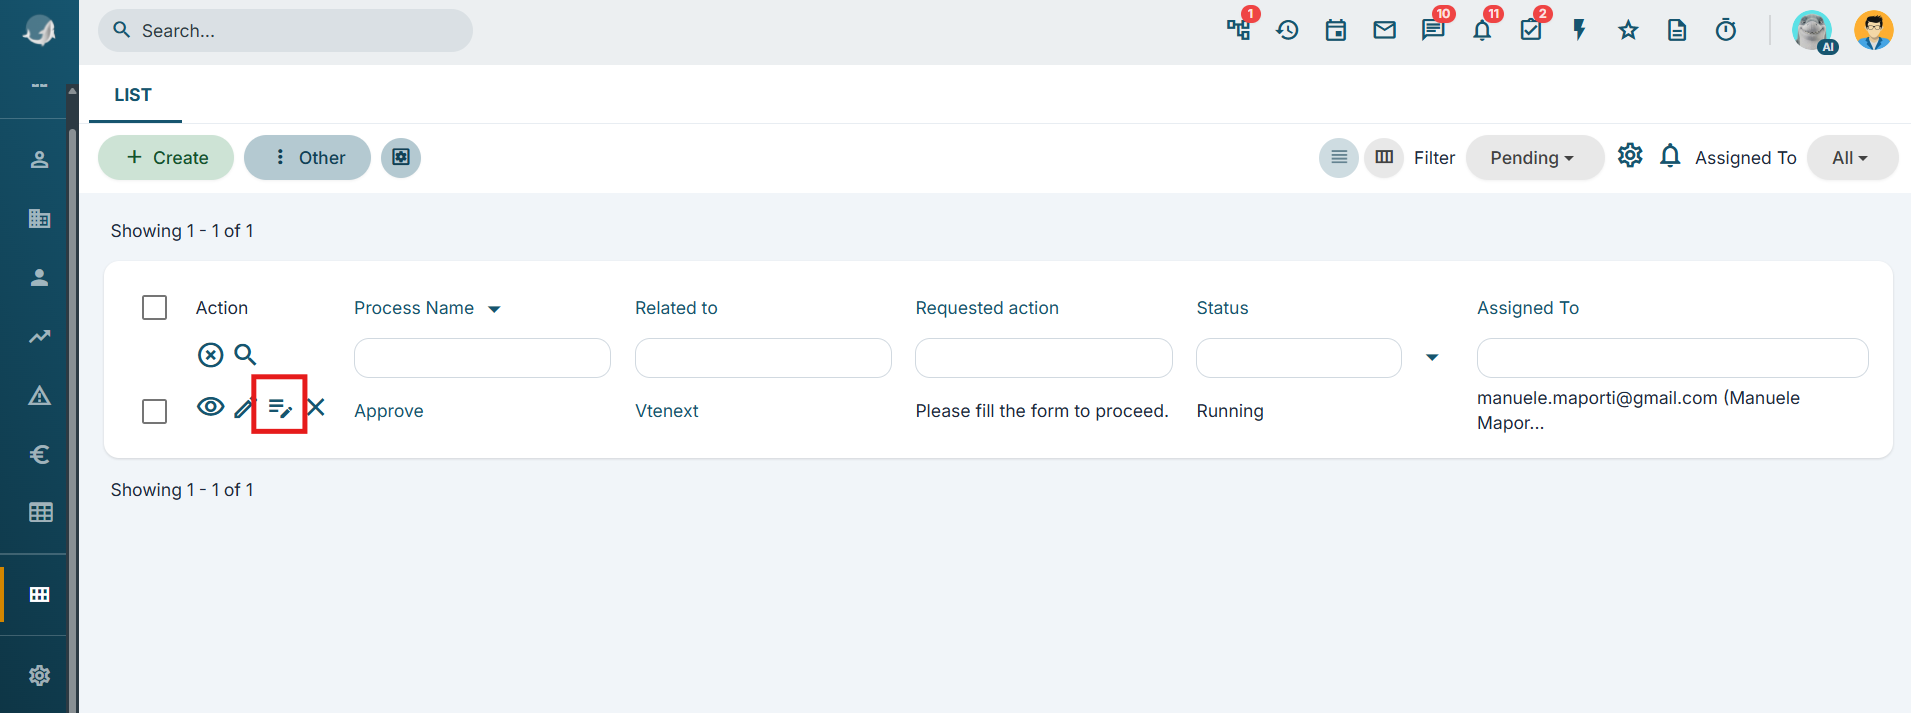
Figure 15
Clicking the "Fill" button displays a pop-up containing the dynamic form.
The user simply needs to fill in the "Action" field and then click the "Save" button (Figure 16).
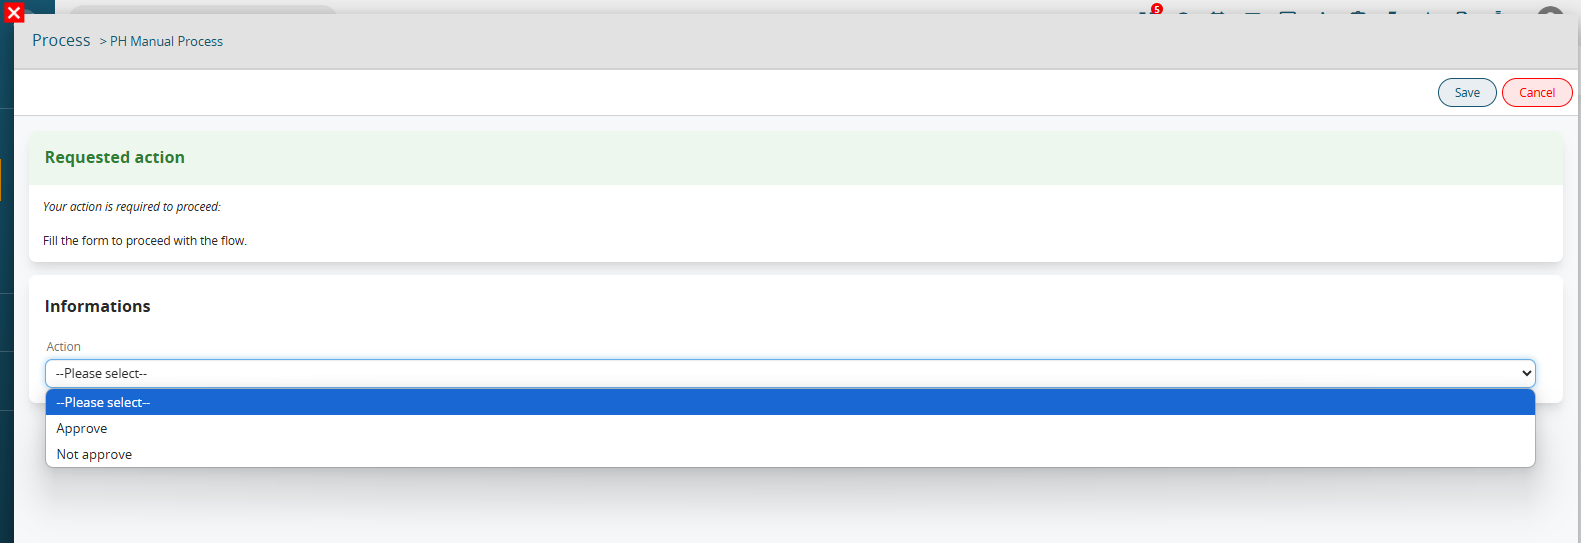
Figure 16