
8.2 Activating an Advanced Process - Managing Installation Renewals
Now let's proceed with the vision of the process in action.
We then create a new installation by entering the required information (see Figure 1).
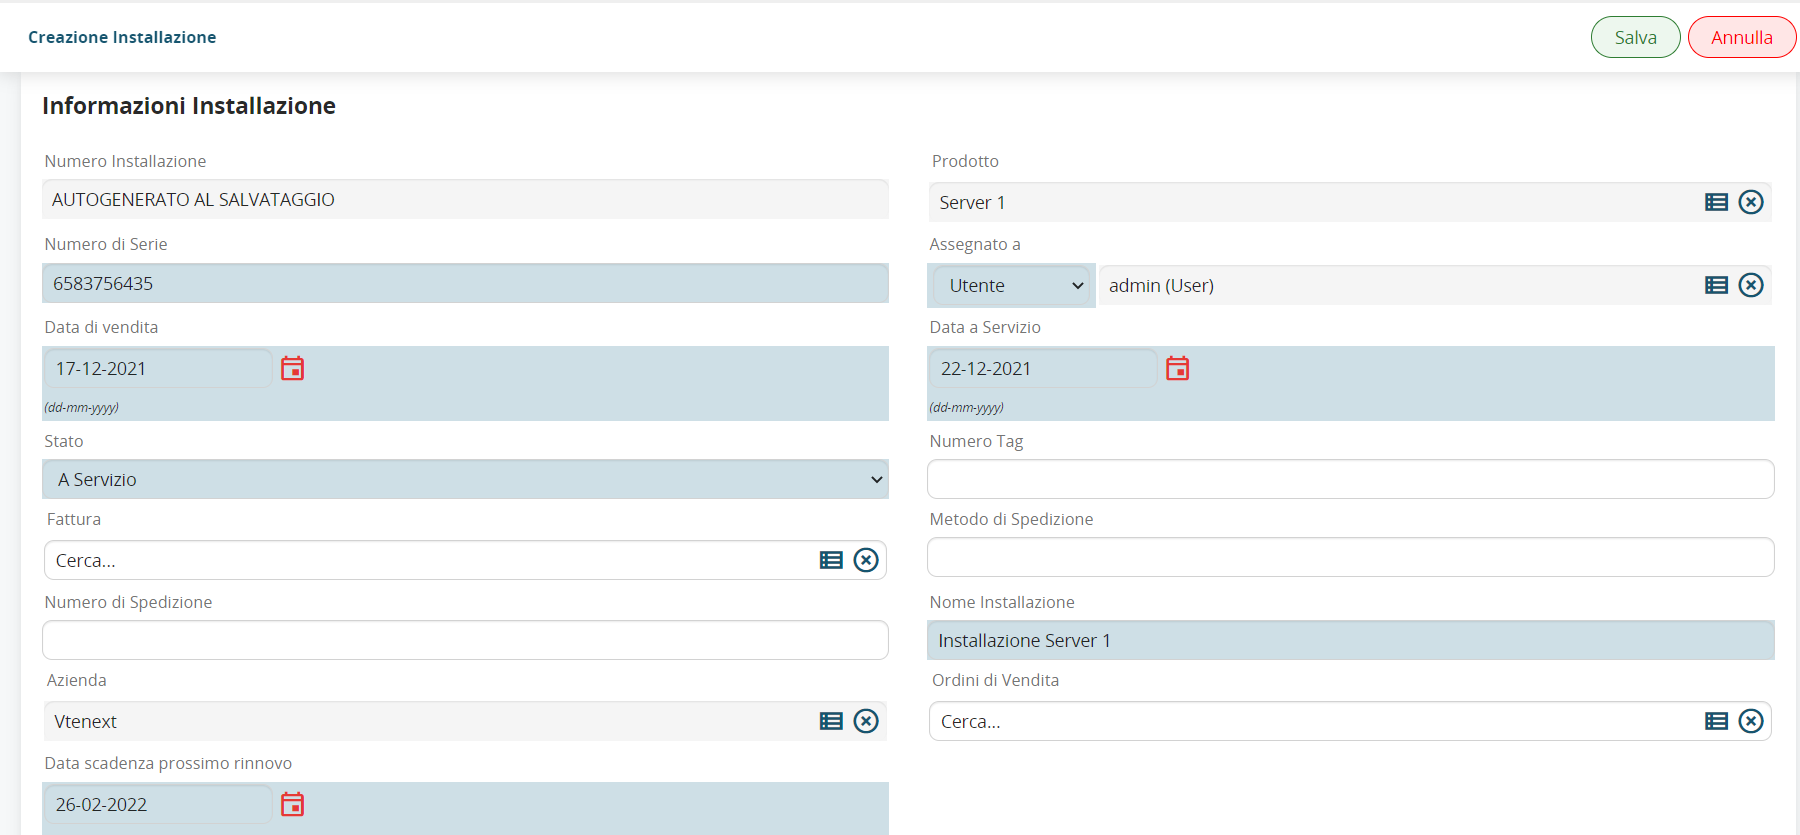
Figure 1
After saving, the process will start by positioning itself on the timer to wait for the “Next renewal expiration date” to be reached (26-02-2022).
In fact, by observing the process graph, we can see that the timer in the diagram is surrounded by a blue outline. (see Figure 2)
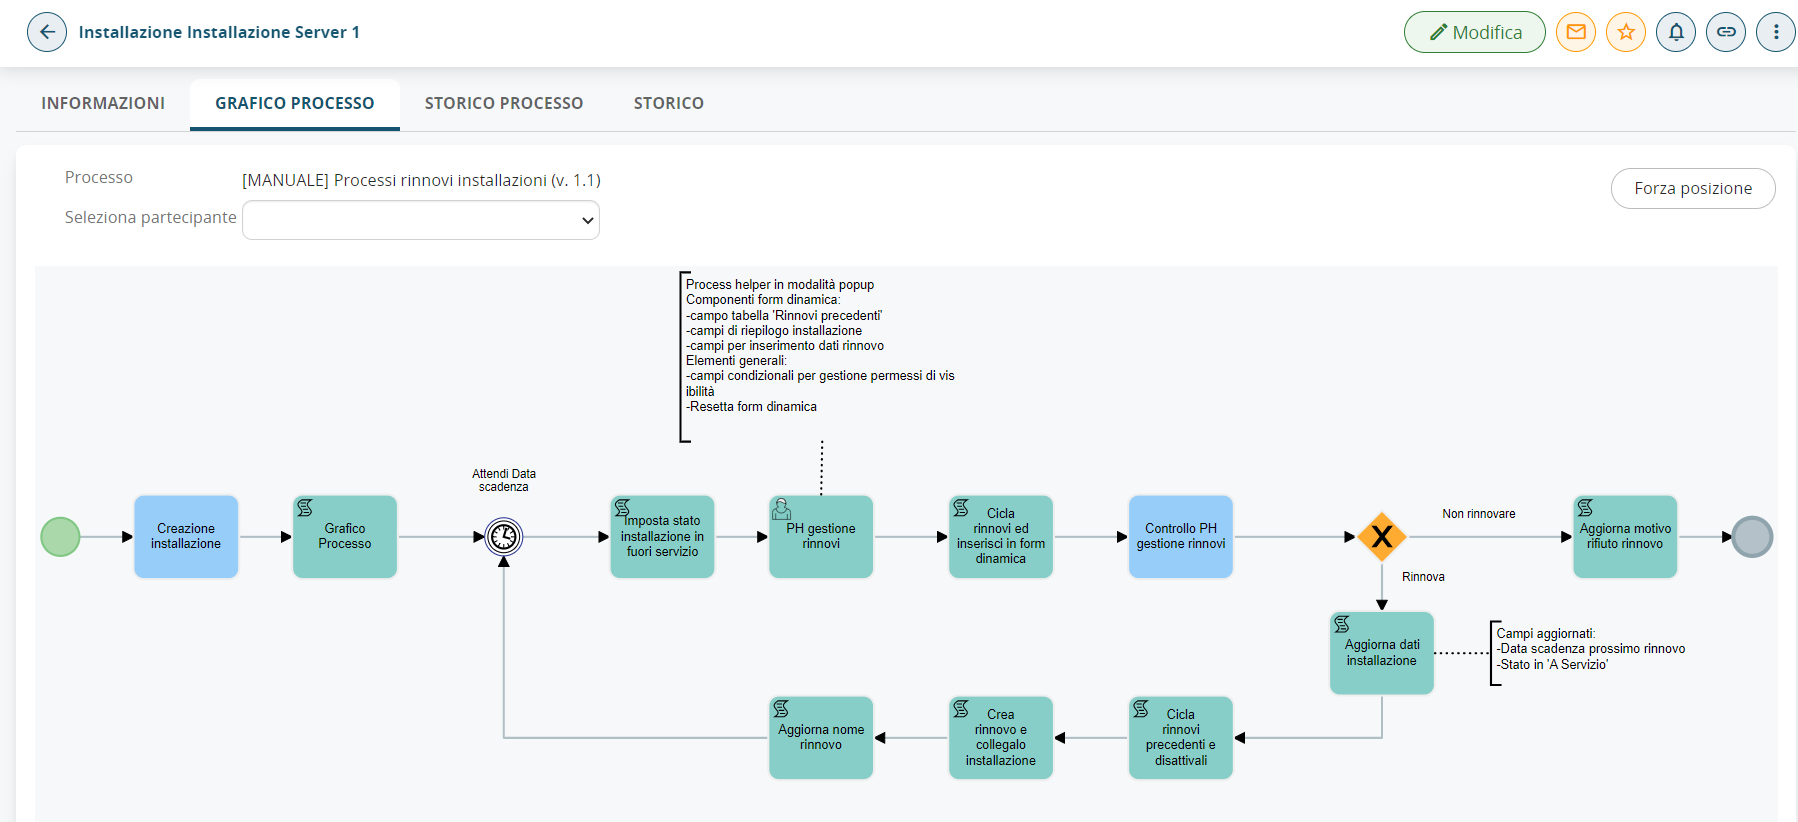
Figure 2
Once the expiration date is reached, the process will automatically set the status to “Out of Service” and present a task to the installation assignee to fill out the popup to manage the next renewal.
The popup can then be filled out by clicking on the “Fill Out” button to the right of the task (see Figure 3)
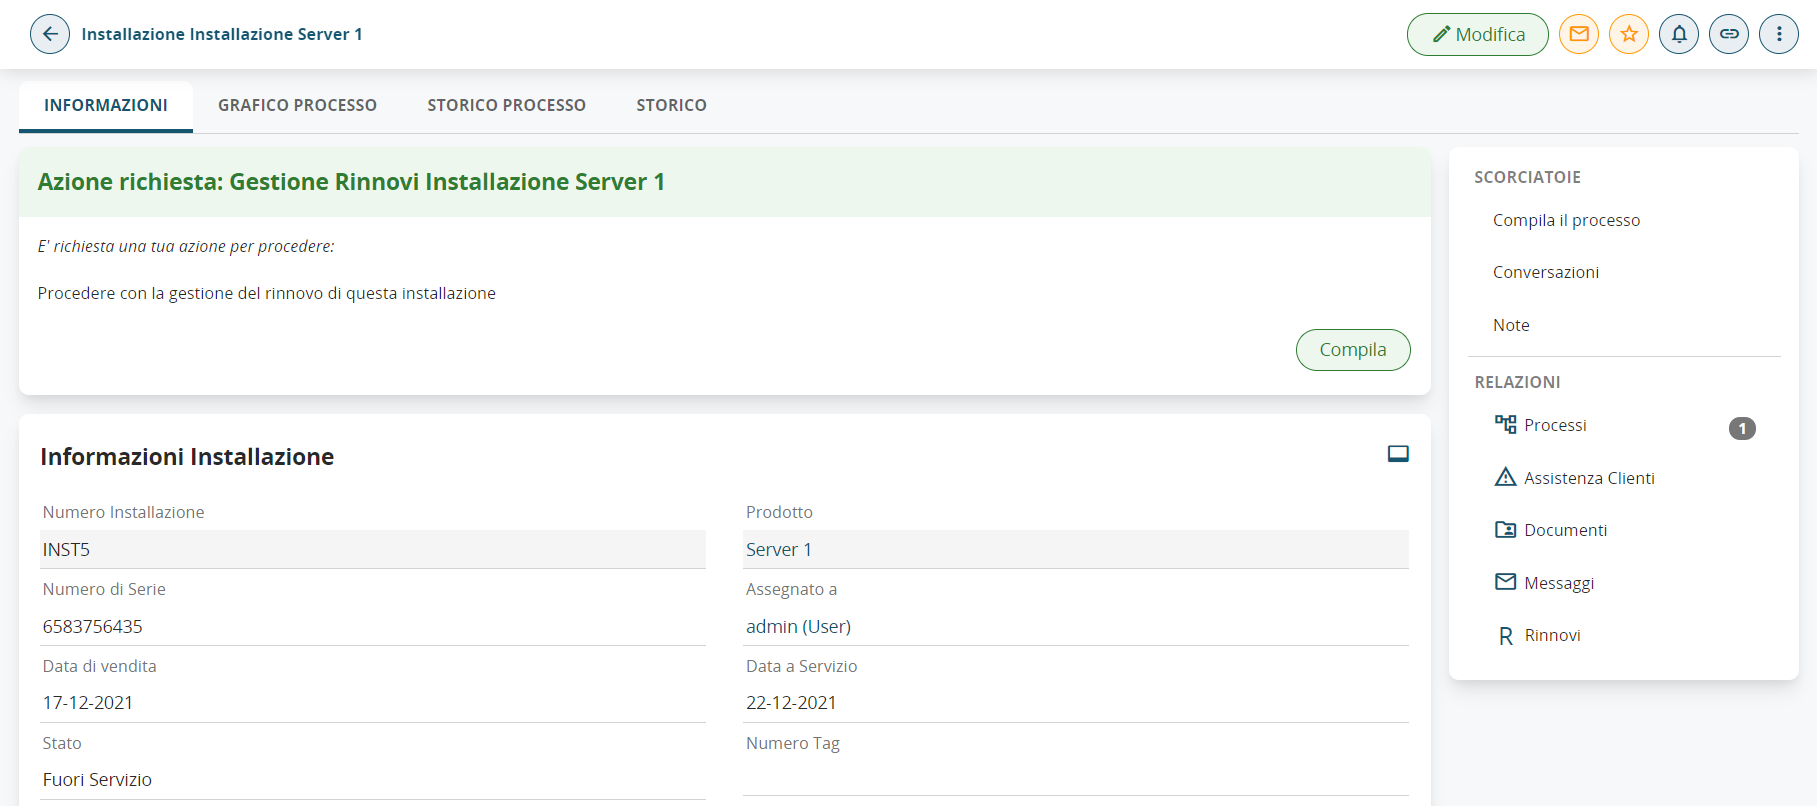
Figure 3
However, the task described above will only be visible by entering the installation registry, for this reason it is possible in this case to compile the process helper through the "Processes" section reachable from the menu at the top right. (see Figure 4)

Figure 4
In fact, it shows all the pending processes assigned directly to the user or to any groups to which he belongs, so just look for the line with the following information (see Figure 5):
-process name: “Server Installation Renewal Management 1”
-connected to: “Server Installation 1”
After that, just click on the pencil to the left of the process name to be able to fill in the process helper that will be displayed as if we were editing a module.
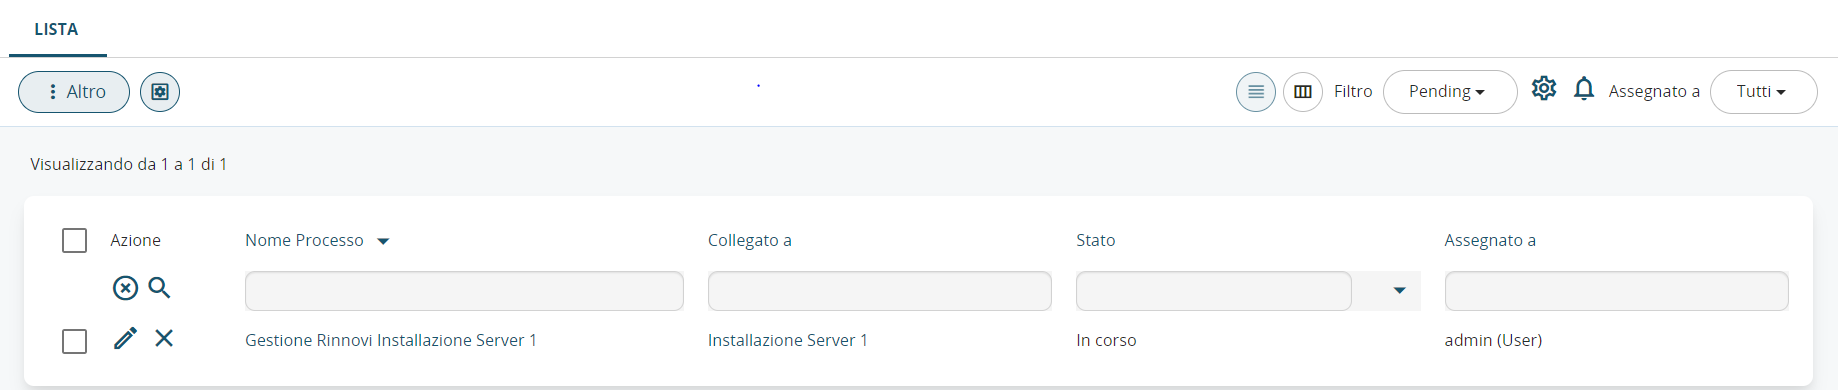
Figure 5
Once on the process helper form, the user will find themselves in front of the screen shown in Figure 6.
Based on the value of the Action field, the previously created conditional fields will be activated, which will manage the permissions of the form fields involved in the rules.
N.B: Since no renewals have been made yet, the Past Renewals table has always been hidden through the conditional fields.
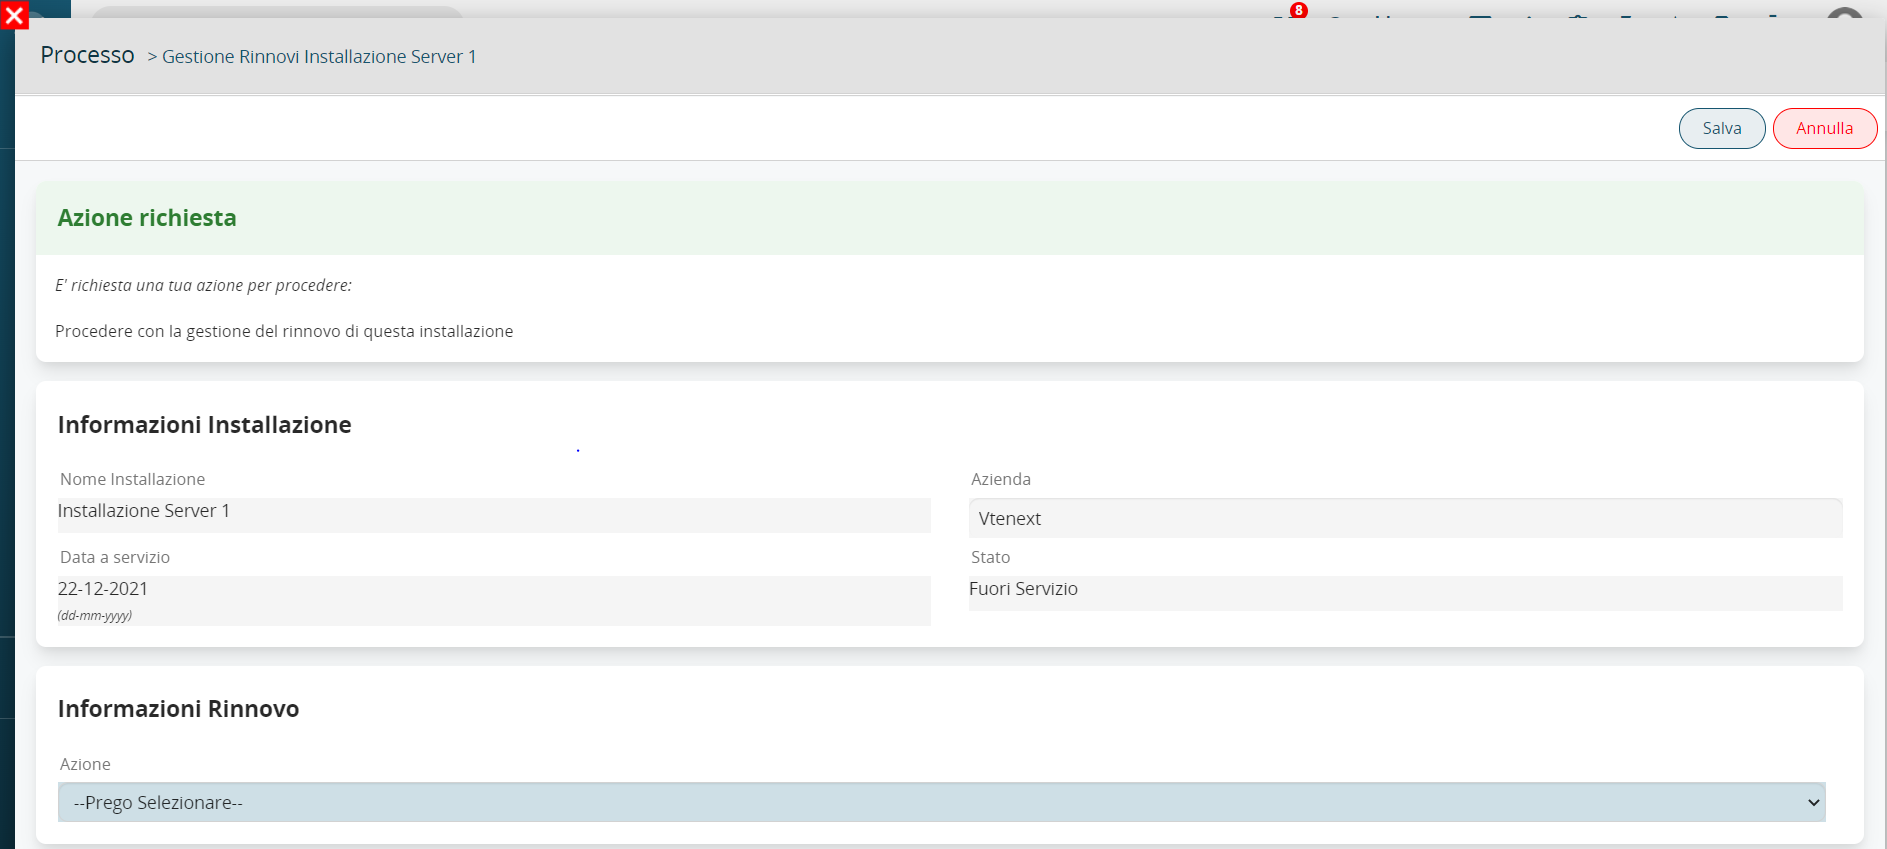
Figure 6
If you want to simulate a renewal of the installation, click on the “Renew” value, in this way the system will show us the fields “Number of months Renewal” and “Additional notes” (see Figure 7).
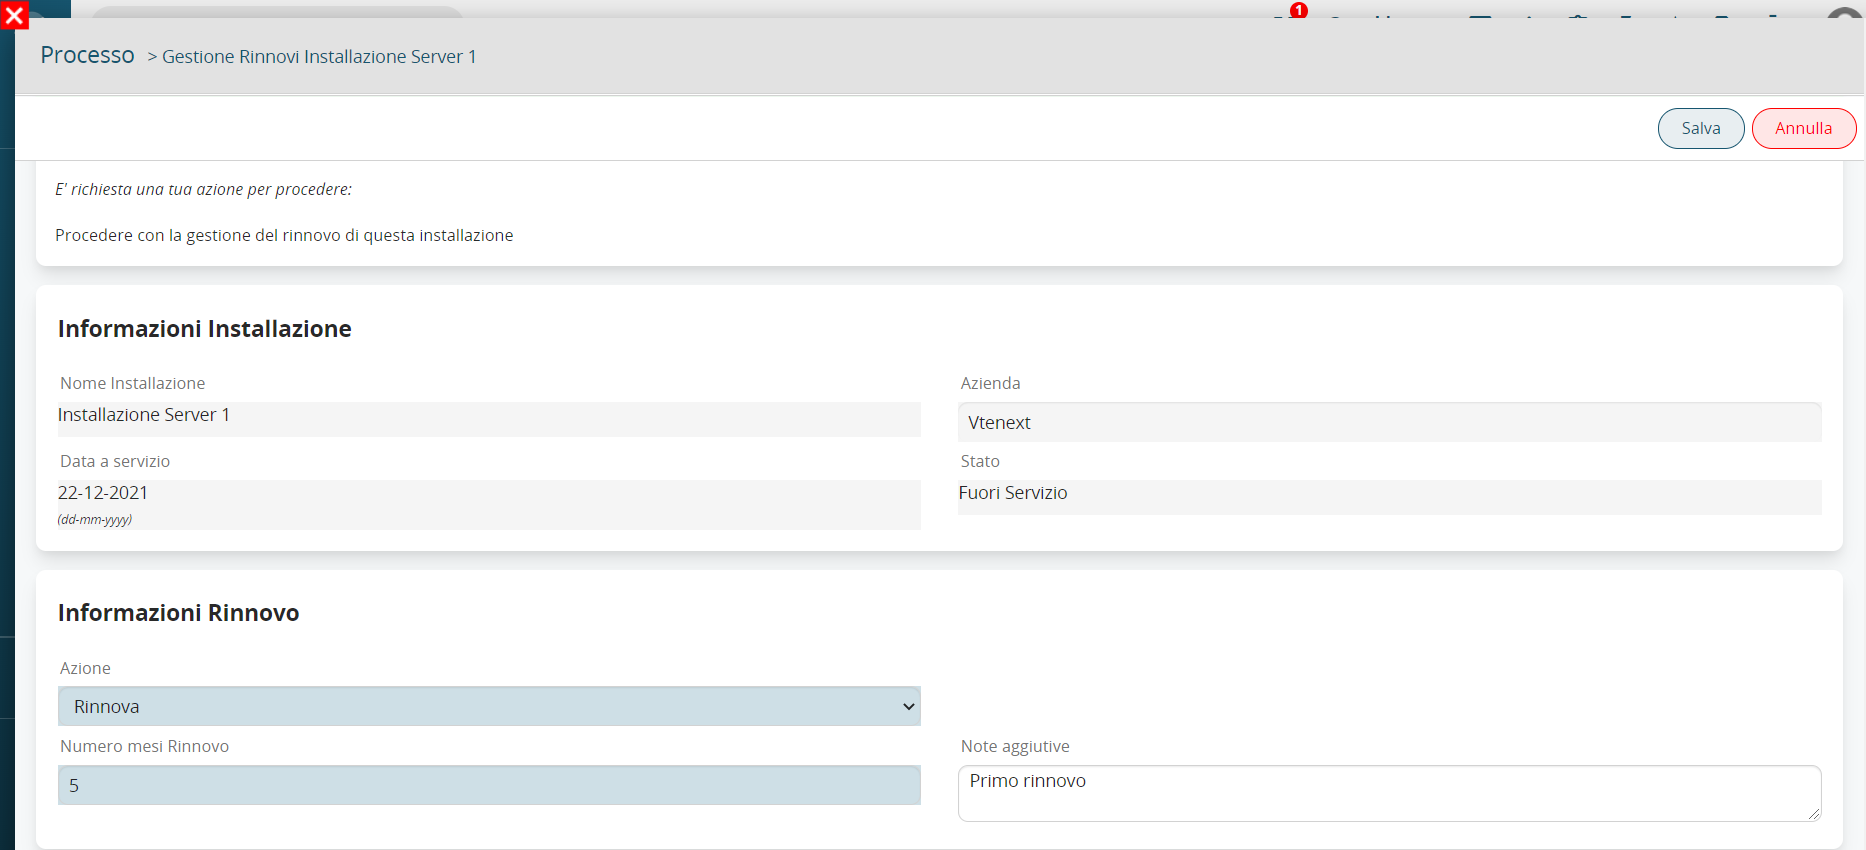
Figure 7
Once the 2 fields mentioned above are filled in, we save and the process will generate a renewal that will be automatically related to the installation (see Figure 8).
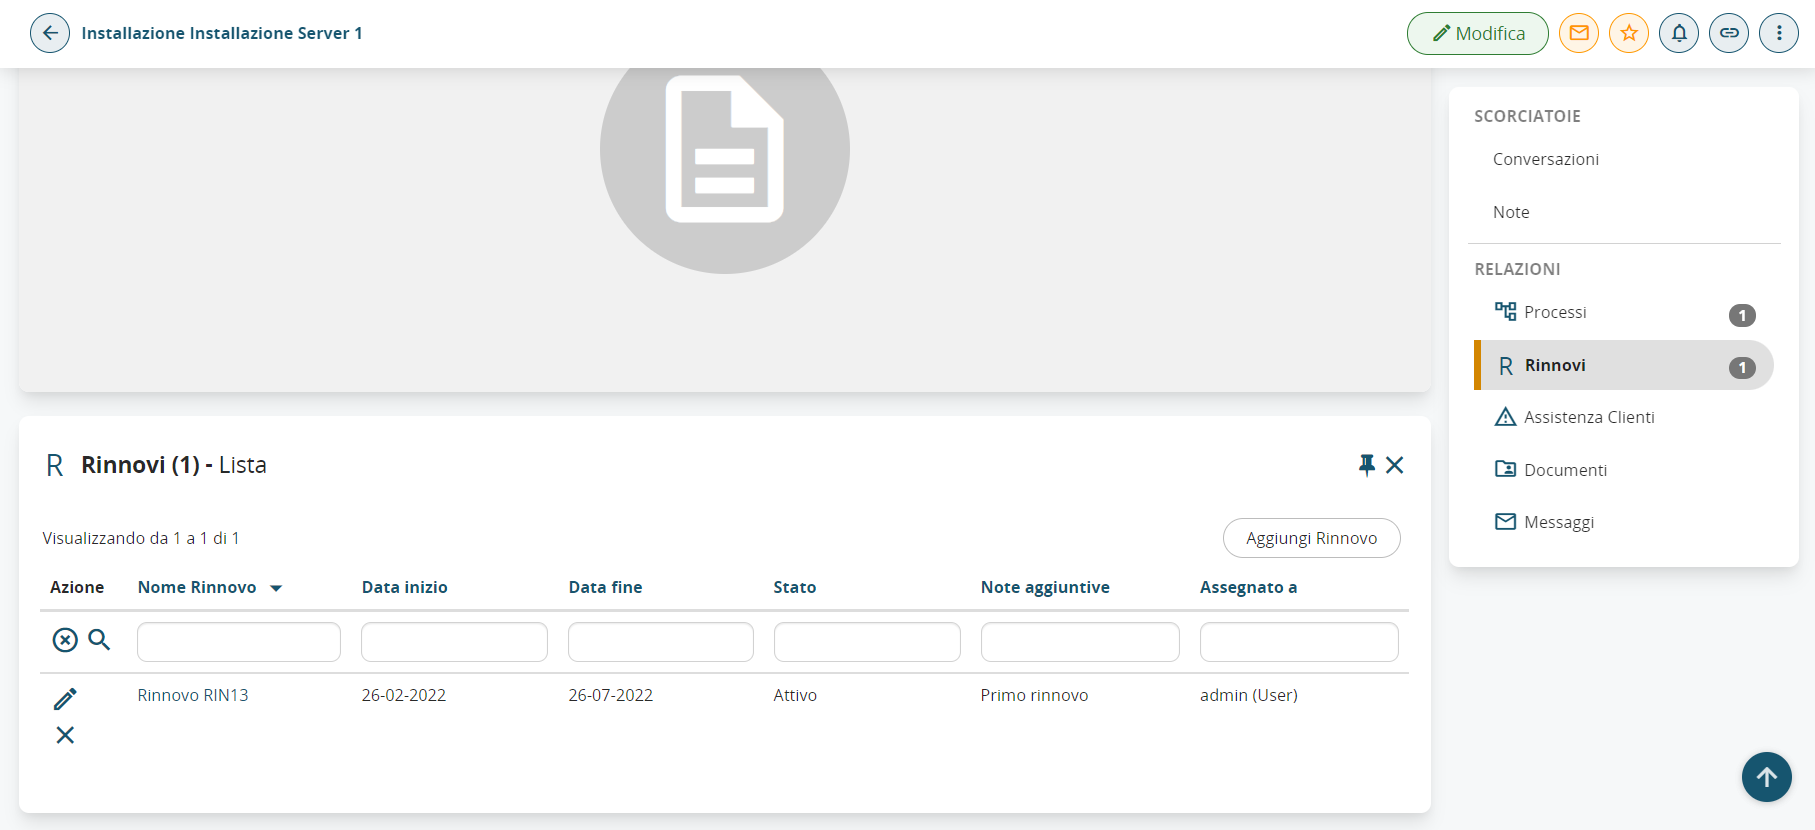
Figure 8
From the first renewal onwards the process helper will display the Past Renewals table field as shown in Figure 9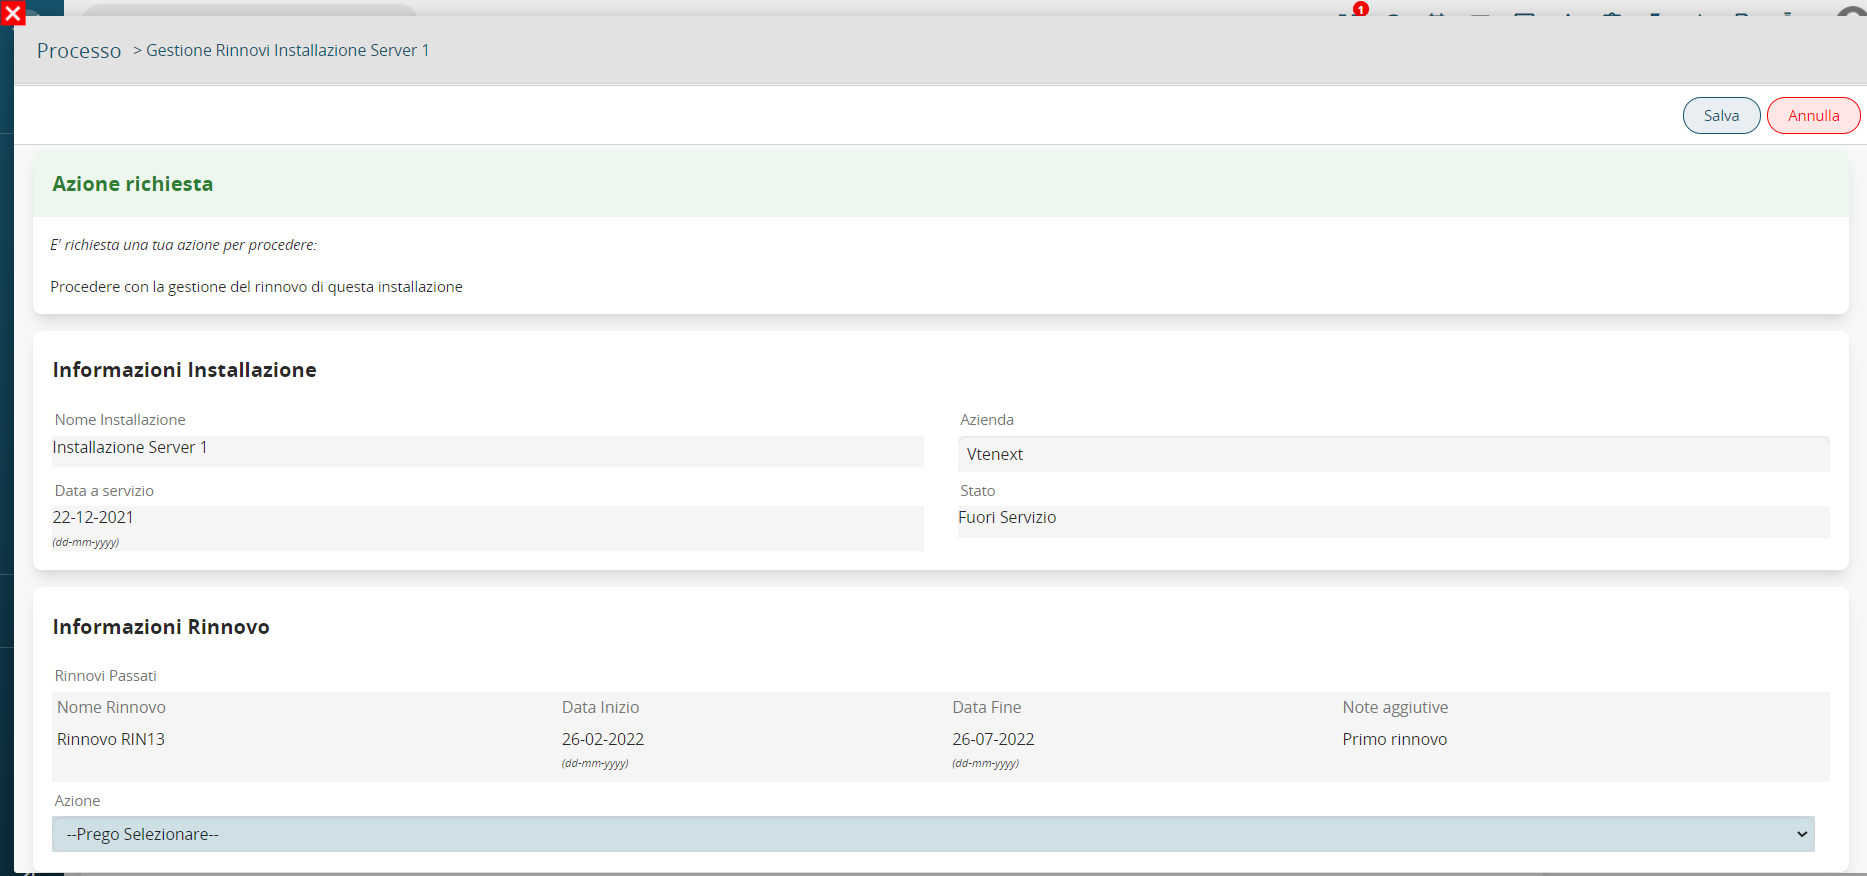
Figure 9
Simulating instead of not wanting to renew, we click on the value "Do not renew", the system will ask us to enter a reason for refusing the renewal (see Figure 10).
Upon saving, the "Reason for refusing renewal" field of the installation will be populated.
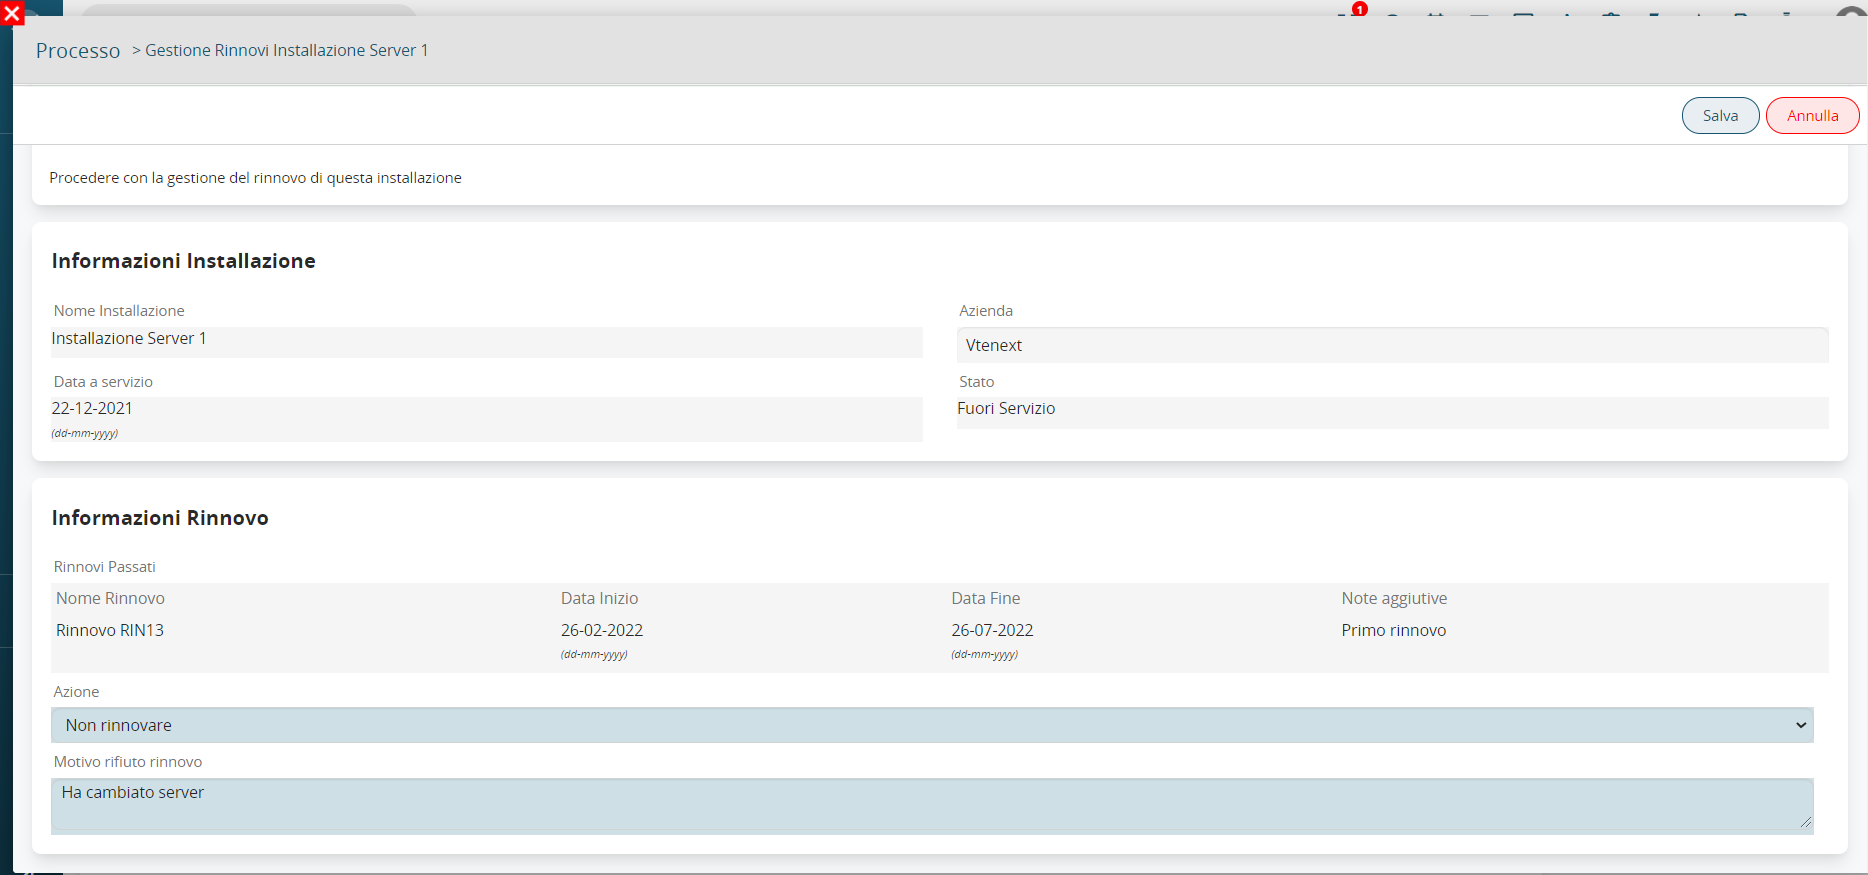
Figure 10