Creating a New Course
From the main screen of the Courses module, you can easily create a new course by simply clicking on the "CREATE" button located at the top left.
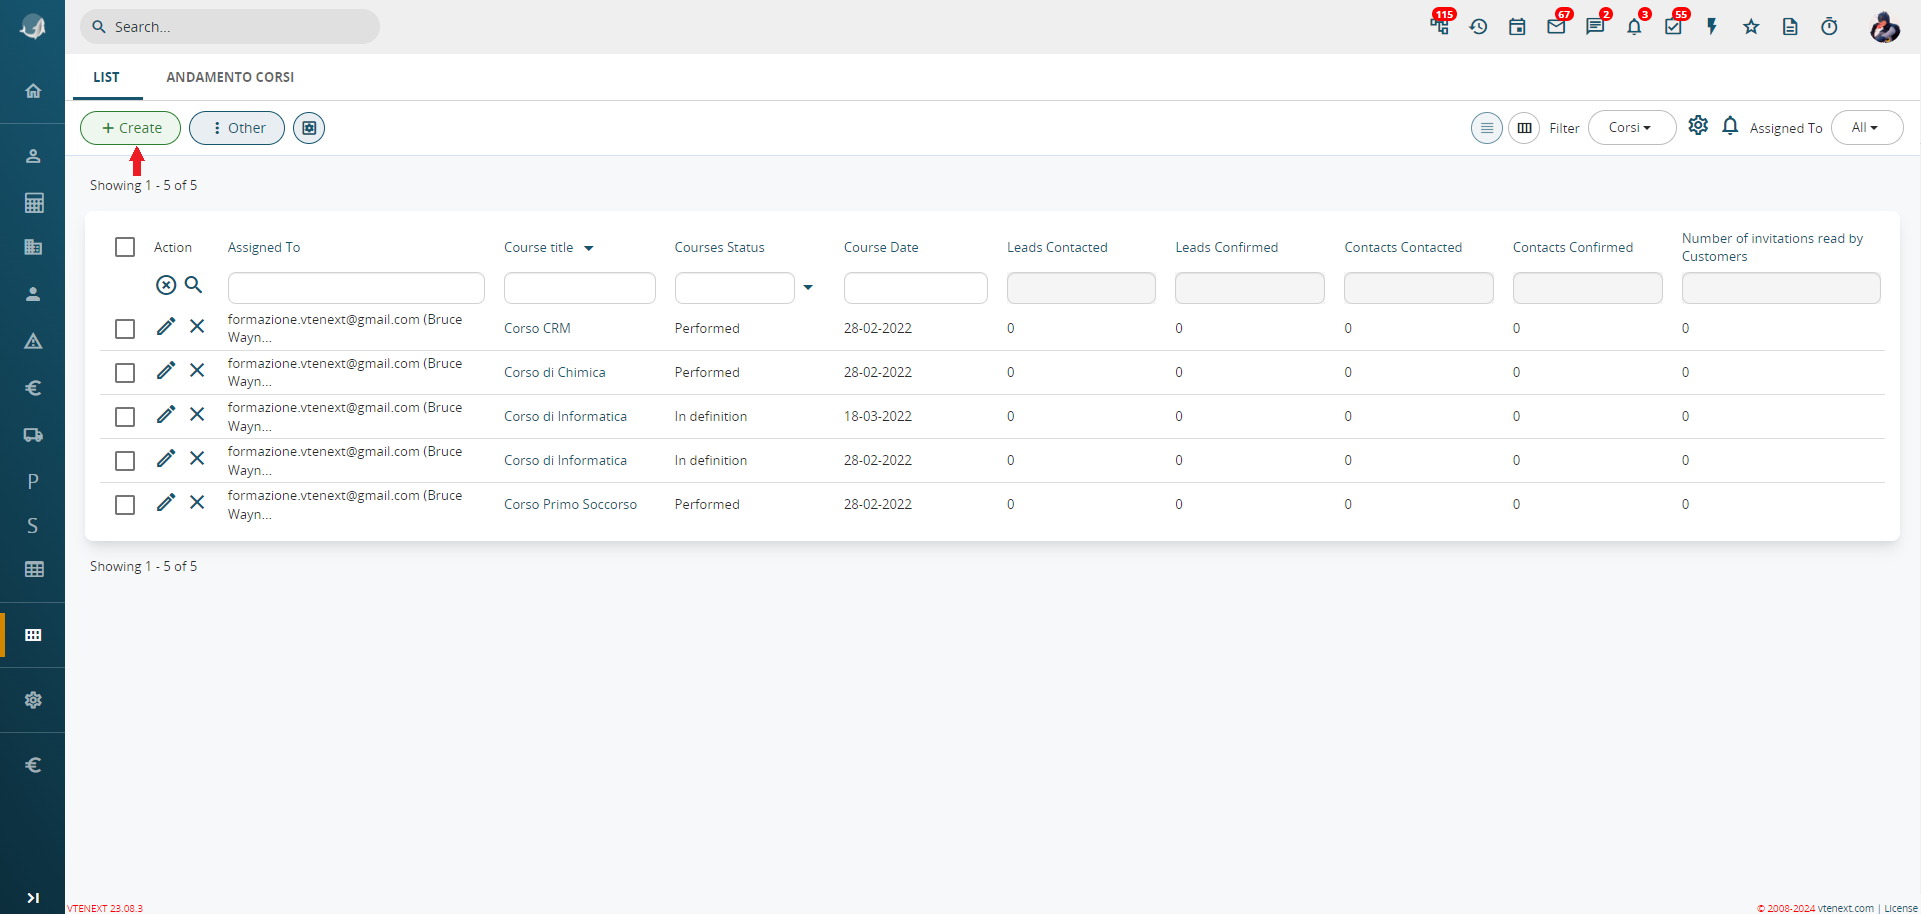
Courses Module Home Page

Course Details
First, you need to enter all the necessary information for setting up the Course, such as the Course Title, Location, Date, Duration, Topics to be covered, Course Type, Target Audience, etc. Note that there are some sections with fields that cannot be manually filled in, as they are controlled by the module's automation (we will go over these in detail later).
It is important to configure the dropdown menus mentioned earlier (such as Target Audience, Course Topics, Course Type) under SETTINGS > STANDARD PICKLIST EDITOR. This allows for maximum customization of the module based on specific needs. There is also the option to add additional fields as needed and create display rules using conditional fields, depending on the course type chosen (standard configuration in vtenext).
Creating the Communication Template for the Course
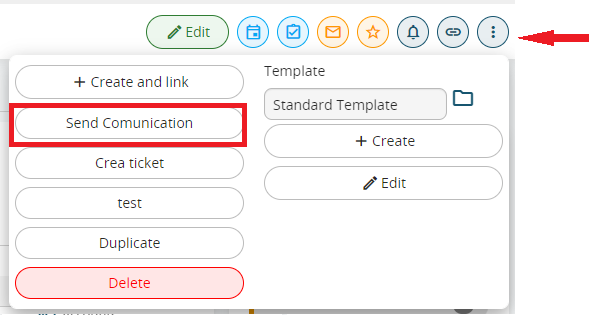
By clicking the MORE button in the top right, you can create or select a Template for the communication that will be sent to all course participants.
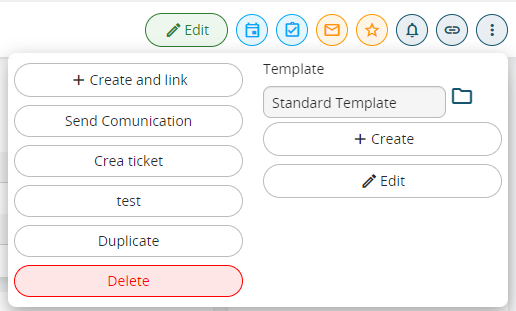
Details of the Popup for Choosing/Creating a Course Communication Template.
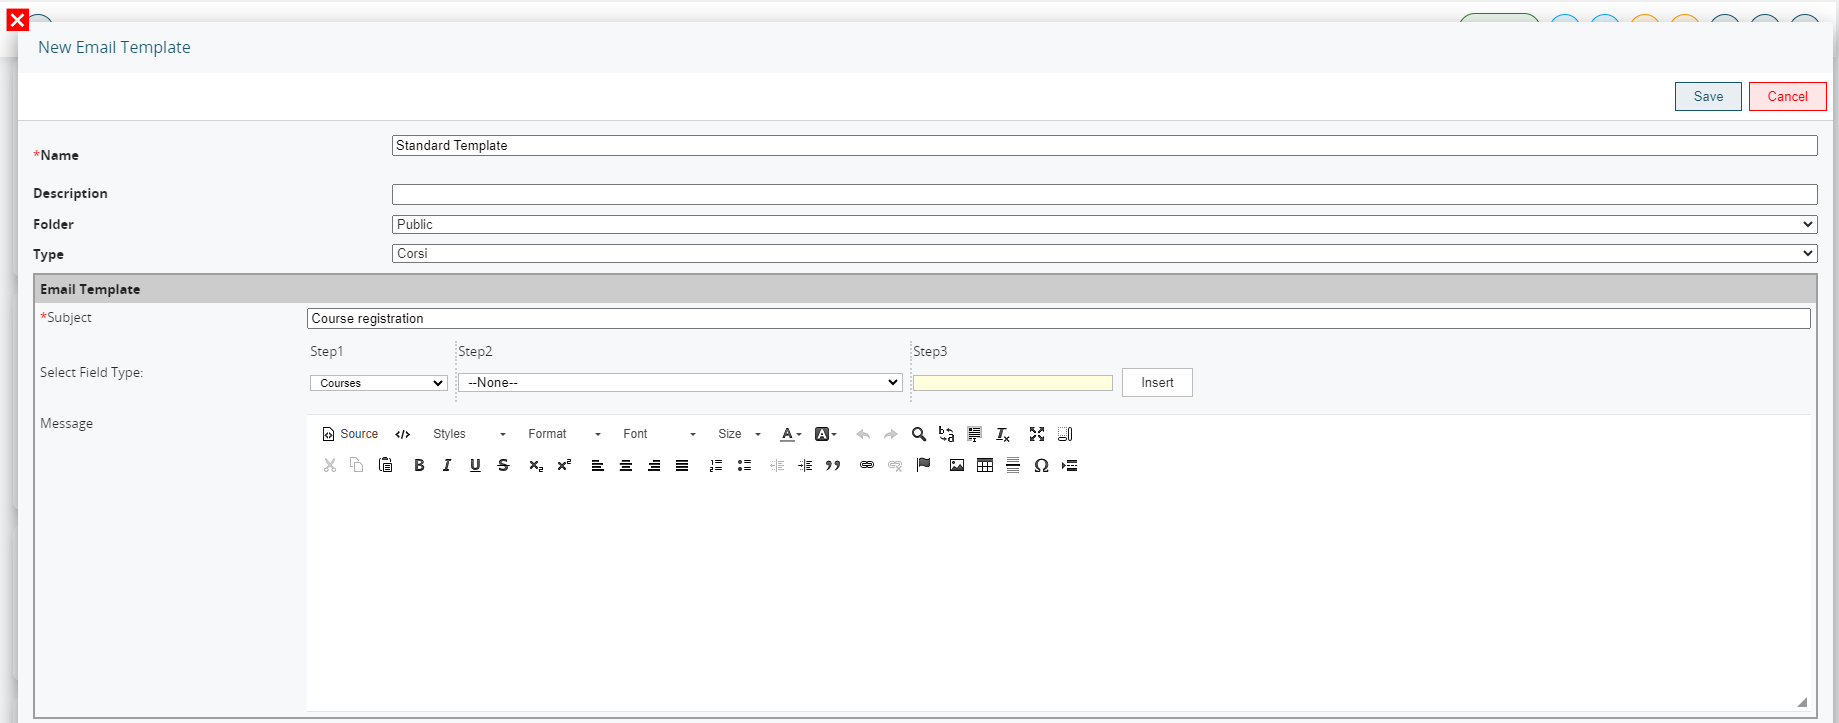
Details of the Course Communication Template Creation Screen
From this popup, you can create your own templates using the standard editor or by importing source code created on another external platform.
Selecting Participants and Sending Course Communication.
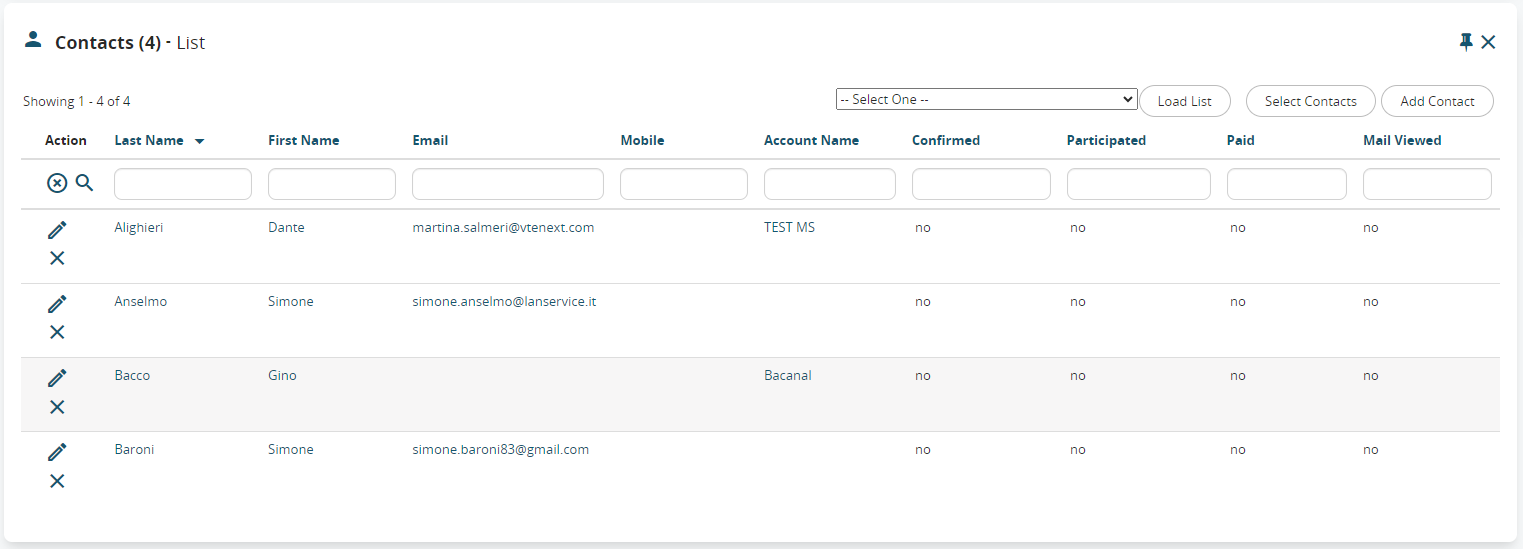
In the course details view, by clicking on the related records on the right side, such as Leads, Companies, and Contacts, you can choose a filter and import the records you want to contact.
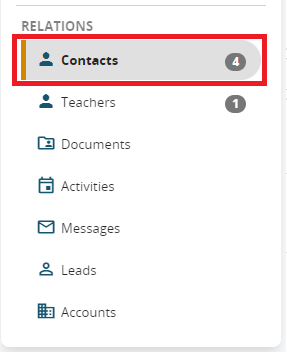
Details of Relationships with Contacts Selected for the Specific Course

Details of the Related Section with Selected Records and Interaction Information
Selection of Instructors and Speakers
In the course details, by clicking on the relationships to the right concerning Instructors and Speakers, you can select from the contacts in vtenext who will be the individuals fulfilling those roles.
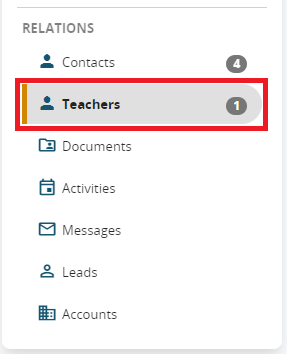
Detail of Relationships with Instructors and Speakers Selected for the Specific Course

Detail of the Related List of Selected Records for Instructors and Speakers
Sending Course Invitation Communication
Once the participants have been selected (similar to creating a manual target), it will be necessary to send the communication, which is the email containing the invitation that all recipients will need to click to accept.
Details for Sending Communication to All Course Participants
By clicking the "OTHER" button in the top-right corner, you will be able to send the communication by first selecting the previously created template and then clicking the "SEND COMMUNICATION" button.
NOTE: To enable this sending, the CRM's SMTP server must be configured.
"SEND COMMUNICATION" opens a popup for sending multiple emails, where all the course participants' email addresses are included. Each participant will only see their own email address as the recipient and will not see the other email addresses to which the communication was sent.

How the Courses Module Works
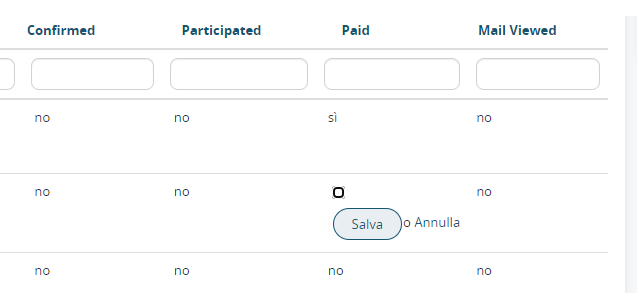
Once the communication is sent, the selected records will receive an email. When the email is opened, the value MAIL VIEWED will change from "no" to "yes." The email also contains a link that, when clicked, allows the CRM to record this data and change the value of the REGISTERED column from "no" to "yes."
The other two values, PARTICIPATED and PAID, need to be managed manually by flagging the appropriate fields to indicate the participant's attendance and payment status for the course.
Legend for Columns in Related LEADS, COMPANIES, and CONTACTS
|
Registered |
when the recipient of the course communication email clicks on the link in that email, the value changes from NO to YES |
|
Attendend |
it is used for taking attendance; the instructor will be responsible for changing the value from NO to YES |
|
Paid |
when the administration reports that the course participant has made the payment for the registration, the value should be changed from NO to YES |
|
Mail Viewed |
when the recipient of the course communication email opens the received email, the value changes from NO to YES |
To modify the flags, you need to click on the related list of Contacts / Leads / Companies. Once the list appears, double-click on the flag you want to modify:
You will be given the option to modify the value and then save the change: