Creating a New Course
From the main screen of the Courses module, you can easily create a new course by simply clicking on the "CREATE" button located at the top left.
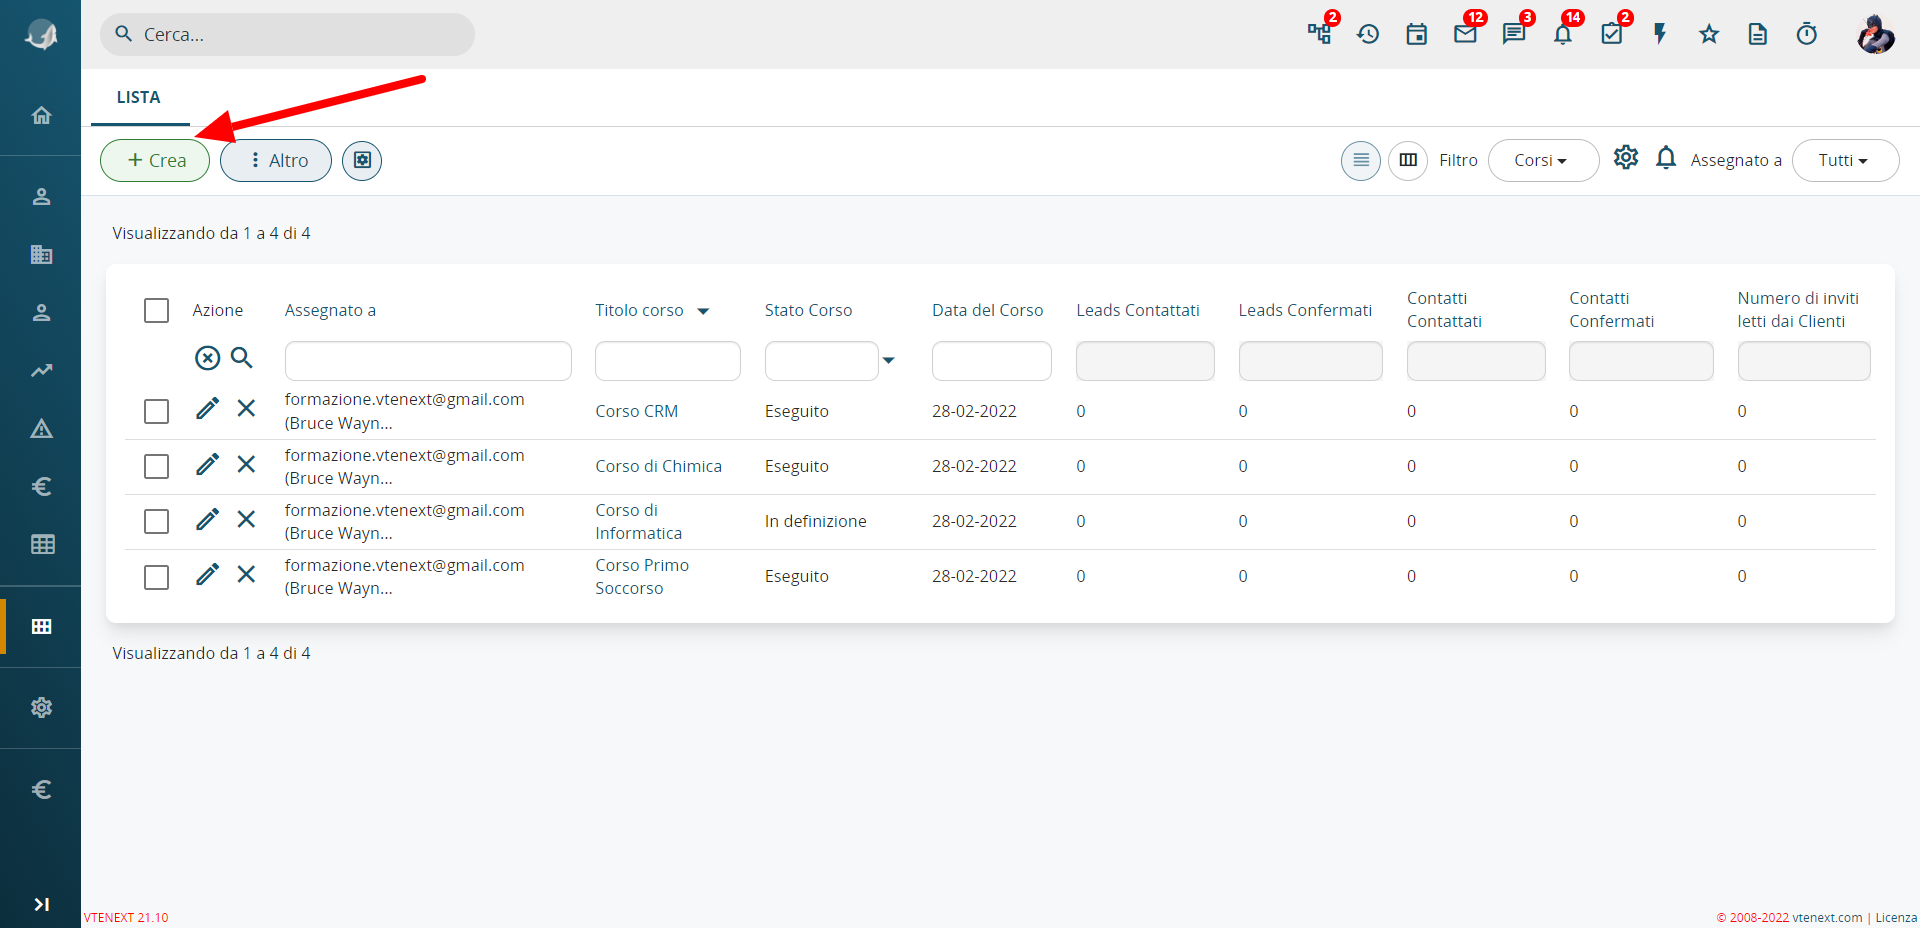 Courses Module Home Page

Course Details
First, you need to enter all the necessary information for setting up the Course, such as the Course Title, Location, Date, Duration, Topics to be covered, Course Type, Target Audience, etc. Note that there are some sections with fields that cannot be manually filled in, as they are controlled by the module's automation (we will go over these in detail later).
It is important to configure the dropdown menus mentioned earlier (such as Target Audience, Course Topics, Course Type) under SETTINGS > STANDARD PICKLIST EDITOR. This allows for maximum customization of the module based on specific needs. There is also the option to add additional fields as needed and create display rules using conditional fields, depending on the course type chosen (standard configuration in vtenext).
Creating the Communication Template for the Course
By clicking the MORE button in the top right, you can create or select a Template for the communication that will be sent to all course participants.

Details of the Popup for Choosing/Creating a Course Communication Template.

Details of the Course Communication Template Creation Screen
From this popup, you can create your own templates using the standard editor or by importing source code created on another external platform.
Selecting Participants and Sending Course Communication.
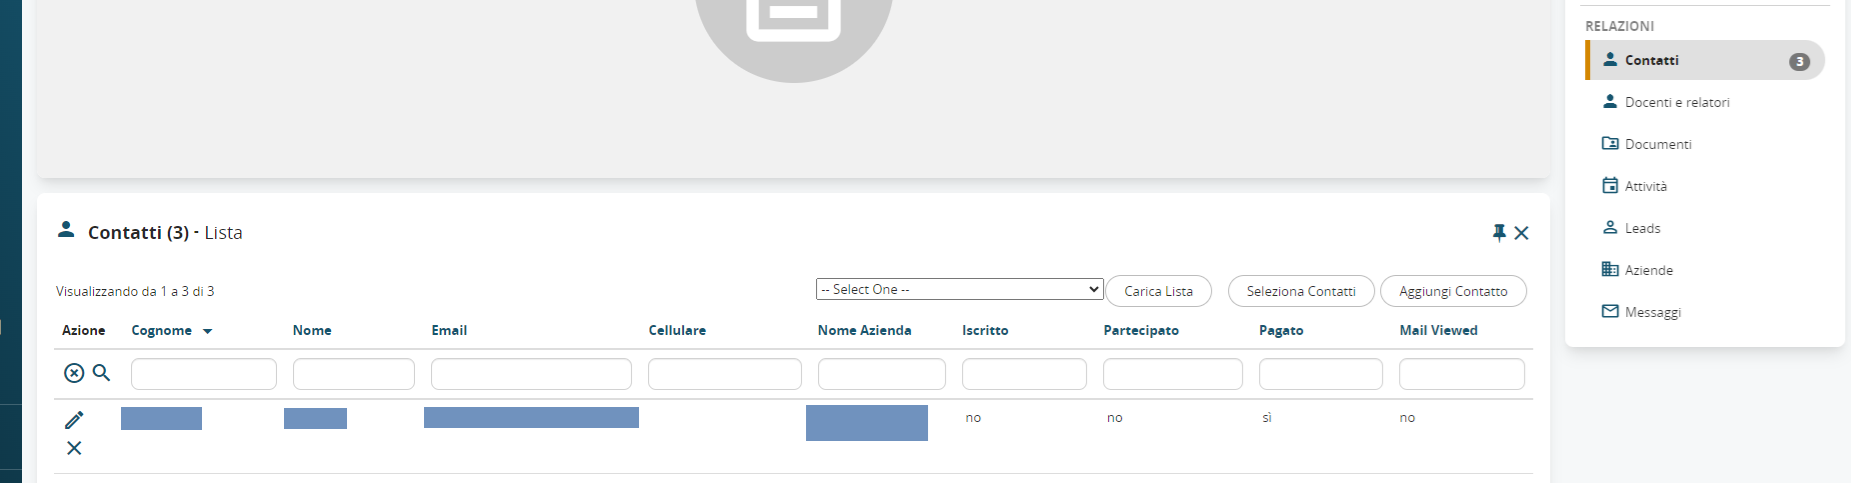
In the course details view, by clicking on the related records on the right side, such as Leads, Companies, and Contacts, you can choose a filter and import the records you want to contact.

Details of Relationships with Contacts Selected for the Specific Course

Details of the Related Section with Selected Records and Interaction Information
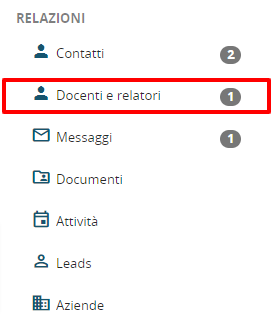
Selection of Instructors and Speakers
In the course details, by clicking on the relationships to the right concerning Instructors and Speakers, you can select from the contacts in vtenext who will be the individuals fulfilling those roles.
DettaglioDetail delleof relazioniRelationships conwith iInstructors Docentiand eSpeakers RelatoriSelected selezionatifor perthe quelloSpecific specifico corsoCourse

DettaglioDetail dellaof relatedthe conRelated laList listaof delleSelected anagraficheRecords selezionatefor relativeInstructors aiand Docenti e RelatoriSpeakers
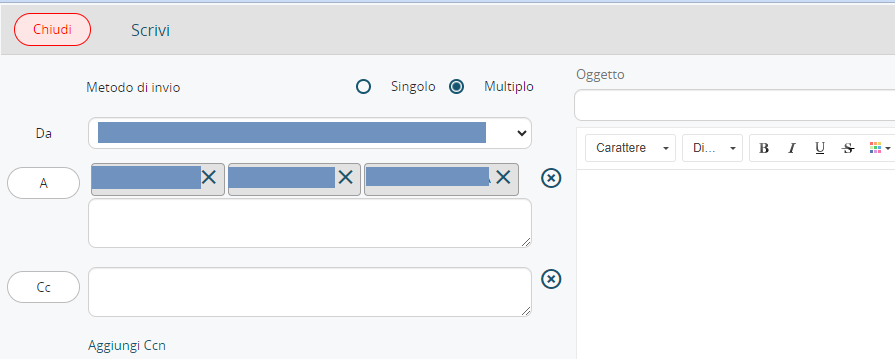
InvioSending ComunicazioneCourse diInvitation invito al CorsoCommunication
UnaOnce voltathe effettuataparticipants lahave sceltabeen dei Corsistiselected (moltosimilar simileto allacreating creazionea manualemanual di un Target)target), saràit necessariowill inviarebe lanecessary comunicazione,to ovverosend l'the communication, which is the email checontaining contienethe l'invitoinvitation sulthat qualeall tuttirecipients iwill destinatarineed dovrannoto cliccareclick perto accettare.accept.

DettaglioDetails perfor l'invioSending dellaCommunication comunicazioneto aAll tuttiCourse i partecipanti del CorsoParticipants
CliccandoBy infatticlicking sulthe pulsante"OTHER" ALTRObutton in altothe atop-right destra,corner, saràyou possibilewill inviarebe laable comunicazione,to selezionandosend dapprimathe ilcommunication by first selecting the previously created template precedentementeand creatothen edclicking infinethe cliccando"SEND sull'appositoCOMMUNICATION" pulsante MANDA COMUNICAZIONE.button.
ATTENZIONE:NOTE: perTo permettereenable talethis invio,sending, devethe essereCRM's configurato ilSMTP server SMTPmust delbe crm.configured.
"MANDASEND COMUNICAZIONECOMMUNICATION" apreopens una popup difor inviosending e-mailmultiple diemails, tipowhere Multiploall althe cuicourse interno vengono inseriti tutti gli indirizzi e-mail dei corsisti. Il singolo corsista non vedrà soltanto la sua e-mail come indirizzo di destinazione e non tutte le altreparticipants' email aaddresses cuiare èincluded. stataEach inviata.participant will only see their own email address as the recipient and will not see the other email addresses to which the communication was sent.
Come funziona il modulo Corsi.
Una volta inviata la comunicazione, le anagrafiche selezionate, riceveranno un'email aprendo la quale, il valore MAIL VIEWED passerà da no a sì. Nell'email è inoltre presente un link, cliccando il quale, permetterà al crm di raccogliere quel dato e di cambiare il valore della colonna ISCRITTO da no a sì.
Gli altri due valori, ovvero PARTECIPATO e PAGATO, andranno gestiti manualmente, flaggando l'apposito campo per determinare la partecipazione ed il pagamento del corso da parte dell'iscritto.
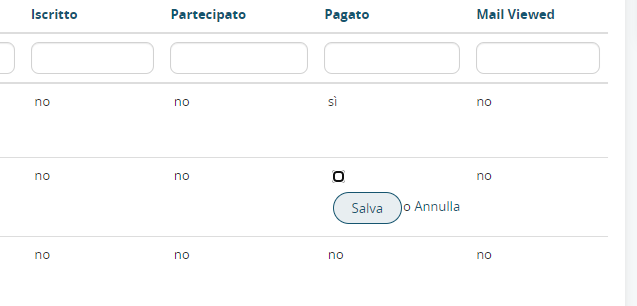
Legenda colonne presenti nelle related LEAD, AZIENDE e CONTATTI.
|
Iscritto |
quando il destinatario dell'email comunicazione corso, clicca sul link presente in quell'email, il valore passa da NO a SI' |
|
Partecipato |
serve per l'appello dei presenti, il Docente si preoccuperà di cambiare il valore passa da NO a SI' |
|
Pagato |
quando l'amministrazione segnala che il partecipante al corso ha effettuato il pagamento dell'iscrizione, il valore dovrà essere cambiato da NO a SI' |
|
Mail Viewed |
quando il destinatario dell'email comunicazione corso apre l'email ricevuta, il valore passa da NO a SI' |
Per poter modificare i flag è necessario cliccare sulla lista relazionata dei Contatti / Lead / Aziende ed una volta comparsa la lista fare doppio click sul flag che si vuole modificare:
Viene data la possibilità di modificare il valore e poi di salvare la modifica: