
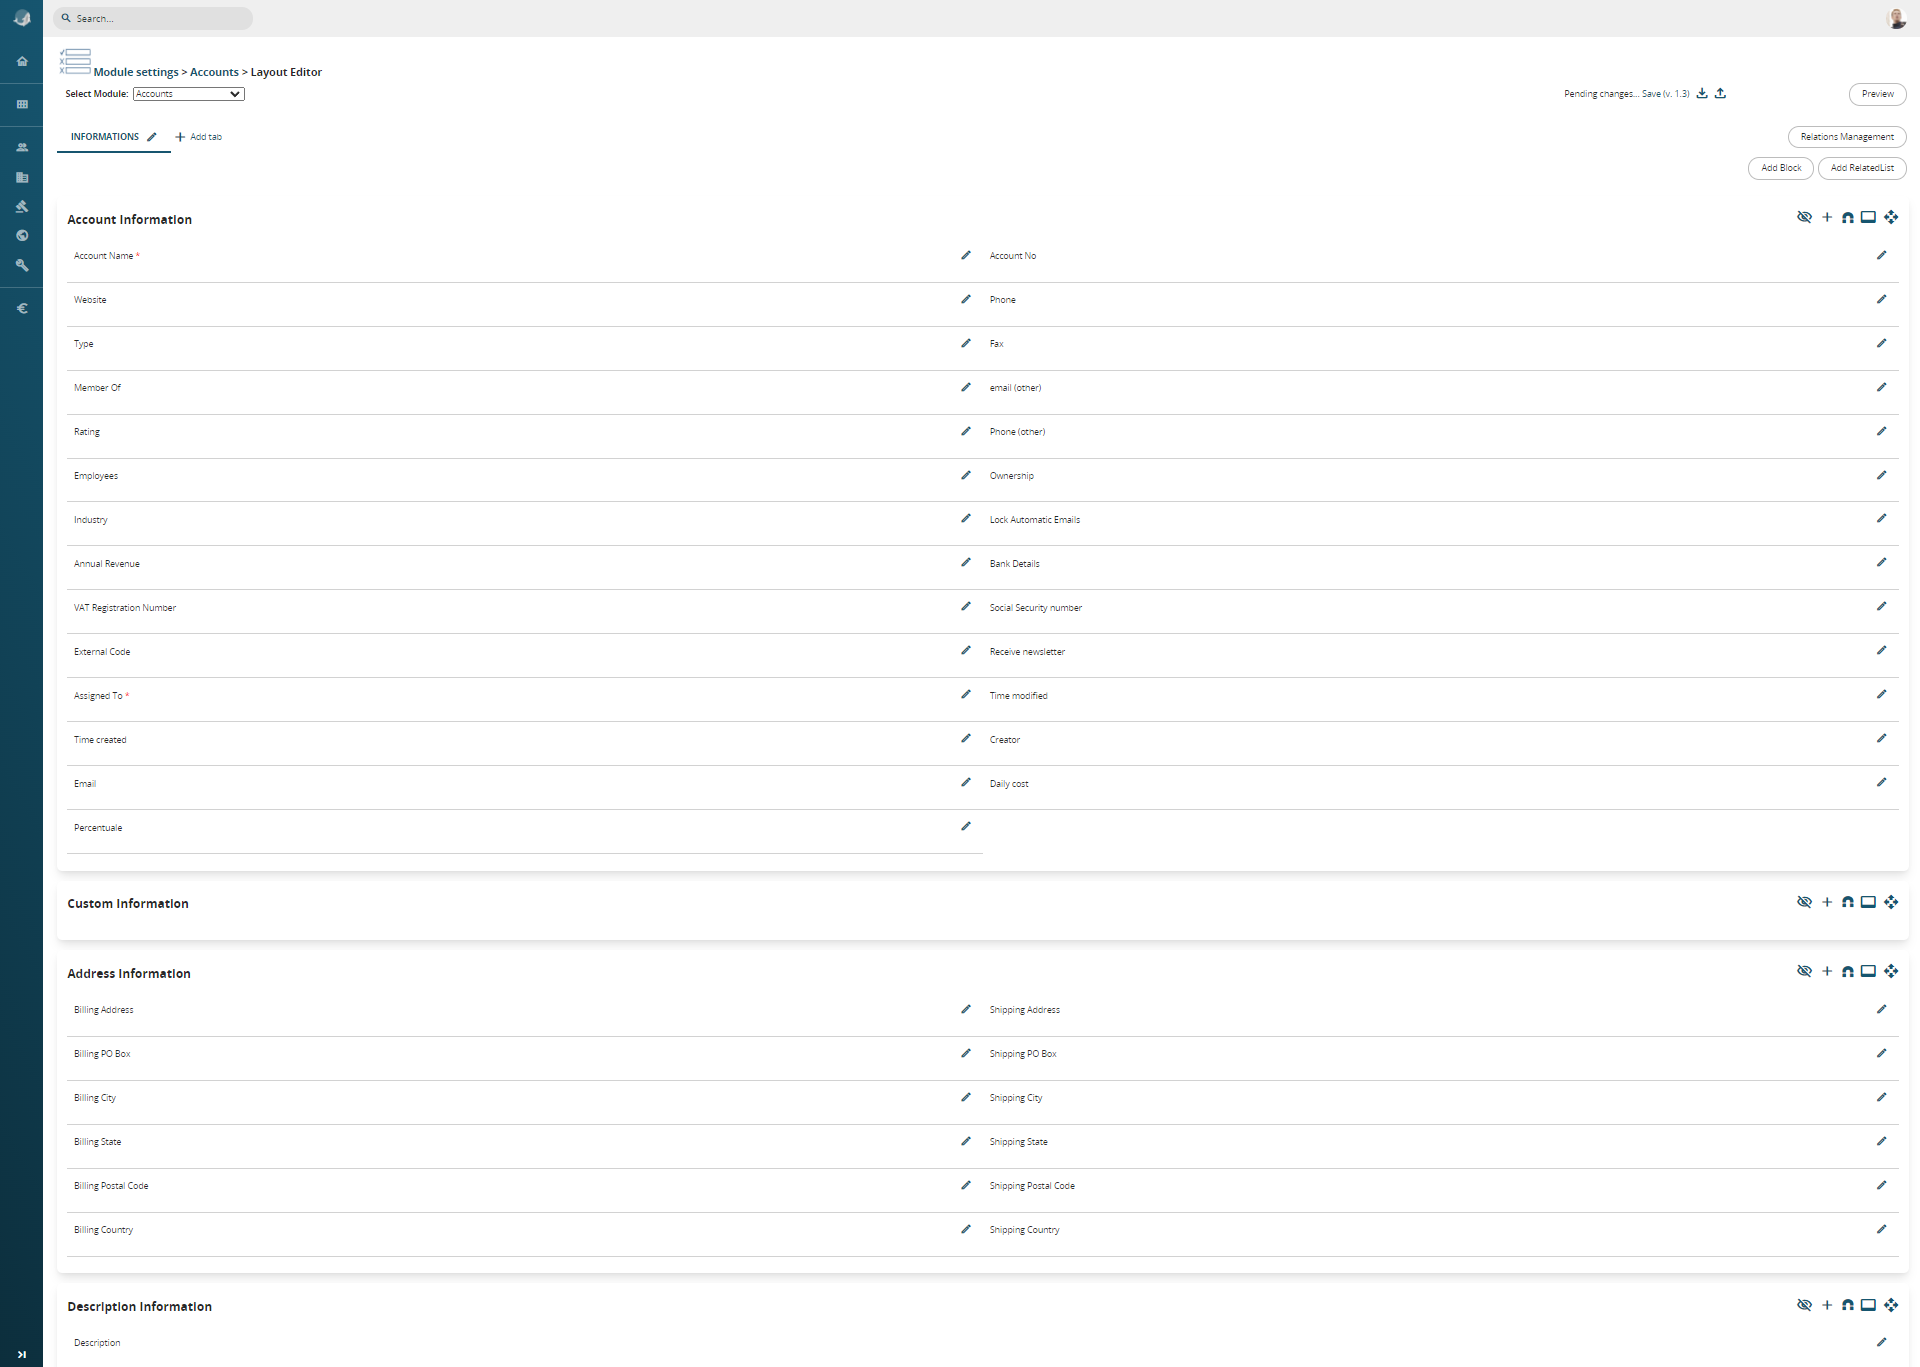
17.7 Layout editor
From Settings > Business Process Manager > Module name (es. Accounts) is possible to access to Layout Editor of any module.

|
|
Add custom fields to the module |
|
|
Move fields from another block to the block where the magnet is present |
|
|
Display the fields that were hidden during the layout configuration |
|
|
Use this icon to collapse the blocks. The blocks will appear closed, but if they contain fields, they will still be visible as blocks while hiding the fields they contain. Please note that a block without fields, visible in the Layout Editor, will be entirely hidden and invisible in the module detail view |
|
|
It is used to move an entire block, along with its contents, from the tab where it is located to another tab that has been specifically created or already exists |


It is possible to move a field thanks to the drag&drop function, both inside of a blocka and from one block to another one.

The layout editor allows you to:
- add a custom field within a block
- change the positioning of a field
- edit properties of the field
- display the list of hidden fields, with the option of restoring them
- move fields in other blocks into one block
- add new blocks to the tab (a block is a set of fields, useful for keeping the tab tidy)
- block operations: move above/below, delete (only allowed if the block does not contain fields)
- sort the relationships (serves to define which relationships to keep in the single tab configurator)
- add a new tab with relative blocks and fields
Versioning: all settings for the modules can be saved, generating a version (e.g. v.1.0). Versions can be exported or imported to ensure a higher level of security during setup.
Custom field types
The following are the specifications of the fields available during creation:
|
Text |
It is a field that can contain from 1 to 255 characters (letters and numbers). The desired length and the name to be given therefore need to be defined. |
|
Text Area |
Text field with pre-set dimensions, visual width equal to the card and with a maximum number of characters of 66,000 (letters and numbers) |
|
Number |
It is a field that can contain from 1 to 64 numbers (including decimals). The desired length, the name to be given and how many decimal places to enter and display therefore need to be defined. |
|
Percentage |
The name to be given to the field needs to be defined (it is recommended to insert the % symbol in the label, as a reminder). The field is purely numeric with the impossibility of exceeding 100% |
|
Currency |
The name to be given, the desired length and how many decimal places to enter and display need to be defined |
|
Date |
The name to be given needs to be defined. Activate the datapicker and autocomplete with today's date in the entity creation phase ATTENTION: The “standard” date fields are pre-filled with the current date when you open the record creation page in the module. |
|
Hour |
It allows for the creation of a time field, with the option to assign a name, and provides the ability to click on a clock icon to select the time directly from a clock face. |
|
Datetime |
It allows for the creation of a field that captures both the date and the full time. The format will be dd-mm-yyyy - hh:mm, with the option to assign a name. |
|
|
The name to be given needs to be defined. Once the email address is saved, if clicked, it will open the predefined composer window to create a new message |
|
Phone |
The name to be given needs to be defined. Once the number is saved, if the switchboard is configured, you will be able to use click-to-call |
|
URL |
The name to be given to the field needs to be defined. Once saved, the URL address allows you to open it in a new tab |
|
Check Box |
This is a YES/ NO flag field. The name to be given needs to be defined |
|
Picklist |
To create a drop-down menu with the fields of your interest. The name to be given to the field and to the values (one below the other) of the list needs to be defined |
| Skype | Define the name to be attributed. Once the Skype ID is saved, it will open the chat directly with the ID setted. |
|
Combo multisection box |
To create a drop-down menu where, using the CTRL key, you can select multiple values. The name to be given to the field and to the values (one below the other) of the list needs to be defined |
|
Multilanguage Picklist |
To create drop-down menus, whose values will be available for translation into other languages. The name to be given to the field needs to be defined and then the values (with related translations) created through SETTINGS > MULTI-LANGUAGE PICKLIST EDITOR |
|
Skype |
It allows for a direct link with the Skype application, typically used to call the Skype contact entered in that field, with the option to assign a name.
|
|
Related to |
It allows you to create a related field within a module, but it will not be possible to reference the same module multiple times or to reference itself (e.g., within a Support Ticket, it is not possible to link the Trouble Ticket module) |
|
User |
The name to be given needs to be defined. It is used to insert an additional link to the entity with a user |
|
User without filtering permits |
The name to be given needs to be defined. It is used to add a link between the entity and a user by bypassing roles and permissions |
|
User from filtered list |
The name to be given needs to be defined. It is used to add a link between the entity and one of the users defined upstream |
|
Group |
The name to be given needs to be defined. It will provide a drop-down menu with any available groups |
|
Button* |
Allows you to create a button that recalls a custom function. You need to enter the code during creation *see also 17.7.1 BUTTON field in vtenext |
|
Table Field |
It allows you to create table fields, which permit you to insert lines with values of choice, recalling them from the modules or creating them specifically Note: For better usability of the table field, it is advisable not to exceed 60 rows during its use. |
|
Attach documents |
It allows you create a field for adding documents at the same time as creating an entity |
|
Signature |
It allows the creation of a signature field, to which a name can be assigned, and can be used both via the app and as a variable to be called in PDF Maker. |
|
Rating |
It allows the display of a rating system from 1 to 5 stars, to which a name can be assigned. |
|
Media |
It allows the upload of images/videos/audio and displays a preview (if the connected source permits) in the detail view of a record. When filling in this type of field, it is also possible to specify a remote URL. ATTENTION: The Media field uploads images into the CRM’s Documents folders. Therefore, if Folders or Documents are set to Private in Shared Access, any uploaded images will follow the same user permission rules |
Add a custom field
By clicking the + button on the right next to a block, you can add a field. After choosing one of the types mentioned above, you can assign a name to the field (label).
Then, by clicking the pencil icon next to that field, you can change certain properties:
- Force permissions: Default, Read-only, Hidden
- Mandatory: To make the field mandatory for all users
- Active: if the flag is removed, the field is hidden and can be reactivated using the crossed-eye icon located on the right side of each block (by clicking that icon, you can find all disabled fields and re-enable them).
- Mass Edit: To make it available for mass editing
- Enable barcode scanning (Wilson App): This function allows using this field as a support for barcode scanning through the Wilson App
- Help: Allows you to display a question mark (?) next to the field. Hovering over it will show a suggestion on how to use that field. This suggestion should be written in the provided space.
Note: These tooltips will automatically be available on the Business Portal once activated.
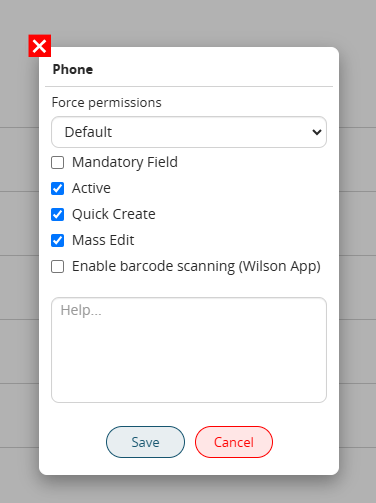
Field property selection popup
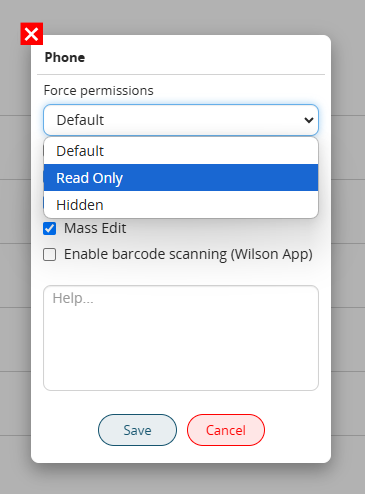
Details of the "Force Permissions" dropdown menu
Manage the columns/fields present in the relationships
In the top right corner of the screen, has been added the button RELATIONS MANAGEMENT. This button allows to modify the relations columns present in the record details of all modules in the crm (For example. we are in the Accounts module, we can modify the columns present in Contacts, Potentials, Sales orders, etc.).


Lastly is possible to see a Preview of the screen based on a certain profile, this function allows to immediately verify if the configuration has be done correctly.

Clicking on Preview, the system will open a pick list
 From the opened menu, it will be possible to choose from which profile see the screen preview

If there will be no available users for the chosed profile, the crm will show the popup above

Example of screen preview
Layout Editor for Products block
There is also the possibility to modify the columns present in the product block in the module Quote, Sales orders, Purchase order and Invoice. The configuration, allows to vary the number of columns with customized fields ( for example unit of measurement, count per package, checkbox, description field or text fields, currency fields or numeric, etc.). The possibility to modify the columns in product block in addition allows, for each created field, to manage also new formulas, giving the possibility to go beyond the classic but however present, PxQ ( Price multiplied Quantity);
